Tool Search: Verification
Before You Begin
- Verify the Verification Preferences of FRAM Preferences are configured.
- Verify applications being excluded from the Verification process are marked as "excluded" on the Household Applications tool.
- Click New.
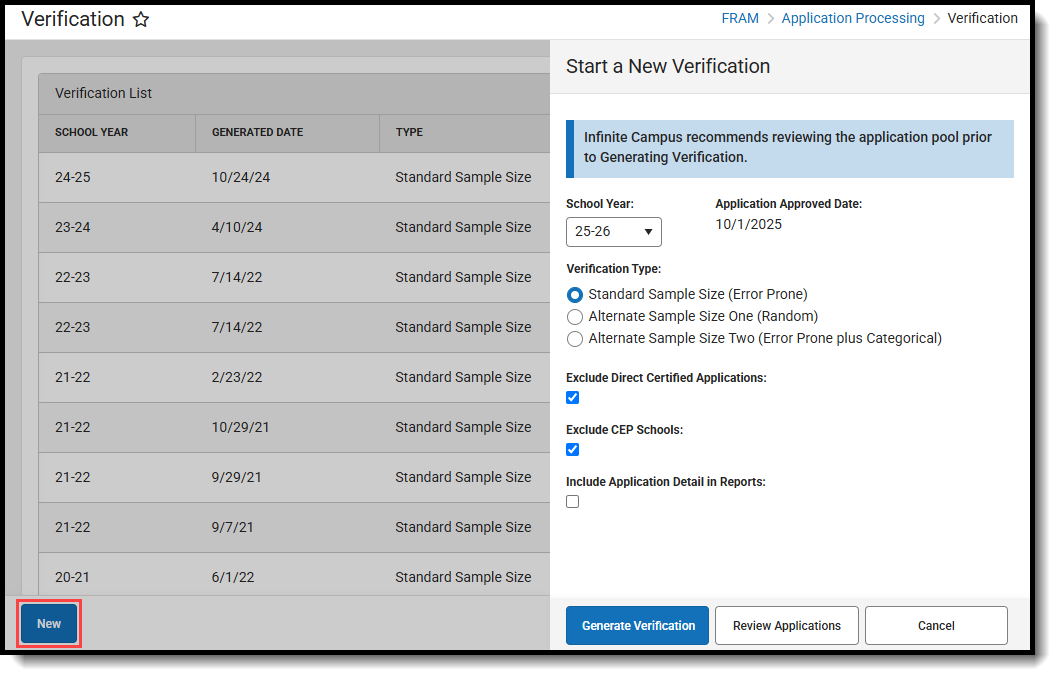
Select the school Year for which the verification should be performed.
Verify the Application Approved Date.
This read-only field is populated according to the school year selected in Step 3. Applications approved on or before this date are included in the verification pool.
Select a Verification Type.
Mark the Exclude Direct Certified Applications checkbox to review which applications should be removed from the Verification process.
Mark the Exclude CEP Schools checkbox to exclude applications from students enrolled at a CEP school from the verification pool.
- Mark the Include Application Detail in Reports checkbox if you want the application details to be included on the confirmation and validation reports.
- Click Review Applications to review all qualified applications in detail before generating the Verification sample.
Result
The Confirmation Review Report (PDF) displays.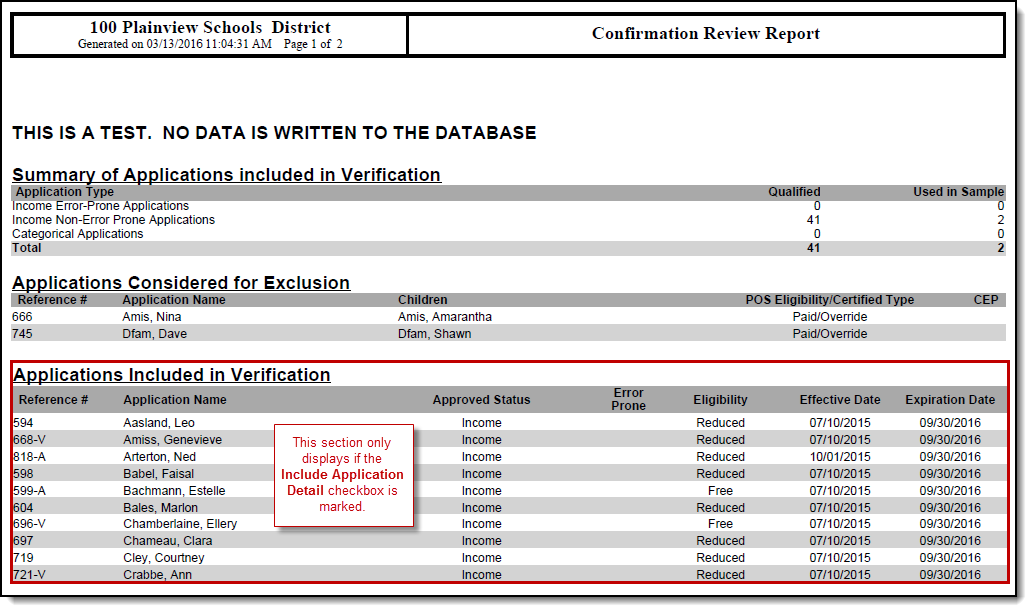
- Click Generate Verification.
Result
The Validation Report displays and the Free Reduced Verification Status Detail editor (which displays all pending applications included in the verification sample) also displays on the Verification tab.


To continue the verification process, go to Step 2. Review and Replace Applications (FRAM). See the Verification Screen Examples and Field Definitions article for more information about the new editors and fields that display after generating a verification.
