Tool Search: Enrollments
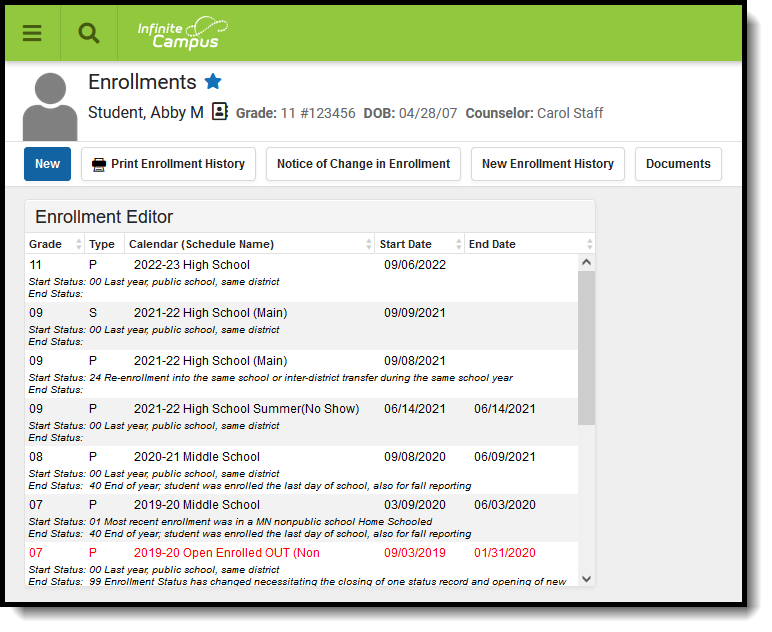
The Enrollments tool displays all instances of a student’s enrollment in the district. Enrollments are listed by enrollment start date. To reorder the list of enrollments, click the blue hyper-linked headers in the Enrollments Editor list. The list of enrollments can be sorted by Grade, Calendar, Start Date or End Date.
Enrollments marked State Exclude display in red text.
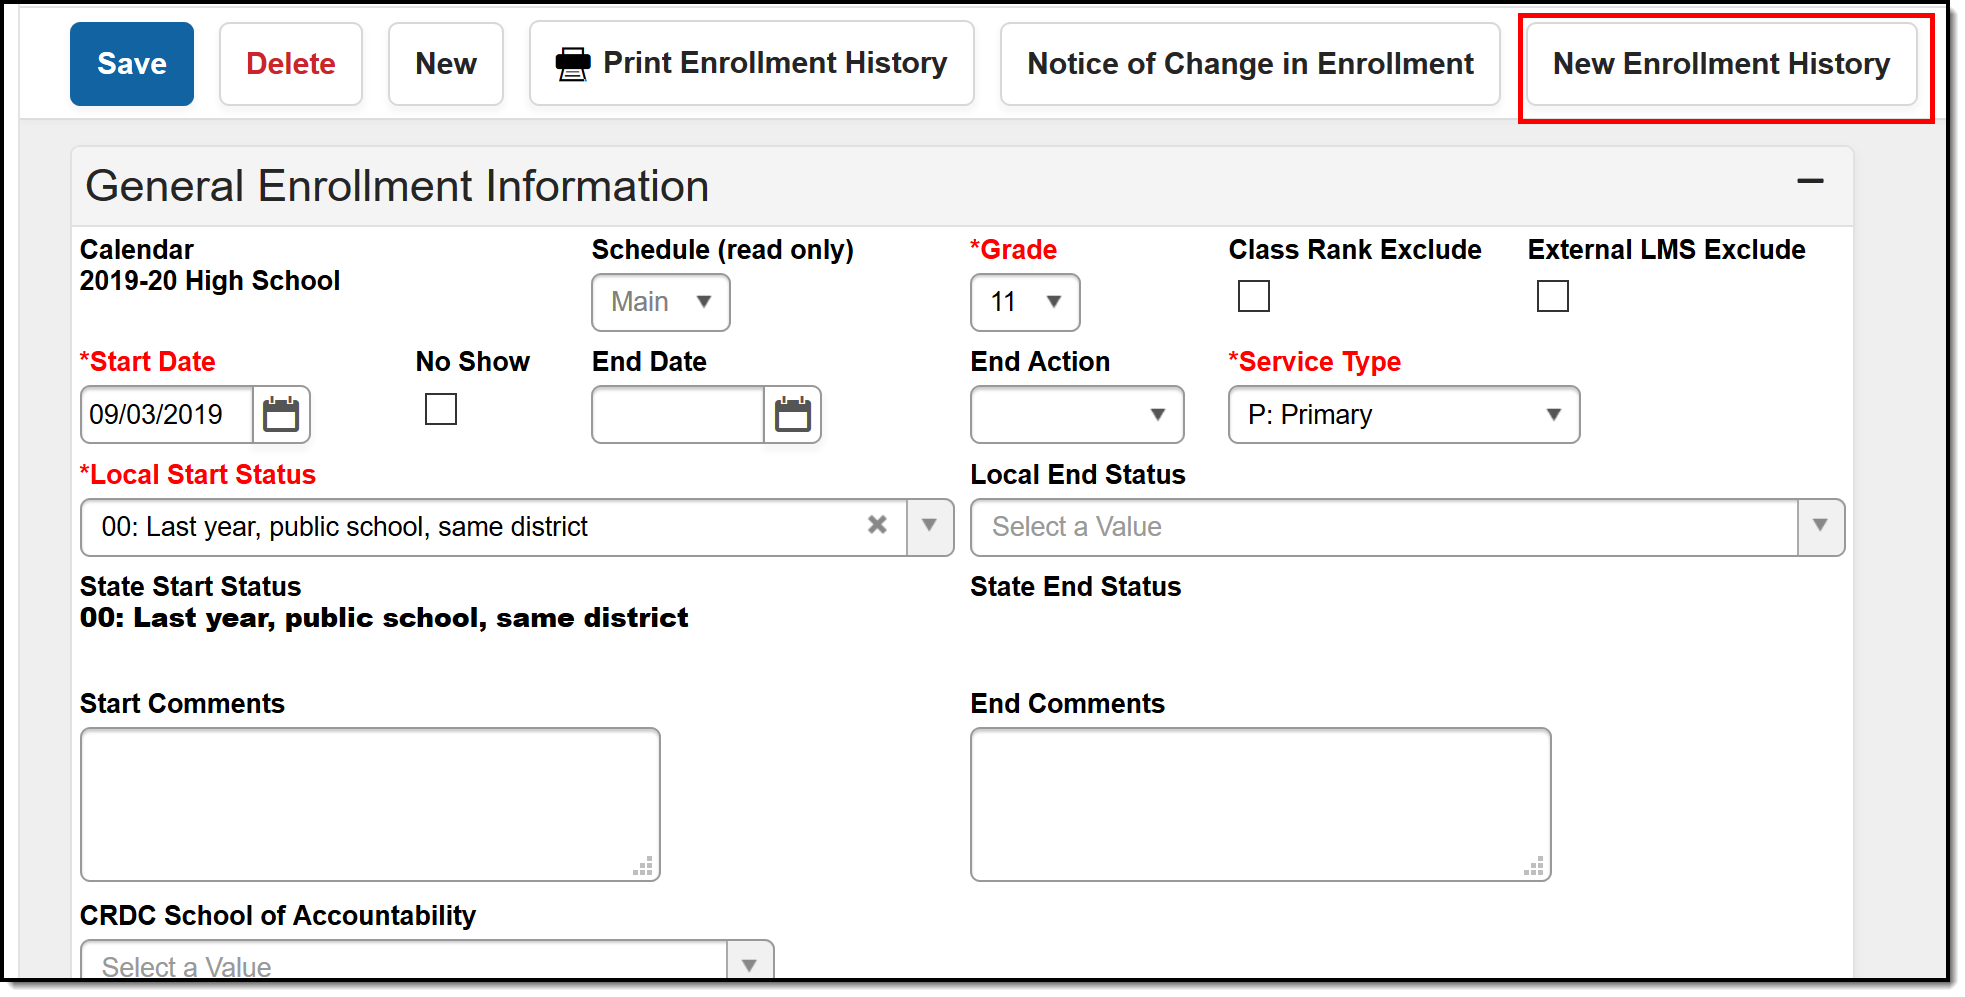
New Enrollment History can be used to manually add records of past enrollments outside of the district.
 Student Enrollments
See the Student Enrollments Tool Rights article for information about rights needed to use this tool.

Add Enrollment Information
Enrollments can be added for a student from the Enrollments tool or through the Enrollment tool in Census. A person in Campus is considered a student when that person has an enrollment record, active or not active.
- Select the New icon from the Action bar. The enrollment entry information (General, State Reporting Fields, etc.) displays below the Enrollment Editor.
- Enter the required information (Grade, Start Date, Service Type, Local Start Status) in the General Enrollment Information editor.
- If additional information can be added at this time, enter that information as well.
- Click the Save icon. The new enrollment is listed in the Enrollment Editor. Additional field selections can be made now or at a later time.
Once a new enrollment record is saved, staff can add schedule information, prepare for fees entry, etc.
An error displays if there is a mismatch between the Structure ID visible on the Schedule Structure Detail editor and the selected Calendar ID visible on the Calendar Information editor. If this happens, the enrollment cannot be saved. Contact Campus Support to resolve the issue.
End Enrollments
Enrollments are ended when the student leaves the school for a period of time, when the school year ends (depending on state reporting guidelines) or if the student has a change in services (depending on state reporting guidelines).
- Select the enrollment to end from the list of available enrollments.
- Enter the End Date, which is the last day the student is enrolled in the selected calendar.
- Select an End Action from the dropdown list, if applicable.
- Select an Local End Status that relates to the reason the student is ending enrollments.
- Enter any End Comments related to the ending of the enrollment.
- Click the Save icon when finished. The enrollment displays in the Enrollment Editor list as ended.
Ending a student's enrollment also ends enrollment in all courses (drops the student name from the Section Roster), and any attendance data entered after the end date is deleted.
If multiple students are ending enrollments on the same day for the same reason (end of school year processing), use the Enrollment End Batch Wizard.
Summer Enrollments
Summer School Enrollments are managed the same way a regular school year enrollment is. It is recommended that a separate Summer School Calendar be made for each school that allows summer school enrollments. This is done by marking the Summer School checkbox on the Calendar Information editor.
Generally, students are in the same grade level for the summer school enrollment as they are for the enrollment in the just finished school year.
This is a guideline for summer school enrollments. The process for this may vary by district. If district process information exists, please follow that information.
Instructions assume a summer school calendar and courses have already been created.
Mass Creation of Summer School Enrollments
- Create an Ad hoc Filter using the Selection Editor that contains all students who are attending summer school.
- Use the Enrollment Roll Forward tool to create enrollment records. For the Source Ad hoc Student filter, select the ad hoc filter created above.
Single Creation of Summer School Enrollments
- Search for the student in the current school year calendar (not summer school calendar).
- Navigate to the student's Enrollment tool and select the New icon.
- Change the Calendar selection to be the Summer School Calendar.
- Enter a Start Date for the enrollment, usually the first day of summer school.
- Select the appropriate Start Status for this enrollment.
- Verify the current year Grade level is selected. Students are not considered to be enrolled in the next grade level until the fall enrollment.
- Select the Service Type of S: Partial.
- Click the Save icon.
End Dating Summer School Enrollments
This is only used for students who ended summer school enrollment prior to the last day of summer school.
- Search for the student in the summer school calendar.
- Navigate to the student's Enrollment tool and select the New icon.
- Enter an End Date for the enrollment.
- Select the appropriate End Status for this enrollment.
- Click the Save icon.
No Show Enrollments
Each state, district and education agency determines the No Show policy for their schools. The following provides a best use for this checkbox so districts can determine the best use of this checkbox.
 Recording No Shows
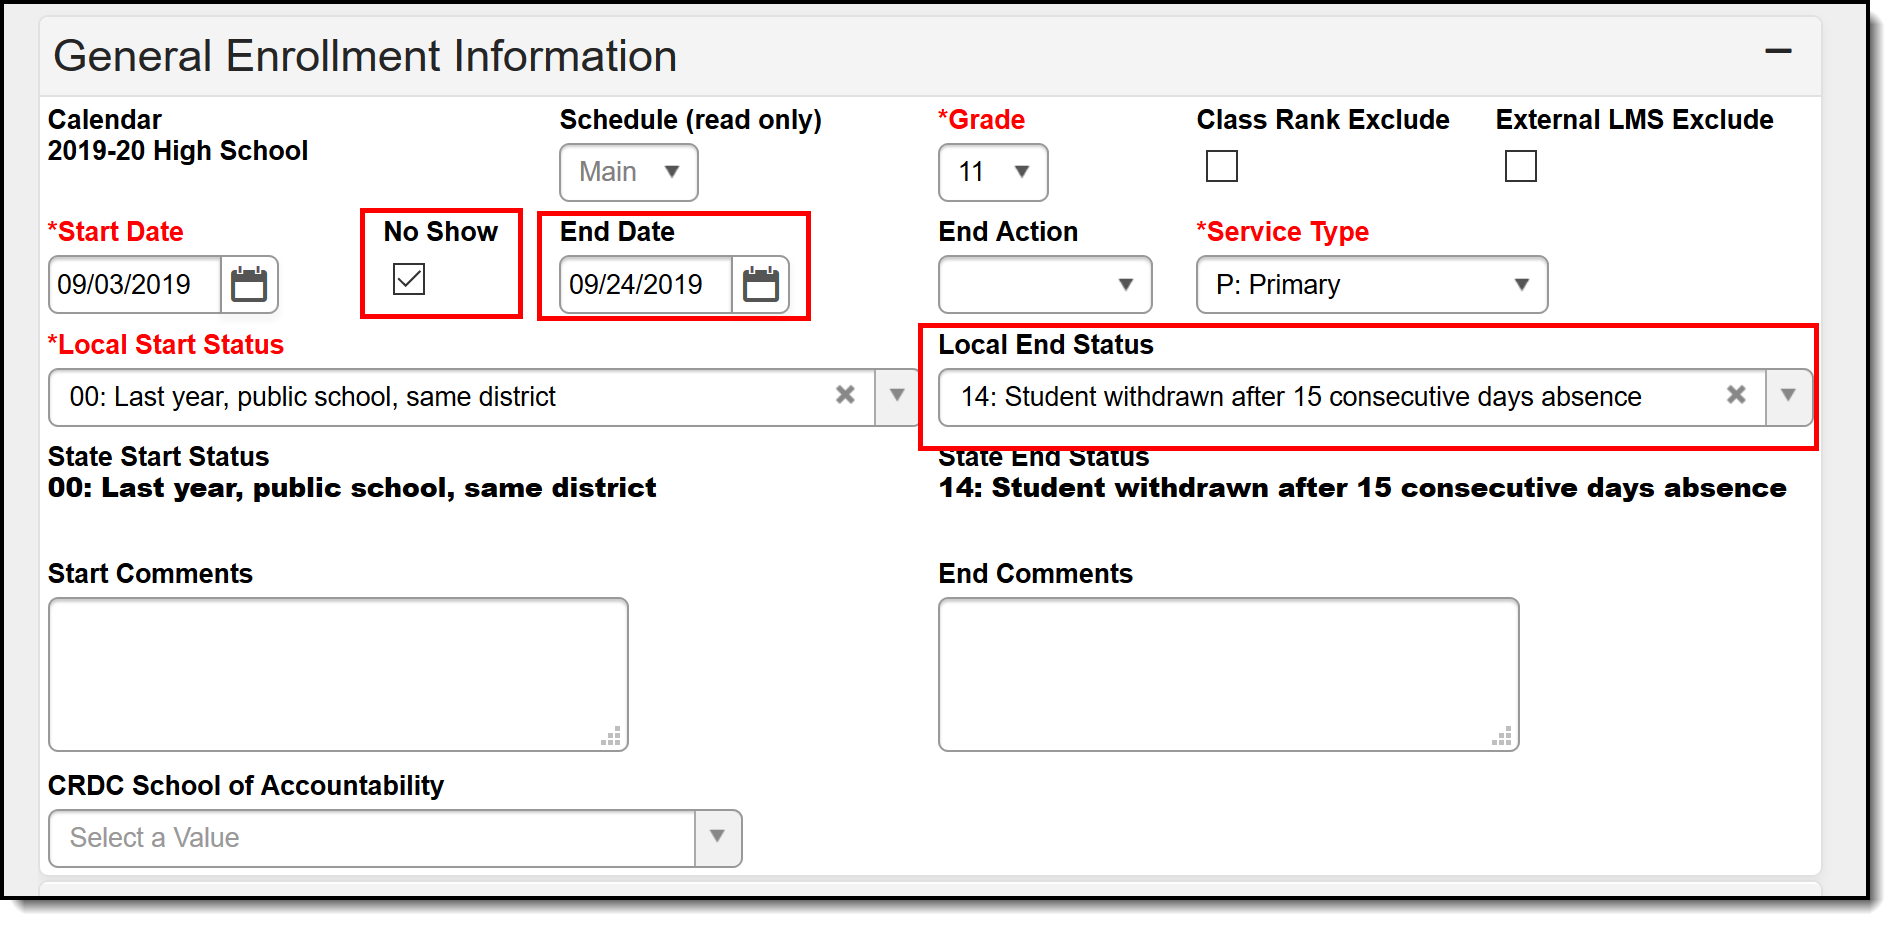
Enrollments usually aren't marked as No Show until a certain number of days passes and the student has never been considered present in any scheduled course sections. Up until this date (10 days after school starts, for example), the student is marked absent with an unknown excuse. At the time the student is considered a No Show, the checkbox on the enrollment record is marked, an End Date is entered for that enrollment, and an appropriate End Status is assigned.
Mark a Student as No Show
- Locate the student who has never attended the school for the year.
- Edit the Enrollment and mark the No Show checkbox.
- Enter the appropriate End Date and assign an appropriate End Status.
- Click the Save icon.
Upon saving the record, the following happens:
- A message displays on the Walk-In Scheduler view of the Student Schedule, indicating the end date is not within the section's start and end dates.
- An End Date that is one day prior to the calendar start date is placed on the student's Schedule. For example, a Drop Date of 06/30/2021 displays on the student's Schedule when the Calendar Start Date is 07/01/2021. This means the End Date on the Schedule is not the same end date that is entered on the Enrollment record.
- An End Date that is one day prior to the term start date is inserted into the student's existing roster records that are tied to the enrollment for which the checkbox is marked.
- Students are removed from section rosters and attendance is removed as of the End Date entered on the enrollment.
- Attendance records are not reported in the ADM and ADA Detail Report.
- Students report on the No Show Report.
- Students may not be included in state reports and extracts, dependent on the specific report logic.
- Students are not included in any student search results. They are included in an All People or Census search.
- Transcripts do not display Cumulative GPA, Class Rank or Percentile.
- Students return in red font when searched, since they are no longer an active student. The following logic is used:
When a student has a No Show enrollment followed by another ended enrollment in the same calendar, the student displays in red the day after the subsequent enrollment is ended or after the last day of the calendar.
When a student has a No Show enrollment followed by another future enrollment in the same calendar, the student displays in red until the Start Date of the subsequent enrollment.
When a student has an ended enrollment followed by another No Show enrollment in the same calendar, the student displays in red beginning the day after the enrollment End Date.
When a student has only a No Show enrollment in the calendar they do not display in the Student Search at all.
Options for Using the No Show Checkbox
- On the first day of school, all students who are absent are marked as No Show to remove them from attendance. After a prescribed number of days, the enrollment is either deleted or ended. In order to not have a membership record in the current calendar year, the enrollment would need to be ended prior to the first day of school. Therefore, the calendar must be set to start one day before the Term start date. If and when the student finally appears, a new enrollment would be created with the actual start date.
- For districts where the state pays for a set number of days at the start of school, even though the student has not appeared, the following steps should be followed:
- A school enrolls a student in the upcoming calendar.
- The student is scheduled into the appropriate course sections.
- The student doesn't show up for the first 10 or so days of school. Up until that point a school is marking that student as absent unknown. From that point on, a student is flagged as a 'no show' with an enrollment end date using that threshold date.
- At any time afterwards, a week or several months, the student shows up.
- The school leaves the current enrollment records as is with the 'no show' flag marked
- A new enrollment record for that student, with the start date of the date the student shows up.
- The school then uses Restore feature on the Walk-In Scheduler to perform a restore of the student's previous schedule, so each course section reflects the appropriate start date of the child's new enrollment.
Re-Enroll After a No Show Enrollment
In the event a student has been marked as No Show and the enrollment has ended:
- Create a new enrollment record for the student in the same calendar and grade level.
- Enter the correct start date and select the correct enrollment record.
- Save the enrollment record.
- Navigate to the student's Schedule. The previous schedule displays in gray text with a drop date of the previous school year calendar's end date.
- Modify this date by selecting the course section number link and removing the entered end date. At the same time, enter the correct start date for the new enrollment start date.
For example, a student has an enrollment in the 2016-17 school year that begins on the first day of school (September 6). The student never came to school for the first 15 days of the school year, so this enrollment was marked as a no show, an end date was entered and an end status was assigned (September 26).
The student has now appeared at the school office after a number of days (October 3). A new enrollment has been added with the new start date. The student's schedule lists all of the previously scheduled course sections with a drop date (end date) of the 2015-16 end of calendar date. The course section is edited to remove the end date and the new enrollment start date (October 3) is entered and saved.
Future Enrollments
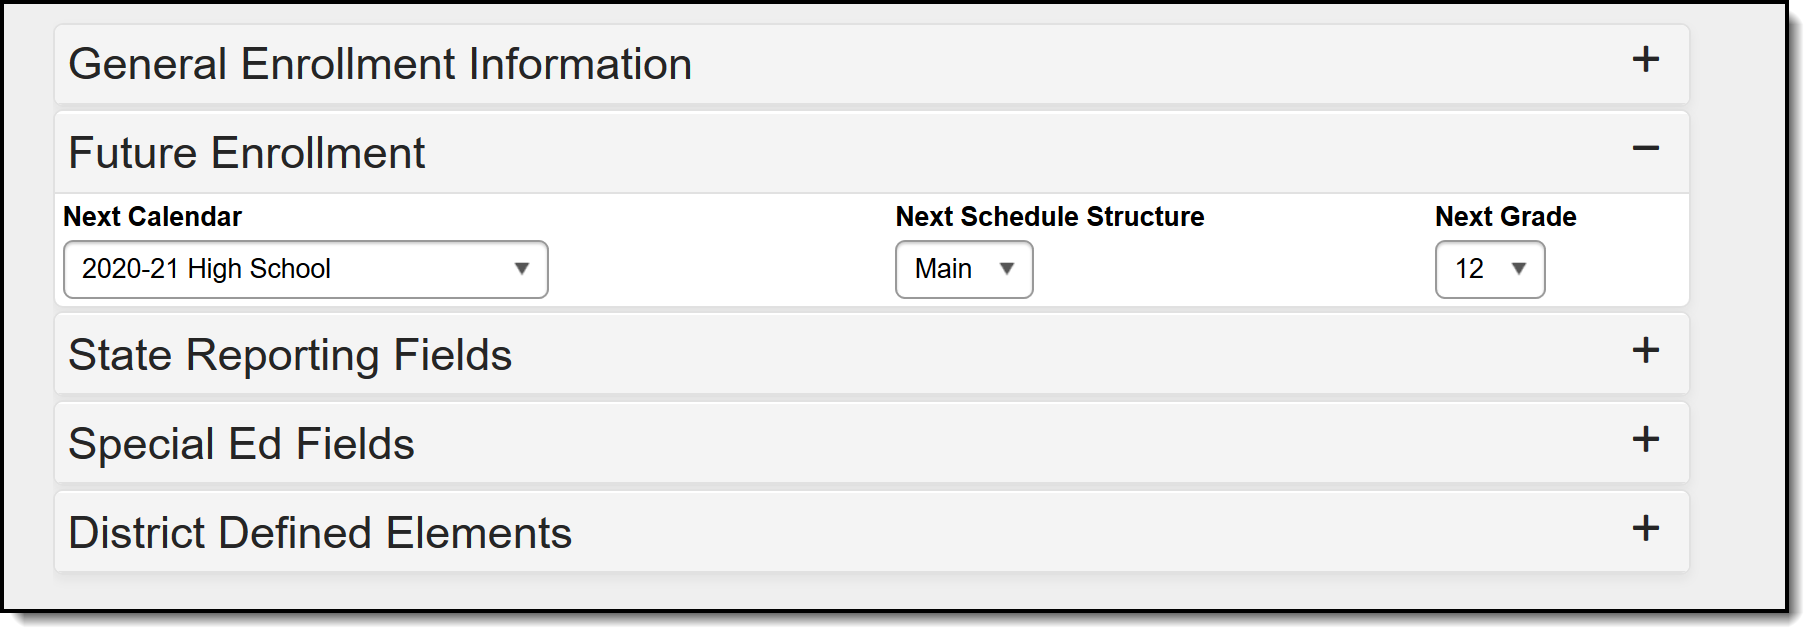
The Future Enrollment editor provides information regarding the student’s plan for the next school year (i.e., elementary to middle and middle to high). This should only be used by districts that have multiple school sites for a given grade level.
See the Enrollment Roll Forward article for information on how these fields are used when rolling enrollments into the next calendar.
 Future Enrollment Editor
When a student has the ability to choose a school outside of the student’s school boundary, the Next Calendar and Next Grade need to be chosen. Only future calendars are available for selection based on the calendar chosen in the Campus toolbar (i.e, calendars for school years in the past do not appear for selection).
- If an existing enrollment is selected, the Next Calendar dropdown list displays all calendars greater than or equal to the year of that enrollment that contains the grade level sequences greater than or equal to the grade level selected in the enrollment.
- If a new enrollment is being created, the Next Calendar dropdown list displays all calendars greater than or equal to the Active School Year.
Set Future Enrollments for Specific Students
- Select the Next Calendar from the dropdown list. This calendar selection should be the next year’s calendar. For example, a student currently enrolled in the 2016-17 Elementary School will be enrolled into the 2017-18 Middle School. The 2017-18 calendar should be selected.
- Select the Next Grade into which the student will be enrolled in the next school year.
- Click the Save icon at the top of the Enrollment tool when finished.
State Reporting Fields
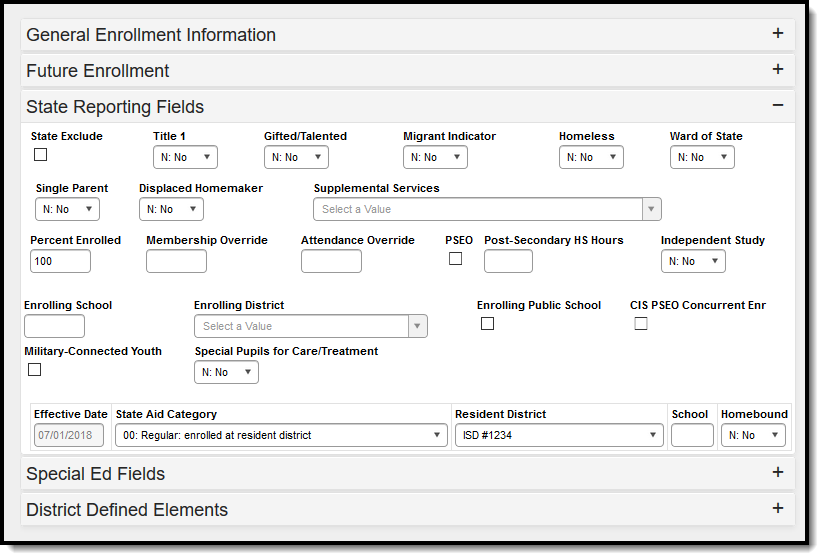
The State Reporting Fields editor contains data elements used in state reporting extracts and federal reporting. Fields on this editor vary by state.
Fields vary by state. Please see your state's Enrollment article for more information on Enrollment fields in your state.
 State Reporting Enrollment Editor
State Exclude
If marked, this option excludes a student from reporting on state reporting extracts.
Special Education Fields
The Special Education Fields editor lists those items that need to be reported for state reporting relative to students determined to be special education students.
Fields vary by state. Please see the State Tools articles for more information on Enrollment fields in your state.
Data elements on this editor vary by state.
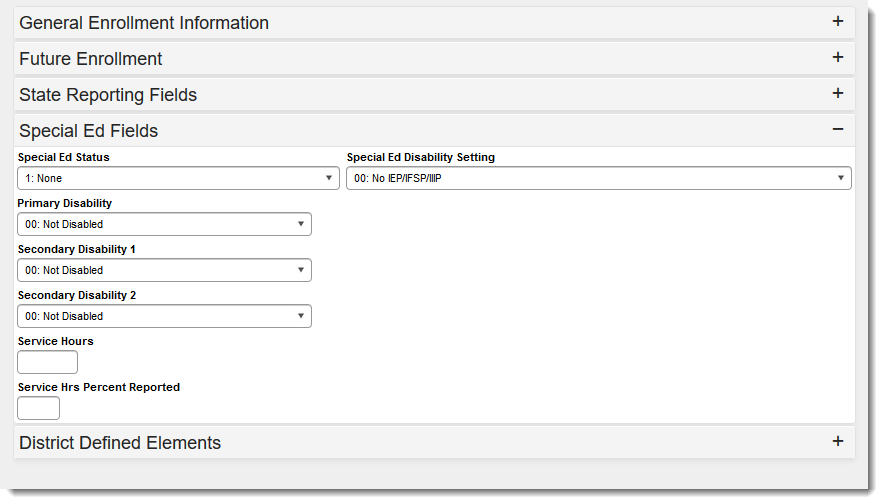 Special Education Enrollment Editor
Enrollment History
All past enrollment information can be entered for the student's entire education career, even if the enrollments were not at the current school or district. This provides the district with the ability to contact past schools or just have a record of enrollment (often required for state reporting).
 Add Enrollment History
Add New Enrollment History
- Select the New Enrollment History icon from the Action bar. An Enrollment History editor displays.
- Enter the following required fields:
- Calendar Name - this is the name of the school
- Grade level of enrollment
- Start Date
- Service Type (defaults to Primary)
- Local Start Status
- Because this is a historical enrollment record, most entries can also include the end of the enrollment information. Enter the following fields:
- End Date
- End Action
- End Status (if needed for state reporting purposes).
- Click the Save. The enrollment history record is listed in the Enrollment Editor list of enrollments, with the word (History) in parentheses.
 Enrollment History Record Listed within other Enrollment Records
Print List of Student's Enrollment Records
This report includes ALL enrollment records for the student, not just the student's Enrollment History records.
- Select Print Enrollment History.
- In the pop-up, select either the Local Grade Level Code or the State Grade Level Code. This determines which grade level displays on the report.
- Click Generate. The report displays in a separate window in PDF Format.
 Enrollment History Report
Documents
To view documents, click the Documents button on the action bar. See the Student Person Documents article for more information.
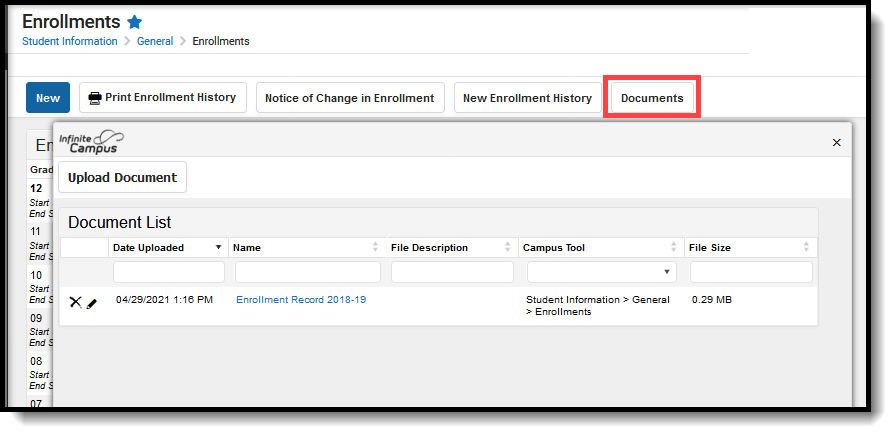 Enrollment Documents
State-Specific Information
Fields vary by state. Follow these links to view enrollment information for your state. Linked articles open in a new browser tab.
