Tool Search: Missing Photo
The Missing Photo - Student Report returns a list of students who do not have a photograph of themselves stored in Campus. This report can be generated after importing student pictures using the Photo Import tool (when adding multiple photos) or the Demographics tab (when adding just one image).
See the Census Reports Tool Rights article for information about rights needed to use this tool.
Report Logic
Only students are included in the report; staff are not included in this report. Students marked as No Show on their enrollments records are excluded from the report.
This report cannot be run at the state edition level.
Report Editor
| Field | Description |
|---|---|
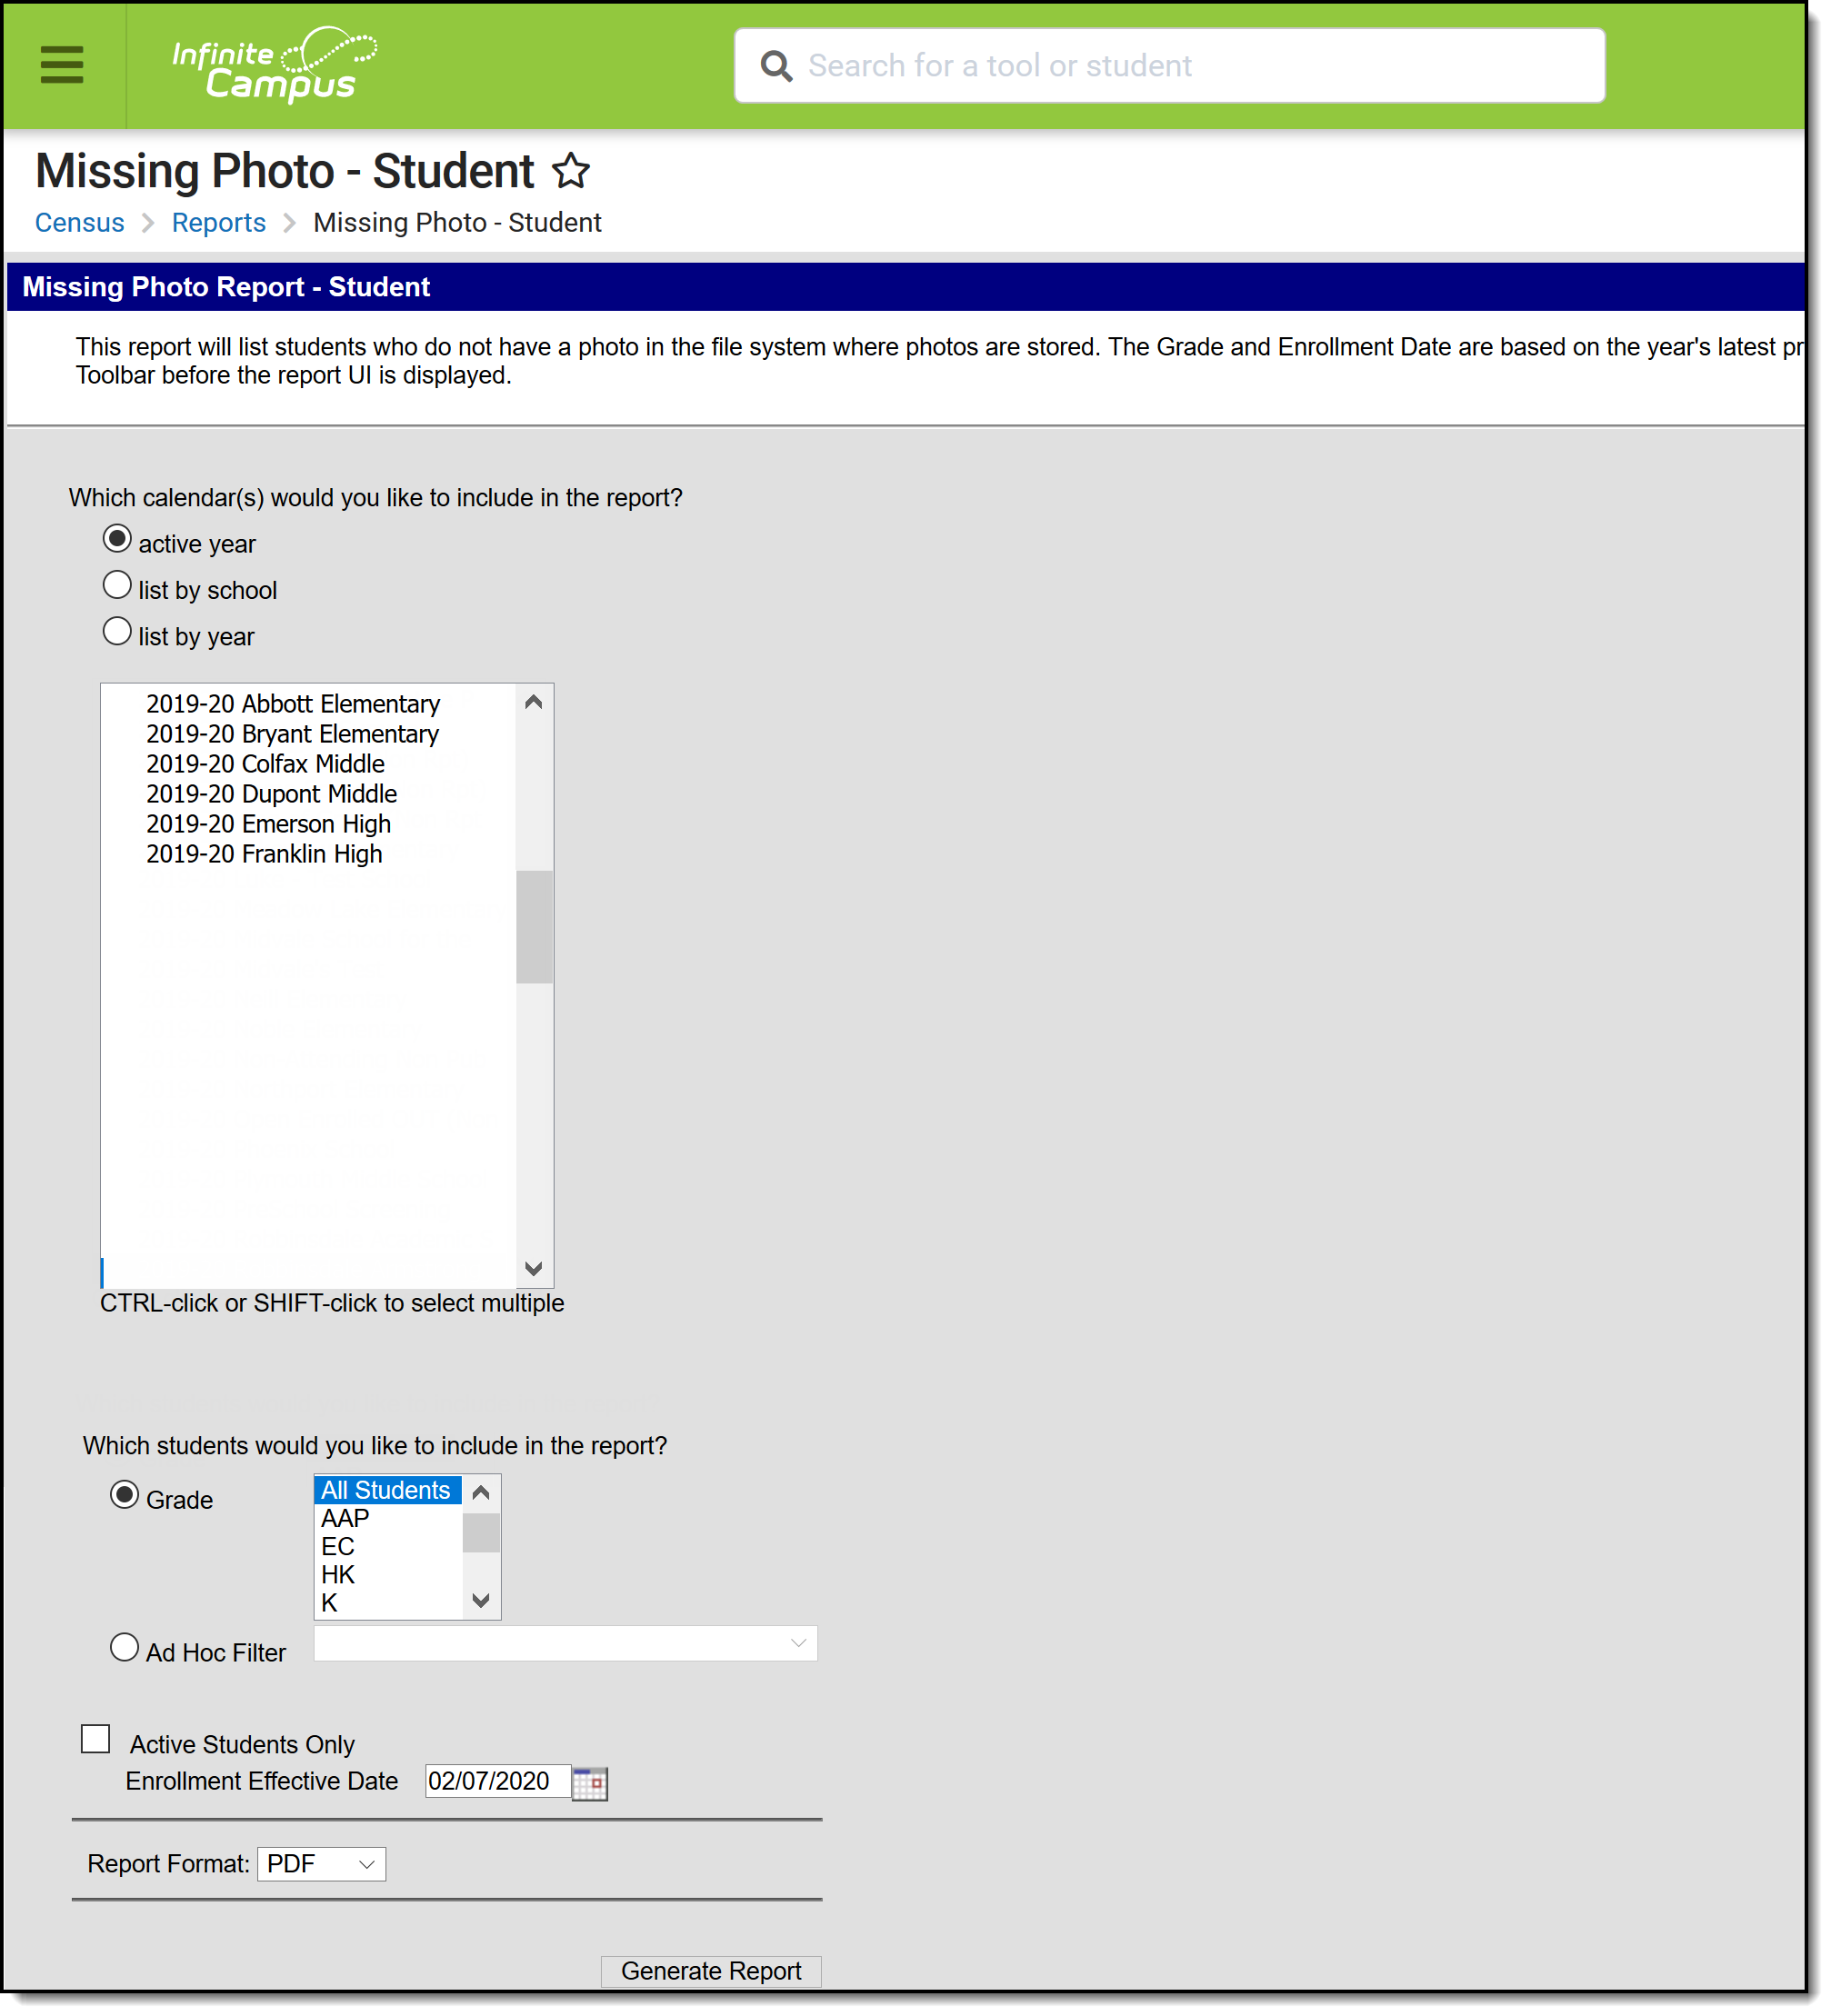
| Calendar Selection | Selection determines from which calendar(s) the students are reported. At least one calendar must be selected in order to generate the report. When a calendar is selected in the Campus toolbar, that calendar is automatically selected in the calendar. Calendars can be selected by active year, by school name or by year. |
| Student Selection | Students can be selected by Grade Level or by an Ad hoc Filter. When generating by grade levels, all Students can be selected, if desired. While this is a simple report, remember that in larger schools, choosing the entire student population may cause performance issues. Instead of selecting a grade level, select an ad hoc filter that includes the students who should be included in the report. Only those students included in the filter are considered to be included in the report (e.g., if students in that filter have a picture uploaded, they are not included on the report). |
| Active Students Only | When marked, only currently enrolled students in the selected year and calendar are included, based on the entered Enrollment Effective Date. When not marked, all students enrolled in the selected year and school calendar are included, which could include students whose enrollment records are ended. |
| Enrollment Effective Date | This entry only applies when the Active Students Only checkbox is marked. Enrollments active as of the entered date (defaulted to the current date) are included in the report. Enter dates in mmddyy format or use the calendar icon to select a date. |
Report Format | The report can be generated in CSV, DOCX or PDF format. |
Generate the Report
- Select the calendar(s) to include in the report.
- Select the students to include in the report by choosing selecting a Grade level or an Ad hoc filter.
- Mark the Active Student Only checkbox to only return those students currently enrolled, if desired.
- If the Active Student Only checkbox is marked, enter the desired Enrollment Effective Date.
- Select the desired Report Format.
- Click the Generate Report button. The report displays in the selected format.
The report sorts students by school number, grade level, and student last name.
Report Layout
| Data Element | Description | Location |
|---|---|---|
| Student Number | Reports the district-defined student number. Note that when generating in CSV format, leading zeros are stripped from the student number, so a student number of 012345 prints as 12345. Format the columns accordingly in Excel to display the leading zeros. Numeric, 10 digits | Census > People > Demographics > Person Identifiers > Local Student Number Person.studentNumber |
| Student Name | Reports the student's last name, first name and middle name. When generating the report in CSV format, the name fields are separated into separate columns, and the middle name prints the student's complete middle name. When generating the report in PDF format, the student's name fields display in one column as Last Name, First Name, Middle Initial. Alphanumeric, 75 characters | Census > People > Identities > Identity Information > Last Name, First Name, Middle Name Identity.lastName Identity.firstName Identity.middleName |
| Grade | Reports the student's grade level of enrollment, based on the selected calendar and entered effective date (if applicable). Note that when generating in CSV format, leading zeros are stripped from the grade level, so a grade level of 09 prints as 9. Format the columns accordingly in Excel to display the leading zeros. Numeric, 2 digits | Student Information > General > Enrollments > General Enrollment Information > Grade Enrollment.grade |
| Enrollment Date | Prints the start date of enrollment for the selected calendar. Note that when generating in CSV format, leading zeros are stripped from the date, so a start date of August 29 prints as 8/29/2016 Format the columns accordingly in Excel to display the leading zeros. Date field, 10 characters (MM/DD/YYYY) | Student Information > General > Enrollments > General Enrollment Information > Start Date Enrollment.startDat |
| Person ID | Prints the student's Campus internal person identifier. Note that when generating in CSV format, leading zeros are stripped from the personID, so an ID of 012345 prints as 12345. Format the columns accordingly in Excel to display the leading zeros. Numeric, 10 digits | Census > People > Demographics > Person Information > PersonID Person.personID |


