Tool Search: Gifted Batch Update
The Gifted Batch Update wizard can be used to create gifted records for students en masse.
Each student is required to have a gifted record for each year. However, the Subject Areas screened each year varies by grade level.
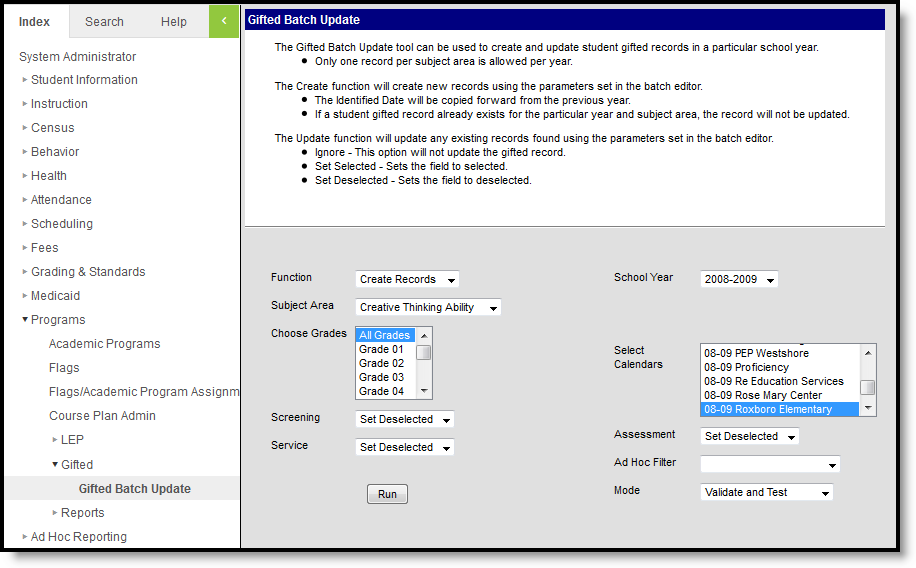 Gifted Catch Update Editor
Gifted Batch Update Wizard Editor
The following table defines the options available on this wizard.
| Field | Description |
|---|---|
| Actions | |
| Function | Indicates if the wizard is being run to create new gifted records or update existing ones. |
| Mode | Users have the option of using the wizard to validate and test, to review the records before they are created or to create or update actual records. |
| Records | |
| Subject Area | The subject in which the student was evaluated. |
| Screening | Indicates if the student was screened to determine giftedness in the subject area. |
| Service | Indicates if the student received services related to their giftedness in the subject area. |
| Assessment | Indicates if the student completed an assessment to determine giftedness in the subject area. |
| Students | |
| Choose Grades | The grade level of students for whom records will be created or updated. |
| Ad Hoc Filter | A pre-defined Ad hoc Filter defining students for whom records will be created or updated. |
| Dates | |
| School Year | The school year folder in which the gifted records will be sorted on the students' tabs. |
| Select Calendars | The calendars for which gifted records will be added. List is based on the School Year selected. Only students enrolled in the selected calendar(s) will have records created. |
Using the Gifted Batch Update to Create New Records
- Select the Function of the batch update as Create Records.
- Select a Subject Area for the records created.
- Indicate the Grade Levels of students for whom a new record should be created.
- Indicate if student gifted status was determined through Screening.
If Selected, the Screened checkbox will be marked. If Deselected, both the Screened and the Assessed checkboxes will not be marked. - Indicate if the student is receiving Services related to their gifted status.
- Select the School Year to which the record applies.
- Select the Calendar for which gifted records should be added.
- Indicate if an Assessment was performed to determine gifted status.
- Select an Ad hoc Filter to limit records created to students in the filter.
- Indicate if the wizard is being run to Validate and Test prior to creating or if records should be actively created.
- Click Run to run the wizard.
When the wizard is run, a report will appear indicating the number of records to be created, the Subject Area of the records, and student information of the records to be created, including first and last name, student number, and the checkboxes to be marked on the record.
If a record already exists for a student in the selected school year, a record will not be created.
If an Identification Date exists for a student in a previous school year, that date will be copied forward to the new record. If the student did not have an Identification Date, the record will default to "Not Identified" until a date is added.
Using the Gifted Batch Update to Update Existing Records
- Select the Function of the batch update as Update Records.
- Select a Subject Area for the records to be updated.
- Indicate the Grade Levels of students for whom records will be updated.
- Indicate if student gifted status was determined through Screening.
The Ignore option will leave this field unchanged in the record; the Selected or Deselected options will update this field. - Indicate if the student is receiving Services related to their gifted status.
- Select the School Year to which the record applies.
- Select the Calendar for which gifted records should be added.
- Indicate if an Assessment was performed to determine gifted status.
- Select an Ad hoc Filter to limit records created to students in the filter.
- Indicate if the wizard is being run to Validate and Test prior to updating or if records should be actively updated.
- Click Run to run the wizard.
When the wizard is run, a report will appear indicating the number of records to be updated, the Subject Area of the records, and student information of the records to be updated, including first and last name, student number, and the checkboxes to be marked on the record.
State-Specific Information
Fields may vary by state:
