Tool Search: OLR Literals Bank
This documentation applies to both versions of Online Registration.
The OLR Literals Bank allows you to provide translated text or provide additional clarification for options that display on the Online Registration site. When parents/guardians log into the Online Registration site, they are asked to select a language. That selection determines what text displays when they move through the registration panels. Buttons, labels, questions and instructions can display in a specific language based on the active languages created in the Language Groups tool and the parent's/guardian's selected language of choice.
You can modify the wording of all pop-ups and validation messages as needed. Districts are responsible for entering the translation for each field and instructional content that is visible. This is not provided by Campus.
Additional translation text can be entered in the OLR Lists Bank tool to translate the content displayed in dropdown lists for States, Address Prefixes, etc.
To access this tool, users must also have tool rights to the Language Groups tool.
HTML formatting is NOT supported by Infinite Campus Support and isn't supported in the WYSIWYG Editor.
Questions (such as droplists, radio buttons, text boxes, etc.) cannot use bold formatting. They have automatic formatting applied to them (which includes bolding the entire question). You still have the ability to use other WYSIWYG formatting options as necessary though.
 OLR Literals Bank
OLR Literals Bank Column Descriptions
The Literals Bank editor lists the fields that can be translated into the available languages.
English fields and instructions are automatically provided and do not need further modification unless you choose to provide more explanation.
| Column | Description |
|---|---|
| Code | This column lists the field that displays for parents/guardians. |
| Translation |
This column shows the text that displays for the language you selected in the Language Group dropdown list. This is the only column that can be modified. You can add additional text for any Code in any language. If you want to add additional information or instructions for the field, enter that text in this column. When the translation is entered and changes are saved, the parent/guardian will see this text instead of the Literal text. |
| Literal | This column provides the English or original text. |
Enter Translations
- Select the Configuration for which you want enter translations.
- Select the Language Group.
- Expand the OLR Literals Bank Category dropdown list to locate the section you want to modify.
- The Receipt category contains separate subcategories for each of the OLR Literals Bank Categories.
- Enter translated text in the Translation column for the fields you want to translate.
Tips:
- HTML formatting is NOT supported by Infinite Campus Support and isn't supported in the WYSIWYG Editor. If you choose to use HTML tags, only use valid HTML and simple tags like <b> or <i>.
- Double quotes and new line/character returns should not be used.
-
Click Save before moving to a new OLR Literals Bank Category, Language Group, or Configuration.
Result: The Online Registration panels will display the new text.
Exporting and Importing Translations
OLR has many literals to translate, and districts often want to use a third-party vendor to complete their translations. They can now use the Import and Export options to export a file out of Infinite Campus (with or without translations) and import the file with their new translations.
Exporting a File to be Translated
- Select a language group from the Language Group field to export for translation.
- Click Export to File.
- Select the appropriate export option:
- All literals without existing translations - Use this if you want to have all current English text translated.
- All literals with existing translations included - Use this to generate a backup of the current text or if you want the current translated text available while translating.
- New literals only - This file will only contain literals for which there are currently no translations for the previously selected language. Use this file if you only want to update new literals without affecting any other translated text.
- If you are opening a file with prior translations or non-English characters, be sure to import the file into Excel or other spreadsheet software as a UTF-8 file.
- Open Excel to a blank spreadsheet. Do not open Excel using the file itself.
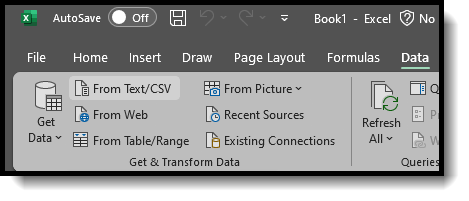
- Go to Data > From Text/CSV > Select your file and click Import > Change the File Origin to 65001: Unicode (UTF-8).
- Click Load.
- Add your translations in the "TranslatedText" column. Do not translate the column header itself.
- Save the file in the UTF-8 CSV Format.

If the file is ever saved as a regular CSV, non-English characters may turn into question marks "?" and render the translations useless.

Importing a File that has been Translated
- Ensure your file is saved in the UTF-8 CSV Format.
If the file was not saved as a UTF-8 CSV, check to see if any non-English characters in the translations turned into question marks "?". If they have, fix those translations and re-save the file as a UTF-8 CSV.
- Click Import From File.
- Click Select Files and select the file you wish to import.
- Click Import.
