Tool Search: Contact Log
The PLP Contact Log records all instances of communication by school personnel regarding a particular student and their learning plan needs. This communication can be with the student, their guardians, or others, and could include letters or email, phone calls, and face-to-face meetings for example.
There are several areas within Student Information that include a Contact Log tool - Counseling, Health, PLP, Response to Intervention (RTI), Special Education, plus several states that have a localized Contact Log for certain tools. In an effort to consolidate and streamline the process of managing communication between the school and students/guardians of students, the Contact Log in Student Information General is the main hub where all contact log records can be viewed and modified by school personnel who are granted proper tool rights. The PLP Contact Log functions the same as this new Contact Log.
Submit feedback for the new Contact Log by clicking the Feedback button in the bottom right hand corner. This takes you to the Campus Community Contact Log forum topic where you can add your suggestions for the Contact Log.
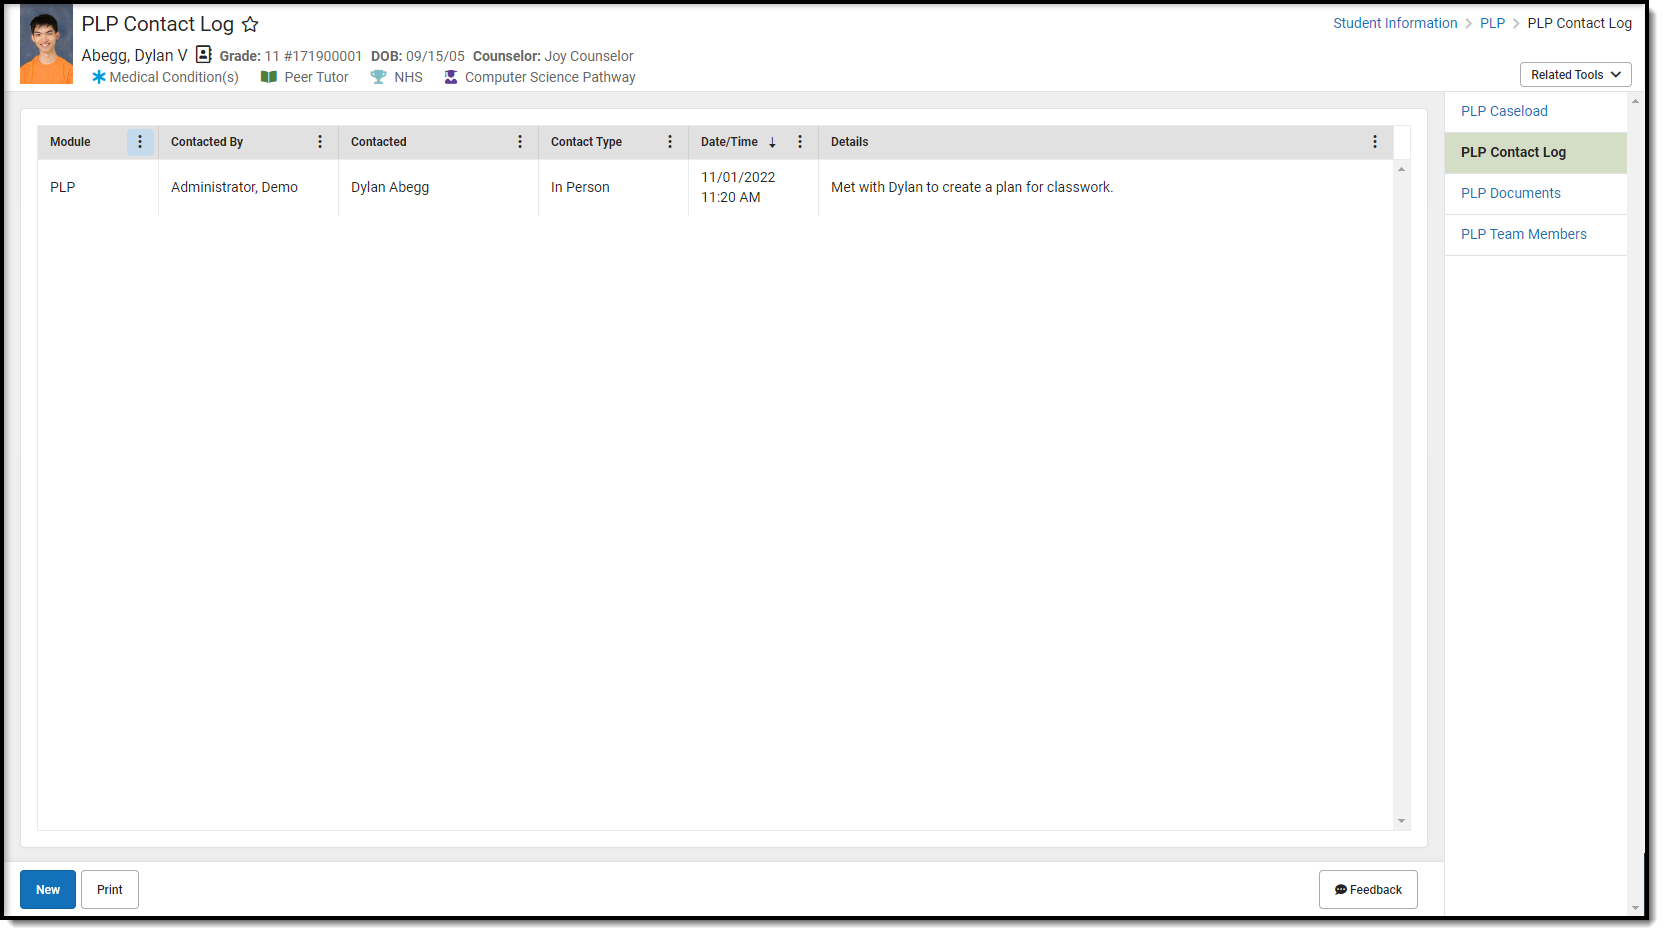 PLP Contact Log
See the PLP (Personal Learning Plan) Tool Rights article for information about rights needed to use this tool.
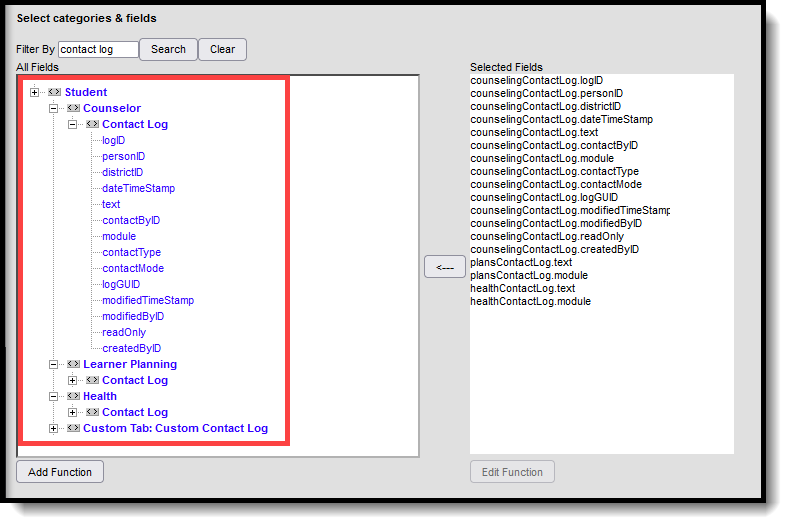
Contact Log Fields in Ad hoc Query Wizard
Information from the Contact Log records can be included in an Ad hoc Query using the Student Data Type. Contact log fields are available in the following locations:
- Student > Counselor > Contact Log
- Student > Learner Planning > Contact Log (includes fields for RTI, PLP and Special Education)
- Student > Health > Contact Log
See the Contact Log Detail Descriptions for specific Ad hoc fields.
 Contact Log Ad hoc Fields
Enter a New Contact Log Record
See the table following these procedures for descriptions of these fields, Ad hoc locations and Database information.
- Click the New button. The Contact Log Detail side panel displays.
- Select the area of contact from the Module dropdown list. When entering a Contact Log record from a location other than the General Contact Log tool, the Module field is already populated with the area of product.
- Verify the ContactDate/Time field of the contact is correct. This field auto-populates with the current date and time. When entering a record from a contact that previously happened, modify this field accordingly.
- Select the appropriate Contact Type from the dropdown list.
- Use the Contacted fields to select and/or enter who was contacted.
- Enter the Details of the contact.
- Click the Save button to save the record. Or, to enter another record for the same student, click the Save & New button to save the record and enter another new record.
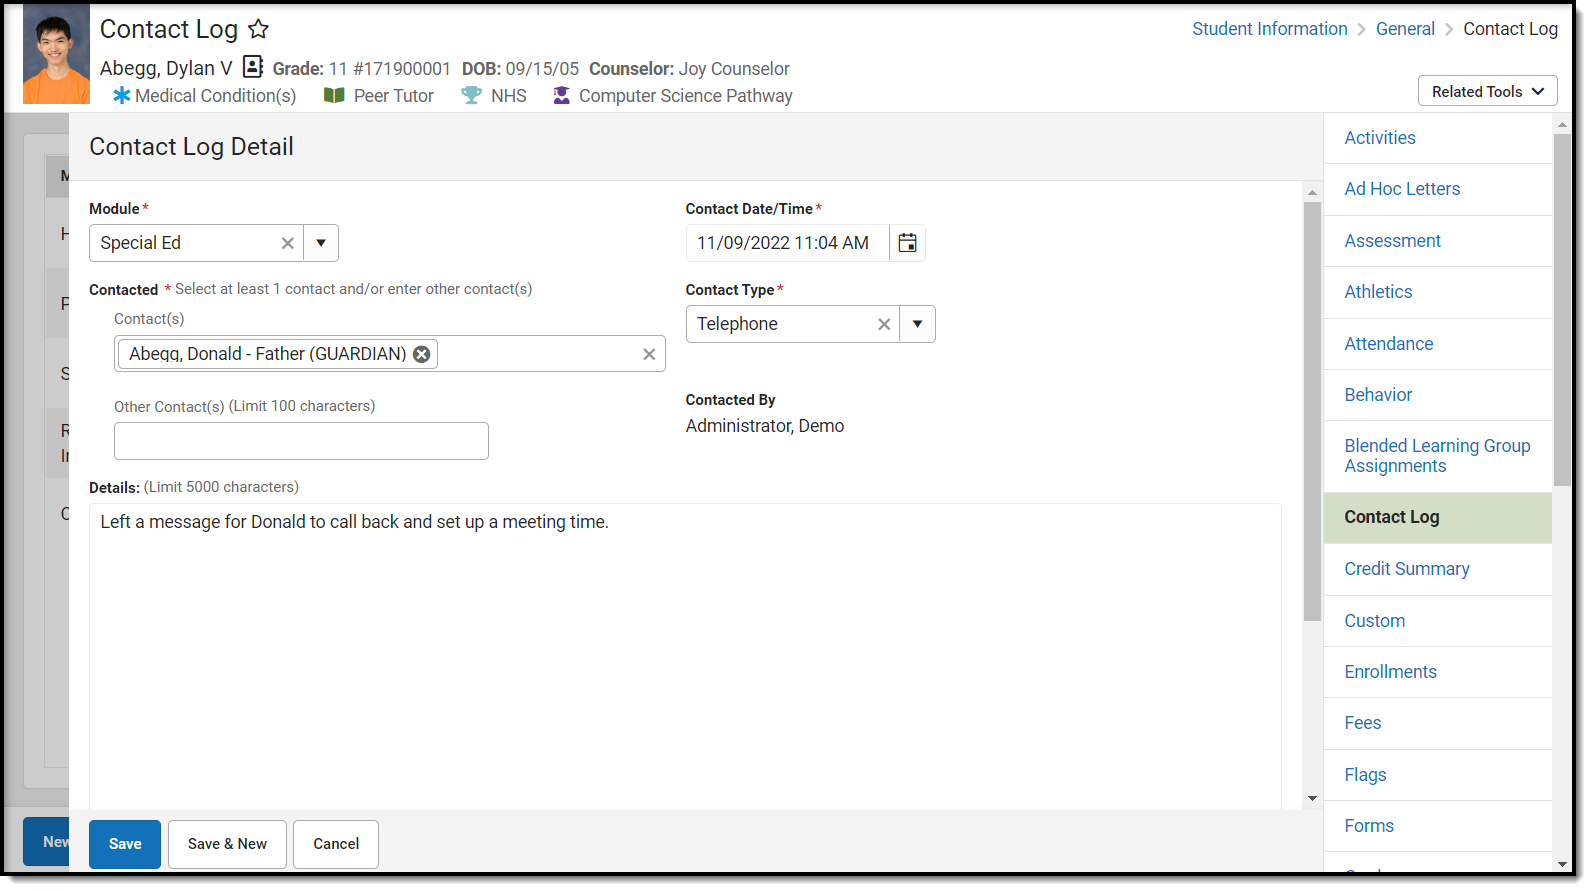 Contact Log Detail
The Contacts(s) dropdown list includes 6 different "types" of people and shows them in the following order:
- the student themselves
- people with current relationships to the student ("Guardian" will appear if the guardian checkbox has been marked)
- people currently in the student's household
- active teachers for course/sections a student is currently taking
- any current Team Members for the student
- people who have been contacted previously for this student who exist as users in Campus
Contact Log Detail Descriptions
| Data Element | Description | Database and Ad hoc Field Locations |
|---|---|---|
| Module | Lists the area where the contact was entered in the product, or the general topic of the contact.
Options are:
|
ContactLog.module
Ad hoc Location
|
| Contact Date/Time | Reports the date (mm/dd/yyyy) and time (HH:MM) the record was entered. | ContactLog.dateTimeStamp
Ad hoc Location
|
| Contact Type | Indicates how the individual was contacted. Additional options can be added in the Attribute/Dictionary (ContactLog > Contact Type). |
ContactLog.contactType
Ad hoc Location
|
| Contacted | Indicates the person or people intended for the contact. There are two fields where information can be entered. Select contacts who have been entered in Campus from the Contact(s) field. The Other Contacts field can be used to enter anyone who is not entered into Infinite Campus. | ContactLog.contactMode
Ad hoc Location
|
| Contacted By | Records the staff person who entered the record. | ContactLog.contactByID
Ad hoc Location
|
| Details | Provides a text entry field for recording a detailed description of the contact. | ContactLog.text
Ad hoc Location
|
Filter Contact Log Records
The Contact Log organizes records by Module (the type of contact log record), Contacted By (who made the contact), Contacted (who was contacted), Contact Type, the date and time the record was saved, and the Details (reason) for the contact.
Contact Log records are sorted first by the Date and Time of the record, with the most recent record displaying first. To display contact log records for only one module, select that module by using the filter option located in the Column Menu which is indicated by 3 dots to the right of each column.
In the example below, the Column Menu is open for the Module column showing the options available.
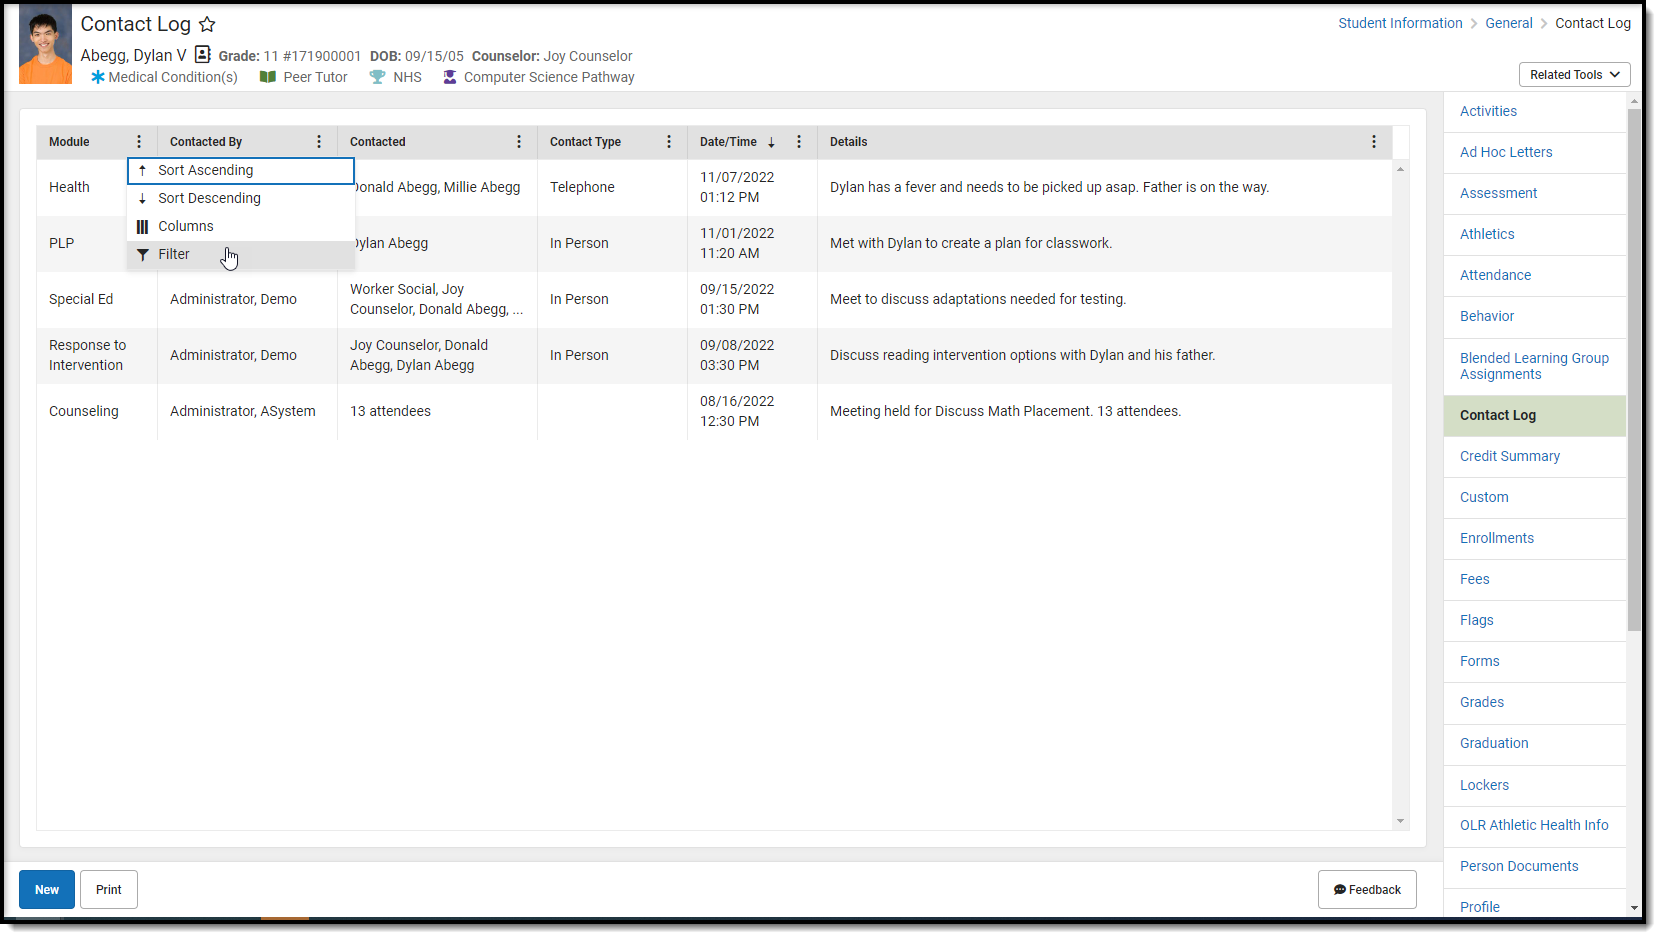 Filter Options from Column Menu
Print Contact Log Records
Default options are set to include every contact in each module, for all dates, contact types, entered by all staff, and contact made to all individuals, and sorted by date. These can be modified by removing the All option and adding specific values to the fields.
- Click the Print button in the lower left corner. A Contact Log Print panel opens to the right.
- Choose desired Module for which to print records.
- Enter the Start Date and End Date to return records within that range only. Or, leave these fields without a selected date to print all records.
- Select the desired Contact Type.
- Select the desired Contacted By option.
- Select the desired Contacted option(s).
- Choose the appropriate Sorting option - Date ascending, Date descending, or Contacted By.
- Click the Generate button. The report prints in PDF or CSV format for the selected student.
In the example below, Counseling Contact Logs entered between October 1 and December 2 in ascending Date order are included.
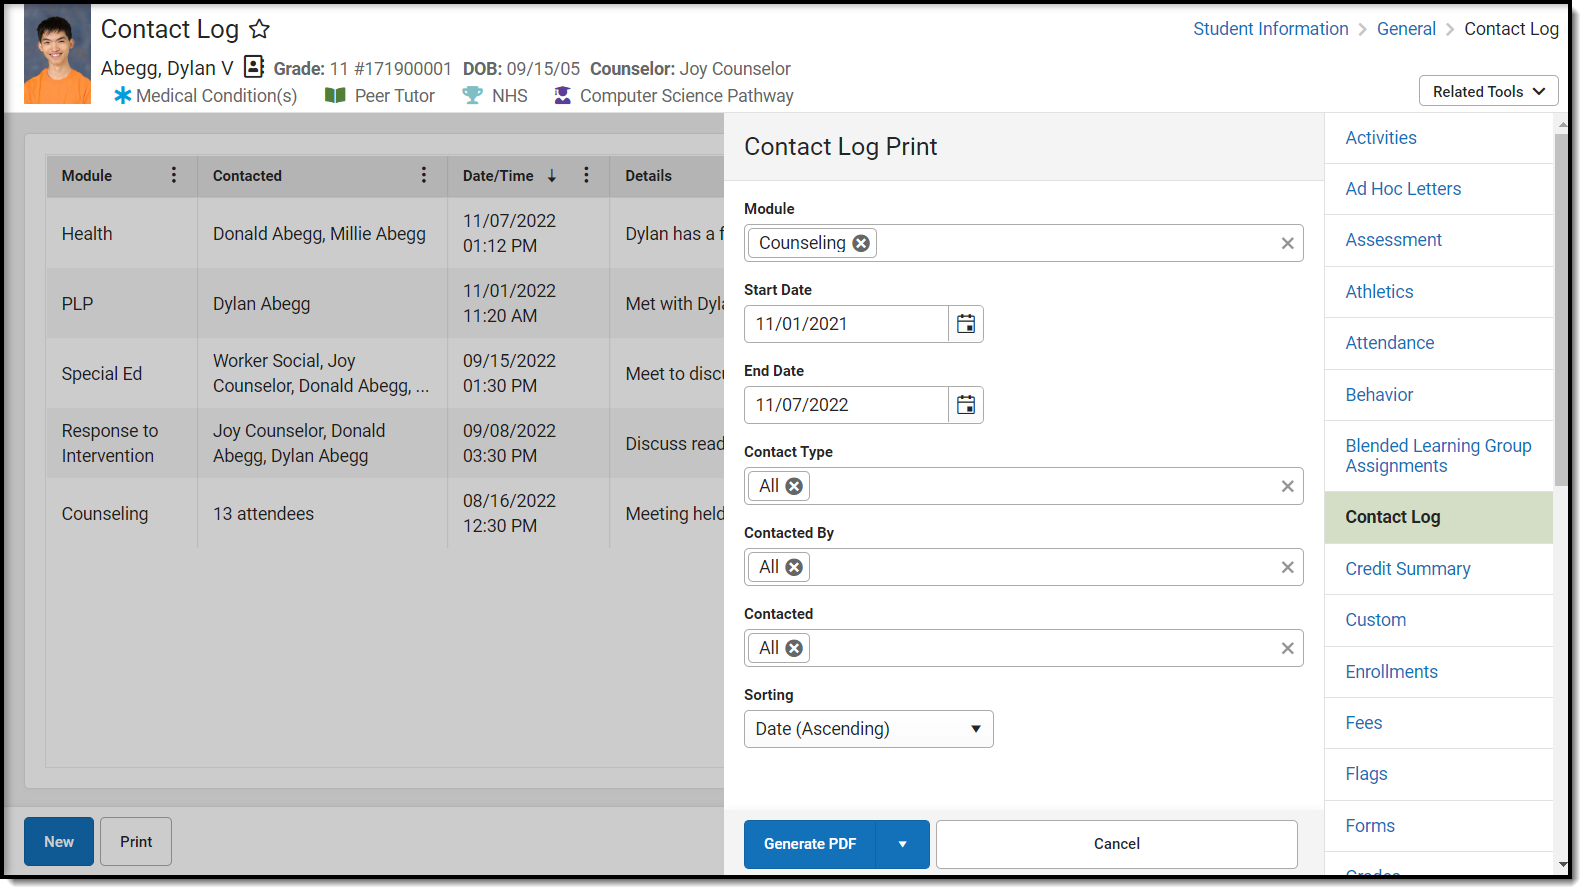 Contact Log Print
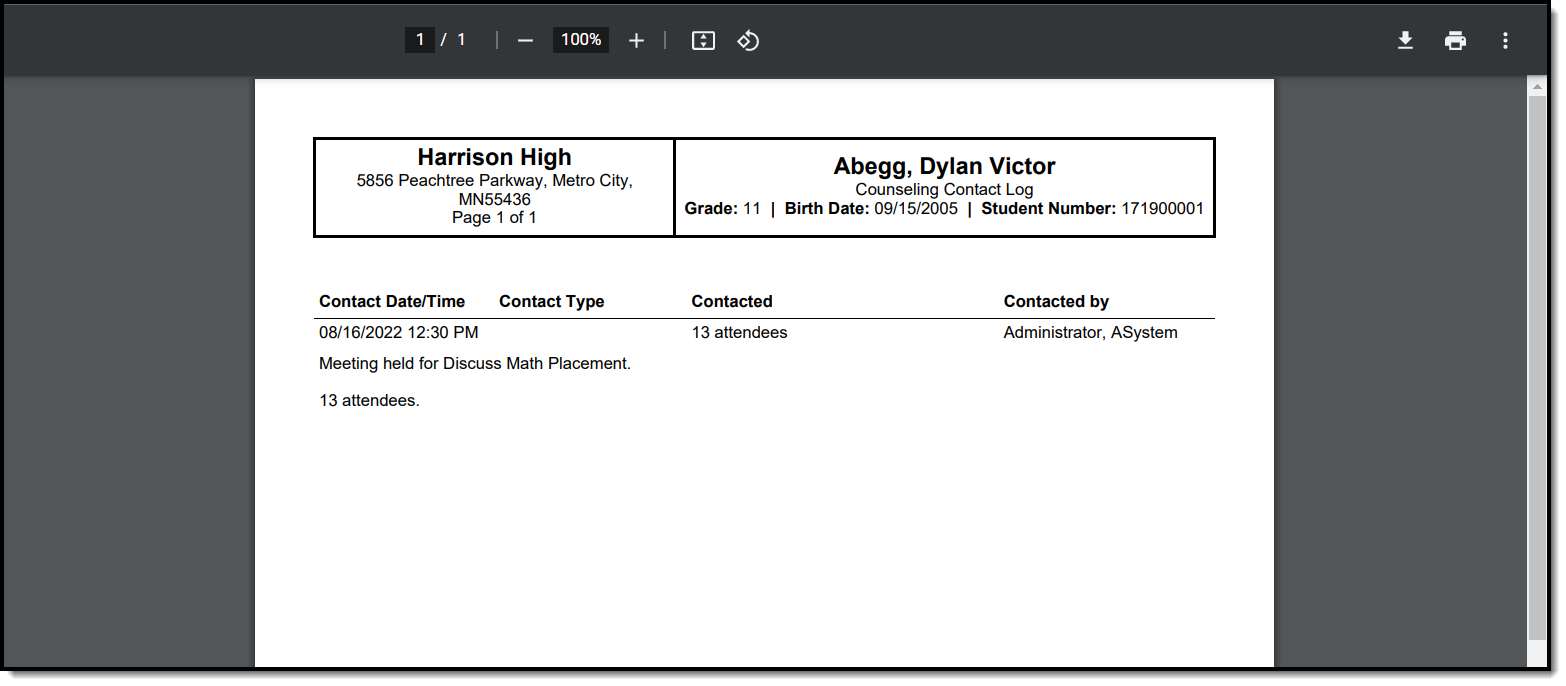 Contact Log Report
