Tool Search: Translation Setup
The Translations tool allows you to enter a language translation for individual fields within a specific tool (module) or application. Once a language is created, translations are entered for field names, and the language is activated, users can select this language from a dropdown list at the bottom of the Campus login page. Once the language is selected, fields are translated from English to the selected language.
At this time, translations can only be entered for Campus Parent/Student.
 Translation Setup
See the Portal Translation Setup Tool Rights article for information on available tool rights.
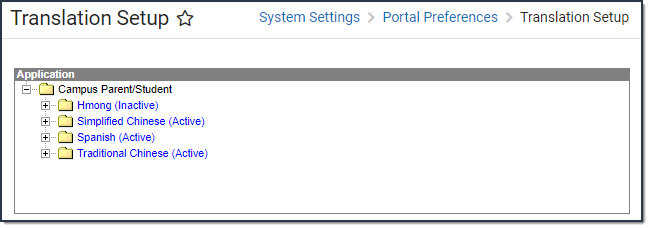
Translations are organized by tool/application, then the language, then all of the available pages within that tool/application, and then the fields on that page.
In the image below, the Assessment page is selected in the Application list for the Spanish translation. All of the fields displayed on the Assessment page appear within the Key column and the English Text column indicates how they are displayed in English on the page. Next to each field is a Translation box where you can enter the language translation of the English Text next to it. Once translations are entered and saved for these fields, the English fields will translate to the values entered when the user selects the language on the Campus login screen or within the app.
In the image below, Spanish translations are entered for each field within the Assessments tool (Evaluación). The Campus Portal user selected to translate the app into Spanish and the screen was updated to display these fields in that language.
 An example of the Calendar in Translation Setup and Campus Student
Considerations for Translations
- OS Limitations. Certain operating systems are not set up to handle certain character sets. For example, Windows 7 does not display Burmese (Myanmar) characters.
- Context. An English word or phrase may be translated many different ways depending on how it is used.
- Length limitations. There are occasions where very long words (for example, native German or native Hawaiian words) extend beyond the boundaries of the left navigation pane on the Portal. To correct this, manually add a space-hyphen break in the word so auto-wrapping is in effect in the menus.
- File Encodings. Encode CSV files to use UTF-8. Other encodings do not work properly.
- Excel files. Excel cannot be used to save CSV files. Excel recognizes some UTF-8 files, but it cannot be used to save files with UTF-8 encoding. CSV files saved in Excel may not load properly. Instead, consider using Google Sheets, or any other editor that does not change the encoding of a file.
Enter Translations
- Select the page of the module/application for which to enter translations.
A Translations editor displays. On the left is the Key, or what field is being translation. The middle Translation field is where the word is entered in the selected language. On the right is the English Text. - Enter the translation for the field in the Translation field. If a translation field isn't available for a field, the English text displays.
- Click Save when finished.
In the example below, the tool names in the Campus Parent app navigation bar are translated into Chinese.
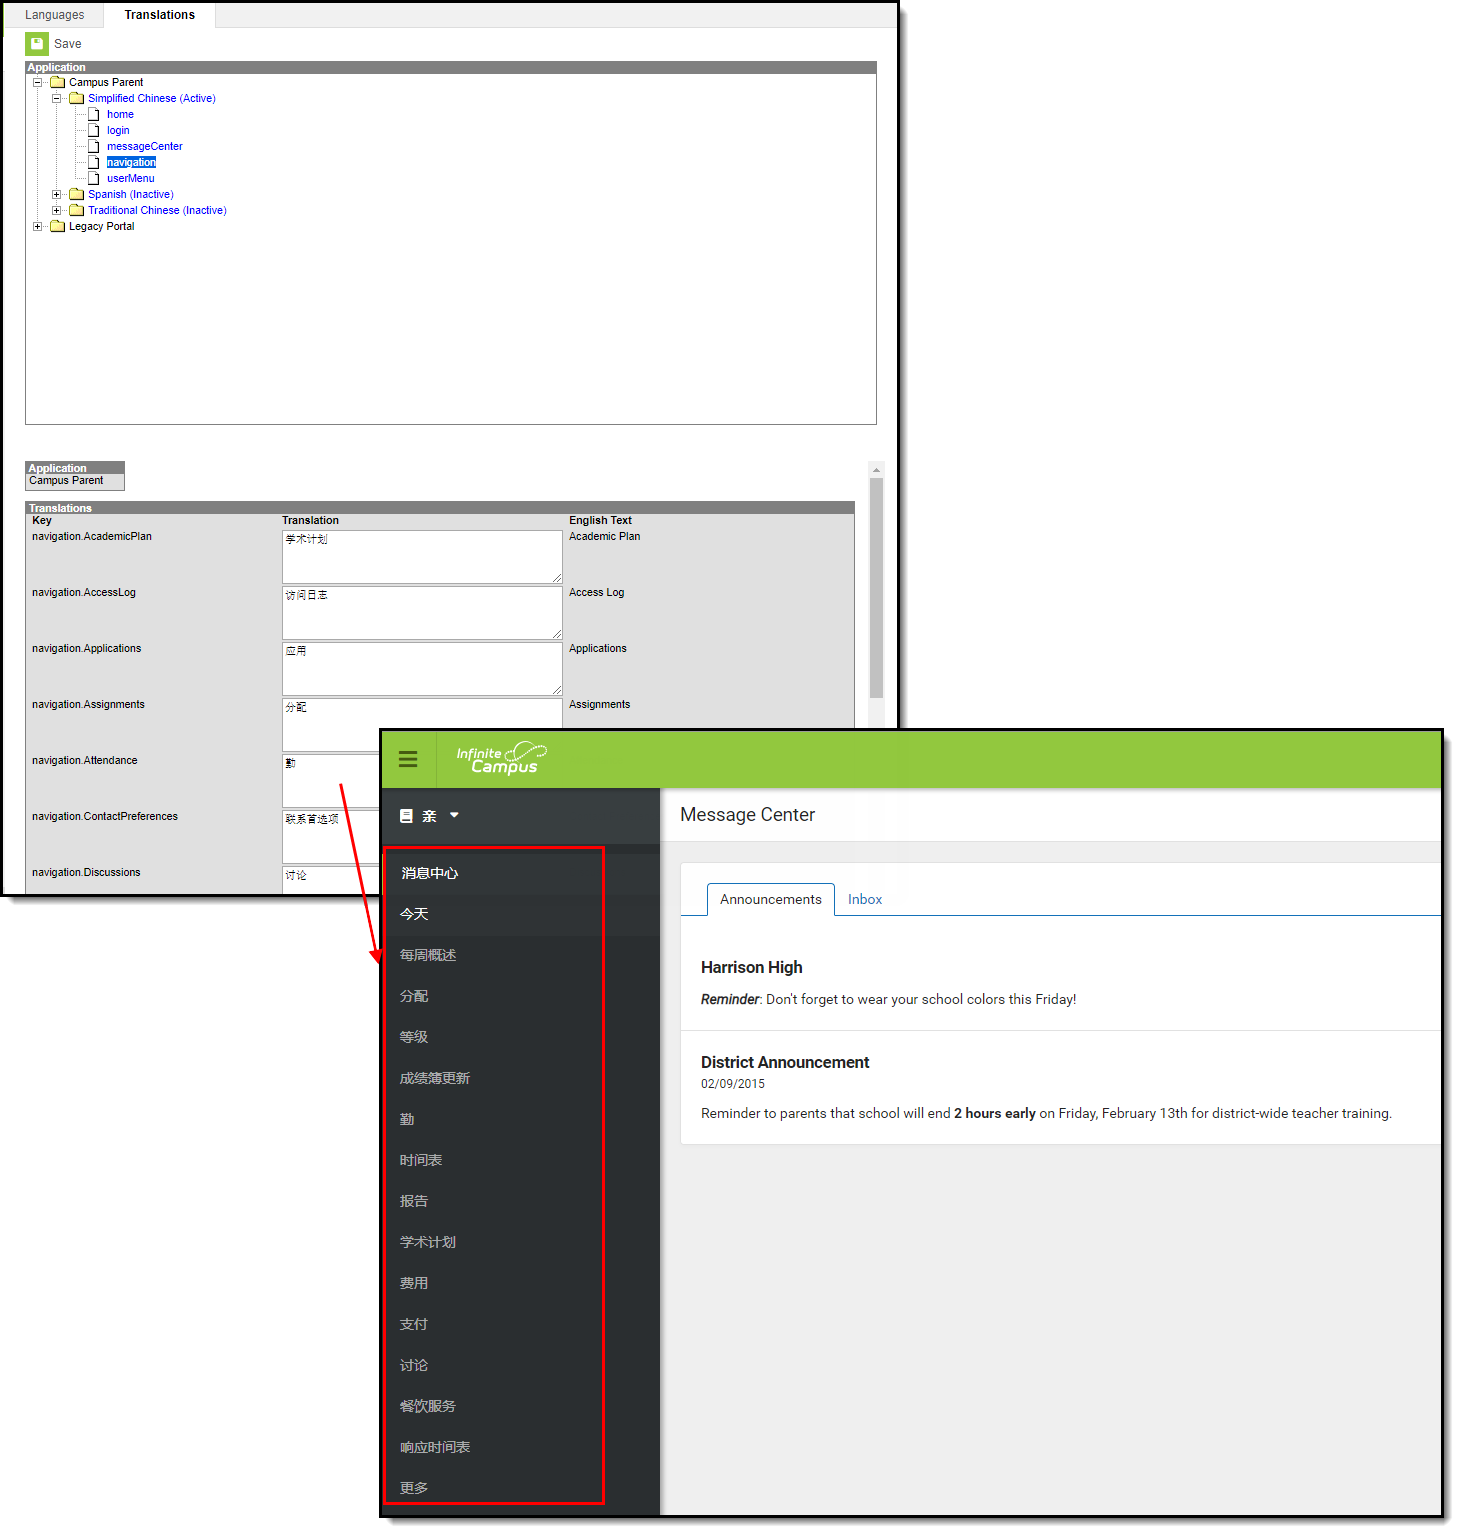 Navigation Bar Translated to Chinese
Activate a Language
When a language is added on the Languages tab, it is inactive. After the translations are entered for a language, it needs to be activated. Once activated, users can select it as an option.
New core fields added to the portal are the responsibility of the district to add their own translations in order for these new fields to have the translations needed in the existing languages.
To make a translation available for users, mark the Active checkbox (see image below). In the example below, Simplified Chinese is marked Active for the Campus Parent app and thus, is available for selection by the user.
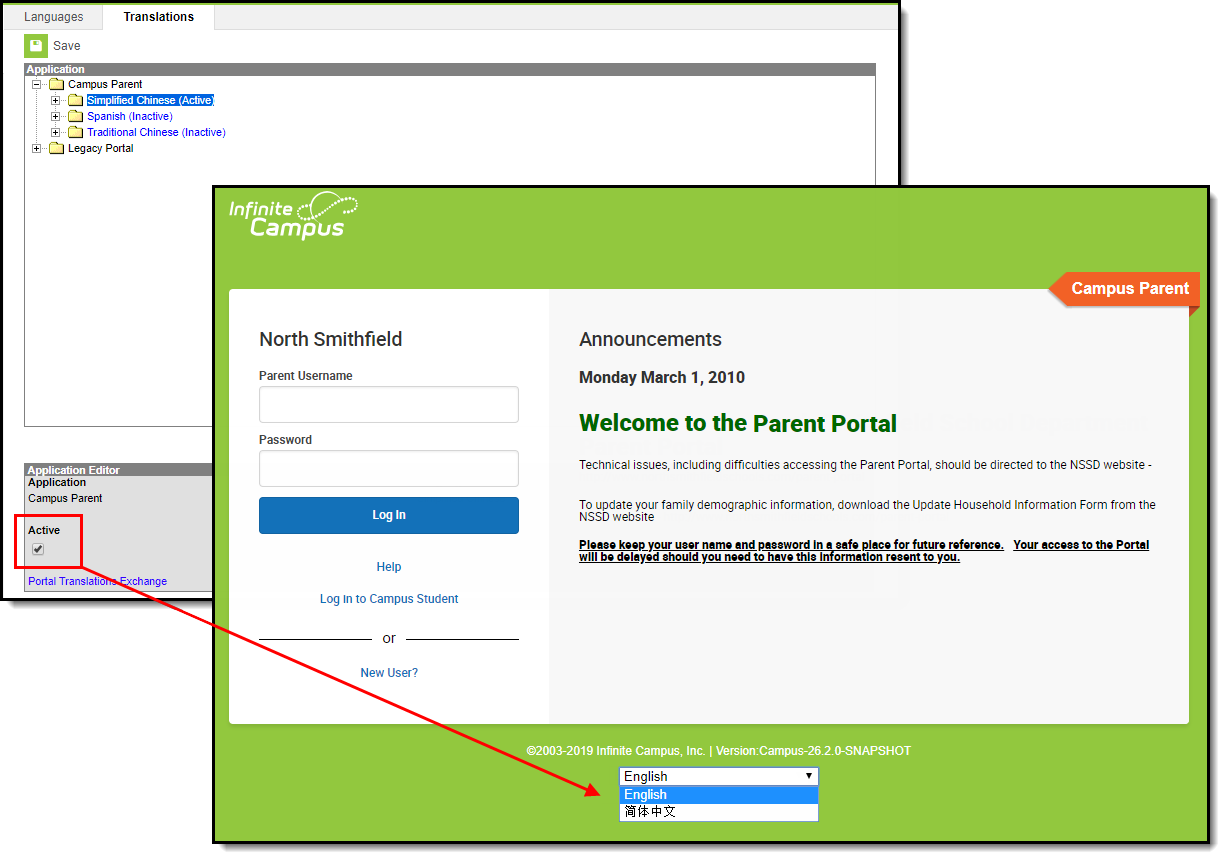 Activating a Language Translation
Download Translations
When a language is selected, a Download Translation editor becomes available. Users can download all translations or just missing translation for all fields in the module/application into a CSV format. This can be populated in-house with the needed translations, or sent to a translation service. Once translations are complete, they can then be uploaded back into Campus.
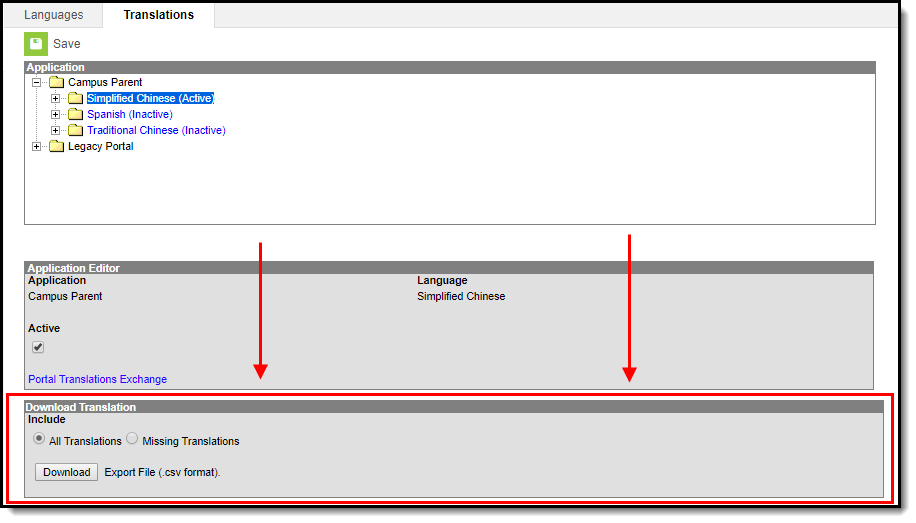 Download Translation Editor
- Determine whether all fields in the module/application should be downloaded into the spreadsheet, or just the fields that are missing translations. Choose the appropriate radio button for All Translations or Missing Translations.
- Click the Download button. The CSV spreadsheet downloads as other downloads would.
- Save the newly downloaded file and enter the translations or send it to your third party translator.
The CSV spreadsheet includes the selected Language Code, the label, the application from which the fields are being downloaded, the English Text that displays and the Translated Text.
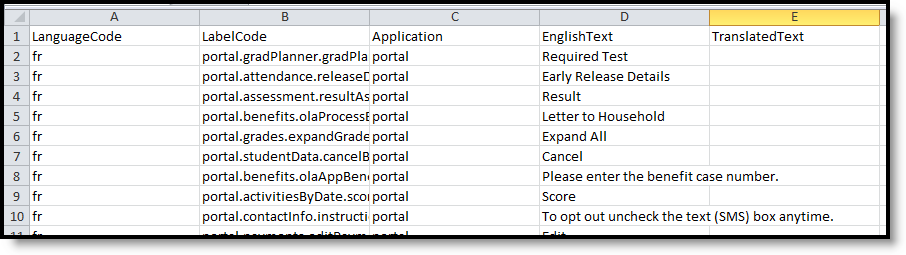 CSV Download
Upload Translations
When the downloaded spreadsheet has been populated with translations, use the Upload Translations functionality to upload the file and add the translations to the Campus database. You can also upload a shared file that was available on the Campus Community Forums.
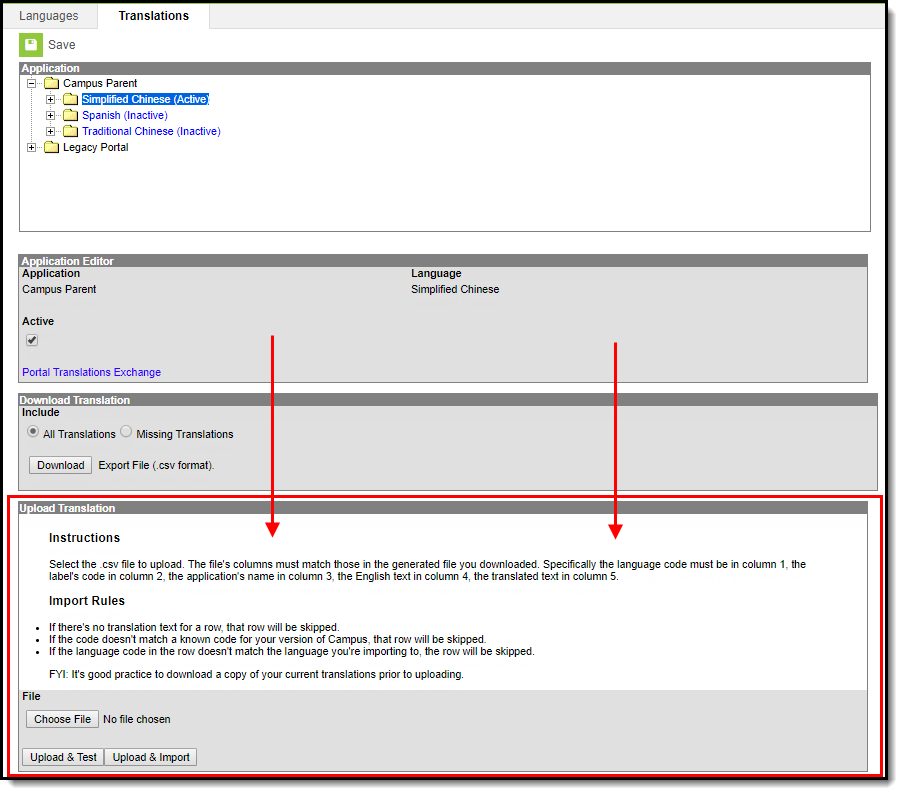 Upload Translations Editor
- Click the Choose File button to locate the file to upload.
- Click the Upload & Test button to test the format of the file before uploading. An error report displays when the test has been completed. Correct these issues prior to importing the file.
- Click the Upload & Import file to import the translated files to the database.
Encode CSV files to use UTF-8. Other encodings do not work properly.
Share Translations
A Campus Community Forum is available for users to share their translation files. Use the Download Translations process above and add your file to the forum for any language you have translated. In turn, import any translation file posted on the Forum that other districts have translated.
A link to the Portal Translations Exchange Forum is included on the Application Editor, displayed when a specific language is selected. It will open the Campus Community.
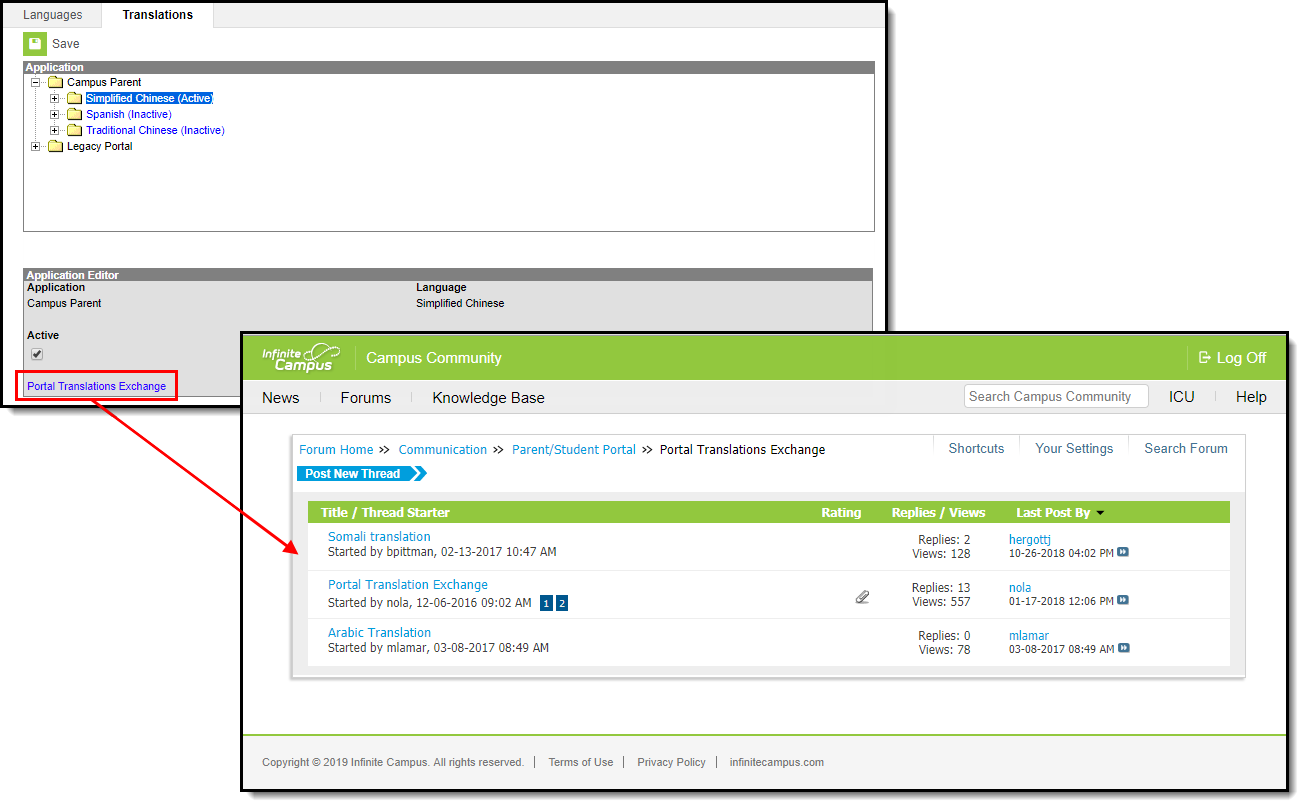 Portal Translations Exchange
