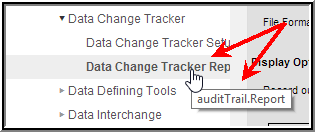
Tool Search: Data Change Tracker Report
Data Change Tracker is available as part of the Campus Data Suite. Campus Data Suite is available for self-hosted and Cloud Choice hosted Districts.
The Data Change Tracker Report details all data changes that have occurred in tables tracked by Data Change Tracker functionality.
Using filter criteria, you can view data changes that have occurred by specific users for specific tables during a specific time and even specific modification type(s). You can also view a large amount of data for many tables over a period of time and sort this data using available sorting options.

Prerequisites
Before generating the Data Change Tracker Report, the following must be completed:
- Data Change Tracker functionality must be enabled for your district.
- Data Change Tracker functionality must be enabled via the Data Change Tracker Setup tool.
- The user must be assigned to the Data Change Tracker security role by your district's Security Administrator or given tool rights to the Data Change Track Report. Tool rights for the Data Change Tracker can only be given to individual user accounts. These tool rights cannot be given to a User Group.
Only users assigned the Data Change Tracker security role can view and access tool rights for the Data Change Tracker Report.

Purpose of the Data Change Tracker Report
The Data Change Tracker tool was designed to help users view and analyze data modified within Campus and its database. This report helps users:
- Reconcile changes made within the system.
- Understand who has made what changes within the system.
- Understand what the old values were before they were changed.
- Understand the overall impact a data change has on current records; such as mass ending enrollment records.
What this report is NOT intended to accomplish
It is important to understand what this report is NOT intended to accomplish, such as:
- The tool is only intended to capture changes to the core SIS product in the Campus District Edition. Campus Premium Product functionality (such as Food Service) is out of scope.
- Existing audit reports such as the Pre-AYP Audit, Transcript Audit, Fee Audits, etc are not tied to Data Change Tracker functionality and will not report this data.
- Existing UI screens within Campus will not be updated to show captured data change information or be modified in any way to function in coordination with Data Change Tracker functionality.
- Data Change Tracker functionality cannot and will not restore prior records or values. This report only displays the before and after value of a data change and cannot restore the old value.
- This report does not include Campus usage information such as page hits, who has viewed what tools within Campus or who has what tool rights within Campus.
- Data Change Tracker information is not tied to Ad Hoc Reporting and is not an option for reporting within those tools.
- You cannot create alerts when certain modifications occur within Campus. This report is merely a display of the changes which have occurred, it is not designed to be an active monitor and alert system for changes.
Generating the Data Change Tracker Report
The following steps should be followed when generating the Data Change Tracker Report:
- Step 1. Select Affected Tables
- Step 2. Enter Filter Criteria
- Step 3. Select a Print Option
- Step 4. Select Display Options
- Step 5. Generate the Report
Step 1. Select Affected Tables
The first step in generating the report should be to define which tables should be included in the report results. Defining specific tables is important for narrowing the large amount of change data and focusing on how you might filter this data based on filter criteria options.
Multiple tables can be selected by holding the CTRL key and selecting each table or by holding the SHIFT key and selecting a group of tables.
You must select at least one table.
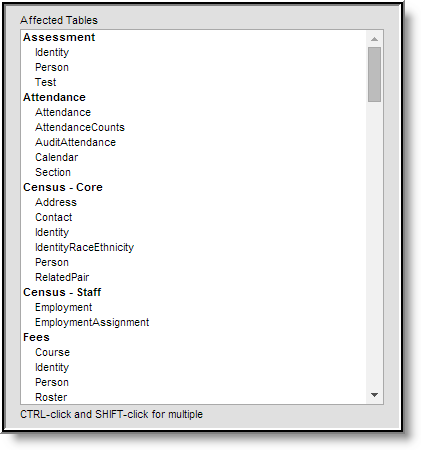
If a table appears within the Affected Tables window, this indicates the table contains at least one piece of data change information.
If no tables appear within the Affected Tables window, this often indicates the tool has either not been properly enabled/configured or more time is needed for data changes to occur within Campus before there is data to be reported. The report will also indicate this issue as a warning in the report header (see Image 4).
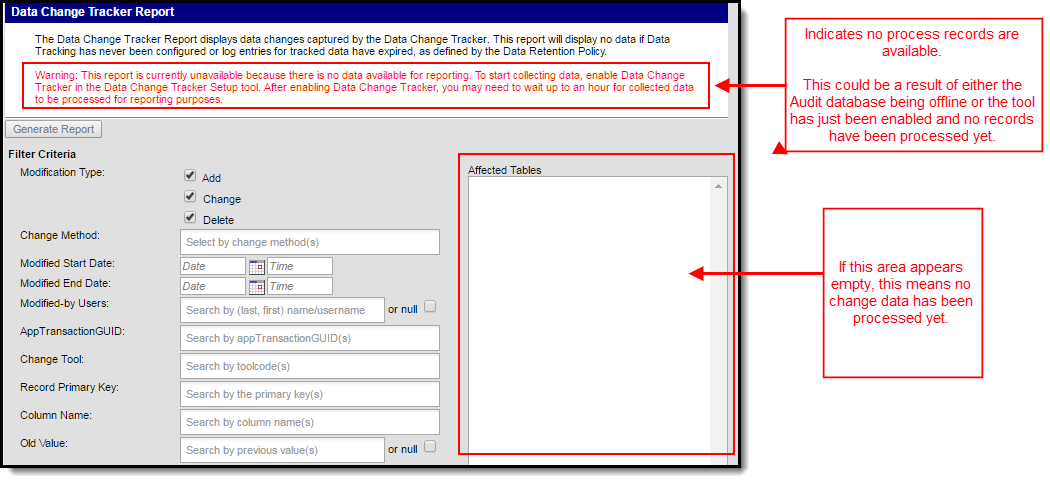
Step 2. Enter Filter Criteria
Once affected tables have been selected, you should determine how data will be filtered for inclusion in the report. Because of the vast amount of data change information a school or district may have, this step is crucial in narrowing reported data into only information that is important or relevant.
When populating multiple values within a single search field, the logical operator "OR" is applied.
When populating values across multiple search fields, the logical operator "AND" is applied.

The following table explains each available filter option:
| Field | Description |
|---|---|
| Modification Type |
|
| Change Method |
|
| Modified Start Date | Only data changes occurring on or after this time and date are reported. A date range cannot exceed 60 days. |
| Modified End Date | Only data changes occurring on or before this time and date are reported. A date range cannot exceed 60 days. |
| Modified-by Users | Allows you to specify which Campus or database users will report change data. Only data changes made by these users will be included in the report. |
| AppTransactionGUID | A unique GUID is generated for each data change event that occurs within Campus. This field is especially useful in viewing only changes that occurred for a specific event. |
| Change Tool | The tool(s) within the Campus used to make the data change. Change tools are entered by specifying their tool code. Only changes made within the tools specified will be reported. If you are unsure what a tool's tool code might be, hover the mouse cursor over the tool in the Campus Index.
|
| Record Primary Key | Allows you to only view data for specific records which had data changes (i.e., courseID, enrollmentID, etc). For example, if you want to only view changes for a specific enrollment and you know the enrollmentID, you can view just this information. |
| Column Name | Allows you to only view data changes made for a specific column within selected affected table(s). The column name and field name in the application do not always match. You may need to match corresponding values in columns and fields in order to properly understand a column/field relationship. |
| Old Value | Allows you to only view data changes that modified or deleted columns with this original specific value. This is most useful when using in tandem with the New Value field to view data changes which changed from one value to another within a specific table or column. When an entire new record is added or inserted, the old value for each column pertaining to the table will report as null. Likewise, when an entire record is deleted, the new values for each table column will be null. Some areas of Campus delete records and insert new records instead of updating existing records. |
| New Value | Allows you to only view data changes that modified or added this specific value within the affected table(s) specified. This is most useful when using in tandem with the Old Value field to view data changes which changed from one value to another within a specific table or column. When an entire new record is added or inserted, the old value for each column pertaining to the table will report as null. Likewise, when an entire record is deleted, the new values for each table column will be null. Some areas of Campus delete records and insert new records instead of updating existing records. |
| Affected Person | Allows you to report data for a specific person or set of people who were affected by changes made to selected tables. |
| Affected Calendar | Allows you to report data for a specific calendar(s) affected by changes made to selected tables. |
| Affected School | Allows you to report data for a specific school(s) affected by changes made to selected tables. |
| Affected District | Allows you to report data for a specific district(s) affected by changes made to selected tables. |
| Rows Affected | Allows you to return changes that affected a certain number or threshold of records. |
| SQL Statement | Allows you to report changes made to records caused by a specific SQL statement. |
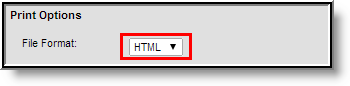
Step 3. Select a Print Option
Once tables have been selected and filter criteria has been defined, a print option should be selected. The following options are available:
HTML
You can generate the report in HTML format. This format is useful for clearly and easily reviewing each individual change among iterative searches or large amounts of data.

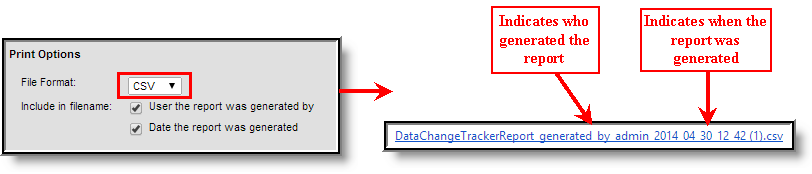
CSV
You can generate the report in CSV format. This format is useful for utilizing spreadsheet software to use advanced Excel functionality, customize print formats, extract the data into another system, etc.
Selecting the User the report was generated by and/or Date the report was generated checkboxes means this information is included in the name of the generated report file (see Image 7).

XML
You can generate the report in XML format. This format is useful for feeding this information into other programs or reporting services.
Selecting the User the report was generated by and/or Date the report was generated checkboxes means this information is included in the name of the generated report file (see Image 8).


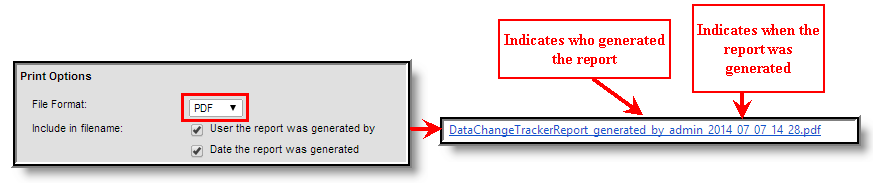
You can generate the report in PDF format. This format is useful for reviewing data and sharing this data with other users.
Selecting the User the report was generated by and/or Date the report was generated checkboxes means this information is included in the name of the generated report file (see Image 9).
Step 4. Select Display Options
Now that tables have been selected, filter criteria has been defined and a print option has been selected, display options should be defined.
Display options (Output, Seq, Sort, Direction) determine which reported fields (listed below Field) are included and how this data is sorted/displayed within the report.
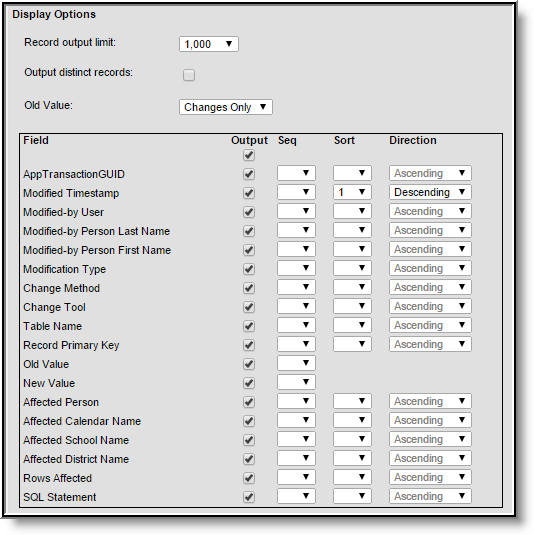
The table below explains each display option.
| Field | Description |
|---|---|
| Record output limit | This indicates the maximum amount of records that will be included within the report. |
| Old Value | This allows you to decide whether to display all old columns and values or only those columns and values that were changed as a result of an update. |
| Output | If marked, this column will report data within the report. |
| Seq | This field determines the order in which these 13 fields are displayed within the report. For example, if Modified Timestamp has a Seq of 1 and Modified Type has a Seq of 2, the first two columns in the report will be data for Modified Timestamp and then Modified Type. |
| Sort | This field determines the order in which data is sorted on the report. For example, if Table Name has a Sort of 1 and Column Name has a Sort of 2, the report will first sort data by table name and then sort by column name. |
| Direction | This field determines how reported data in each field is sorted. This field is defaulted to a value of Ascending. For example, if New Value has a Direction of Ascending, all reported data for New Value will be sorted in ascending order. |
Step 5. Generate the Report
To generate the report, click the Generate Report button at the top or bottom of the report editor.
![]()
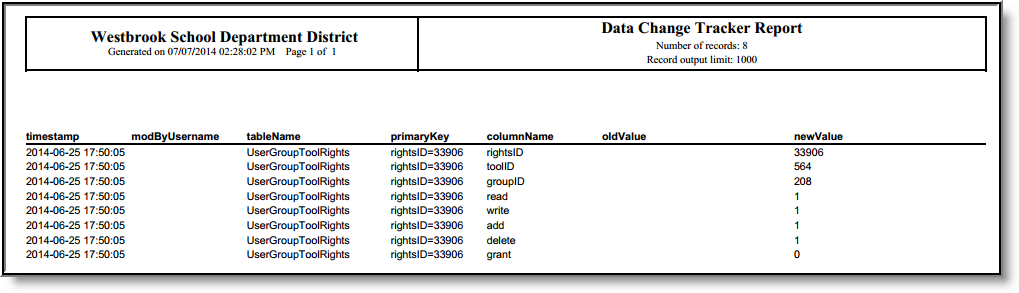
Understanding the Data Change Tracker Report
This section will help you better understand the purpose of each column in the report.
There is an affected change record limit that prevents a single change from overloading the Data Change Tracker process job and database storage. Currently, this limit is set to 10,000 records from a single modification.
In these instances, no affected record details before or after values will be tracked.
If the change was a result of a SQL statement, then that statement will be logged along with the Database User and Timestamp.

| Column | Description |
|---|---|
| appTransactionGUID | A unique GUID is generated for each data change event which occurs within Campus. Because one data change event can cause multiple changes within Campus, all changes caused by the event are given the same TransactionGUID. This helps users better understand the entire scope of changes which occurred with the event. |
| Timestamp | The date and time in which the change event occurred. |
| Mod By Username | The user who initiated the data change within Campus or the database. Change records created via a tool interacting with the Data Service Broker will always report the username configured by Campus Data Services and not the Campus user who was logged in and initiated the change record. |
| Mod by Last Name | The last name of the user who initiated the data change within Campus or the database. Change records created via a tool interacting with the Data Service Broker will always report the name of the user configured by Campus Data Services and not the Campus user who was logged in and initiated the change record. |
| Mod by First Name | The first name of the user who initiated the data change within Campus or the database. Change records created via a tool interacting with the Data Service Broker will always report the name of the user configured by Campus Data Services and not the Campus user who was logged in and initiated the change record. |
| Modification Type | The type of modification that occurred (Add, Change, Delete). |
| Change Method | Indicates whether the data change was made within Campus (UI) or the database (DB). The report defaults to a value of DB is no Change Method was explicitly set during the transaction. |
| Change Tool | Indicates what tool was used to make the data change. This column will report blank if the change was made directly via the database. |
| Table Name | The name of the table that had data modified by the data change event. |
| Primary Key | The unique identifier for the record that was modified, which corresponds to the table. |
| Old Value | The column value prior to the data change event. |
| New Value | The column value after the data change event. |
| Affected Person | The specific person affected by the record change. |
| Affected Calendar Name | The name of the calendar affected by the record change. |
| Affected School Name | The name of the school affected by the record change. |
| Affected District Name | The name of the district affected by the record change. |
| Rows Affected | This column tells you how many database records were changed by a single action, in other words, how many things got modified at once. What the value means:
If you are looking for information on a record change that was part of a batch update exceeding the 10,000-row limit, you will not be able to find it, as the row limit prevented the data from being recorded. |
| SQL Statement | The SQL statement used to change data and produce the change record. This column will report blank unless the change was made directly within the database or the limit for the max number of affected records was reached for that table. |
