Tool Search: Verification
The FRAM Verification tool helps districts complete the required, yearly process of verifying a percentage of approved, free/reduced applications. Applications with the status No Response should NOT be verified.
Applications are verified when an application signer submits the documentation requested through the verification process (usually in response to the 1st or 2nd Pre-Notice letter). A list of verified, pending, and replaced applications appears in the Free/Reduced Verification Status Detail area.
| If... | Then... |
|---|---|
| the household responded that they "do not want to participate any more" |
|
| the local SNAP office has verified that a household DID NOT receive SNAP benefits |
|
Applications may be verified more than one time.
- Click View in the Action cloumn.
- Click Verify.
Result
Step 2 of Verify Application displays.
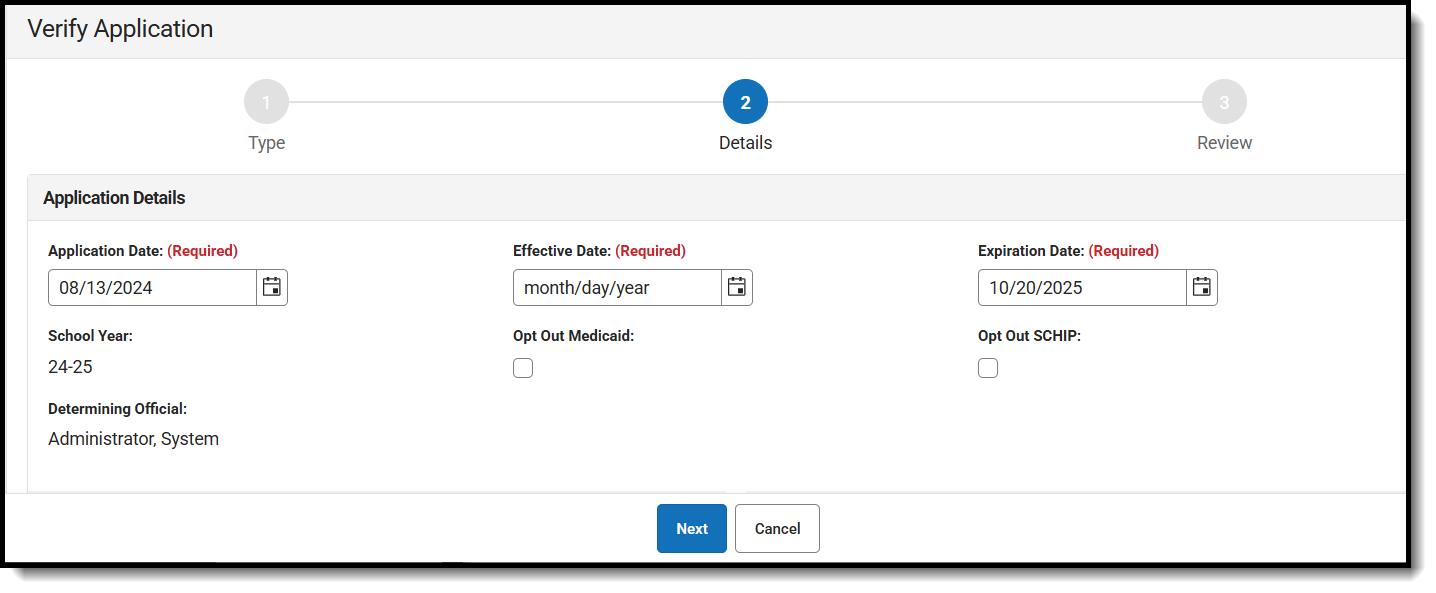
- Add the Effective Date. If the application has changed, the Effective Date is the date the changes will go into effect. If there is a reduction in benefits requiring a 10-day notice of adverse action, the Effective Date must be adjusted.
- Verify/adjust the Expiration Date.
- Compare the existing data with the data that the application signer submitted.
If...
Then..
No discrepancies are found during the verification
Process the verification as is.
Discrepancies are found during the verification
Make adjustments to the application on this screen then process the verification. This screen allows you to complete the following tasks:
- Remove students and/or household members.
- Adjust income levels.
- Update student information.
- Add students and household members using the Add Student from Census button, Add Person from Census, or the Quick Add button.
You want to exit without completing the verification
Click the Cancel and Leave to exit the editor. Changes will not be saved.
- Click Next.
- Click Process to save the verification. A Print notification will appear asking to print the Post Notice Letter.
Result
The Verification screen reappears. The newly verified application is listed in the Verified Applications editor, below the remaining pending applications, at the bottom of the screen. The eligibility value in the Verification Status column is updated, and the current date is auto-populated in the Process Date and Effective Date columns.

