Tool Search: Payments Notifications
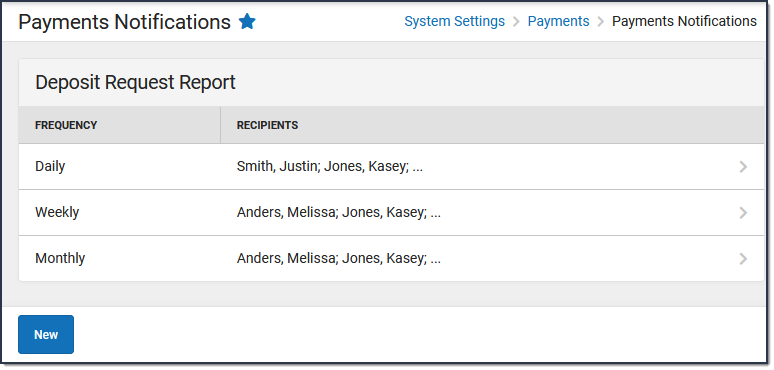
Districts can set up a Payments Notification for the Deposit Request Report. The notification is an email that includes a PDF version of the Deposit Request Report. Only users assigned tool rights to the Deposit Request Report may be assigned to receive this email.
| What can I do? | What do I need to know? |
|---|---|
Important Information About this Tool
- Campus Messenger must be enabled.
- In the Email Settings tool, the required fields must be filled in and the Allow Email Attachments checkbox must be marked.
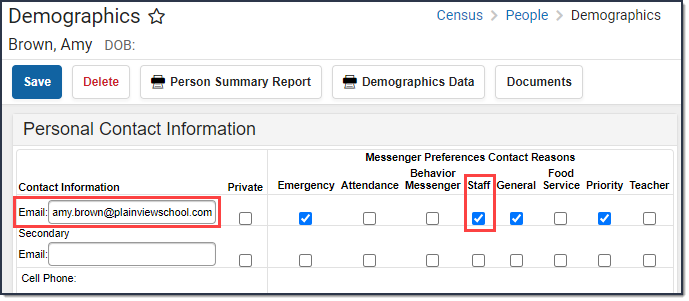
- To receive a notification, Recipients must
- be assigned tool rights to the Deposit Report,
- have the Staff checkbox marked, and
- an Email address entered on the Demographics tool.

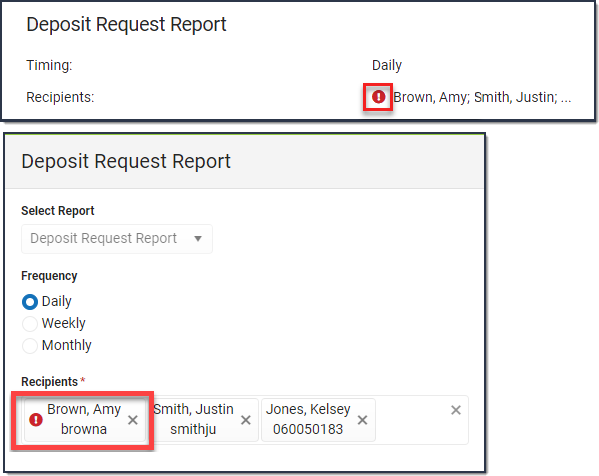
If a recipient is added to a notification but later does not meet all three requirements, a red exclamation displays on the Payments Notification screen and on the notification panel.
Troubleshooting
The Sent Message Log, Mailgun Message Log, and Recipient Log allow you to see when messages were sent and to whom they were sent. Use these tools to troubleshoot Payments Notifications issues.
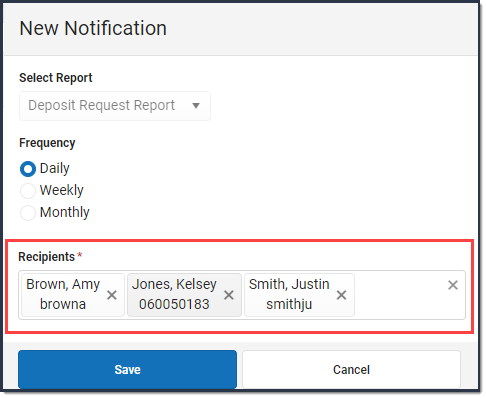
Add a Notification
- Click the New button.
Result: The New Notification panel displays.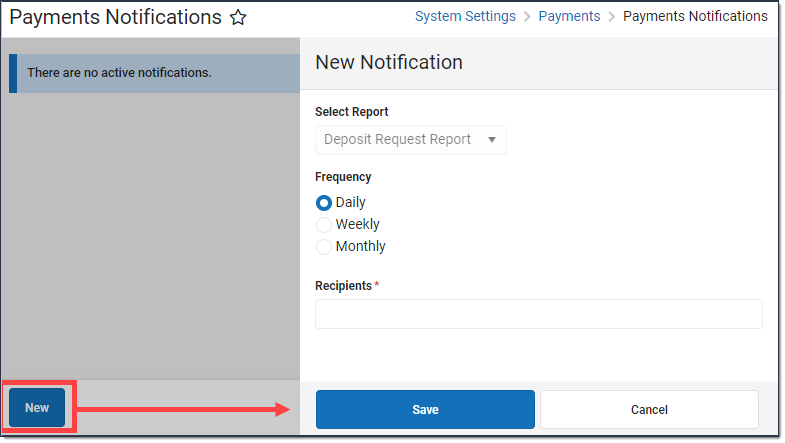
- Select the Frequency for sending the notification.
Frequency Description Daily The daily email is sent on Monday, Tuesday, Wednesday, Thursday, and Friday mornings. Weekly The weekly email is sent on Mondays. After setting up this notification, Campus will begin emailing the selected recipients the following Monday. Monthly The monthly email is sent on the first day of the month. After setting up this notification, Campus will begin emailing the selected recipients on the first day of the following month. - Select the Recipients to whom the notification should be sent.
- Click the Save button.
Result: The new notification is saved and displays on the Payments Notifications tool.


Add or Remove Recipients from a Notification
- Select the notification you want to modify.
Result: The Deposit Request Report panel displays. - Click the X next to any Recipients you want to remove or type in the field to find and add new Recipients.
- Click the Save button.
Result: Changes are applied immediately and affect the next notification.
Delete a Notification
- Select the notification you want to delete.
Result: The Deposit Request Report panel displays. - Click the Delete button.
Result: A confirmation message displays. - Click the Delete button on the confirmation message.
Result: Campus deletes the notification and notification messages are stopped.
