Tool Search: Blended Learning
Blended Learning allows districts to create and assign learning groups to students to manage classes and attendance in a setting that is adaptable for students who are physically in a building for learning, for students who are attending classes virtually, or for a combination of both.
Blended Learning groups provide the first step in reducing in-person class sizes.
Blended Learning tools were first released in the Campus.2028 Release Pack (July 2020). See the Blended Learning Groups article for an overview of the entire Blended Learning Group process.
 New Blended Groups
See the New Blended Learning Groups Tool Rights article for information about rights needed to use this tool.
The main view of the New Learning Groups tool lists existing groups, their assigned color, their start and end dates, and how students are added to the group.
It also includes the status of each group - either Active or Archived. Archived groups are no longer in use and can be hidden from this main view by moving the Show Archived toggle in the upper right corner from On to Off. When set to Off, only Active groups are listed.
NOTE the following automatic creation of Learning Groups when your district updates to Campus.2032 Release Pack (August 2020):
If your district was using the original COVID-19 Attendance Process for recording attendance for students in the 2019-20 school year BUT Blended Learning Groups have NOT been created, one Blended Learning Group will be created automatically, and all students enrolled in a calendar with Enable Covid-19 assignment insert marked will be assigned to that new group.
In addition, that automatic group is then associated with every attendance day in the affected calendar.
Learning Groups can be created, with students automatically assigned to them or students added manually.
Create "manual" learning groups first and manually add students to those groups. These manual learning groups would be students who are never virtual or on-site. Students assigned to these groups are excluded from the automatic student assignment process.
If learning groups have already been created and students have already been assigned, creating additional groups overwrites the current group assignments.
Groups are assigned to all students who have active enrollments in the selected calendars. Logic works to assign students in the same household to the same group, if possible. Groups are also assigned for students who are not members of a household or who are members of a household but that household is not assigned an address.
Blended Learning Information in Ad hoc Query Wizard
Blended learning information is available in the Query Wizard for Student Data Type. Fields are available in the Learner > Blended Learning folder. Fields exist for the student's Active Group Assignment and All Group Assignment.
See the Blended Learning Groups article for more detailed information on Ad hoc information for Blended Learning, including:
- Virtual Today and Virtual Tomorrow logic
- Term Summary and Participation Detail
- Course/Section Data Type and Blended Learning Fields
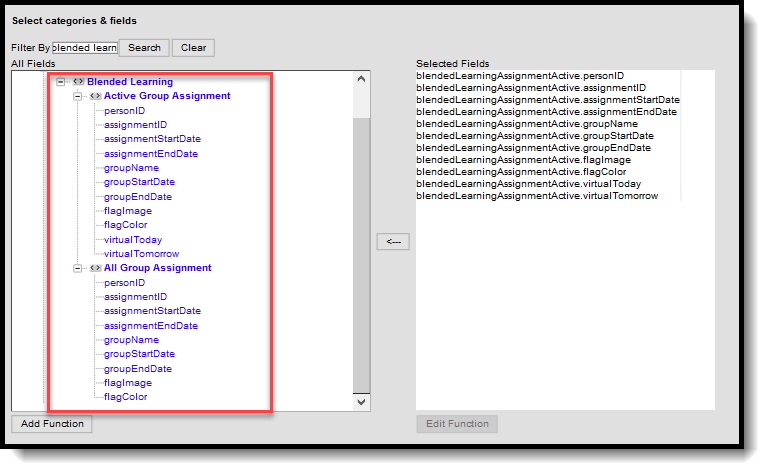 Blended Learning Ad hoc Fields
Date Logic for Blended Learning Groups
Note the following logic for dates as they relate to Blended Learning Groups.
- Date fields are auto-populated from the next future date to the last instructional date in the selected calendar.
- When creating a blended learning group, the end date entered in the New Blended Learning Group tool is also added to the database and displays all student group assignment end dates associated with the group.
- End dates can only be entered for a current or future date.
- End dates are required when editing or adjusting groups.
- Extending a future group end date does not update the student group assignment end date.
- Shortening a future group end date does update or delete any group assignment or day rotation necessary.
Create Learning Groups and Add Students Manually
Verify the correct School Year is selected in the Campus toolbar.
At any time during this process, use the Previous button to return to the previous step or Cancel to end the process completely.
Click the New button and choose the Groups: Add Students Manually option.
 Group Creation - Add Student Manually
Step 1. Group Information
- Enter the Group Name for the manual distribution of students. Group names can only be used once per school year.
- Click Next.
 Manual Group Name Entry
Step 2. Group Day Rotation
- Enter the Start Date and End Date for the rotation of the groups. These date fields are auto-populated from the next future date (tomorrow) to the last instructional date in the selected calendar. The Start Date can be modified, but the End Date cannot.
- Select the desired Remote Learning Type, which determines how students learn when assigned to this group (virtual instruction with a live teacher or virtual instruction without a live teacher). This may not be available for all states.
- If desired, mark the Exclude Summer School Calendars option. This will prevent Blended Learning Groups from being created for any calendar marked as a Summer School Calendar.
- Choose the desired option for Assign Group Rotation - Do Not Assign Group to Calendar Days (Always in School) or Assign Group to Every Calendar Day (Always Virtual).
- Click Next.
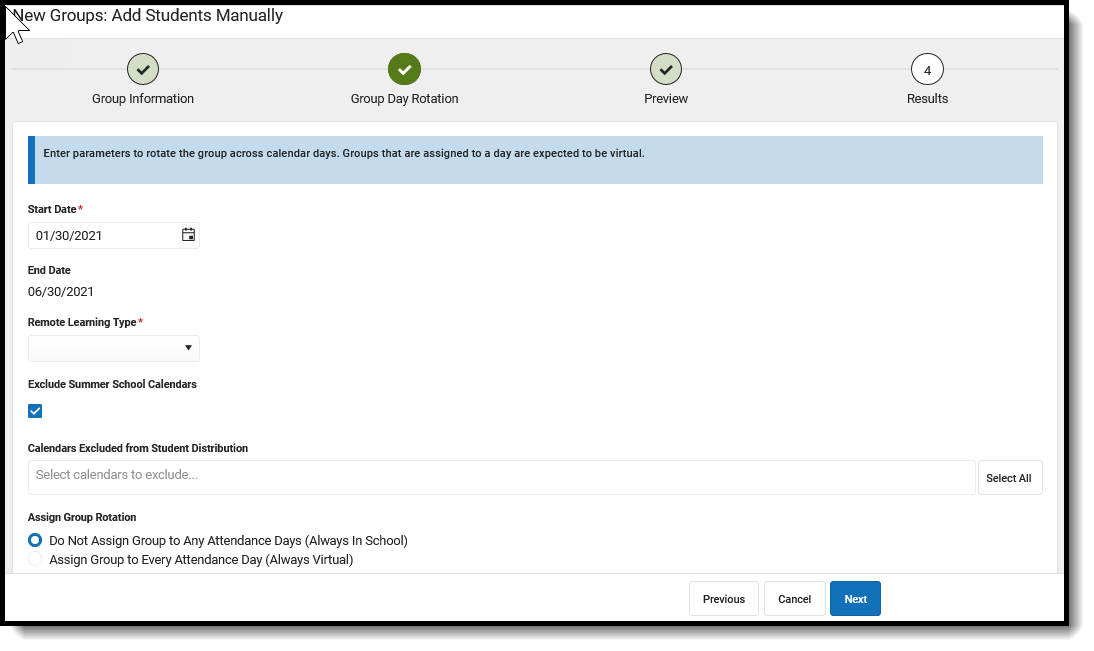 Manual Group Day Rotation
Step 3. Preview
- Verify the desired Group Name and the Assigned Group Rotation is correct.
- If yes, click the Finish button to create the groups and assign students to those groups. If not correct, click the Previous or Cancel buttons to being the process again.
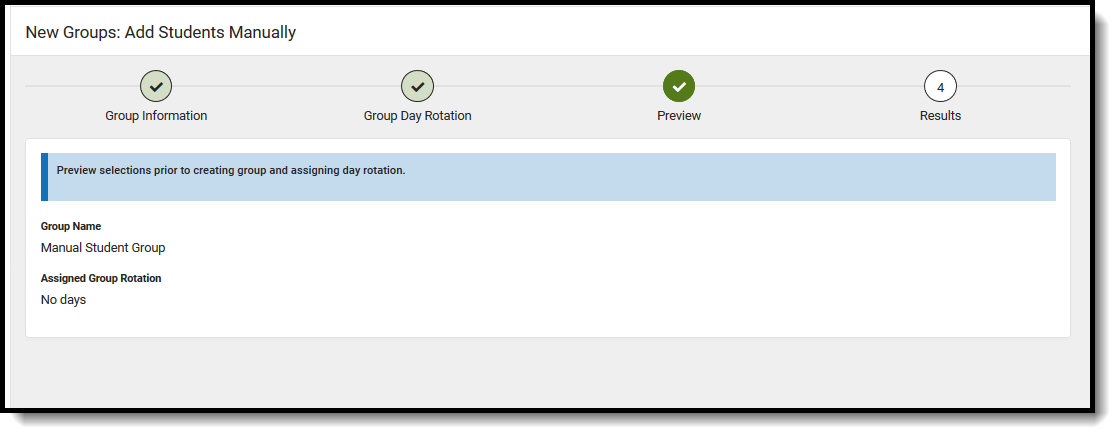 Manual Group Preview
Step 4. Results
The group is created and depending on the Group Rotation option, days are either assigned or not assigned. When finished, a summary of the groups and number of students assigned displays.
Use the Adjust Blended Learning Groups tool to manually add students to learning groups or to adjust the day assignment of the groups.
Click Close or Repeat to begin the process again.
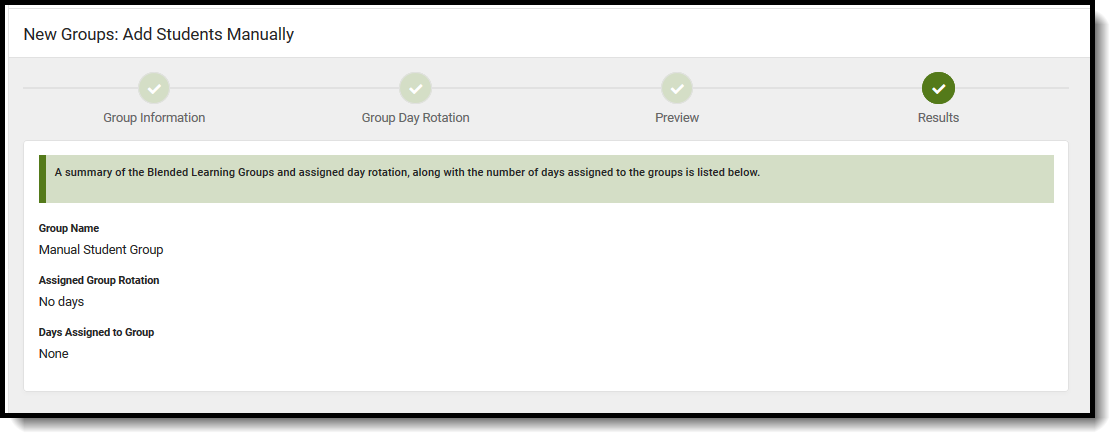 Manual Student Assignment Results
Create Learning Groups and Automatically Add Students
Verify the correct School Year is selected in the Campus toolbar.
At any time during this process, use the Previous button to return to the previous step or Cancel to end the process completely.
Click the New button and choose the Groups: Add Students Automatically option.
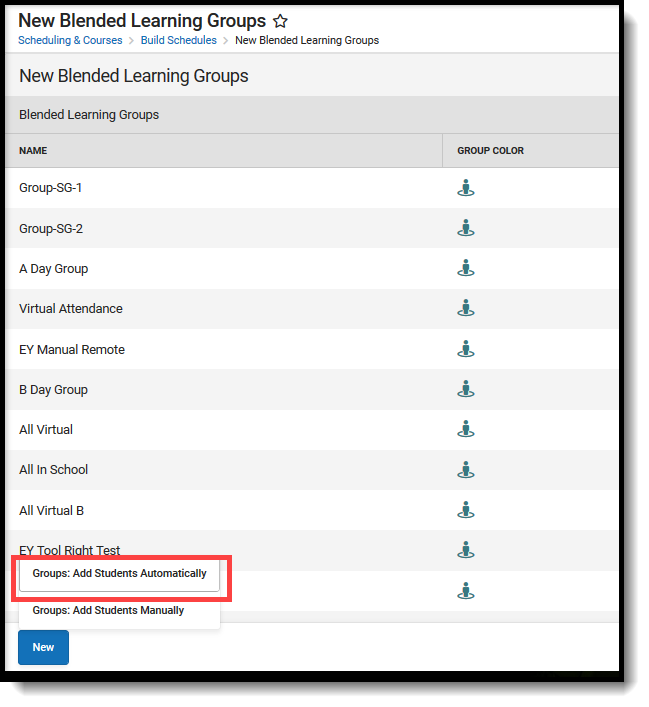 Group Creation - Add Students Automatically
Step 1. Group Information
- Enter the Number of Groups needed for distributing students.
- Enter the Group Names for each group. Group names can only be used once per school year.
- Click Next.
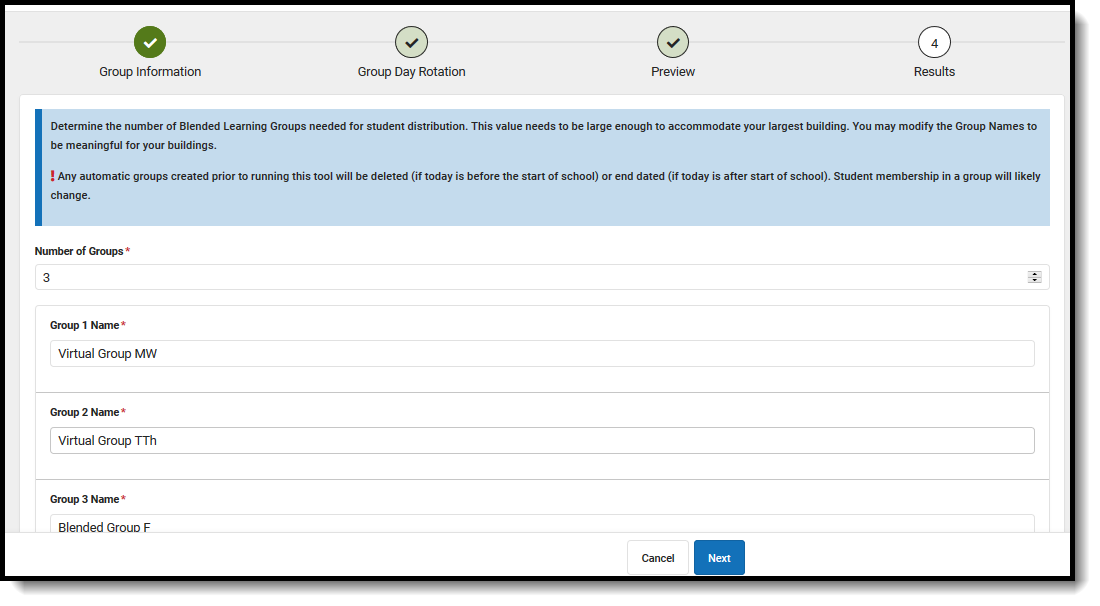 Group Information Entry
Step 2. Group Day Rotation
- Enter the Start Date and End Date for the rotation of the groups. These date fields are auto-populated from the next future date (tomorrow) to the last instructional date in the selected calendar. The Start Date can be modified, but the End Date cannot.
- Select the desired Remote Learning Type, which determines how students learn when assigned to this group (virtual instruction with a live teacher or virtual instruction without a live teacher). This may not be available for all states.
- If desired, mark the Exclude Summer School Calendars option. This prohibits Blended Learning Groups from being created for any calendar marked as a Summer School Calendar.
- If desired, select which Calendars to Exclude from the Student Distribution process. Use the Select All button to add ALL calendars in the district (remove them by clicking the X), or enter the start of the school name or part of the school name (e.g., High to find all high schools).
- Enter the Number of Days in the Rotation.
- Choose which groups are assigned to which rotation days. Use the Select All button to add ALL groups to the Days in Rotation fields.
- Click Next.
 Calendars and Day Selections
Step 3. Preview
- Verify the Number of Groups and the Number of Days in Rotation is correct.
- Click the Finish button to create the groups and assign students to those groups.
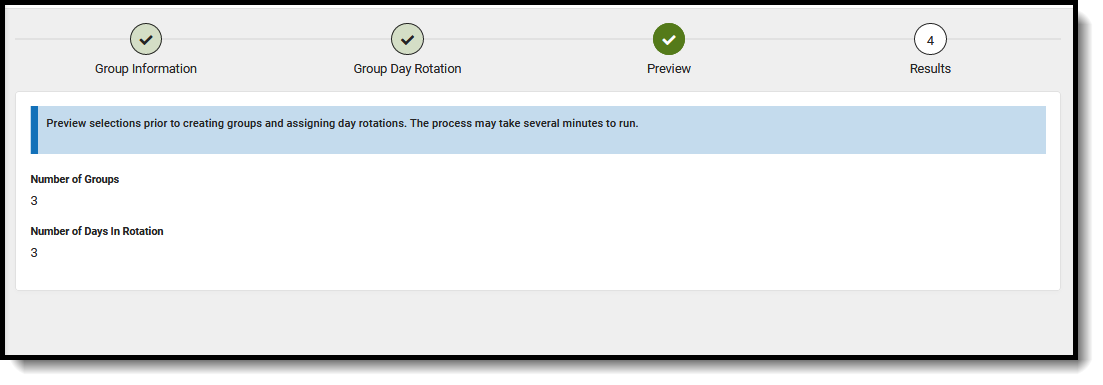 Blended Learning Preview
Step 4. Results
The groups are created, and students are assigned to them. Depending on the number of students in the calendar and the number of groups created, this could take some time.
A status showing the completion of the group assignment displays, along with a percentage of how far the process is.
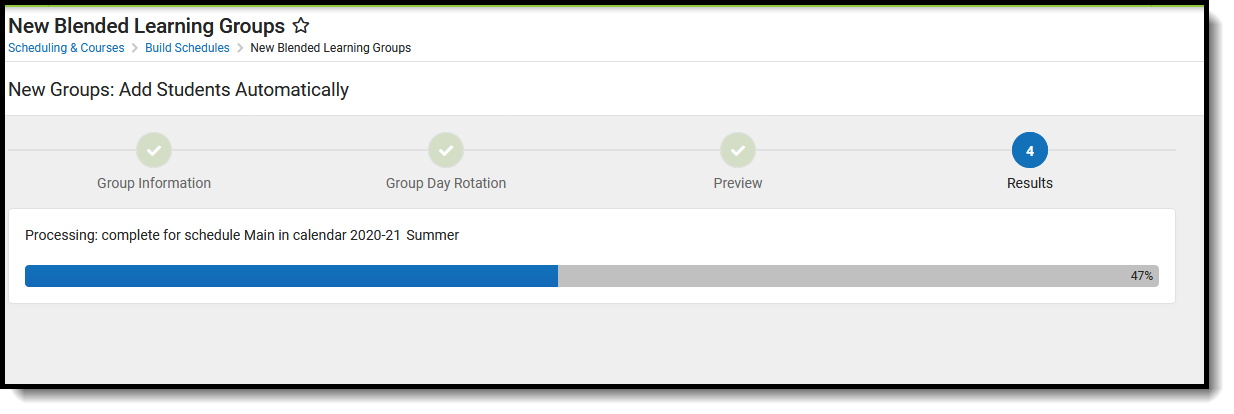 Process to Completion
When finished, a summary of the groups and the number of students assigned displays.
Click Close.
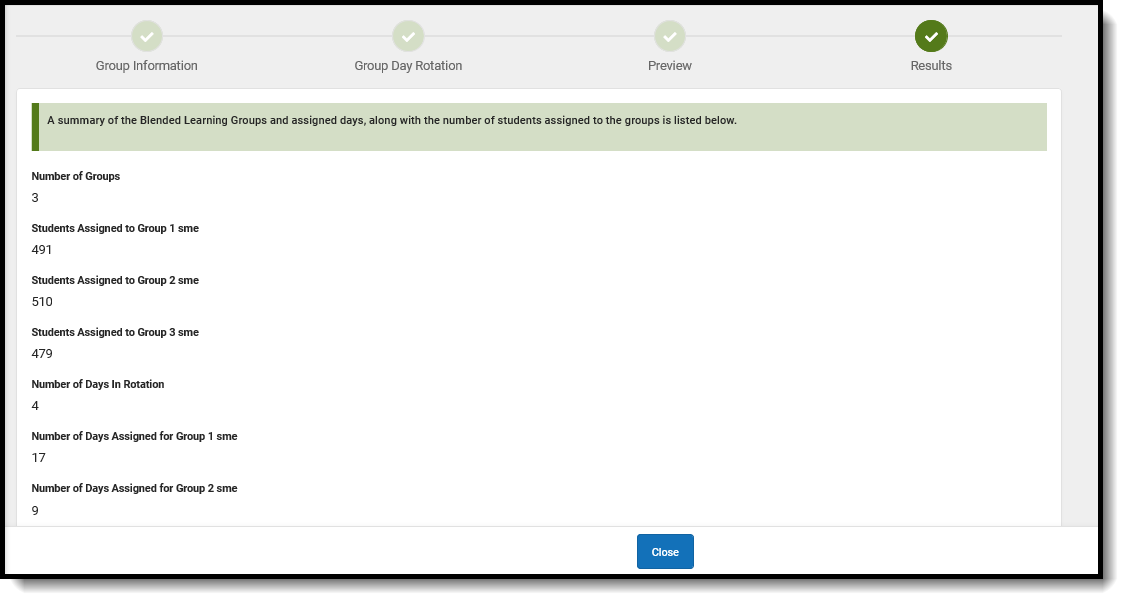 Summary Results for Groups and Student Assignment
During the process, database connections may be lost. If that occurs (a warning message displays), do the following:
- Check the database to see if Blended Learning Groups were created.
- Choose the New Blended Learning Group tool from the outline to see if your new groups were created
If the new groups are not listed in the database or the product, choose the Groups: Add Students Automatically to resync the process.
Depending on the dates entered for automatic learning groups, there might be a gap in group assignments where there is no assignment for the students. When this occurs, the process automatically detects a gap and displays a message in the header text of the editor if a gap is found. Group Day rotations will need to be manually adjusted.
Edit Learning Groups
To modify an existing group, click anywhere in that group row. This opens a side panel where updates to the group can be managed.
- Modify the group's Name. Group names can only be used one time per school year.
- Change the Group Color and selected icon that's associated with the Learning Group - a person with circle or person without a circle. Click the arrow next to the color block to assign a different color.
- Enter an End Date for the group.
- Only groups with an end date in the future or no end date can be updated with a new end date. A message displays indicating the Assignment End Date for all students assigned to the group will be updated to end on that day, and that virtual day rotations after that date will be deleted.
- End Dates must be after the start date of the group, and can be entered for the current date or a date in the future.
- End Dates must be on or after the current date and on or before the last day of the calendar.
- Change the Status of the group, from Active to Archived. Only groups that have an end date in the past can be marked as Archived. Groups marked as Archived display at the end of the list of groups with a red Archived label in the Status column.
- This field is included in the Query Wizard to use in Ad hoc Reports using the Student Data Type (Learner > Blended Learning > All Group Assignment > archived).
- NOTE: Only automatic groups that have been replaced with other automatic groups have an end date. In a future release, the ability to manually end date groups will be available.
Then click Save when finished. Changes to the group names, icons and colors are instantly updated and can be seen on Student Attendance, Student Schedule and everywhere else icons and group names display.
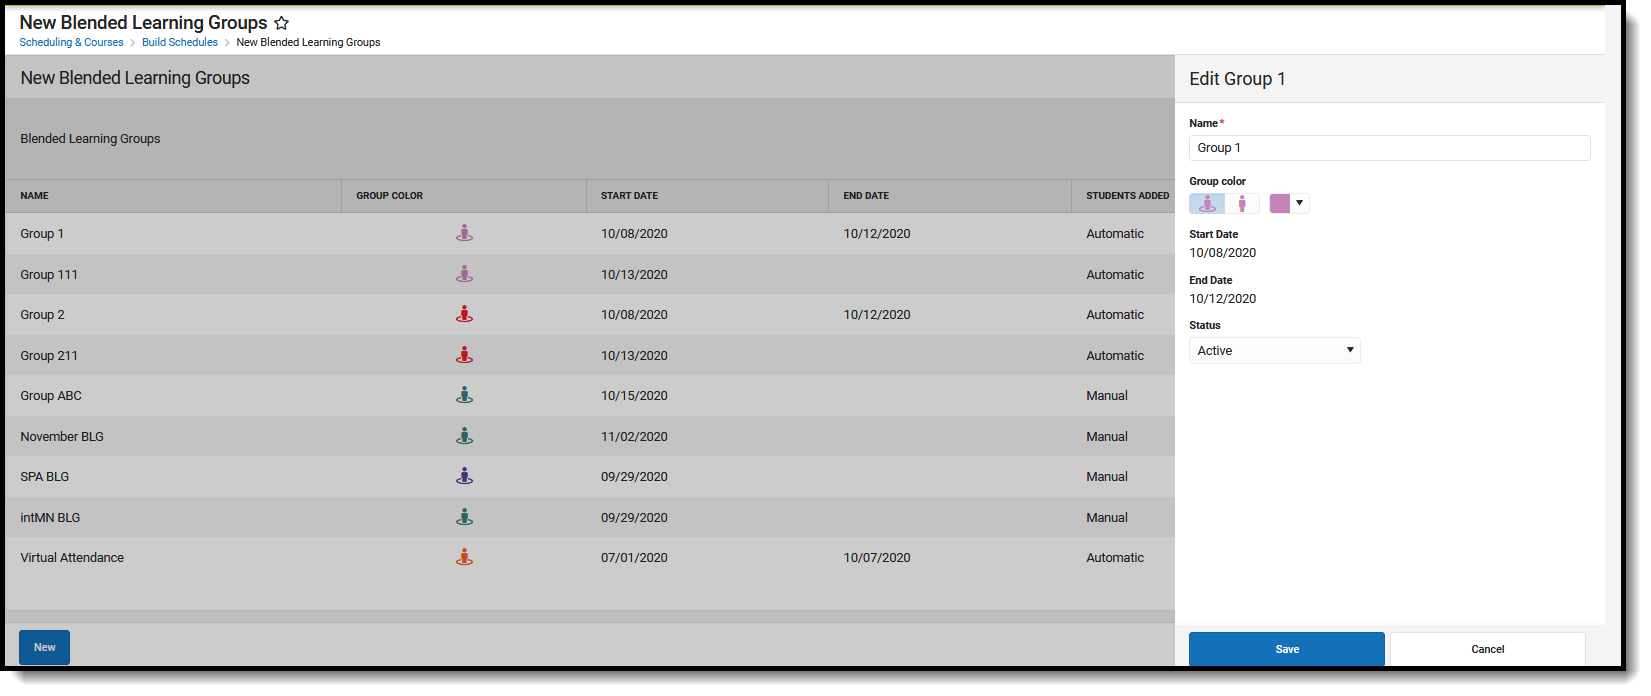 Edit Blended Learning Groups
