Tool Search: Transportation
The Transportation tool allows districts to show a student's transportation information for the day, record the bus routes students are assigned to and from school, create transportation requests, and record information for vehicles students drive to and from school. Additional Route Types can be added via the Core Attribute/Dictionary and additional custom fields can be added to Routes, Requests, and Parking via the Custom Attribute/Dictionary.
Additional Transportation tools are available in School & District Settings Transportation.
 Student Transportation
- Buses - stores all of the district's bus numbers.
- Batch End and Delete Wizard - allows districts/schools the ability to end and/or delete existing transportation records for multiple students at a time.
- Student Bus Assignment Report - prints bus information for students in a list or in a badge form, generated by bus number or by teacher.
- Transportation Summary Report - lists current transportation records that includes either bus information or parking detail information.
Today's Busing
The Today's Busing section details information related to the bus a student will be traveling on today. This includes Route Type, Bus Number, Pick-up Time, and Drop-off Time. If no route information has been added, this section will appear blank.

Routes
The Routes section includes three areas:
- Active - Routes that are scheduled within the current day.
- Future - Routes that are scheduled with a future start date and are not currently active.
- Inactive - Routes have an End Date in the past.
Each of these areas can be expanded by clicking its respective header.

Add Routes
These instructions outline the required fields. Complete any of the additional fields as needed by the district.
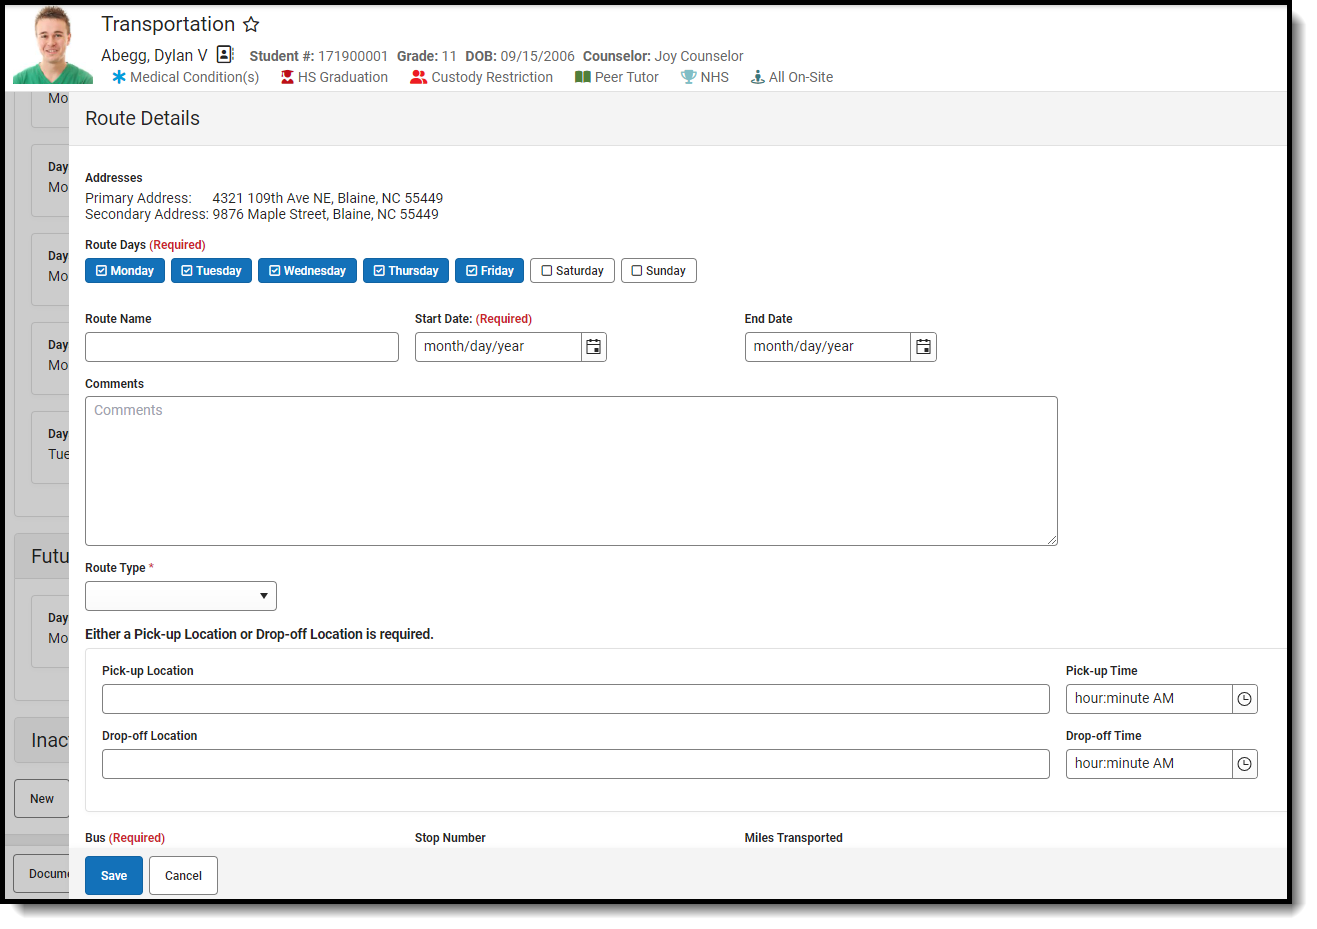
- Under the Routes section, click New. Addresses for the student will appear at the top of Route Details.

- Select the Route Days. These are each of the days the student will be using this mode of transportation.
- Select a Start Date.
- Select a Route Type.
- Enter Pick-up and/or Drop-off Locations.
- Select a Bus.
- Click Save.
Requests
Requests are used to create transportation requests for students within the district. Transportation requests can only be entered by school administrators from the Requests section.

Add Requests
These instructions outline the required fields. Complete any of the additional fields as needed by the district.
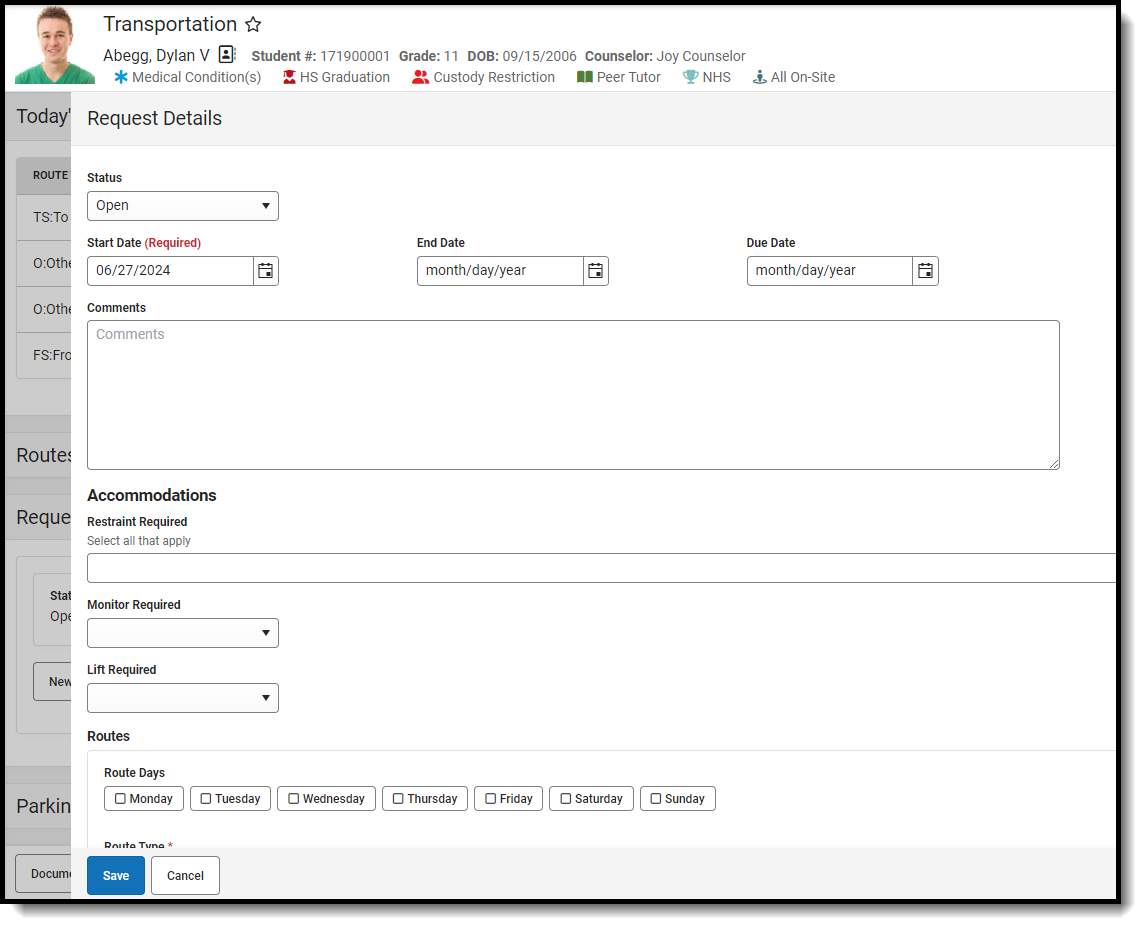
- Under the Requests section, click New. The Request Details panel will appear.

- Select a Start Date.
- Select the Route Type.
- Click Save.
Parking
Parking detail stores all student-specific information related to school parking. This area is useful when issuing parking permits or enforcing parking violations.

Adding Parking
These instructions outline the required fields. Complete any of the additional fields as needed by the district.
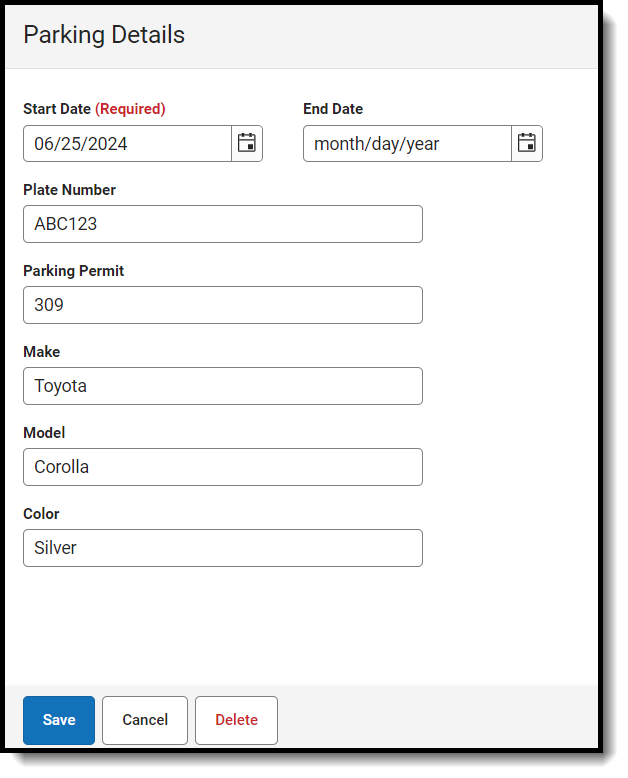
- Under the Parking section, click New. The Parking Details panel will appear.

- Enter a Start.
- Click Save.
Edit and Delete Transportation Information
All Routes, Requests, and Parking records can be edited by selecting their Edit button. Its details side panel will open. After adding or editing any of the fields, click Save.

Records can be deleted by clicking Edit and then clicking Delete.

Documents
To view documents, click the Documents button on the action bar. See the Student Person Documents article for more information.
To have the Documents button appear, the Campus Digital Repository must be enabled and Transportation has been turned on under Enable document attachment within Person by module.
 Transportation Documents
Transportation Ad hoc Reporting
Student Transportation information can be found in Ad hoc reporting under Reporting Ad Hoc > Reporting > Filter Designer for the Student Data Type in the Student > Transportation folder.
- Use the Bus Info options to build reports for student bus assignments.
- Use the Request Info options to build reports for transportation requests.
- Use the Student Parking options to build reports for student parking records.
 Transportation Fields in Filter Designer


