Students enrolled in the school associated with an activity can be manually added to an activity roster. This feature is useful if you would like to allow a student to participate but they do not match the criteria in the Ad hoc filter selected for the activity.
Students with past and future enrollments, in addition to current enrollments, can be manually added to an activity. When the Add Individual Students dropdown list is selected, Campus checks for enrollments 90 days in the past based on the Registration Open Date of the activity and enrollments 90 days in the future based on the Activity End Date.
In this example, the activity's registration open date is 08/05/2022. Students with a past enrollment end date of 05/07/2022 (08/05/2022 minus 90 days) or later can be manually added to this activity. 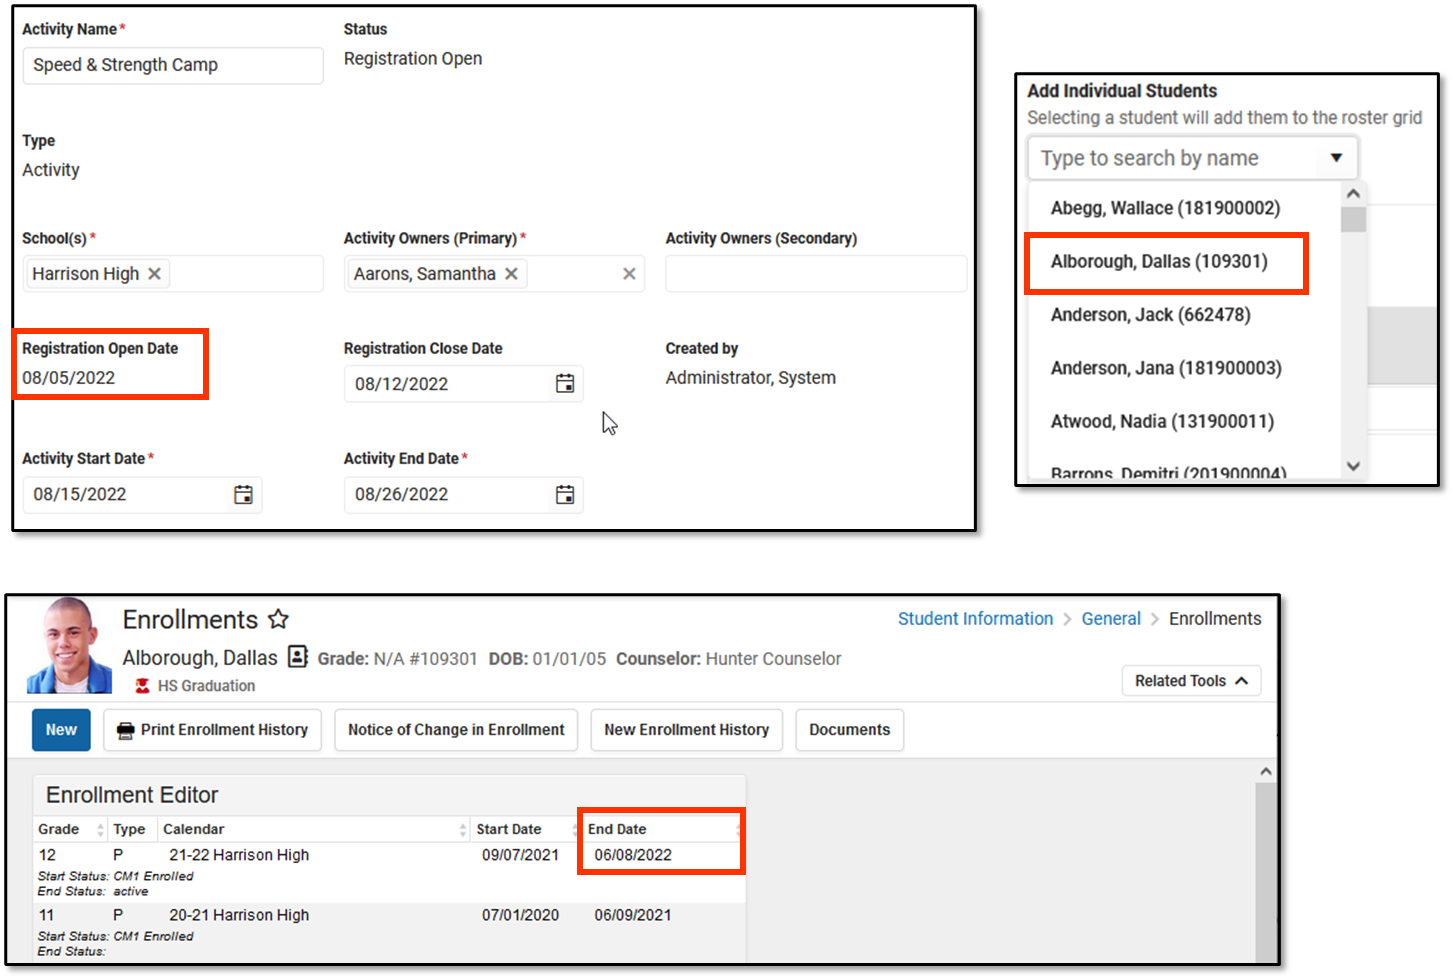 Example Past Enrollment: Student Can be Added Manually
The activity's End Date is 08/12/2022. Students with a future enrollment date of 11/10/2022 (08/12/2022 plus 90 days) or earlier can be manually added to the activity. This example student's enrollment date is after 90 days, so his name does NOT appear on the Add Individual Students dropdown list.
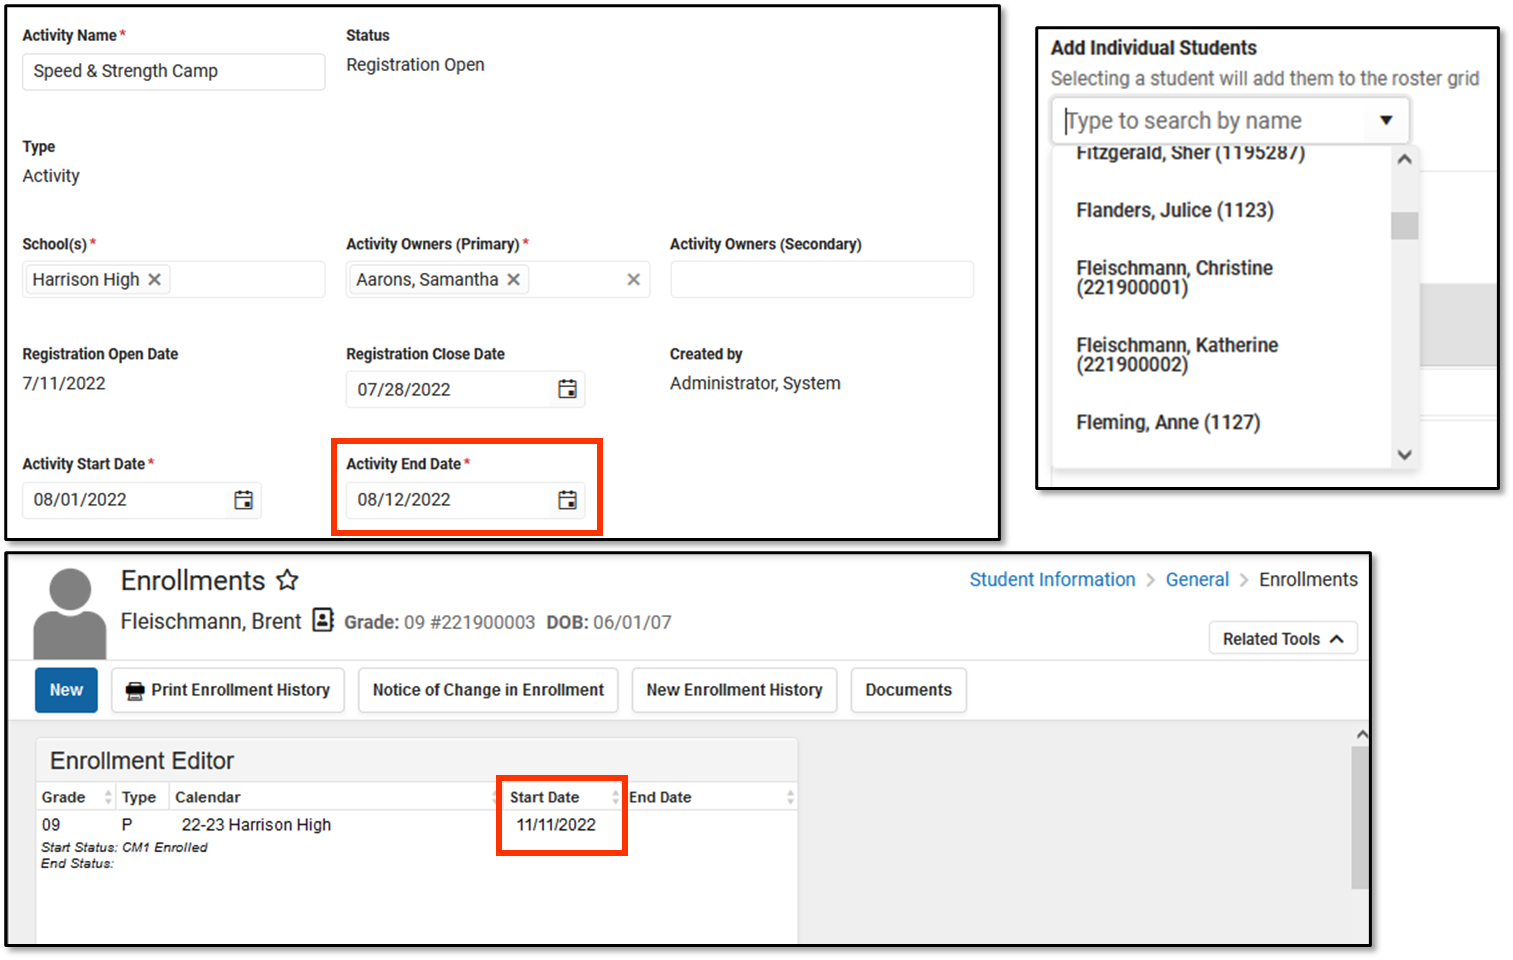 Enrollment Outside Activity Dates Example
Manually Add a Student
If a student is manually added, parents and students will not receive a notification about uploading documents until the activity is purchased (either in the Roster or Campus Parent/Student).
- Click the Roster button on the activity.
- Type the student's name in the Add Individual Students field and select the student when their name displays.
- Campus adds the student with the status of "Pending Save," and they appear at the top of the roster until saved.
- Mark the Required Forms Complete checkboxes. Optional
- Click the Select Purchase Details in Option Purchased to add a payment. Optional
- Click Save to save your changes.

Manage Form Participants and Details
Activity Registration supports interactive custom forms. Interactive forms allow users to enter data directly into the PDF and electronically sign when registering for an activity. You can use the Activity Roster to review these forms and ensure everything is filled out correctly and/or signed.
When you manually add a student to the roster, all forms must be reviewed and if applicable sent for eSignature. Forms can then be filled out in the Campus Student and/or Campus Parent Portal in the Documents tool. District staff can also fill out forms (except for the eSignature) in the Activity Roster if necessary.
Request an eSignature
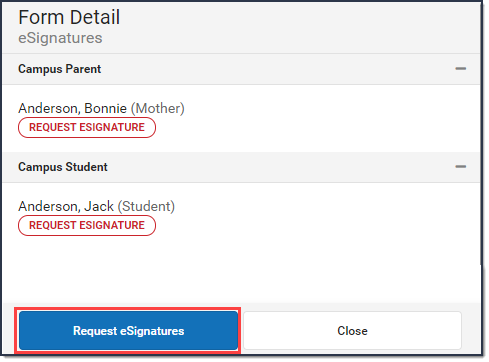
After you manually add a student to a roster and complete forms as necessary, you can request an eSignature from parent/guardians and students when the form requires an eSignature. Requesting eSignatures makes the form read-only; i.e., you cannot make additional changes.
- Select the form that requires an eSignature.
Result
The Form displays. - Click Review Participants.
Result
The Form Details panel displays. - Click the Request eSignatures button.
 Result
A confirmation message displays. - Click Request eSignatures.
Result
A confirmation message displays and the Form Detail panel closes. The eSignature statuses change to Pending on the Form Detail panel. Forms can then be filled out in the Campus Student and/or Campus Parent Portal in the Documents tool.
 Result
Reassign a Form for eSignature
This option allows you to reassign a custom form to a user who did not have an active Campus Student or Campus Parent account when the student was registered for an activity.
- Select the form that requires a signature.
Result
The form displays in a side panel. - Click the Reassign button.
 Result
An error message displays if the users does not have an active portal account. Otherwise, a confirmation message displays and the user can go to the Documents tool in the portal and complete the form.
 Result
Override an eSignature Request
District staff cannot sign for students/parents; however, the eSignature can be overridden. As a best practice, create a new contact log to document any communication that resulted in overriding the eSignature.
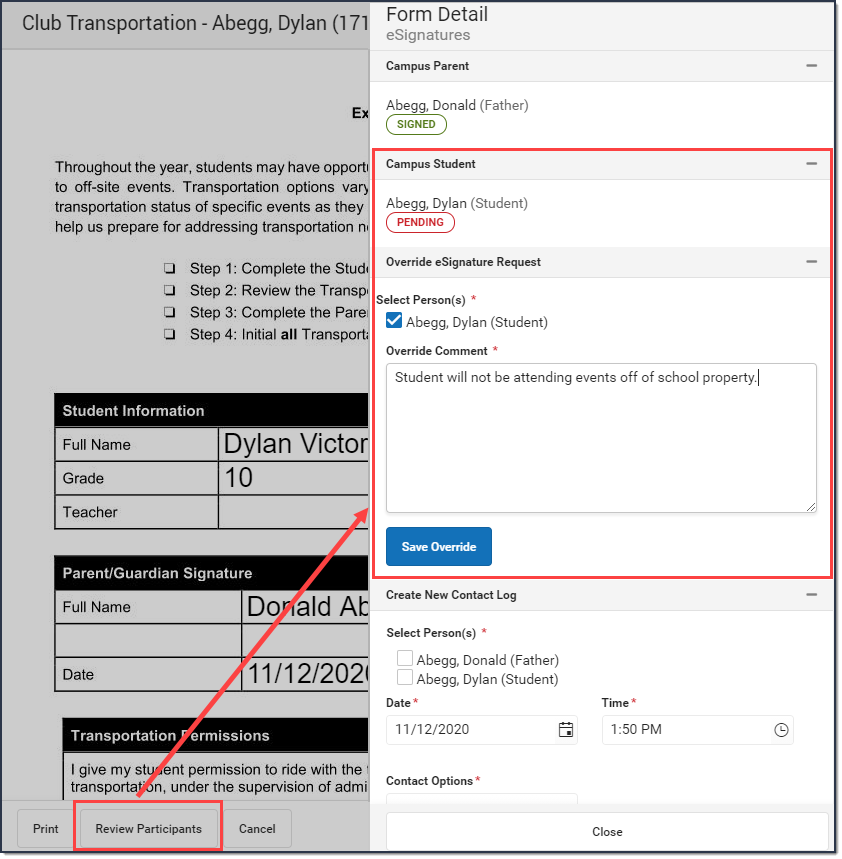
- Select the form that requires a signature.
It will say Action Required next to the form.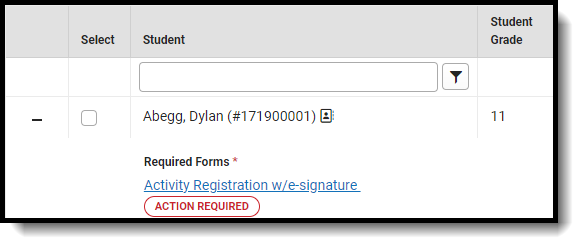 Result
The form displays. - Click Review Participants.
Result
The Form Details panel displays. - Select the checkbox next to the person's name and then enter Comments explaining why you are overriding the eSignature.
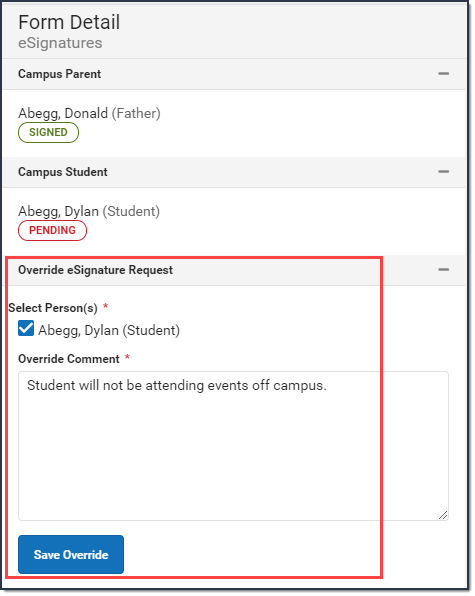
- Click Save Override.
Result
A confirmation message displays as the status changes to Overridden.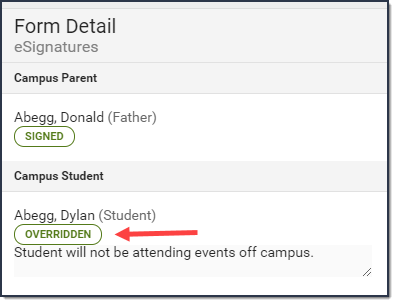
 Result


Create a New Contact Log
The Activity Roster allows you to record an communication you have with participants by phone, mail, email or in person.
- Select the form where you want to add a Contact Log.
Result
The form displays. - Click Review Participants.
Result
The Form Details displays.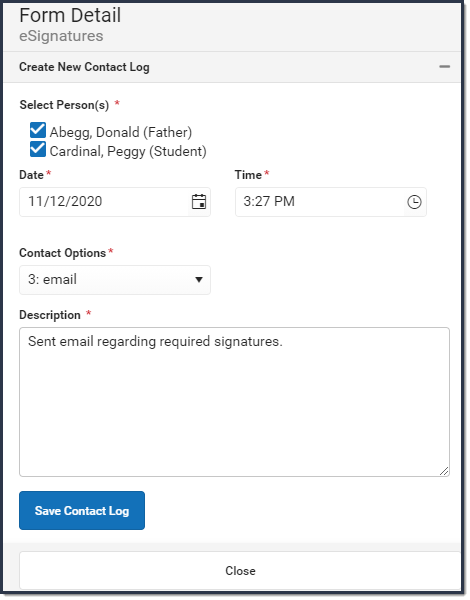
- Mark the checkboxes next to the appropriate person(s).
- Adjust the Date and Time as necessary.
- Select one of the following Contact Options: 1:Telephone, 2: U.S. Mail, 3: email, 4: In Person.
- Enter a Description.
- Click Save Contact Log.
Result
Campus creates a contact log for each person you selected.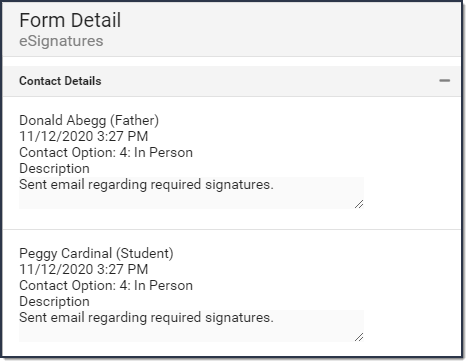


Lock/Complete a Form
Required forms display the status Action Required until the form is locked. (Forms for manually added students do not display that status until the form is first opened.) A locked form indicates no additional changes can be made.
Locking and completing forms can be done manually or automatically.
If a form is interactive and it is marked as Required, then the Complete button appears. If the form is NOT interactive, but it is marked as Required, the Lock button appears. Both buttons perform the same function.
Manually Lock/Complete a Form
Manually locking and completing forms gives you the chance to review a form and ensure the necessary information has been supplied and/or it has been signed.
- Select the form that you want to Lock. It will say Action Required next to the form.
Result
The form displays.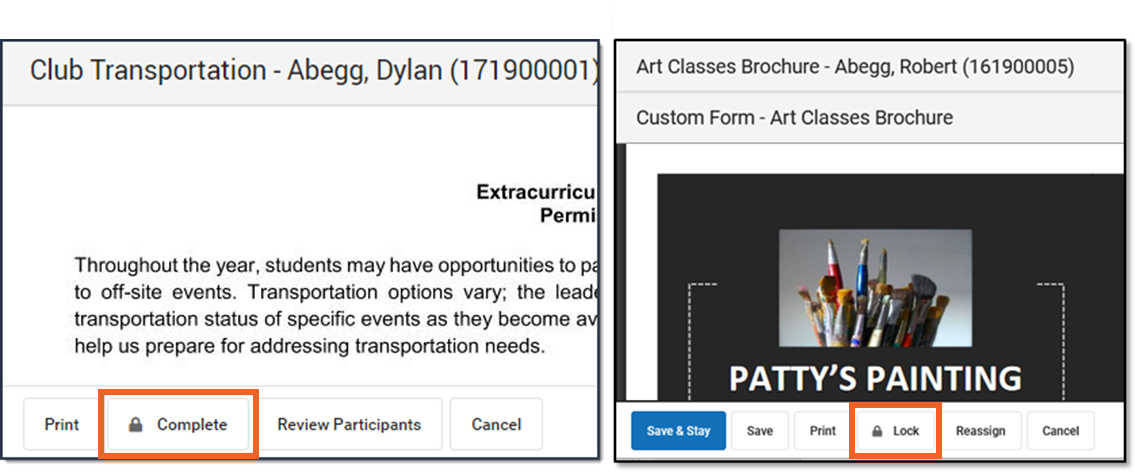
- Click the Complete or Lock button.
Result
The Complete Form or Lock Form confirmation message displays. - Click Complete or Lock.
Result
A confirmation message displays saying the form is locked and the form's status changes to Complete.

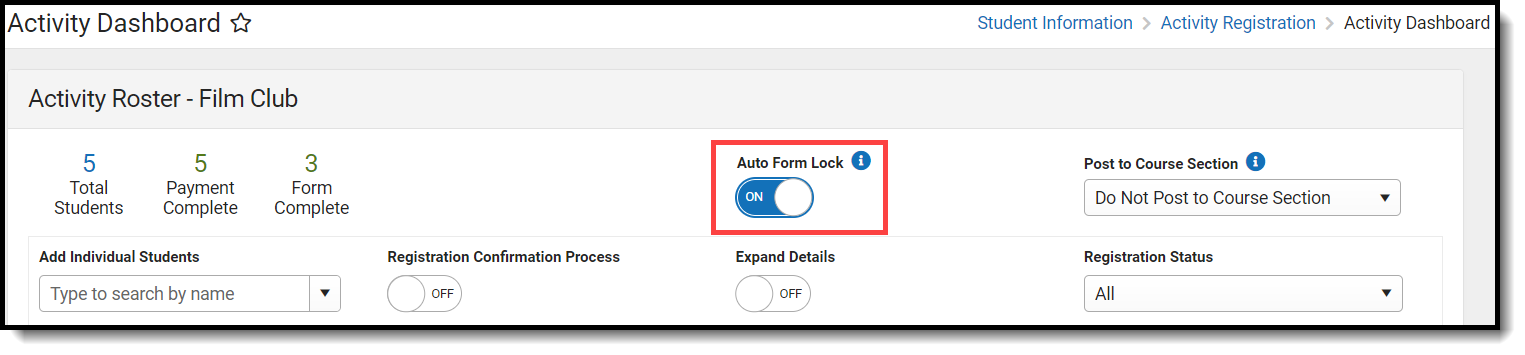
Automatically Lock/Complete a Form
Locking and completing forms is done automatically when you slide the Auto Form Lock toggle to ON. When a form has been completed and/or signed, the form is automatically locked and marked as Complete; the form does not require manual completion.
Creating a Form Using Quick Form Fill
The Quick Form Fill tool allows for custom forms in Activity Registrations to be populated with ad hoc data that is selected for the individual form fields. This tool will only appear when the data returned for the ad hoc provides multiple results and therefore needs input to decide which value to populate into the field. For example, a course name ad hoc populated into an Activity Registration form field will likely have multiple values returned. The Quick Form Fill tool will prompt for the correct course to populate on opening of the form. The Quick Form Fill tool is also available for parents/students to use in the School Store.
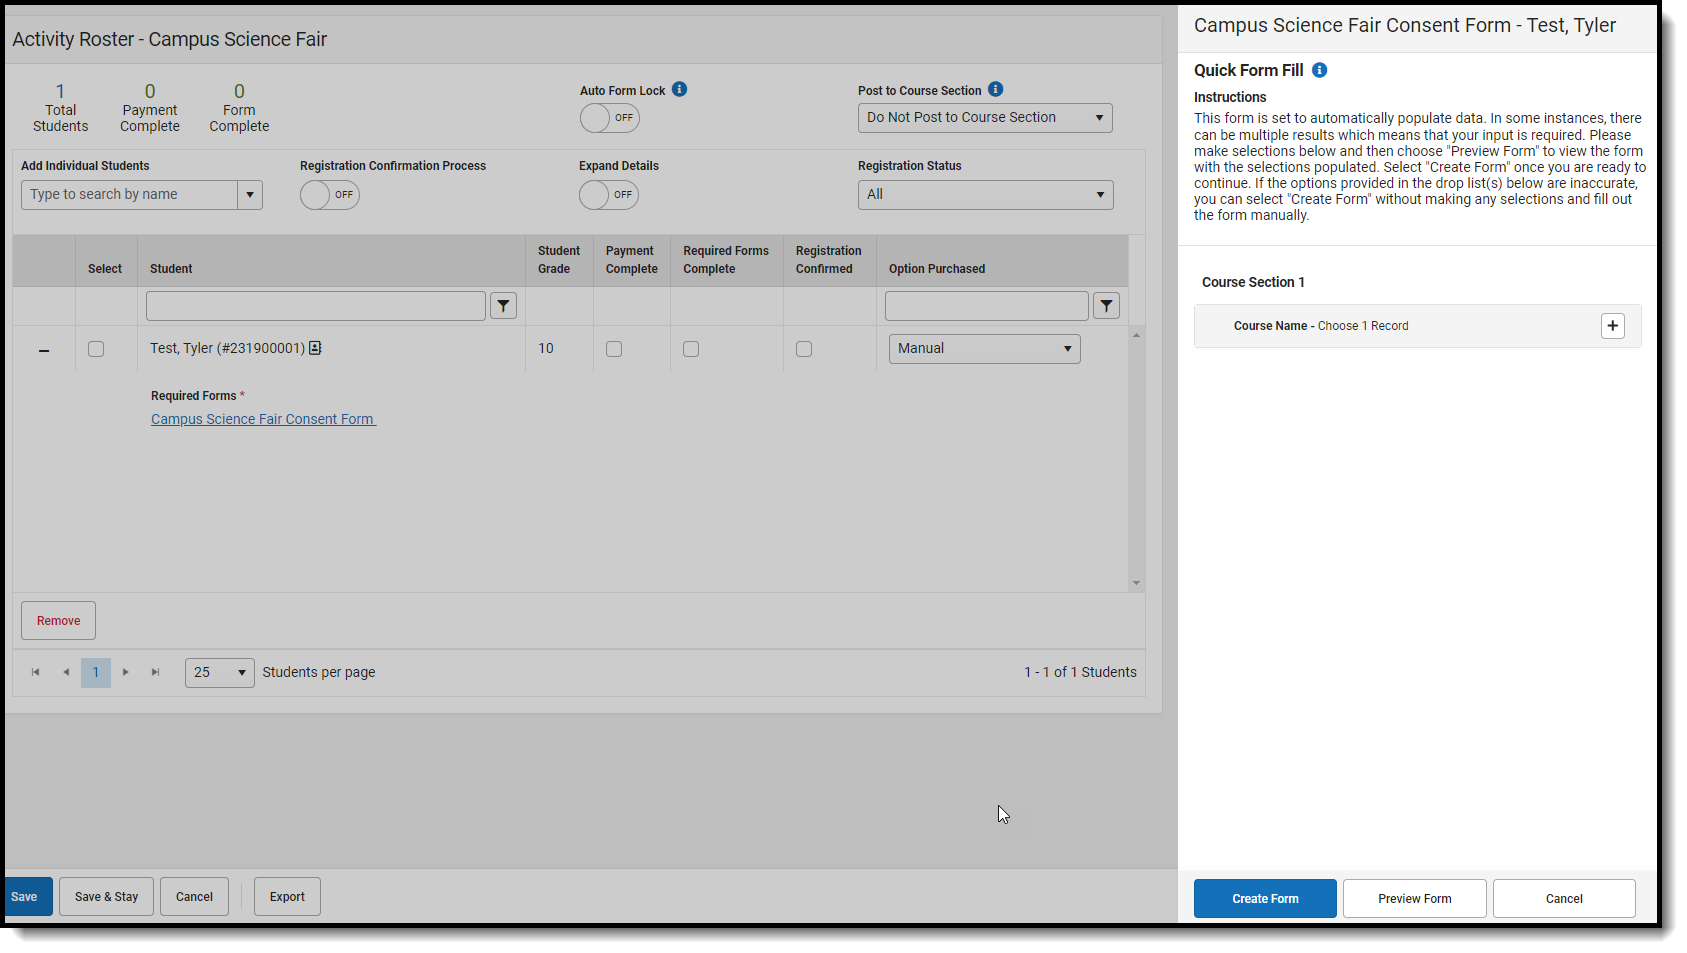
- Select the Expand Details (+) of the student whose form you wish to fill in.
- Select a form from the Required Forms.
- Select from the Quick Form Fill options available.
- Preview the form using the Preview Form button. It will appear in a new tab.
- Click Create Form.
-
Only the Roster version of Quick Form Fill tool will display contextual data (extra info to help the activity staff make the right selection).
-
The first user to fill in the form in the Roster and/or Portal will get the Quick Form Fill tool.
-
The Quick Form Fill tool does NOT function in the Documents tab or the Activity Registration viewing tool (it only works in the School Store and Activity Roster). If a form is clicked in either of these, it will populate non-ambiguous data and leave any ambiguous fields BLANK.
Add Roster Payments
Roster Payment Processing allows for cash, check, and credit card transactions to be taken for an Activity from within the Activity Registration roster screen. If a student does not qualify for the Ad hoc, and is manually added, the payment can only be made via the Roster, not on Campus Parent/Student. After the activity is in a paid status, it is then visible on Campus Parent/Student.
- Click the Roster button of the activity that will be updated.
- Add Individual Students via that search bar.
- Click Select Purchase Details under Option Purchased. The payment side panel will appear on screen.
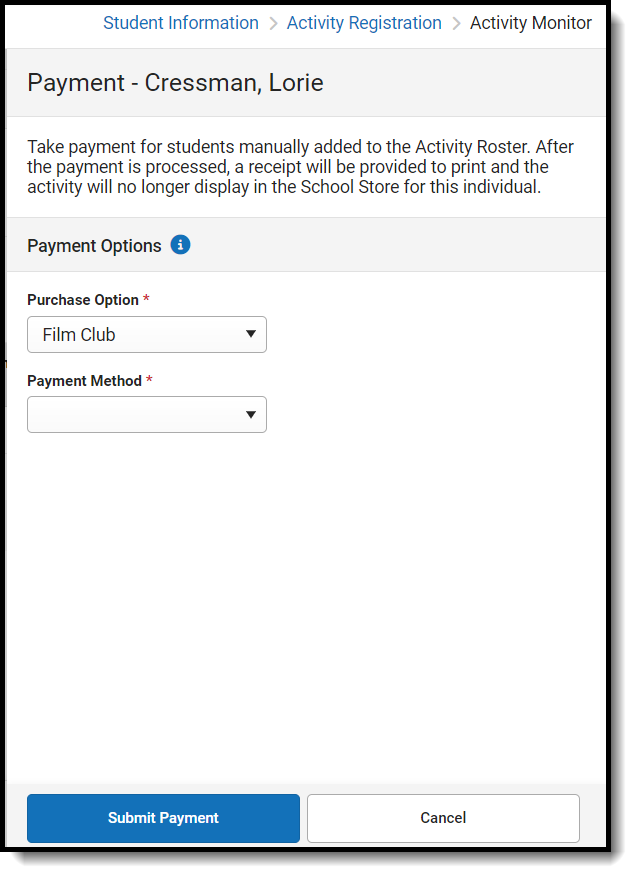
- Select the Purchase Option and Payment Method.
- Enter the Payment Information.
- Click Submit Payment. A Payment Recorded message will appear.
- When finished, click Close.

If you are using the Mobile Payments app, refer to the Mobile Payments Setup for Office Payments guide for detailed setup instructions and additional information.
