Portal: Campus Parent > More > Absence Request
The Absence Request tool allows parents/guardians to submit a request to inform the office in advance of their student's upcoming absence from school. After the request is processed, Campus creates an attendance record for the student.
| What can I do? |
|---|
 Portal Absence Request Tool Screen
This screen displays all current Absence Requests for the parent/guardian's students. See View Requests for more information.
Submit a New Absence Request
 Submit an Absence Request
- From the Current Requests screen, press New to create a new absence request.
- Mark the student(s) for whom you are submitting the absence request.
- Use the Excuse drop-list to select the reason the student will be absent.
- Select the Absence Type.
Absence Type Description Full Day Absence This option allows you to submit a request for an entire day. You may request more than one day. Be sure to enter the dates in the First Day and Last Day fields. 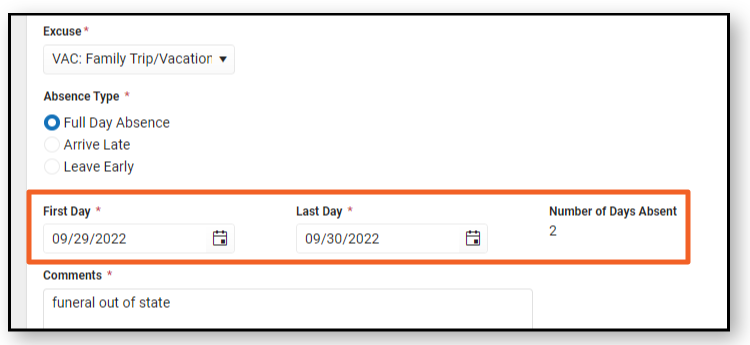
Arrive Late If you select the Arrive Late option, enter the time your student will arrive in the Arrival Time field. Arrival Time must be between the start of the day's first period and end of the day's last period. Parents can enter a time 5 minutes into the past. This allows for instances where a parent drops off a student before entering an absence request.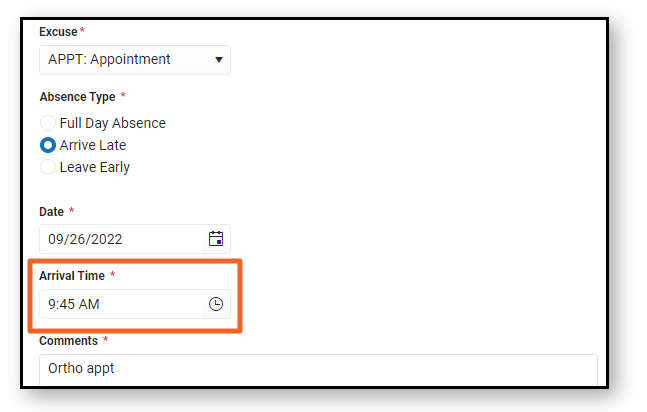
Leave Early If you select the Leave Early option, enter the time your student will leave in the Departure Time field. Departure Time must be between the start of the day's first period and end of the day's last period. Parents can enter a time 5 minutes into the past. This allows for instances where a parent drops off a student before entering an absence request.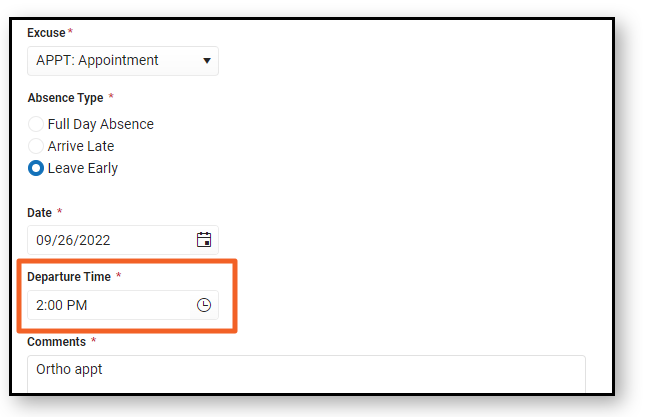
- Enter the date(s) for the absence.
- Upload any optional/required documents. Only one document is allowed per request and it is attached to every student in the request.
- To upload separate documents for each of your students, submit an individual absence request for each student.
- Enter Comments about the absence reason.
Comments are limited to 100 characters.
- Click Submit when finished.


View Requests
Users may view a list of all current Absence Requests and their status.
To view all current absence requests for the student, press View Requests.
 Campus Parent Portal - Current Absence Requests
A screen displays a list of Current Requests for the student. Users can view request details, including who submitted the request, their relationship to the student, request start/end dates, and request status. To view a more thorough version of a request, click on the request for which to view more details by selecting the appropriate request.
Absence Request Statuses
| Status | Description |
|---|---|
| Submitted | The Absence Request is submitted and waiting for processing. |
| Action Required | The parent must take the required action. This status is set when a student generates an absence request that must be approved by a parent. See Verify a Student-Generated Absence Request for more information. |
| Processed | The Absence Request has been reviewed and processed. |
Request Detail View
To view details for a specific request, click on the request. A Request Details screen displays.
 Request Details
From this screen, users can view more specific details about the request and the uploaded document, if applicable.
When finished viewing request details, press Back to return to the View Current Requests screen.
Upload a Document to an Absence Request
Users can upload documents to Absence Requests if a document was not initially uploaded with the request. If a document has already been uploaded with the request, users may not upload more.
Click on the request for which you want to upload a document. The Request Details screen displays.
 Upload a Document to an Absence Request
Use the Upload Document field to upload the appropriate document. Only one document may be uploaded per request.
When finished, press Save to save the uploaded document to the request and return to the View Current Requests screen.
Verify a Student-Generated Absence Request
Districts can set up Absence Codes to allow parents/guardians to verify their student-generated absence request. District policy determines whether a parent/guardian must verify a request before it can be processed.
When a student generates an absence request, the parent/guardian receives a notification in the Campus Parent Portal.
NOTE: Parents/guardians can also access student-generated Absence Requests through the View Requests screen.
 Bell Notification
To access the notifications, click on the bell. A list of notifications appears.
 Campus Parent Notifications
Click on the notification saying the student has submitted an absence request that requires approval. The Request Details screen displays.
 Absence Request (Campus Parent) Verification
Use the Is this absence request accurate? field to verify or decline the request. Select Yes to indicate the request is valid. Select No to indicate the request is not valid.
Once finished, press Save to confirm the absence request or Back to return to the Current Requests screen.
Delete an Absence Request
To delete an unprocessed absence request, click the request on the Current Requests screen then click the Delete Request button.
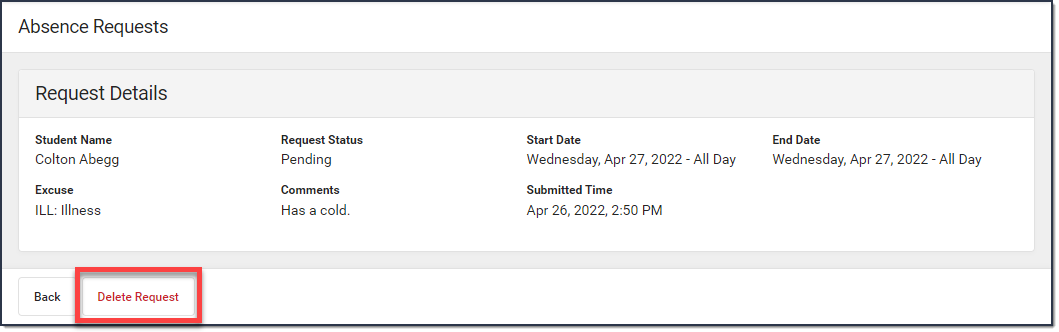 Delete an Absence Request