Tool Search: Letter Designer
The Letter Designer allows districts to create custom letters using a WYSIWYG editor. Letter formats created within the Letter Designer can be used by many users and generated as often as needed.
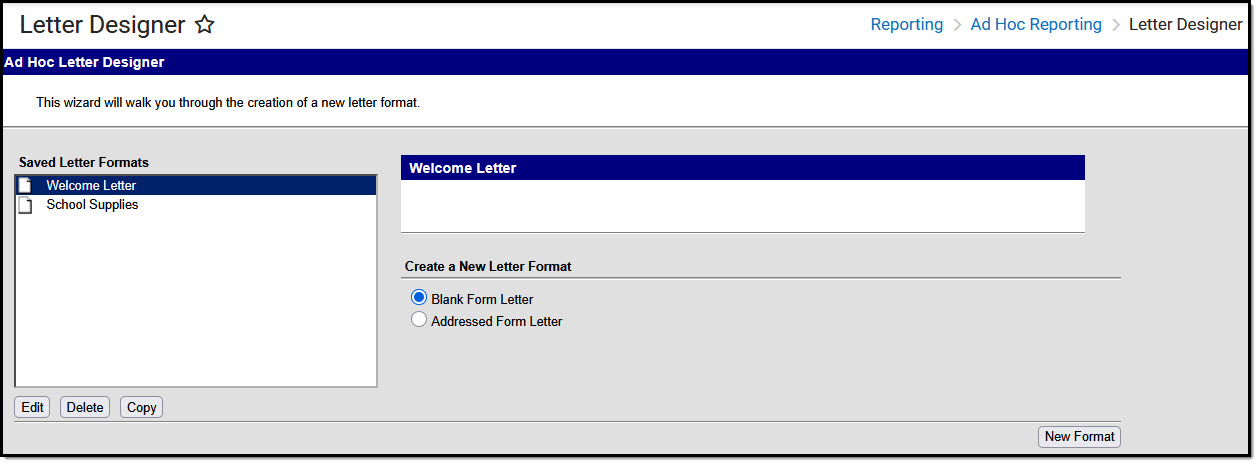 Letter Designer Tool
See the Letter Builder and Letter Designer Tool Rights article for information on rights needed to use this tool.
See the Tool Rights article for more information about Tool Rights and how they function.
Letter Designer Field Descriptions
| Field | Description |
| Saved Letter Formats | Formats previously created and saved that are available for use in the Letter Builder tool. |
| Create a New Letter Format |
|
| Edit | Opens the WYSIWYG editor when a previously saved format is selected. |
| Delete | Option to delete the selected saved format. |
| Copy | Option to copy the selected saved format. |
| New Format | Opens the WYSIWYG editor to compose a new format.
|
Create a New Letter Format
 Ad Hoc Letter Designer
| 1 | Enter a Name.
|
| 2 | Enter a Short and/or Long Description about the letter.
|
| 3 | Select the Preferred Language for the letter format.
|
| 3 | Select the Font, Size, Font Color, and any other formatting options within the WYSIWYG toolbar to compose the letter within the text field
|
| 4 | Use the two buttons on the far-right side of the WYSIWYG bar to include dynamic Campus Field options and sub-reports. See the Campus Field and Sub-Report Options section below for more information. |
| 5 | Expand the Organized To dropdown field to select a user group.
|
| 6 | Select the Save Format button. The report format has been saved and is now available in the Letter Builder tool. |
Preferred Language Setup
Infinite Campus does not provide translation services. Districts must use their own resources when communicating in a language other than English.
Letters must exist in the assigned default language. Text can be entered for additional languages for the district's population. Two things must be done:
- A language must exist in the Attribute/Dictionary and be marked active in the Attribute/Dictionary tool.
- A language must be assigned as the Preferred Language on the Personal Contact Information editor on the Demographics tab.
Existing language codes should not be modified. Access to letters is lost until the original code is recreated. If that language code is assigned to any person, that assignment is also lost.
Step 1. Enter the Preferred Language Default Value
Tool Search: Attribute/Dictionary
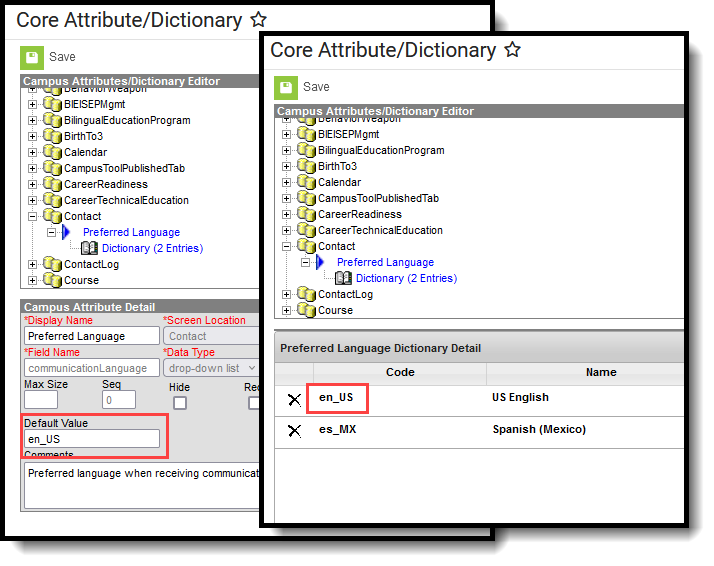
Enter the desired Default Value for the Preferred Language. This value shows the Default Language Preview when creating letters in other languages. If no Preferred Language has been assigned to an individual (Step 3), letters are generated in this default language.
- Expand the Contact object.
- Click on the Preferred Language element. A Campus Attribute Detail editor displays.
- Enter the appropriate Default Value. This could be en_US, es_MX, or another abbreviation that matches the Code assigned to the Languages entered in the Dictionary list. The entered value must match the Dictionary Code for that language.
 Preferred Language Default Value
Step 2. Add Language To Attribute/Dictionary
Tool Search: Attribute/Dictionary
Languages available here are used in the Preferred Language Selector to control the list of languages.
- Expand the Preferred Language attribute and select Dictionary. A Preferred Language Dictionary Detail editor displays.
- Click the Add Row button in the far right corner of the Detail editor.
- Enter a Code, Name, and Sequence for the language.
- Mark the language as Active.
- To add more languages, click Add Row in the top-right corner, then repeat steps 3 and 4.
- Click the Save icon when finished.
The Language Code can be up to 15 characters in length.
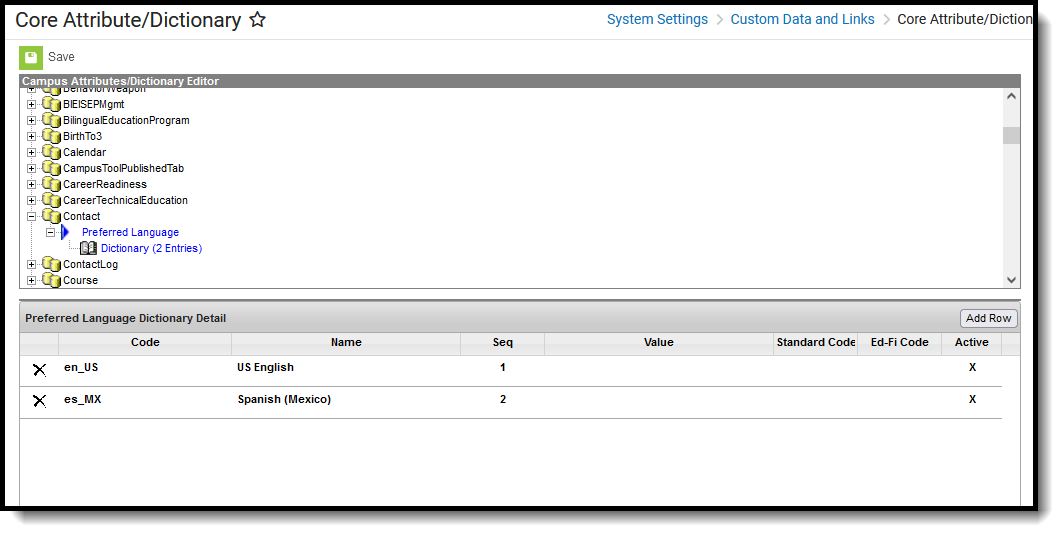 Preferred Language Dictionary Values
All languages except en_US and those identified in the Default Value field can be added or removed. As the default preferred language, it is assumed when an individual does not have a Preferred Language assigned. Letters do not generate at all if this language is removed. The Code entered in the Dictionary must match the Default Value.
 Default Value Matches Dictionary Code
Due to a configuration in Email Messenger settings, en_US should never be removed from the Preferred Language Dictionary.
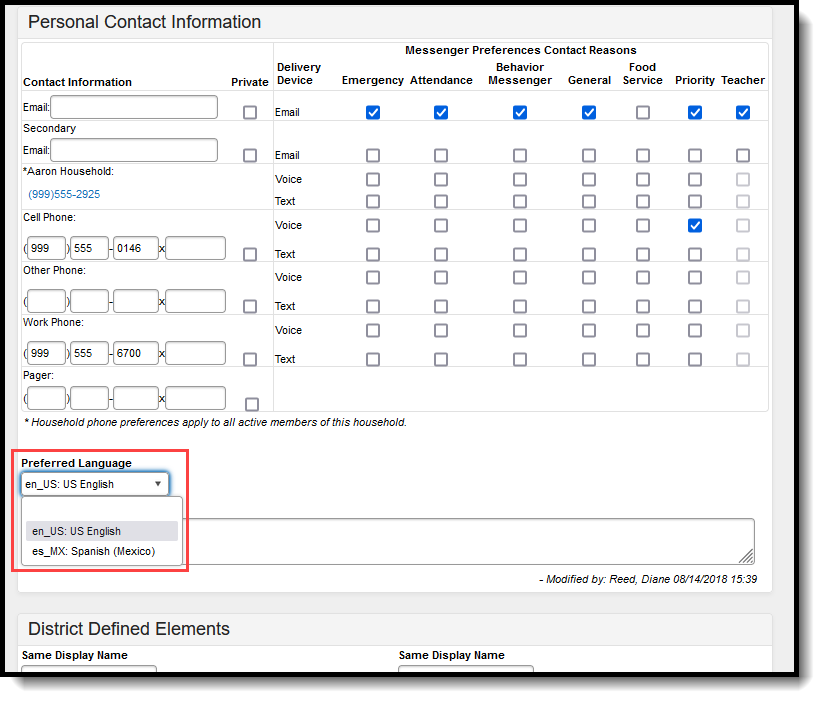
Step 3. Assign Preferred Language to Parent/Guardian
Tool Search: Demographics
Assign the Preferred Language to the parent/guardian who receives an attendance letter. This field can be assigned to all persons in Campus, as well. It is used to send other sorts of messages to parents/guardians, staff, and students.
Parents/guardians can also select the Preferred Contact Language on the Contact Preferences editor in the Campus Portal.
 Preferred Language Assignment
Step 4. Create the Letter in the Default Language
Tool Search: Letter Format
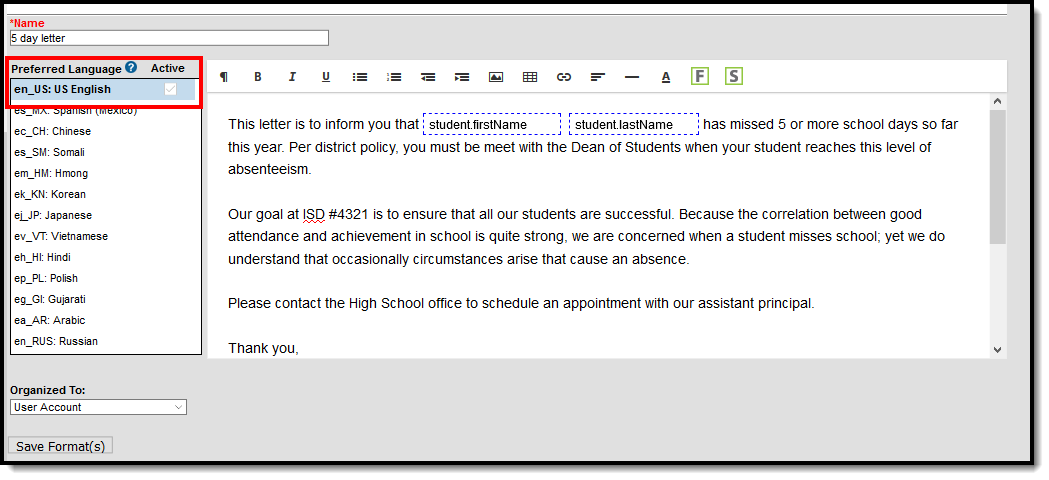 Preferred Language Display
Default Language: English
In the following example, en_US: US English is the Default Language. The Attribute/Dictionary has been entered as follows:
- Preferred Language Default Value: en_US
- Preferred Language Dictionary Value Code: en_US
The English version displays as the Preview when the same letter is created in another language.
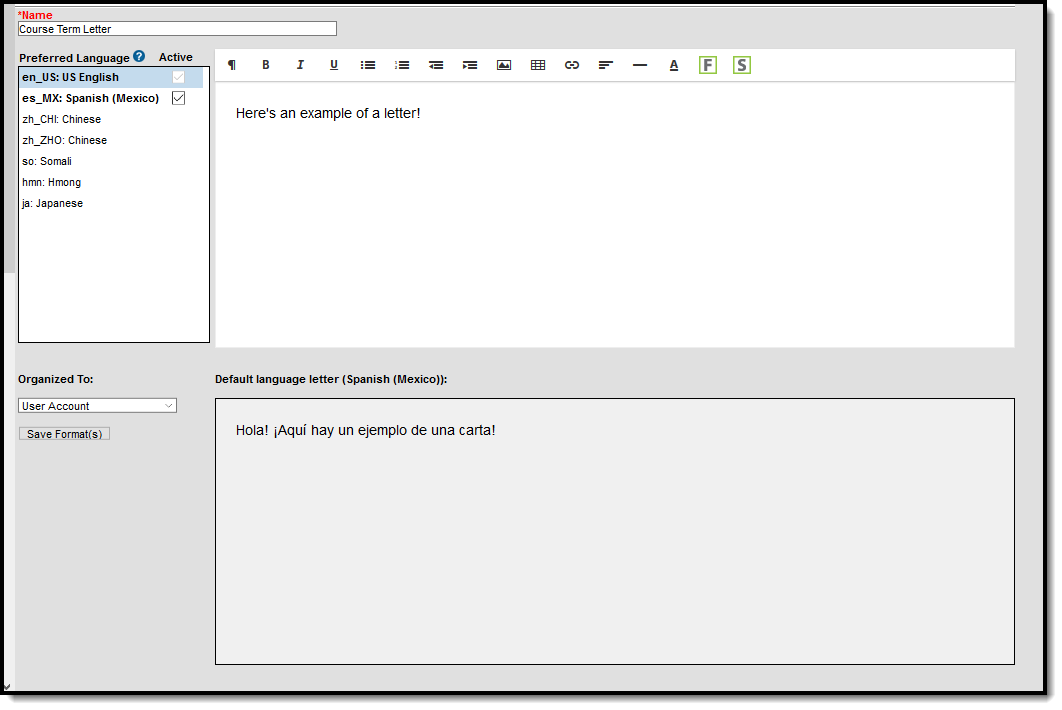
 Letter Format with Default Language as English
Default Language: es_MX
In the following example, es_MX: Spanish (Mexico) is the Default Language. The Attribute/Dictionary has been entered as follows:
- Preferred Language Default Value: es_MX
- Preferred Language Dictionary Value Code: es:_MX
When the same letter is created in another language, the Spanish version displays as the Preview.
 Letter Format with Default Language as Spanish
When finished, select the appropriate Organized To: option, then click the Save Format button. Follow your district's standard procedure to print and generate attendance letters. Letters in English and letters in non-English generate in the same collection of letters. When a parent/guardian is assigned a Preferred Contact Language that is not English, the letter prints in that language.
Step 5. Create the Letter in Additional Languages
After creating the letter in the Default Language, enter text for this same letter in a different language by selecting the language in the Preferred Language list and typing/pasting the translated text into the WYSIWYG editor. That language becomes bold, and an Active checkbox becomes available. A language version of the letter is only a draft until the Active checkbox is marked.
When it is determined that the draft letter can be sent, mark the Active checkbox to indicate the letter is now ready to print for those individuals assigned that Preferred Language.
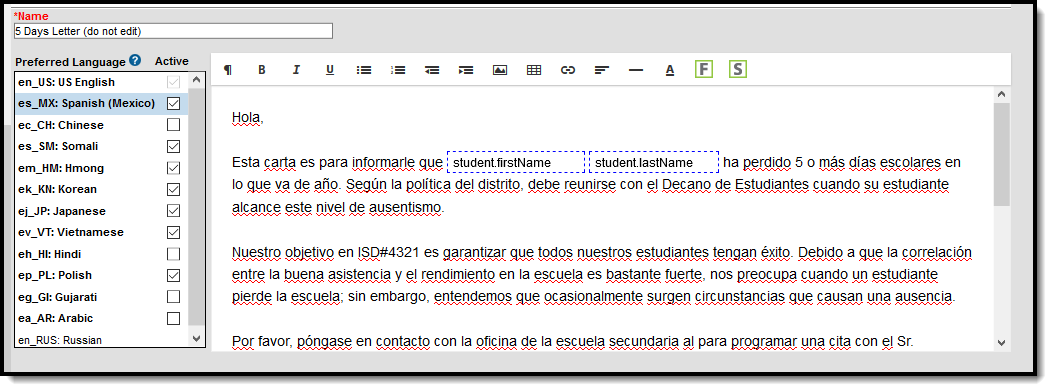 Letter in Spanish
Repeat these steps for the other languages that require letters.
Please adhere to any district policy that may exist for what needs to be included in the letters.
Step 6. Send the Letters
A letter is sent for each distinct Preferred Language associated with the parents/guardians in the household marked to receive mailings. In the example below, one of the student's guardians receives a letter in Spanish because that is the Preferred Contact Language for that guardian, while another guardian at a different mailing address receives the same letter in English. If two parents/guardians in the household are assigned the same Preferred Language, only one letter is generated for the household.
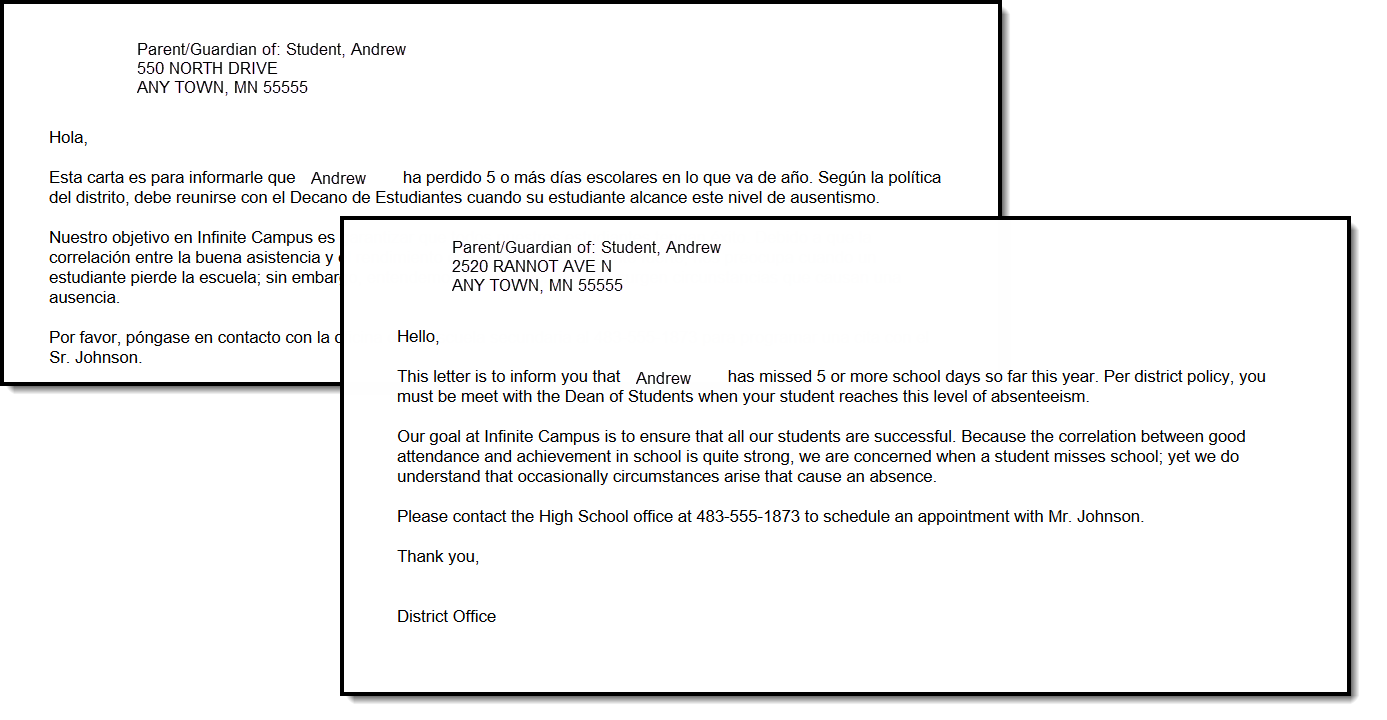 Letters in Multiple Languages
Certain foreign language characters may not line up properly with other text when using the Campus Fields or when fonts are mixed (e.g., phone numbers alongside non-English characters). Try adding additional returns between lines.
WYSIWYG Editor Field Definitions
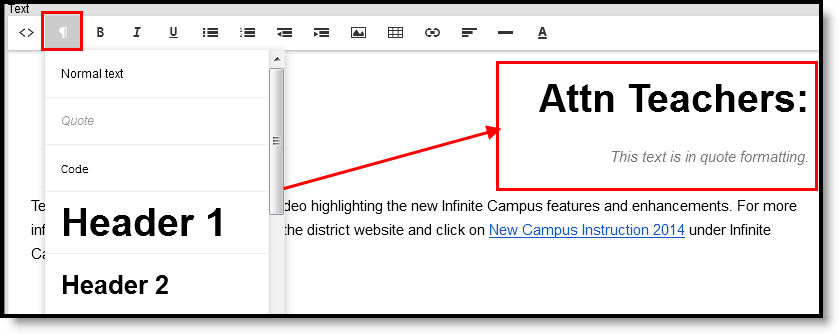
| Formatting | This option appears as the paragraph symbol in the editor and allows you to set different sizes as desired. Available options include:
Text can either be selected and a formatting option chosen, or the formatting option can be set first. |
| ||||||||||||||||||
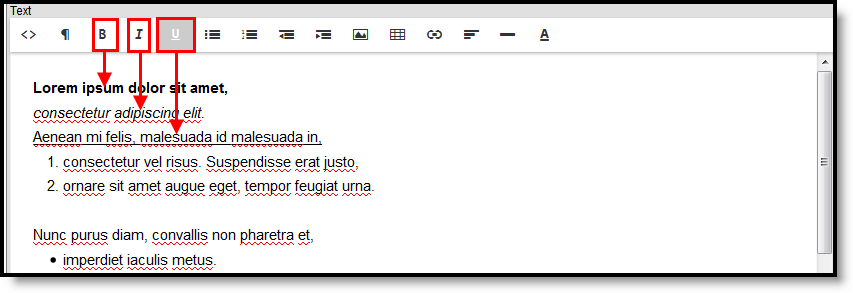
(B)old | Highlighting the text and selecting B makes it bold. |
| ||||||||||||||||||
(I)talic | Highlighting the text and selecting I displays the text in italics. | |||||||||||||||||||
(U)nderline | Highlighting the text and selecting U adds an underline. | |||||||||||||||||||
Selecting this option adds a bulleted list to the text. Bullets will continue to be added until removed.
|  | |||||||||||||||||||
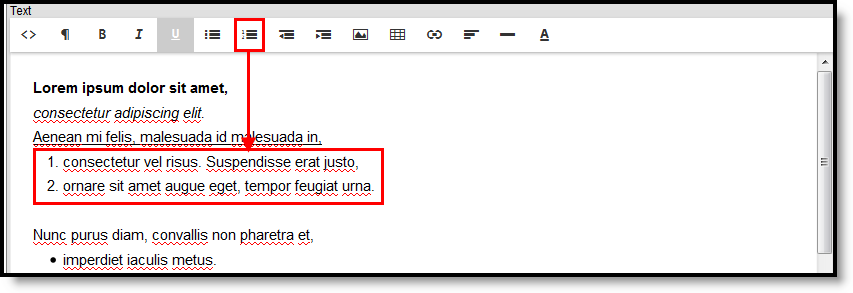
Numbers | Selecting this option adds a numbered list to the text. Numbers will continue to be added in numeric order until removed.
|
| ||||||||||||||||||
<Outdent | Selecting this option removes the indent and moves text to the left. |
| ||||||||||||||||||
>Indent | Selecting this option adds an indent and moves the text to the right. | |||||||||||||||||||
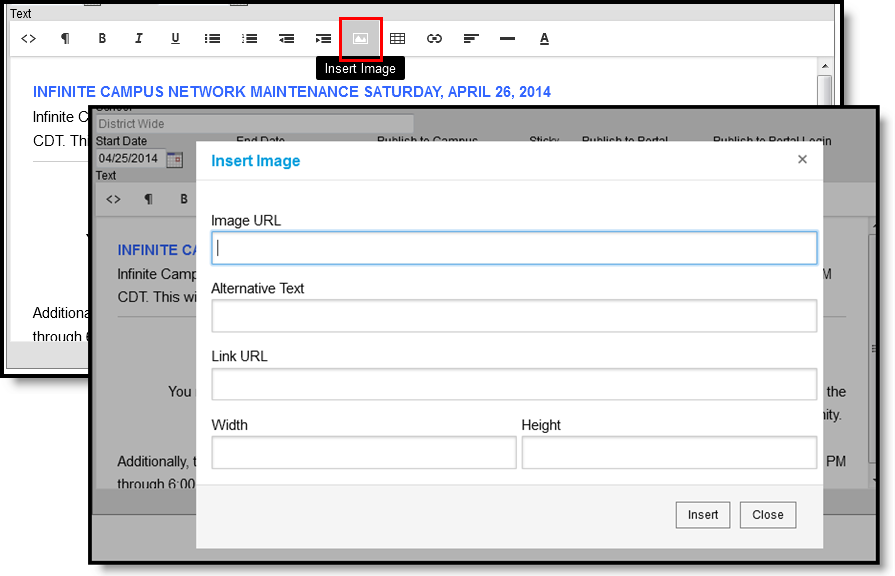
| Insert Image | Adds an image to the message, letter, etc. Enter the URL (file location) of the image, select the desired size, and enter any other required text. Then, enter the desired width and height of the image in pixels. When finished, click the Insert button. The URL must be a public literal URL The following types of images can be inserted. Image file extensions are listed; extensions in bold are the most common type. Approved Image Types for UI Display
Inserting Images in LettersImages in any of the approved formats can be added to letters. If you have trouble with a JPEG image in FOP, try opening it with an image processing program (such as Photoshop or Gimp) and then save it. Specifying 24-bit color output may also help. For the PDF and PostScript renderers, most JPEG images can be passed through without decompression. Grayscale, RGB, and CMYK color spaces render properly; however, for other output formats, JPEG images must be decompressed. Inserting Images in EmailsThe image types accepted depend on your email client. It is recommended to use common file types such as PNG and GIF in emails. |
| ||||||||||||||||||
| Table | Adds a table. First, select the Insert Table option from the dropdown. The default table size is 2 rows by 3 columns. Use the other options in the Table dropdown to increase this size. Available options are:
|
| ||||||||||||||||||
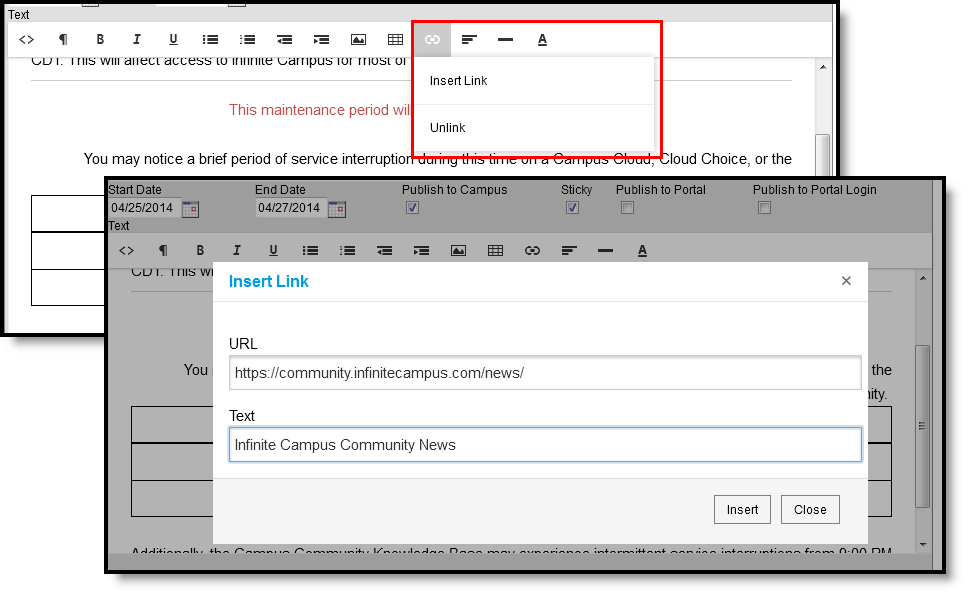
| Links | Adds a URL link to an external site (outside of the district) or an internal site (within the district). Links could include websites, district-approved videos, etc. Videos are embedded and use the <embed> tag All links open in a new window. |
| ||||||||||||||||||
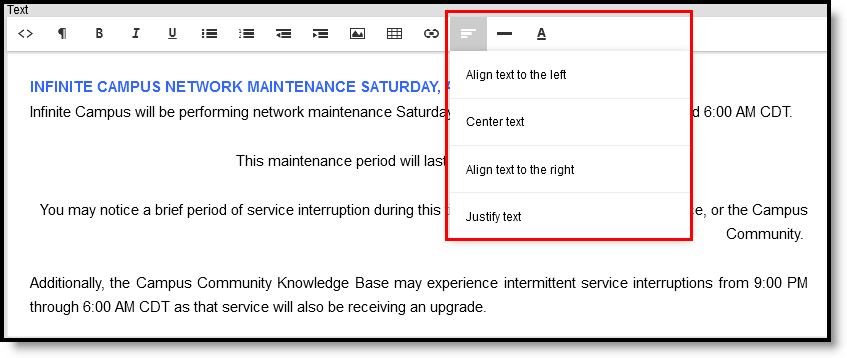
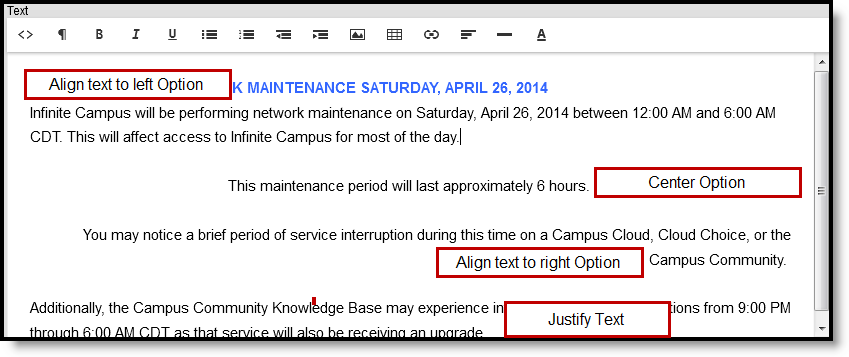
Alignment | Determines placement of text. Options include:
|
| ||||||||||||||||||
Insert Horizontal Rule | Adds a line that displays across the text box, separating a section of the content from another section of the content. | |||||||||||||||||||
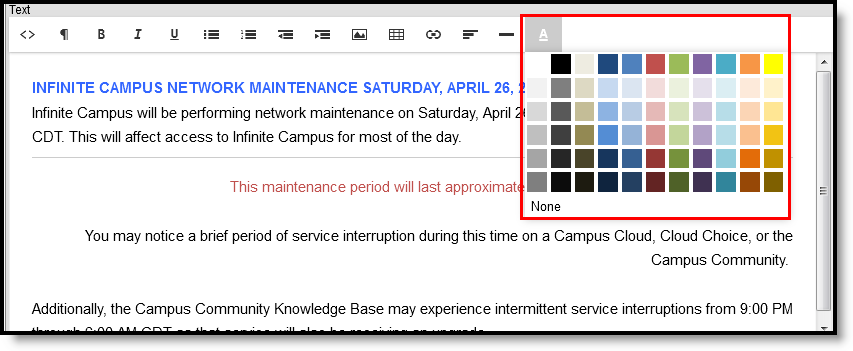
| Font Color | Changes the text color from black to a chosen color. |
| ||||||||||||||||||
| Campus Field | Campus Fields and Sub-Reports allow the letters to dynamically pull and display specific student data for each student within the generated letter. See below for more information. |  | ||||||||||||||||||
| Sub Report |  |


Campus Field and Sub-Report Options
Using Campus Fields and Campus Sub-Reports in letters allows the reports to dynamically pull and display specific student data for each student within the generated letter.
Any fields displaying in red text have been deactivated. Use the Element Replacement tool to replace them with updated fields.
Campus Field Options
To include Campus fields within a letter, select the small icon on the right-hand side of the text format bar.
Once the Campus field options icon is selected, users are presented with the Campus Field Properties editor. Much like other Ad hoc field editors, users can select Campus fields related to student data.
 Insert Campus Fields
Custom Attributes cannot contain special characters when added to letters.
Select the field from the Campus Field Properties editor to insert Campus fields within the letter. The selected field will appear within a dotted blue-lined box in the text field.
 Campus Fields Display
The example above pulls a student's first and last names into the report. Every time this report is generated, each student being reported will pull their unique data for these fields into the letter.
 Campus Fields With Pronouns
Campus fields that allow insertion of student pronouns, as shown in the example above, are tied to the pronoun assigned on a student's currently active Identity. The fields represent the format in which the pronoun will be inserted when the letter is generated (e.g. him_her, His_Hers_capital). Districts that have properly defined additional pronouns through the Pronoun Setup tool will not have to do anything else in order for those pronouns to work with existing Campus fields.
Campus Sub-Report Options
Select the small icon on the right-hand side of the text format bar to include Campus sub-reports within a letter.
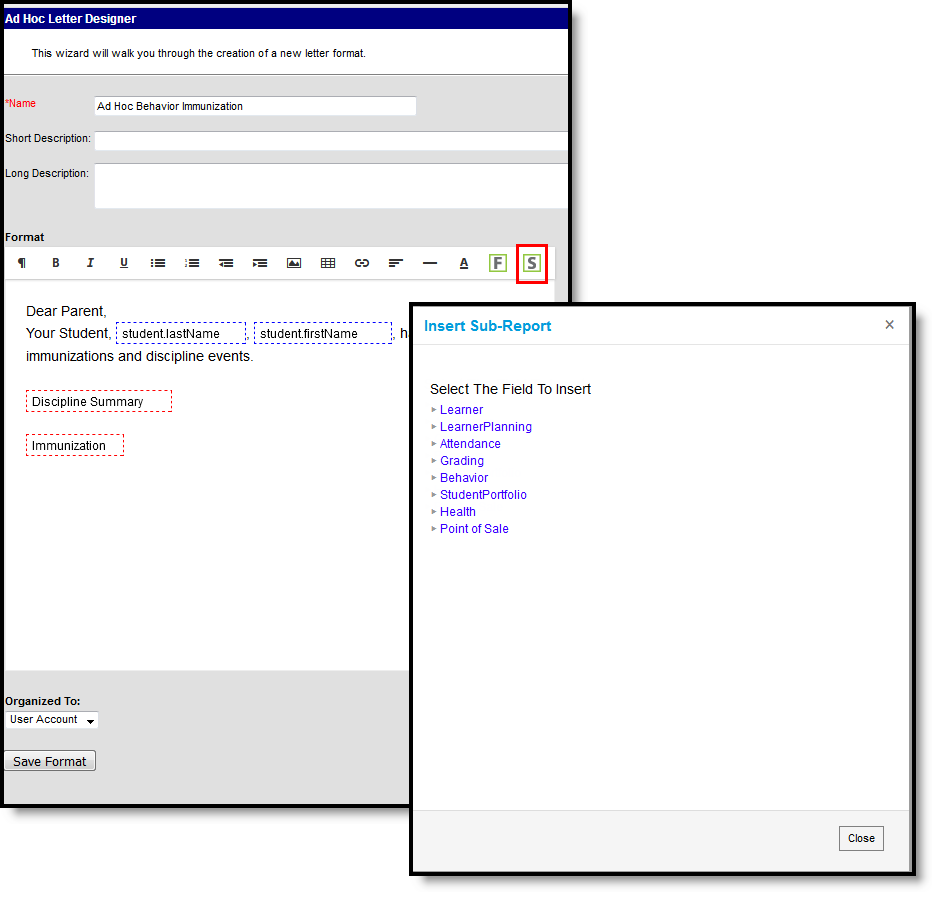 Campus Sub-report Selection
Once the Campus sub-report options icon is selected, users are presented with the Campus Sub-Report Properties editor.
Select the sub-report from the Campus Sub-Report Properties editor to insert a sub-report within the letter format. The sub-report will appear within a dotted red-lined box in the text field.
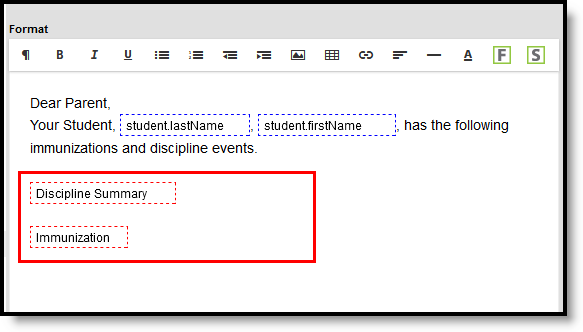 Campus Sub-report Display
Sub-Report Options
The following table lists the sub-report options for each area.
| Area | Sub-Reports |
|---|---|
| Learner | Student Schedule Active and Dropped Student Schedule |
| Learner Planning | Course Requests Course Plan |
| Attendance | Period Mark Summary Course Mark Summary Whole/Half Day Summary Exact Day Summary Single Day Count Summary |
| Grading | Grade Detail Term GPA Summary |
| Behavior | Discipline Summary Behavior Summary |
| Student Portfolio | Cumulative GPA and Class Rank |
| Health | Immunization Health Screening Concussion Health Screening Dental Health Screening Hearing Health Screening Scoliosis Health Screening Vision |
| Point of Sale | POS Account Balance |
When using sub-reports in letters, please note the following:
- All behavior data is included when adding either sub-report.
- A field is displayed only if there is data for it. If a field is selected in the sub-report but there is no saved data for that student, the field's information is not displayed.
- A sub-report option only displays if the district/school records that data.
Letter Formats
Users can generate letters in Blank Form or Addressed Form Letter format. The Blank Form Letter format will generate the letter exactly as it was created within the Letter Designer.
 Blank Form Letter Format
The Address Form Letter format generates the same information as the Blank Form format, but also includes the student's address information at the top. This format is useful for letters printed and mailed to parents/guardians.
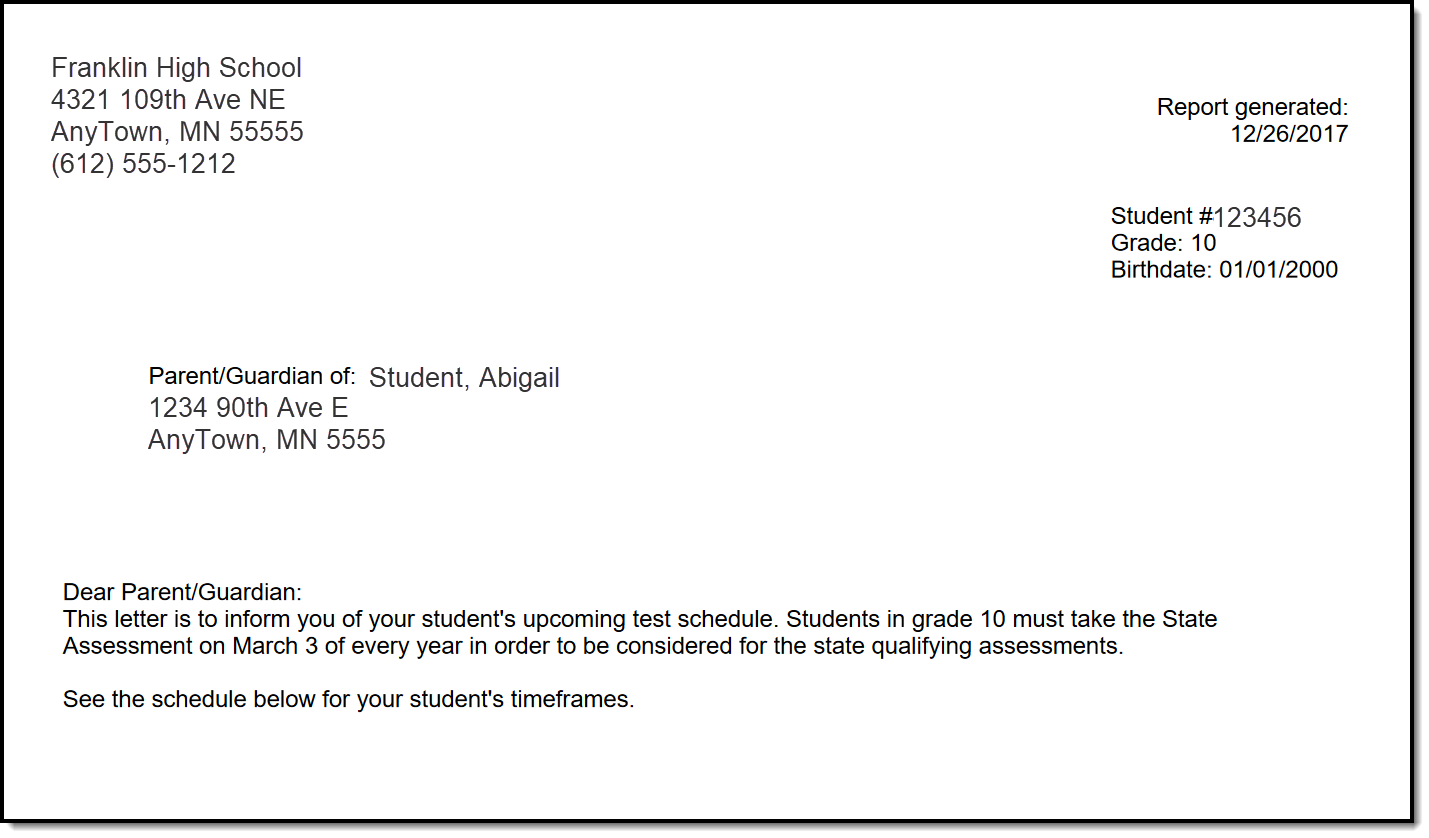 Address Form Letter Format
For students without a mailing address, a letter is still generated. Like in the Preview of the attendance letters, the student's name is listed on the summary of who receives a letter, but instead of an address, the words NO MAILING ADDRESS display where the address would otherwise display. Letters are printed for the student with the same NO MAILING ADDRESS indication.
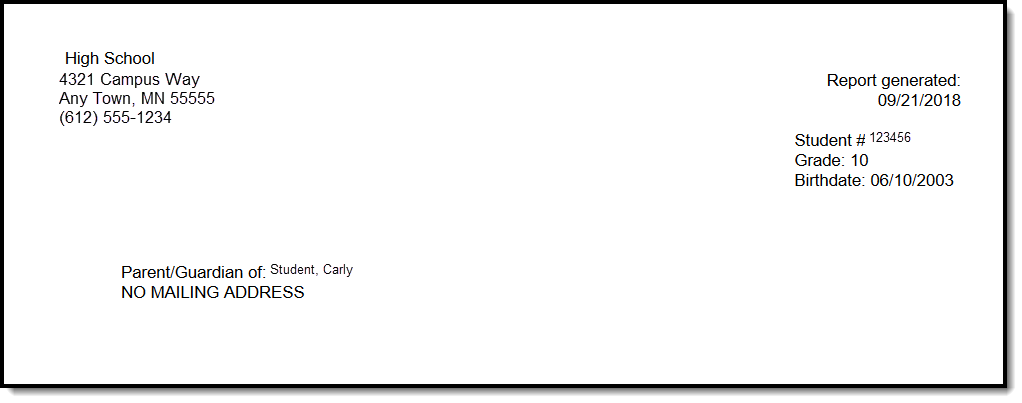 No Mailing Address Display on Letter Print
No Mailing Address is determined by the Mailing checkbox marked on the Household associated with the Address.
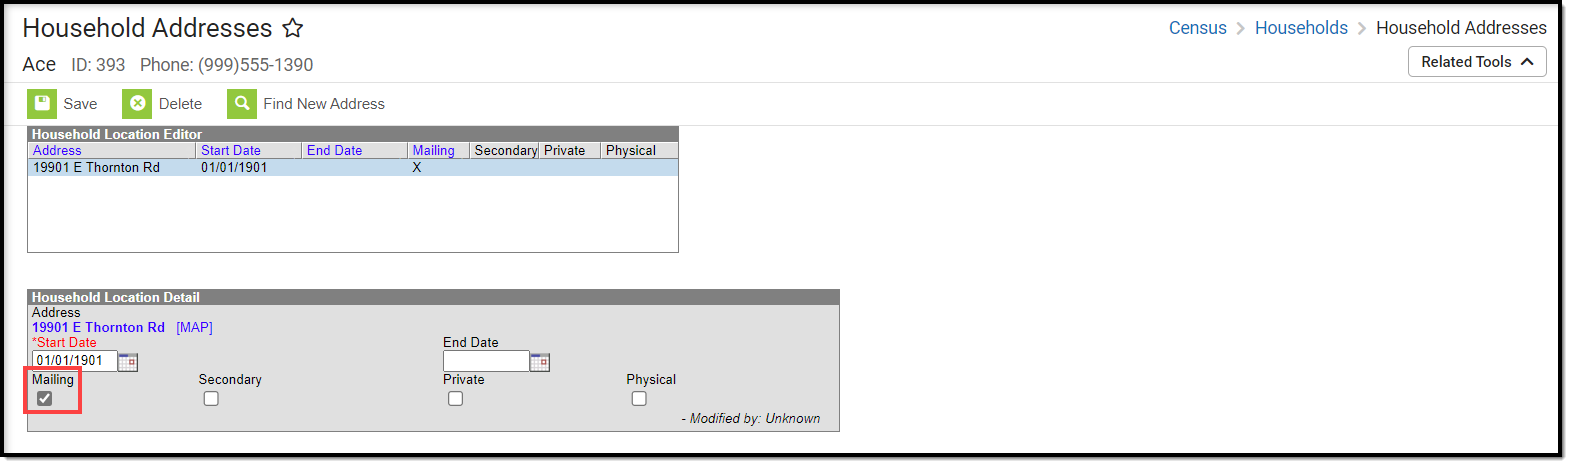 Address Location Detail - M