Tool Search: Missing Assignment Scheduler
The Missing Assignment Scheduler allows districts to select a day and time for Campus to send missing assignment messages. Missing assignment information is based on the start date and the due dates of assignments and the scores entered in the teacher’s Grade Book.
Messages are only sent for assignments marked as Missing.
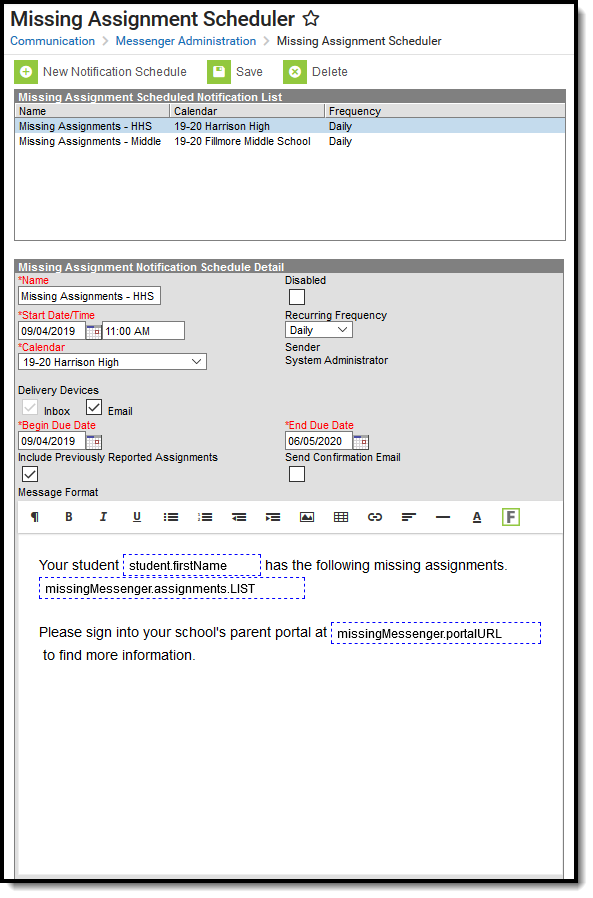 Missing Assignments Scheduler Editor
See the Missing Assignment Scheduler Tool Rights article for information on available tool rights.
Create a New Notification Schedule
- Click New Notification Schedule.
Use the information in the following table to complete the fields.
Field
Description
Required
Name
Enter a unique name to identify this notification schedule.
X
Disabled
Select this checkbox to turn off this notification schedule.
Start Date/Time
Select the day and time by which Campus should start sending messages.
X
Recurring Frequency
Select how often the messages should be send. Valid options include monthly, weekly, daily and hourly.
X
Calendar
Select the calendar for which messages should be sent.
Delivery Devices
Select the devices to which the message should be sent. Valid options include Inbox, Email and Voice. Voice is only an option if the district uses Campus Voice Messenger. Messages are automatically delivered to the inbox on the portal.
Begin Due Date
Missing assignments due on or after the Begin Due Date will prompt a message.
X
End Due Date
Missing assignments with an end due date before or on the End Due Date will prompt a message.
X
Include Previously Reported Assignments
Once a message for a specific failing or missing assignment is sent, that assignment won't trigger another message unless "Include Previously Reported Assignments" is marked.
Send Confirmation Email
This checkbox indicates that a receipt of messages is required.
- Click the Message Format area and add/remove any required text.
- Click the Save button.
