Tool Search: Dependent Care
Registrations are approved or denied through a session's roster. Users may review registration requests and can then approve the application or remove the request.
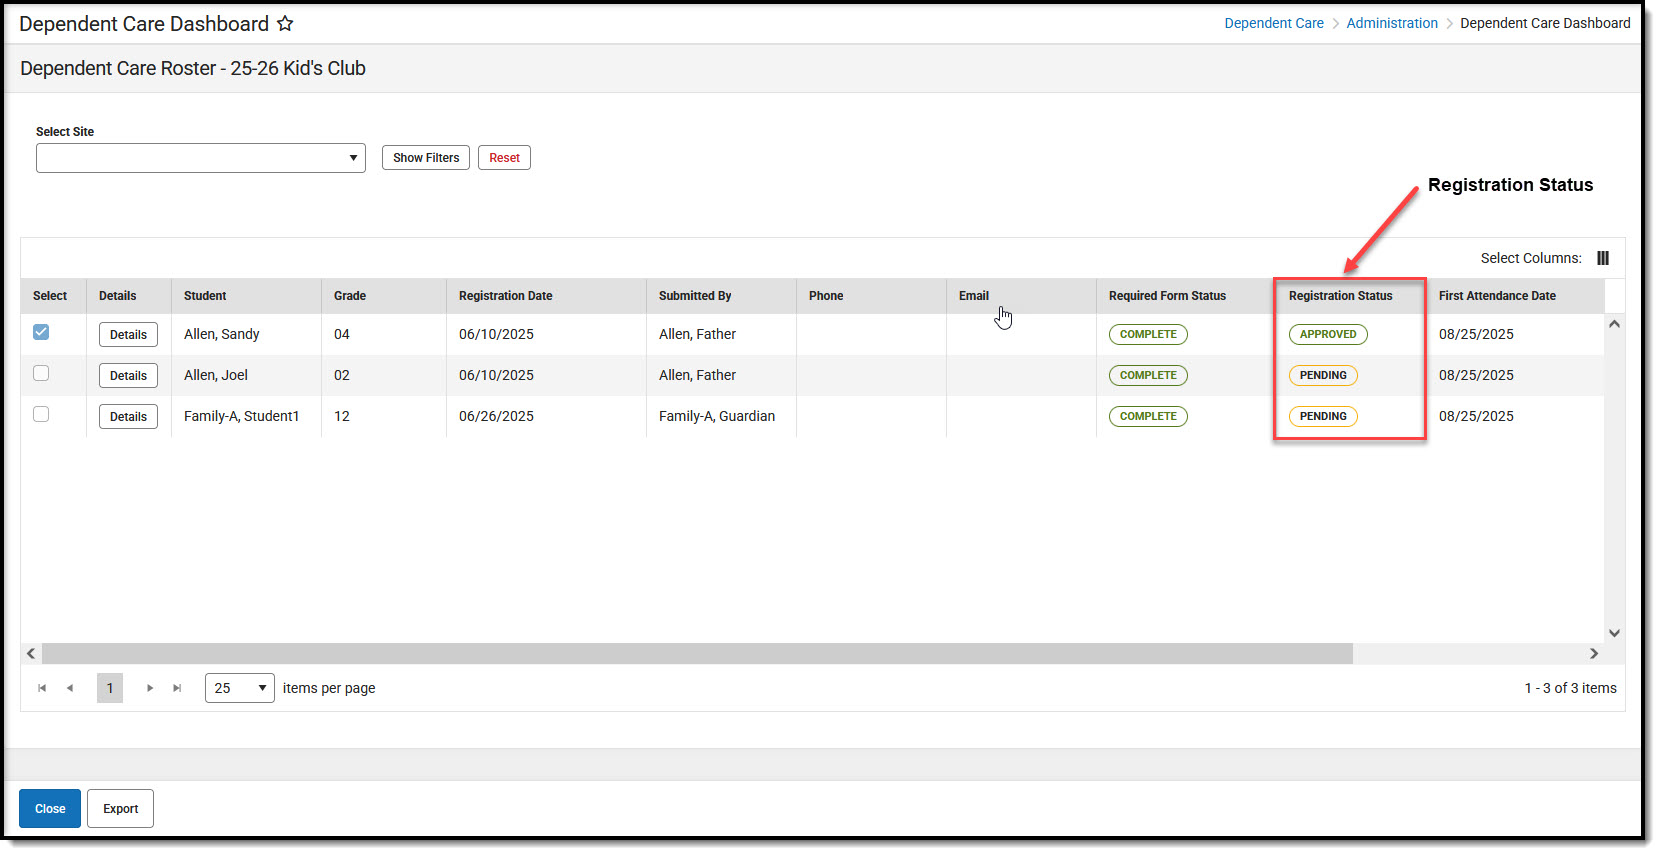 Dependent Care Roster
- To begin session registration review, from the Dependent Care Dashboard, select the session for which the review requests and press the Roster button. The Roster for the selected session display.
- In the Registration Status column, you can view the students with pending registration requests. Press Details for the student whose registration request you'd like to review.
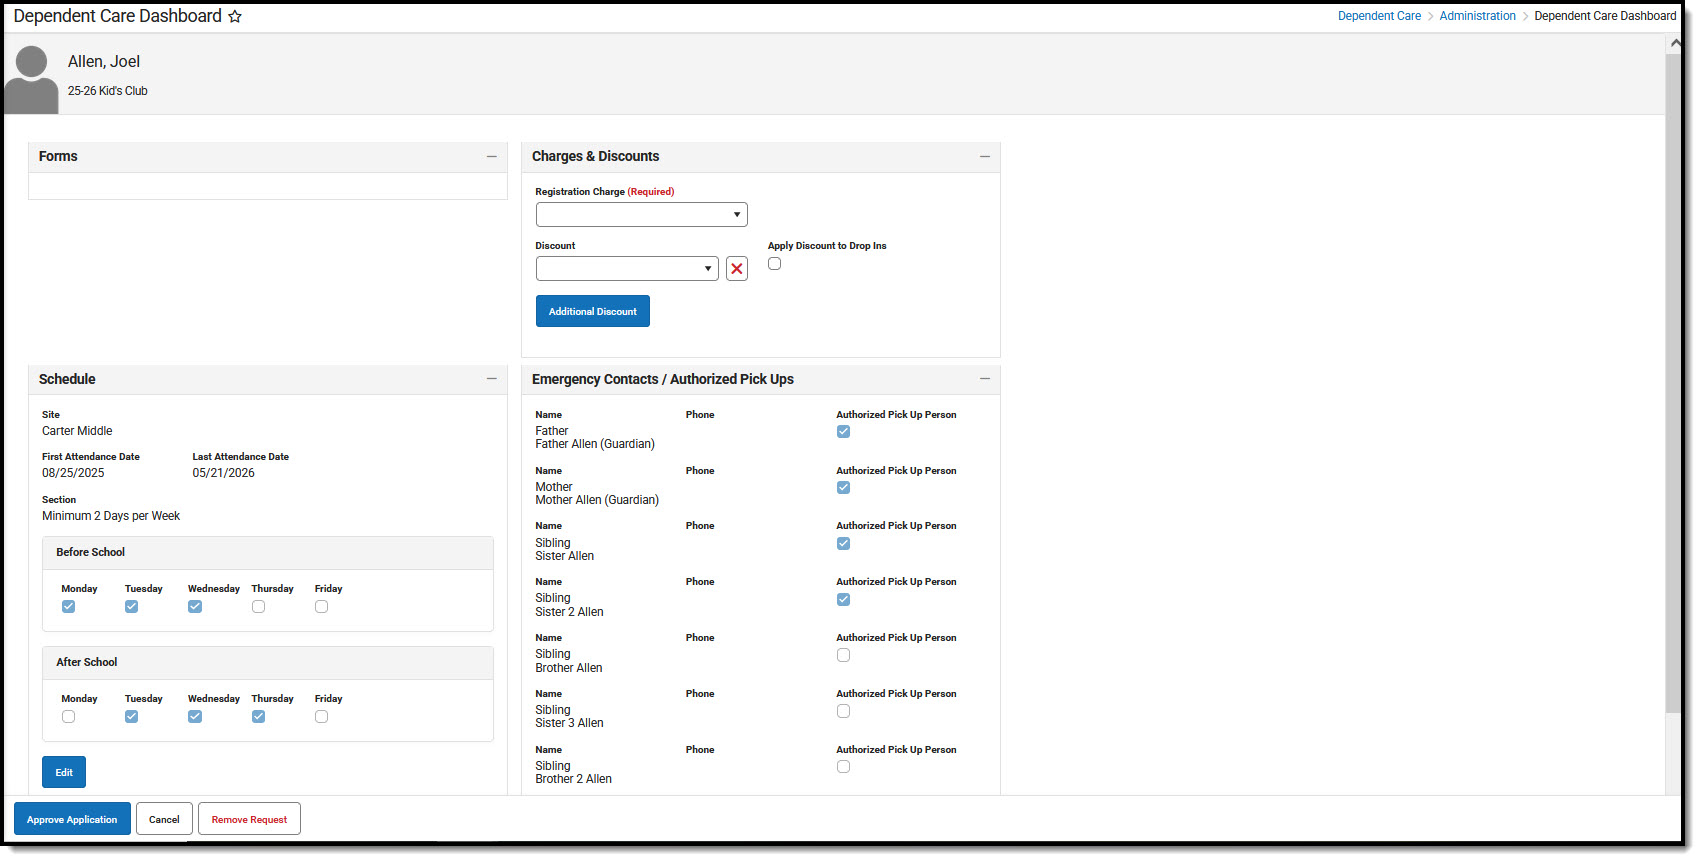
- Details for the student's request are displayed. In the Forms section, be sure to review and approve any required forms parents have filled out.
- In the Charges & Discounts section, users MUST enter a registration charge and may enter any desired discounts.
- Use the Registration Charge drop-list to select the appropriate registration fee for the account.
- From the Discount drop-list, select a discount to apply to the student.
- Mark the Apply Discount to Drop Ins if this discount should be applied to this student's drop-in care as well.
- To add additional discounts for the student, press Additional Discount and add as many discounts as desired.
- The Schedule section allows users to view the student's desired site for care and dates of attendance. Users can also view and edit the desired attendance schedule.
- To edit the student's schedule, press the Edit button.
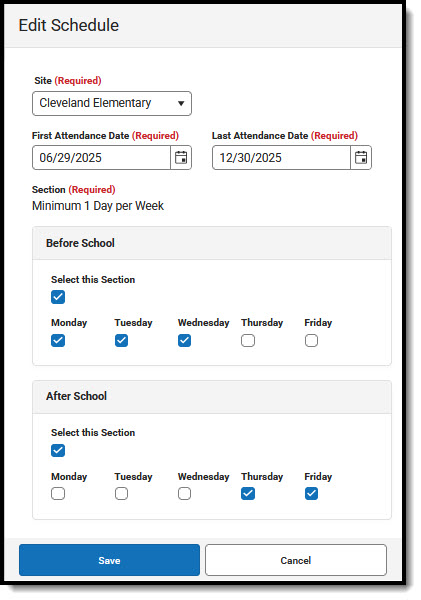
- To change the selected site of attendance, use the drop-list and select the new site.
- Use the First and Last Attendance Date fields to alter the dates of attendance, if necessary.
- To make edits to a student's attendance schedule, use the Select this Section checkbox for the appropriate section and make any desired changes to days of the week for the student's attendance. If the Select this Section box isn't marked, you may not edit the days of attendance.
- When finished, press Save to save the changes or Cancel to exit without saving the changes.
- To edit the student's schedule, press the Edit button.
- Finally, use the Emergency Contacts/Authorized Pick Ups section to review the information. Users may also add any additional contacts.
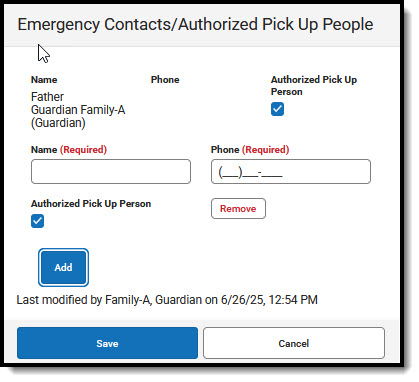
- Emergency Contacts submitted with the registration may not be removed or edited. You can, however, update their Authorized Pick Up status by marking or unmarking the Authorized Pick Up Person box.
- To add additional emergency Contacts, press Add and enter the contacts Name and Phone number. Mark the Authorized Pick Up Person checkbox if they are approved for pick up of the student.
- To remove one of these contacts, find their name in the list and press Remove.
- When finished, press Save to save the changes or Cancel to exit without saving the changes.
- After reviewing the forms and application information, press Approve Application to complete the student's registration for the session. Once approved, the student's Registration Status changes from Pending to Approved.
- To remove the application request, press Remove Request.
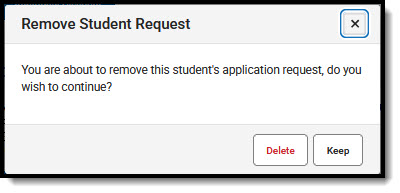
- At the prompt, confirm you want to remove the request and press Delete. Press Keep to cancel the removal of the request. If the request is removed, the student is removed from the roster.
- Press Cancel to exit without approving or denying the request.


