The Preview Tool allows new Campus users to review the health of their data during implementation in preparation for data conversion. Files are uploaded into the Data Conversion Dashboard, which checks the data for errors and allows the user to review those errors.
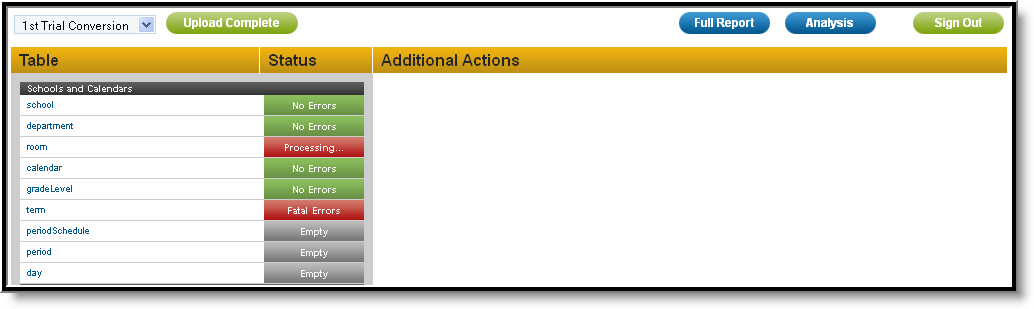
Image 1: Data Conversion Dashboard
Hover over the Table Name to view table-specific conversion instructions.
Uploading Files
To upload a file to a Table, click on the name of the table. A Load Table editor will appear to the right of the table list.

Image 2: Uploading a File
Click Browse to select a file to be uploaded. Indicate whether the file should Replace or Append existing information. The default setting uploads files in delimited text format. To modify the specifications of the file before it is uploaded, click change in the lower right corner of the Load Table editor. Select the appropriate file specifications.

Image 3: File Format Options
Subsequent and live uploads allow the option to copy the same file used in the previous upload. To copy the previous file, select the option in the top right corner of the upload window, as shown in the following image. The option to change the file specifications will remain in the lower right corner.
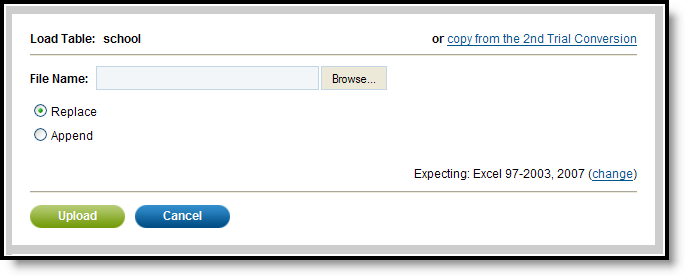
Image 4: Subsequent Upload Copy Options
Upload Order
Data should be uploaded into the tables in the order the tables appear because the data in some tables is reliant on others being converted first. For example, gradeLevel data cannot be uploaded before calendar data, as shown in the following image.
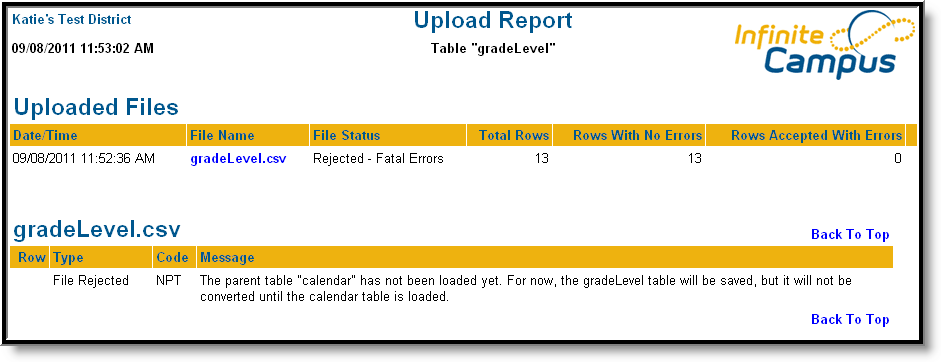
Image 5: Error as a Result of Upload Order
In this example, if a gradeLevel file is uploaded first, a Fatal Error will occur. However, once the calendar file is uploaded and the gradeLevel file is uploaded again, the status will reflect that of the uploaded file.
Status
Once a file has been uploaded, the Status column will reflect any errors in the file. Click the status to view a report describing any errors in the file.
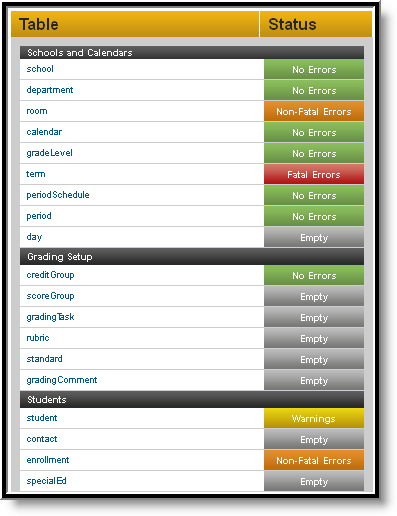
Image 6: Upload Statuses
Non-Fatal Errors are errors such as issues with specific values or rows, as in the example shown in the following image in which a value exceeded the character limit of a field. Fatal Errors prevent the file from being uploaded, which occur, for example, when a required column is missing.
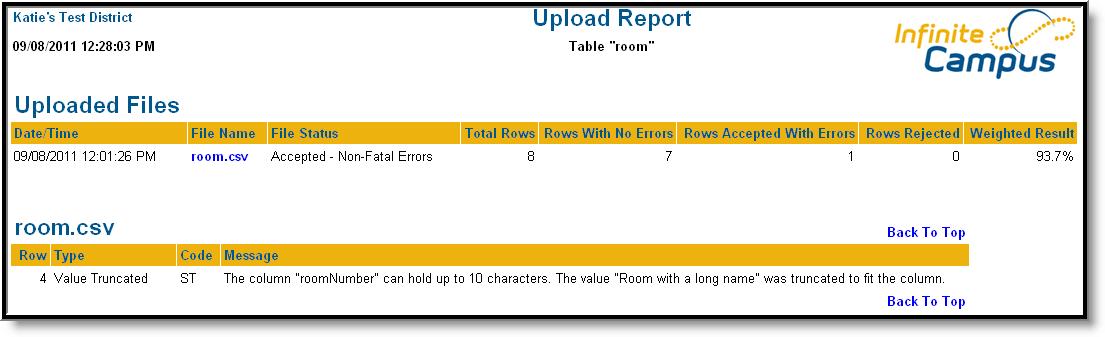
Image 7: Example of Non-Fatal Errors
Warnings indicate data will be lost in the conversion process, as in the example shown in the following image.
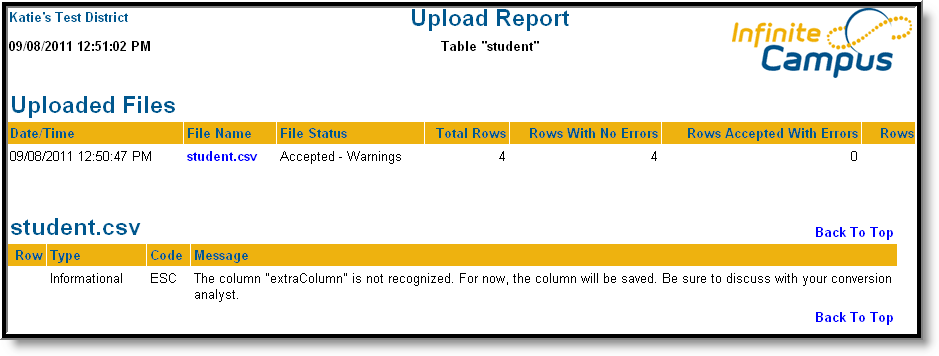
Image 8: Example of a Warning
Reporting Options
There are two options for generating reports describing the results of file uploads, a Full Report or an Analysis.
Full Report
Clicking the Full Report button will generate a report describing all the uploaded files and any errors found in those files. This report is a collection of the individual reports generated by clicking a table Status.
In this report and the individual status reports, the Type column describes the type of information provided in the Message column, such as "Informational," "File Rejected," or "Value Truncated."
A table summarizing all of the uploaded files will appear first, followed by sections describing each of the uploads individually.
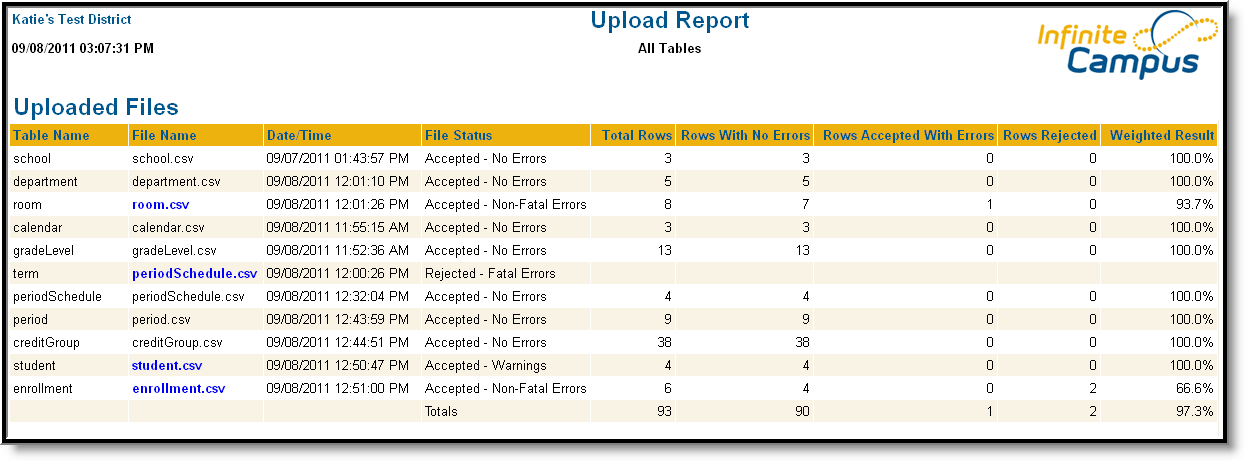
Image 9: Full Report of File Uploads
Files with errors or warnings will appear as blue links, which will link to individual sections describing the errors in each upload.
The first table describes the number of errors found and when those errors caused the upload to reject a row of data. The percentage of rows accepted is calculated at the right.
Analysis Report
Clicking the Analysis button will generate a report describing incorrect or missing information in the data uploaded. The Summary section lists high level areas where data may be incorrect or missing. The Priority column describes the level of attention a district should have based on the item to which it refers. However, all errors should be reviewed before data conversion occurs.
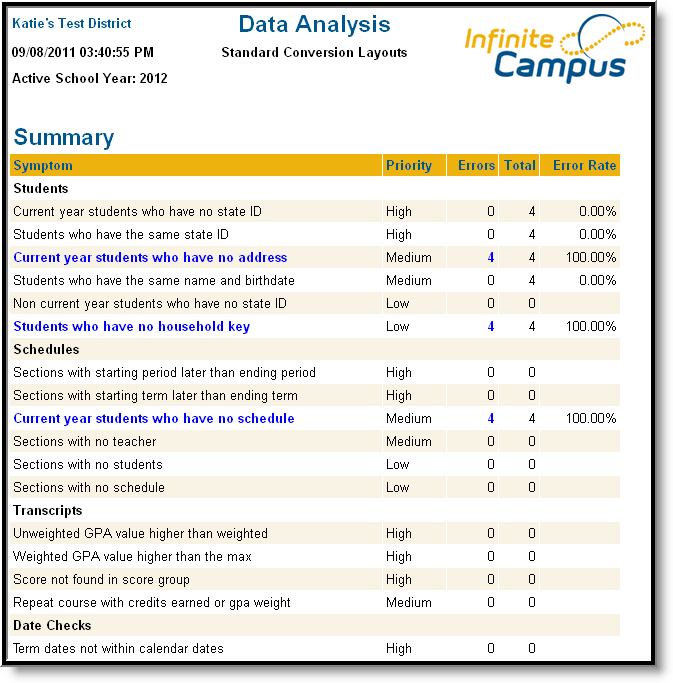
Image 10: Data Analysis Report
Where errors exist, the Symptom field will be a blue link to a section detailing each instance of the error.
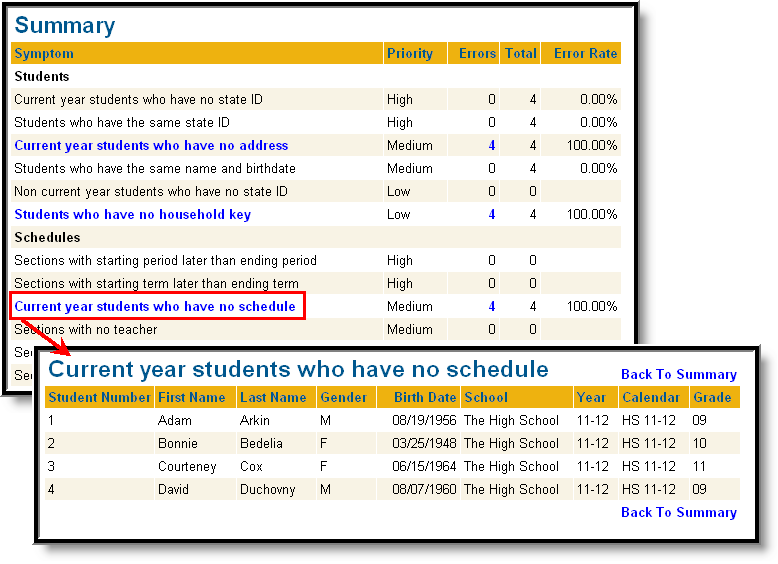
Image 11: Summary and Detail Section Example
