This tool is available as part of the Campus Learning premium offering.
Location: Teaching Center > click the Smiley Face icon
Create an Engagement Check-In to help gauge student well-being and engagement in your class and with curriculum. Questions relate to overall well-being, engagement in class, and feelings about specific assignments and curriculum.
Check-Ins display on the Today screen in Campus Student. Check-Ins are not visible in Campus Parent.
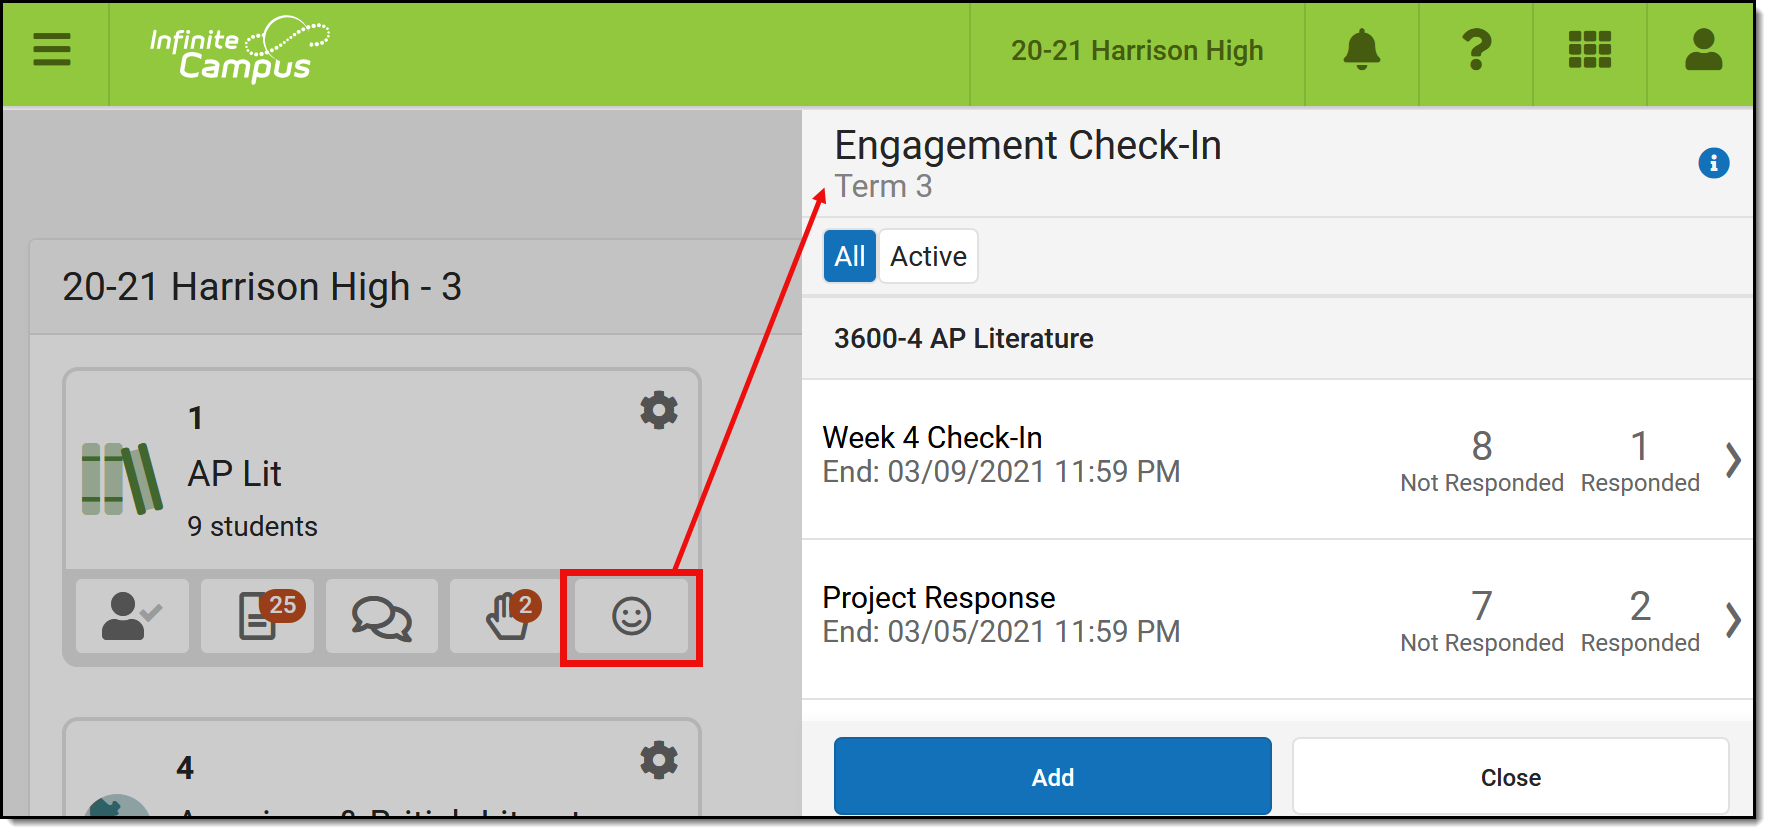 Use an Engagement Check-In to solicit information about student well-being and engagement.
Filter between All and Active Check-Ins using the buttons at the top. A Check-In is Active when today's date falls within the Check-In's date range.
Individualized and Hidden check-ins are indicated with labels.
See the Instruction Tool Rights article for more information.
Create a Check-In
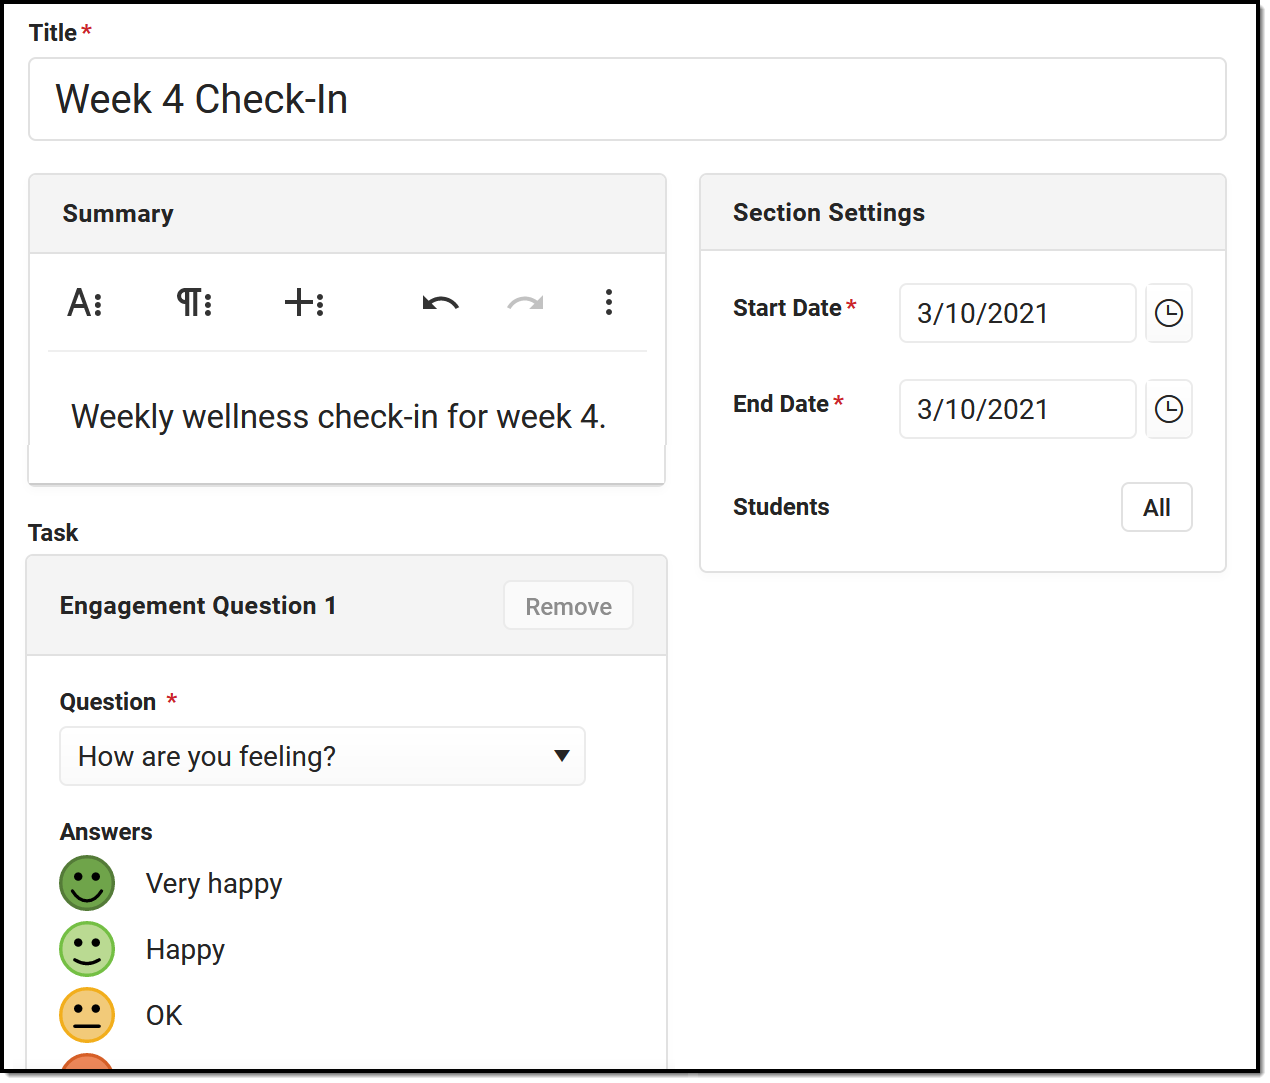
To create a Check-In, click the icon to open the Check-In list and click New.
|
 |
In Campus Student
In Campus Student, students access Check-Ins from the Today screen:
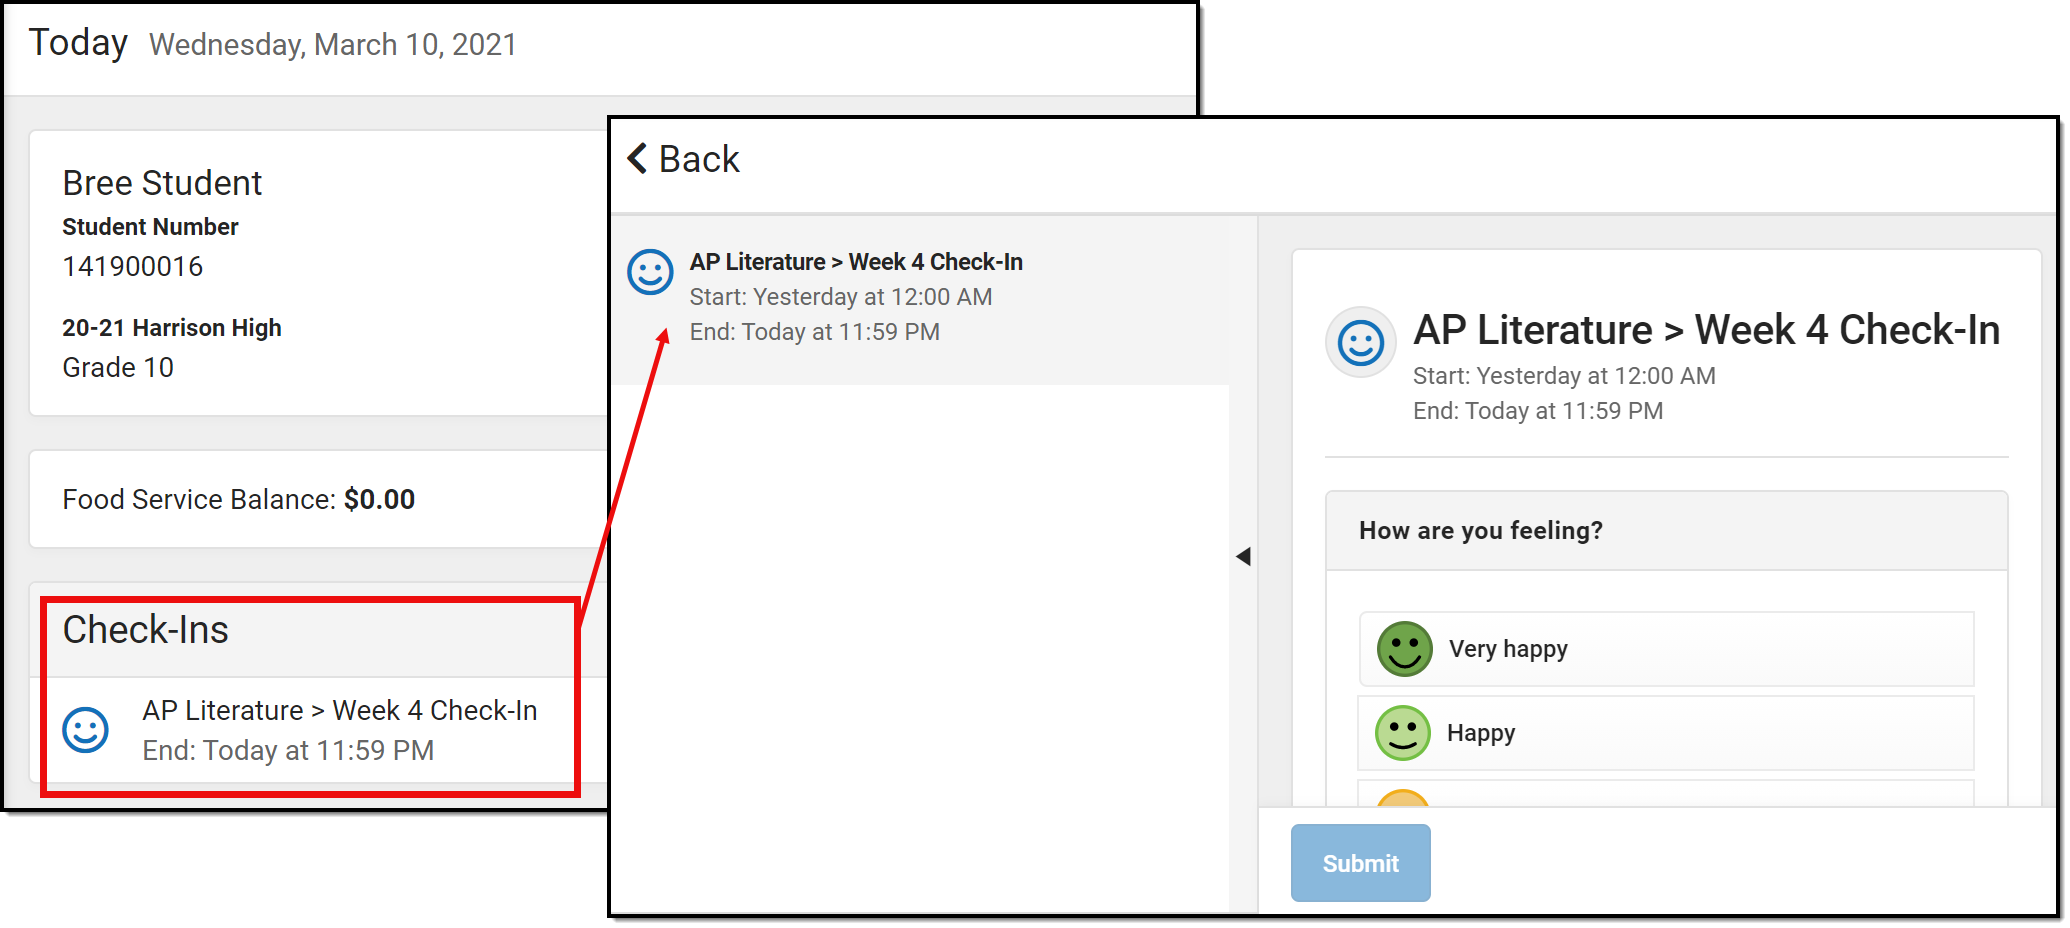 Students access Check-Ins from Campus Student.
View Check-In Results
Open a Check-In and click Edit to make changes. Questions cannot be changed once a student has responded. |
Open an existing Check-In to view results. Three tabs display: Detail, Response Summary, and Student Response.
Detail
The Detail tab shows a read only view of the Check-In.
Response Summary
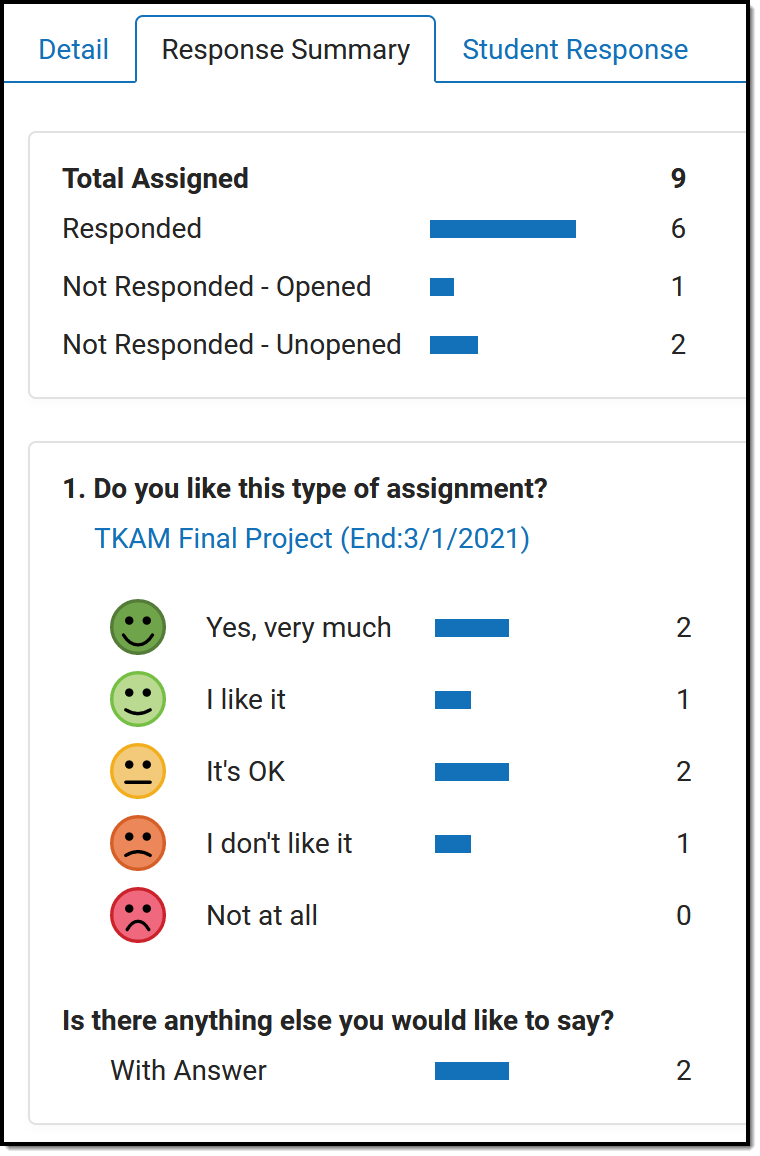
The Response Summary tab summarizes the number of students who have and have not responded and shows a distribution of answers per question.
The Total Assigned section shows the number of students who received the Check-In. The totals of who have responded, who have not responded but have opened the Check-In, and who have not responded or opened the Check-In also display.
For each question, the total number of students who selected each answer is displayed. Hover over a response and then the eye icon that displays to see a tooltip listing the students who selected that response. If the Check-In included a Follow-Up question, the total is the number of students who responded to that question.
Click on any total or response to view a filtered version of the Student Response tab. |
 |
Student Response
The Student Response tab shows responses by student.
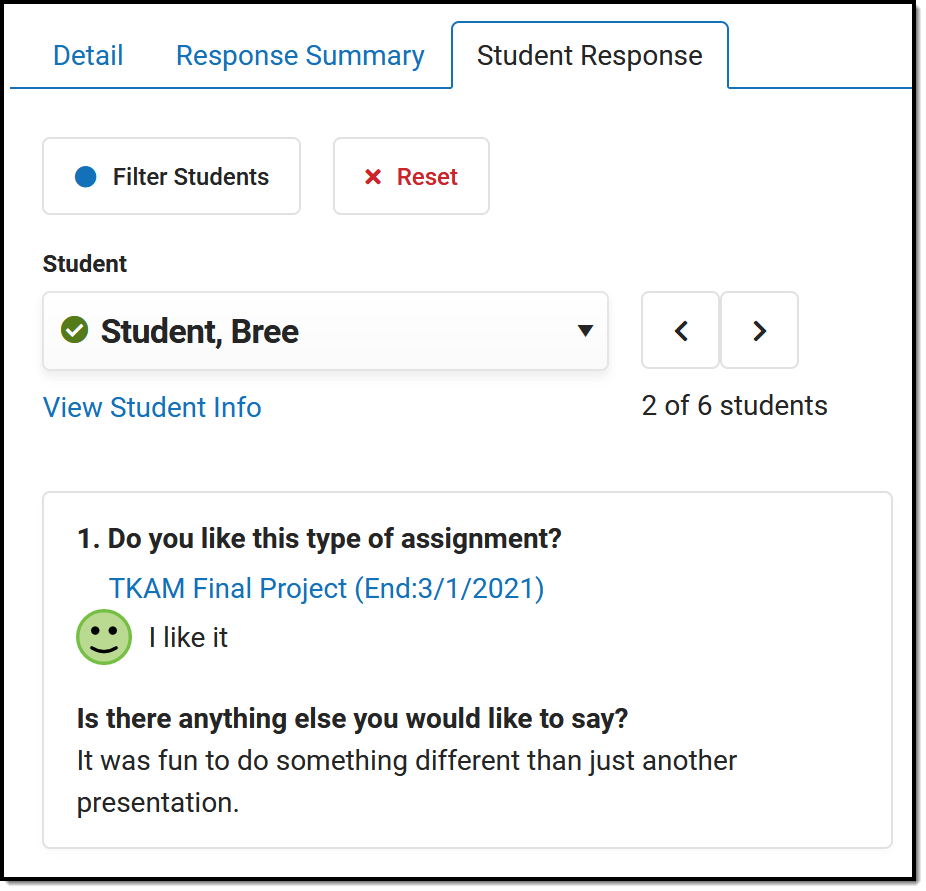 |
Navigate between students using the Student dropdown list or the arrow buttons next to it. The selected student's response displays.
Click View Student Info to view information about the student as shown in the Teaching Center.
Filters Click Filter Students to limit the Student dropdown list to only those who meet the selected criteria. For example, filter the list to only students who had negative responses or those who responded to the Follow-Up question. Click Reset to clear the filter. |
