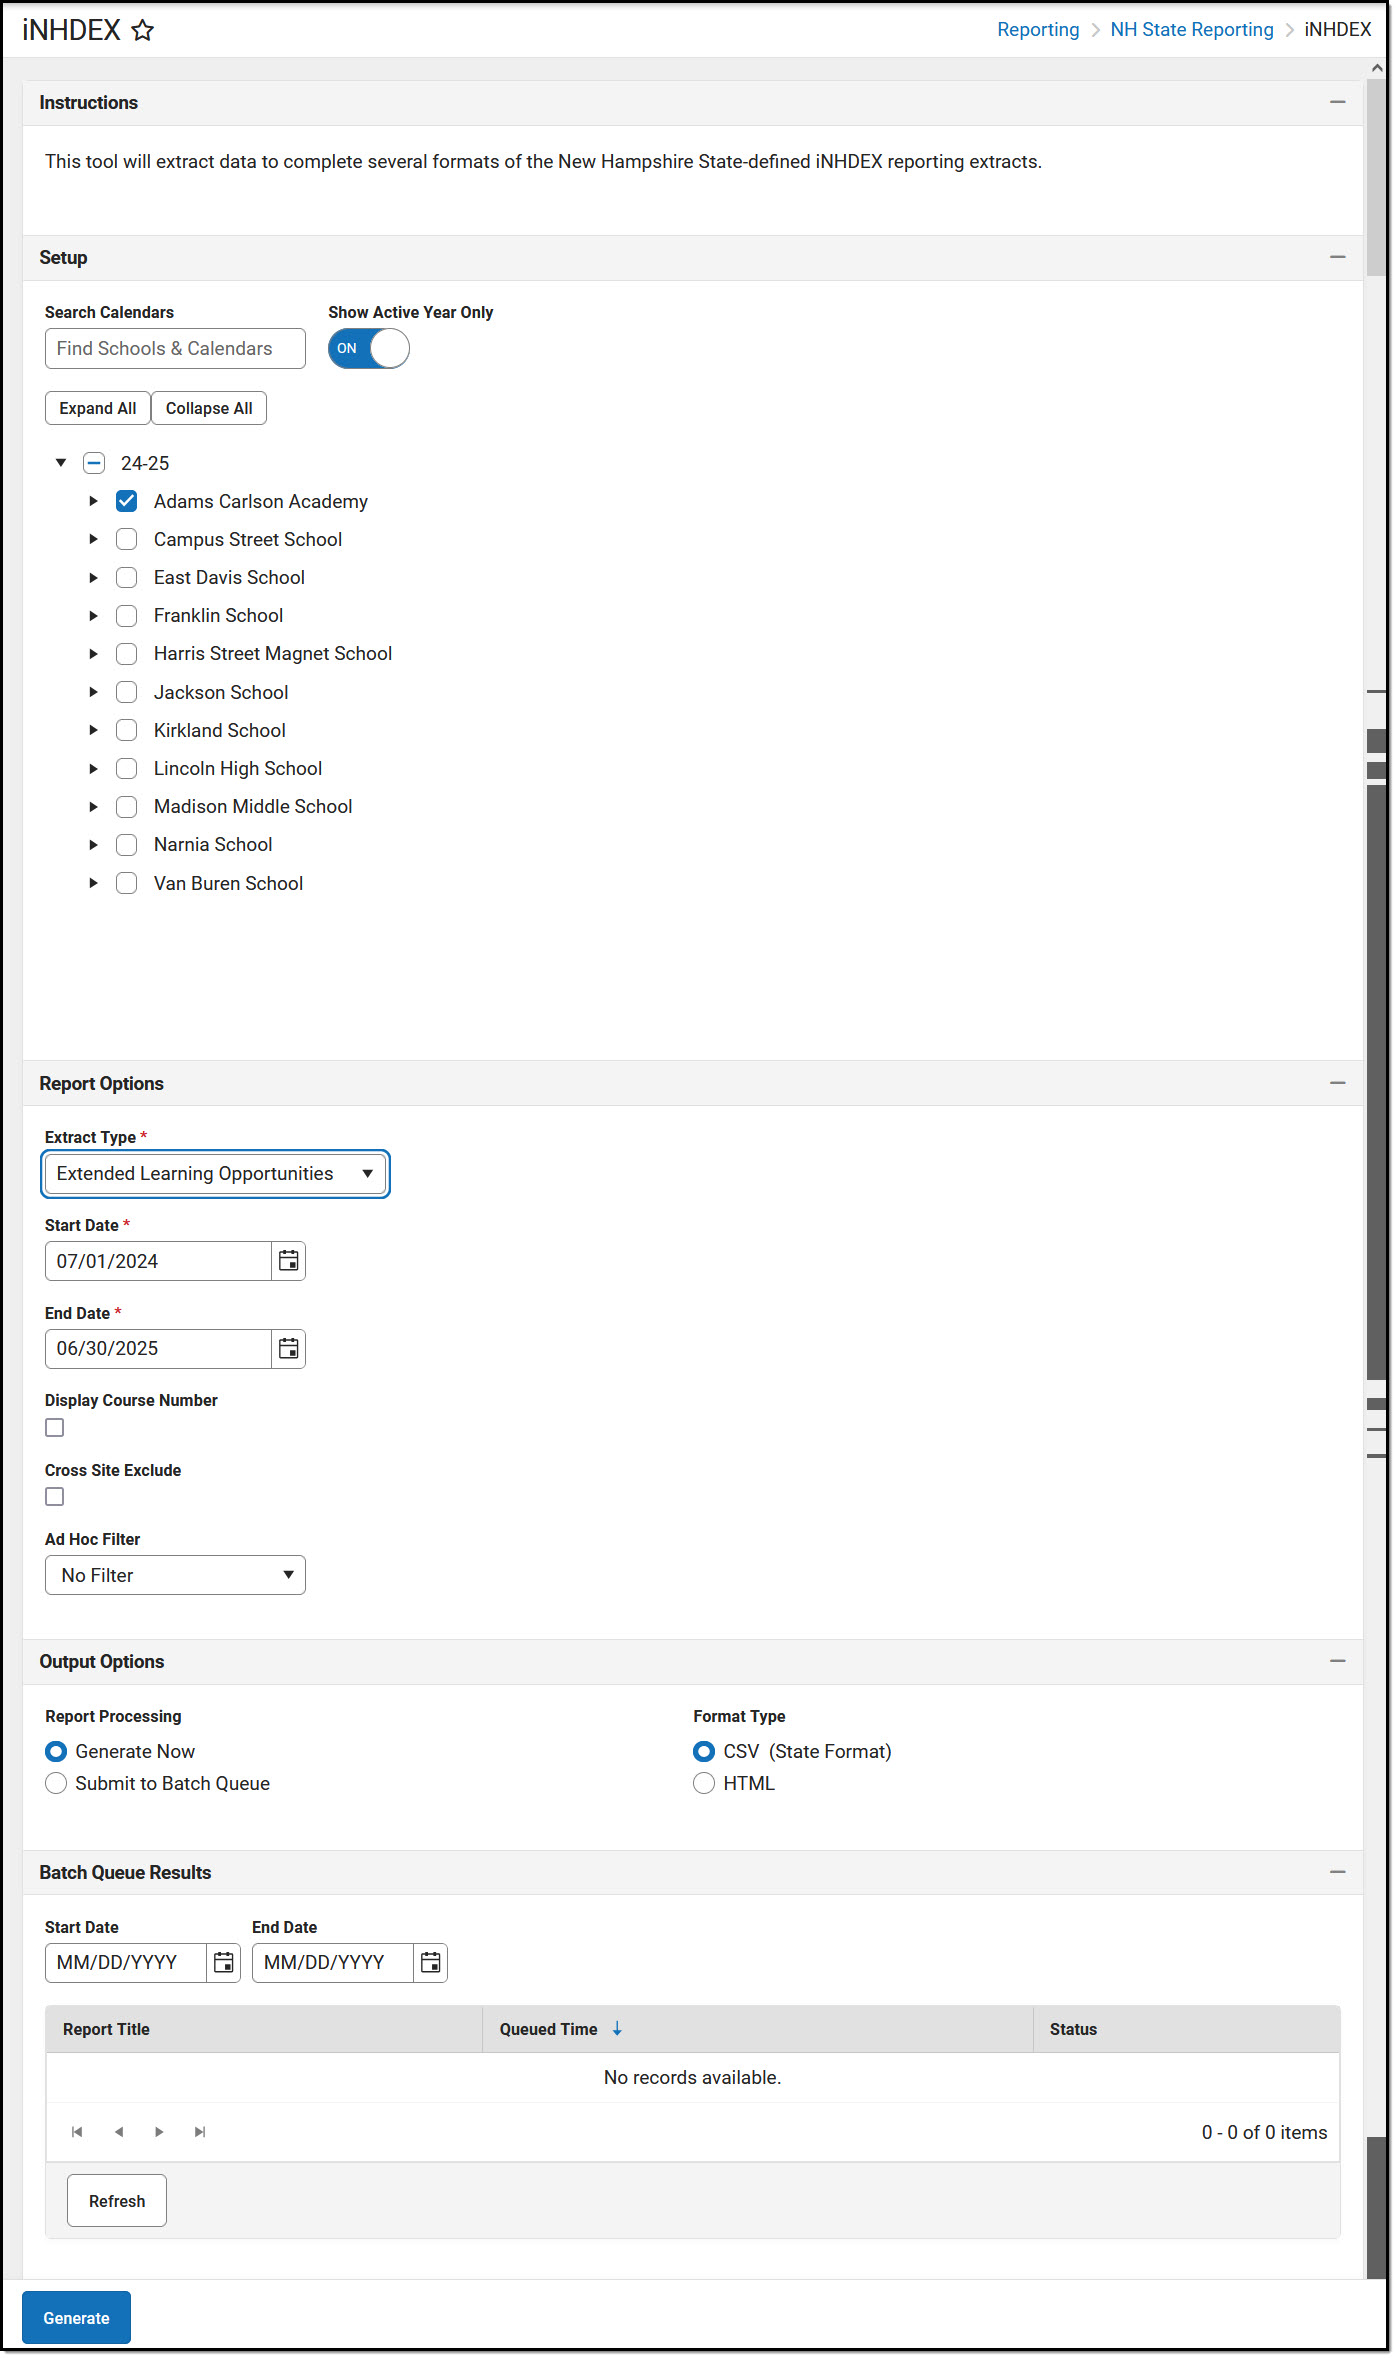
Tool Search: iNHDEX
iNHDEX (Initiative for New Hampshire’s Data Exchange) is the Statewide Student Information System being deployed and phased into all New Hampshire public schools and districts over the next three years (2023-2025). The New Hampshire Department of Education plans for iNHDEX to eventually replace the existing i4see data collection system.
 iNHDEX Report Editor
Report Editor
| Data Element | Description | ||||||||||||||||||||||||||||||||||||||
|---|---|---|---|---|---|---|---|---|---|---|---|---|---|---|---|---|---|---|---|---|---|---|---|---|---|---|---|---|---|---|---|---|---|---|---|---|---|---|---|
| Set Up | |||||||||||||||||||||||||||||||||||||||
| Search Calendars | Use the search field to narrow the list of calendars to select. Use the Expand All/Collapse All option. Place a checkmark next to the desired school and calendars. | ||||||||||||||||||||||||||||||||||||||
| Show Active Year Only | Only calendars for the active school year are available for selection when set to ON. When set to OFF, all calendars from all school years are available for selection based on the user's tool rights. | ||||||||||||||||||||||||||||||||||||||
| Report Options | |||||||||||||||||||||||||||||||||||||||
| Extract Type (required) | Determines which iNHDEX report generates. Click on the hyperlink for more information about the specific extract.
| ||||||||||||||||||||||||||||||||||||||
| Start Date / End Date (required) | Dates determine the time frame of the extract. Dates are entered in mmddyy format or can be chosen using the calendar icon. | ||||||||||||||||||||||||||||||||||||||
| Display Course Number (Does not display for all extract types) | The course number is displayed on the report when the checkbox is selected. | ||||||||||||||||||||||||||||||||||||||
| Exclude Cross-Site Data (Does not display for all extract types) | Cross-site section enrollment data is not included in the report when checked.
| ||||||||||||||||||||||||||||||||||||||
| Ad Hoc Filter | Allows for the selection of a previously created filter. Only students included in the selected filter return on the report. | ||||||||||||||||||||||||||||||||||||||
| Output Options | |||||||||||||||||||||||||||||||||||||||
| Report Processing | Generate Now: Select to generate the report immediately. Submit to Batch: Useful when generating reports for several calendars or larger amounts of reported data. See the Batch Queue article for more information. | ||||||||||||||||||||||||||||||||||||||
| Format Type | Determines in which format the report is generated.
CSV Format Best Practice The accepted state format for all iNHDEX extracts is Comma-Separated Value (CSV). If the Microsoft Excel application is installed on your computer, this file type usually defaults to opening with it. Microsoft Excel handles date-time values in a very specific way. The default handling of date values removes leading 0s, which will cause issues with your reporting. To avoid issues, make sure to perform edits to CSV files through a text editor application such as Notepad, Notepad++, or a similar text editor application. If you want to continue using Excel, ensure that all date fields are set to format MM/DD/YYYY with leading 0's (e.g., "8/4/2024" should display as "08/04/2024"). This article from Microsoft provides detailed instructions on how to change the format of dates within Excel: Format a date the way you want - Microsoft Support. | ||||||||||||||||||||||||||||||||||||||
Generate the Extract
- Select the School(s)/Calendar(s) to include in the report.
- Select the Extract Type from the droplist.
- Enter a Start Date.
- Enter an End Date.
- Mark the Display Course Number checkbox to include in the report. (This option only displays for certain extract types.)
- Mark the Exclude Cross-Site checkbox to not include cross-site section enrollment data in the report. (This option only displays for certain extract types.)
- Select an Ad Hoc Filter if desired.
- Mark Generate Now or Submit to Batch.
- Indicate the Format in which the report should be generated. Note the CSV Format Best Practice outlined above.
- Click the Generate button to generate the report in the desired format.
