Tool Search: Course Master Standards
The Standards tool lists the standards which the school must administer and/or grade for the selected course. To add standards to a Course Master, standards must be created first in the Standards Bank.
Any changes made to the Standards or any other Course Master tool require a push process to the courses. This option is available on the Course Master Info tool.
Review the Course Masters Overview article for information on Course Masters best practices and a Course Master Workflow.
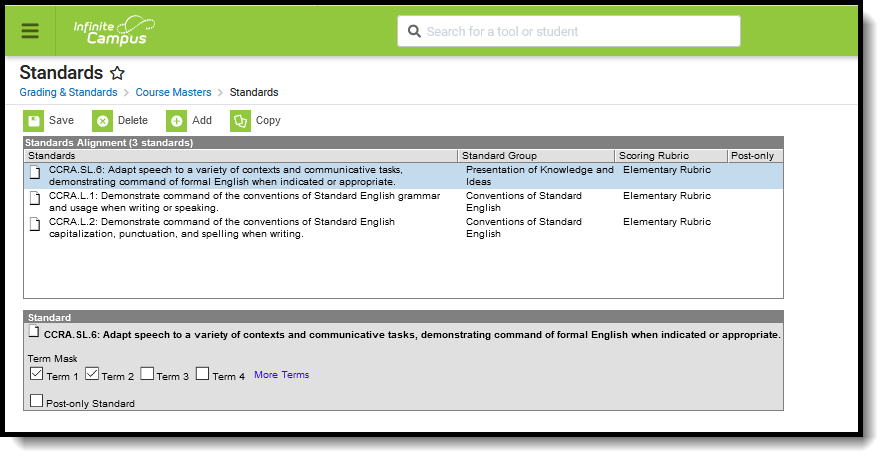 Course Master Standards
See the Standards Tool Rights article for information about rights needed to use this tool.
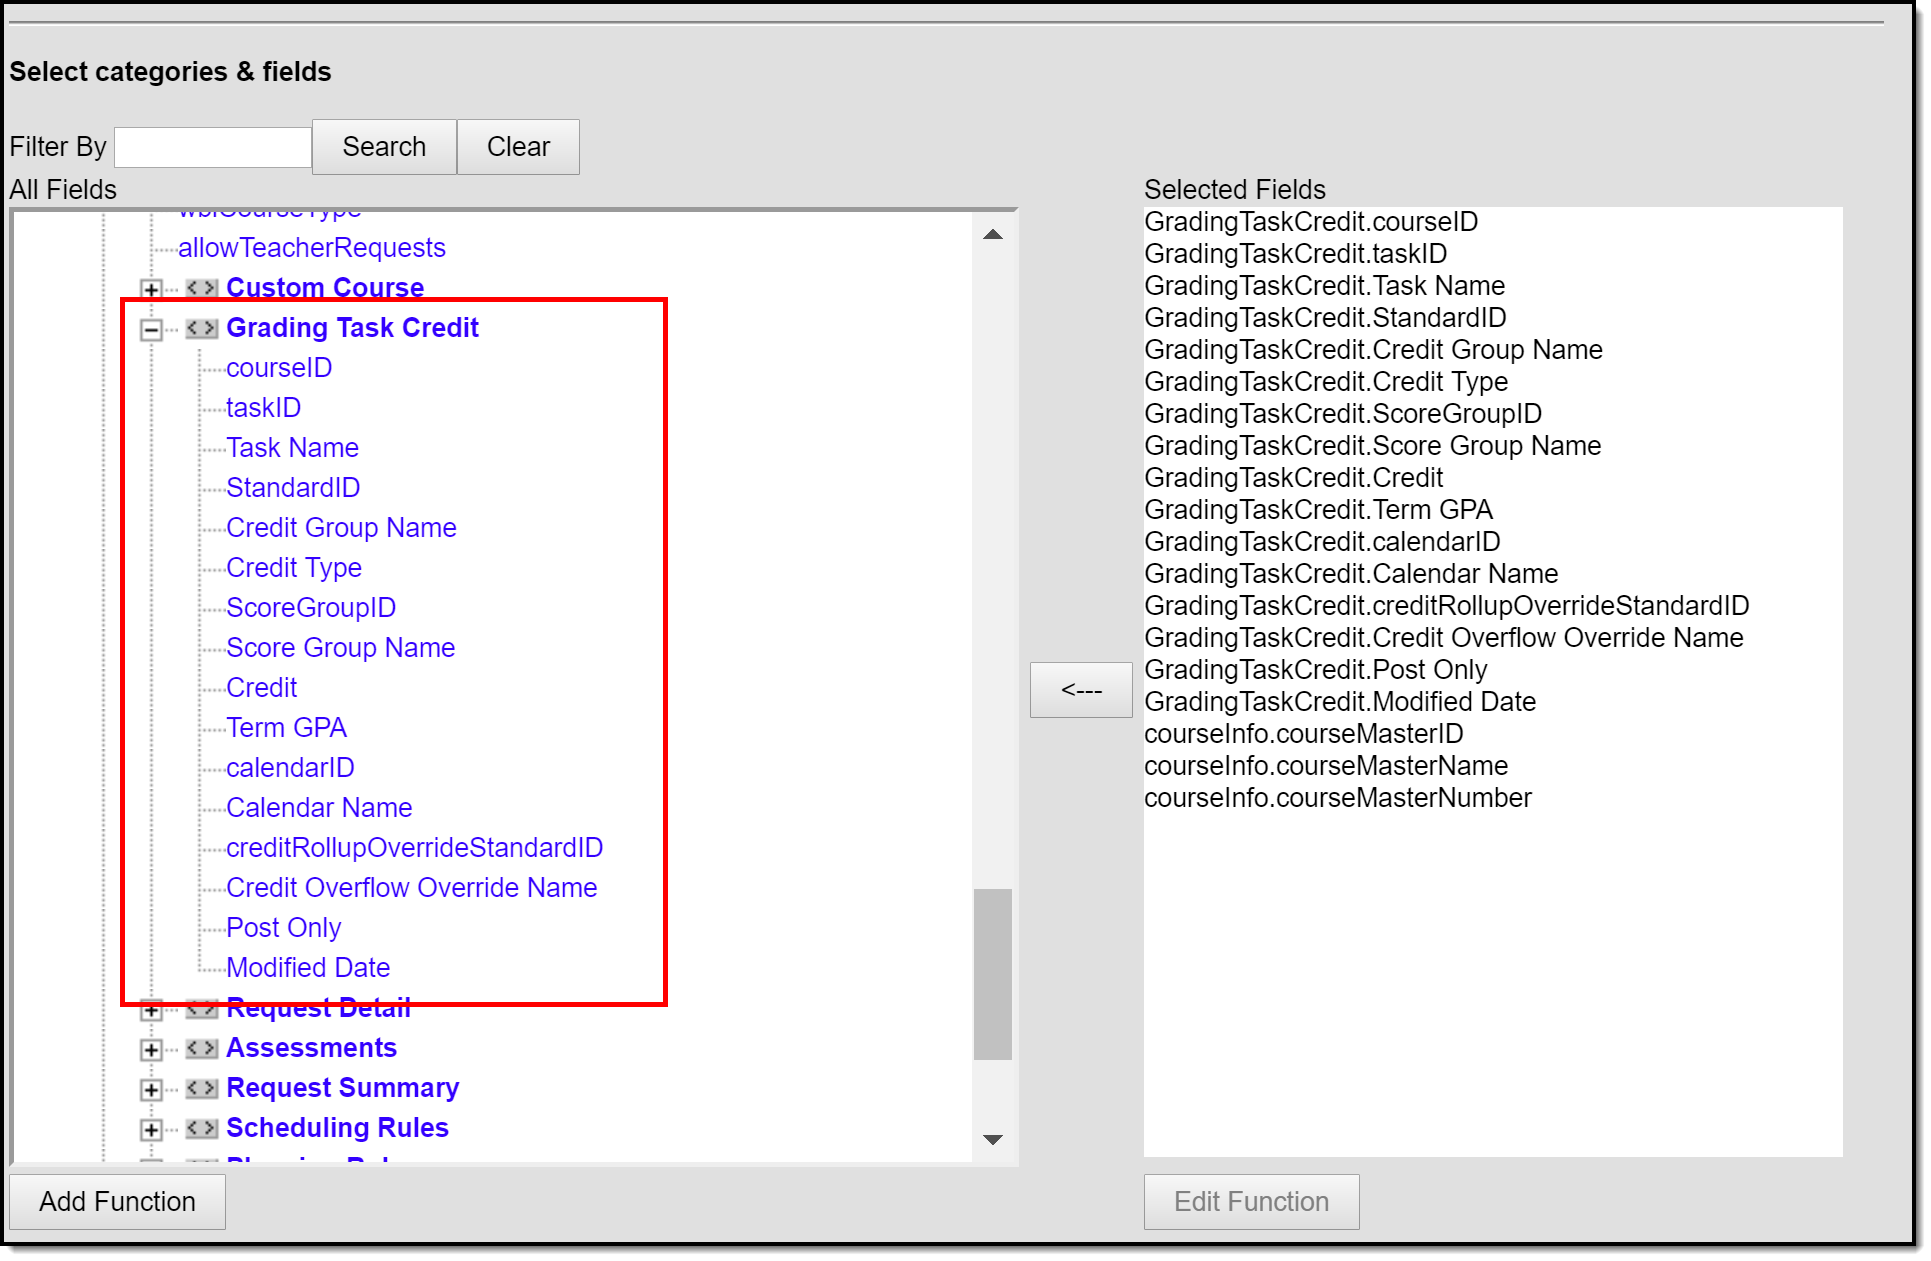
Standard Information in Ad hoc Query Wizard
Course Master Standard fields are available in the Query Wizard when using the Course/Section Data type in the Course > Course Information > Grading Task Credit folder.
 Standards Fields in Filter Designer
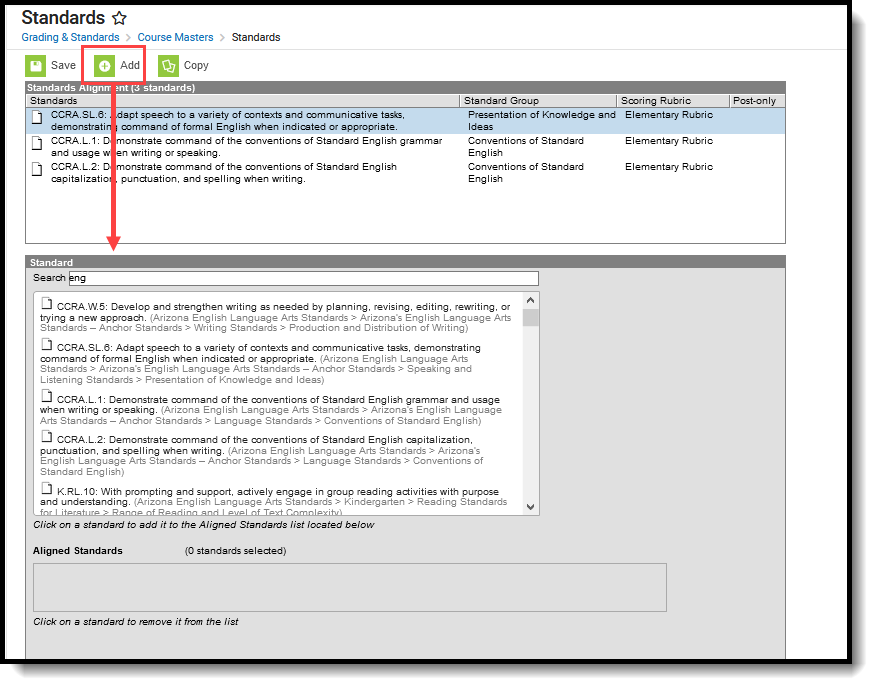
Add Standards
Select Add from the Action Bar. A Standard Detail window appears with a Search field and the expanded list of Standards. The search engine searches based on Abbreviation and standard Display Name. Only standards attached to the selected school on the School Standards tool appears in the selection list.
 Searching for a Standard
The results window lists the full Standards Bank in expanded form. Users can manually scroll through this list if desired. Standards are listed as follows: Abbreviation: Display Name (Location). After selecting a standard, a blue checkmark icon appears next to the name of the standard in the search results and the standard is added to the Aligned Standards section.
Multiple standards can be added to a course within one save action. A checkmark icon appears next to each selected Standard in the search list. Users can then mark the appropriate Term Mask, which determines when the standard is assessed.
Users can also mark the Post-only Standard checkbox. This checkbox indicates teachers cannot align assignments or categories to the standard. Post-only standards are only used for posting scores, not for tracking student progress. When the checkbox is marked, an X displays in the Standards Alignment table in the Post-only column.
Standards that are assessed multiple times can be added, as well as standards that are assessed once (called One-Time Standards). See the Standards Bank article for more information on One-Time Standards and general Standards setup.
It is recommended that users add standards to courses by term in order to utilize en masse updating options on Term Mask.
To remove a Standard, click the Standard in the Aligned list or in the search results.
Click Save to add the selected standard(s) to the course.
If a school has not added a Standard in the School Standards tool, a message appears when a user attempts to add a standard to a course.
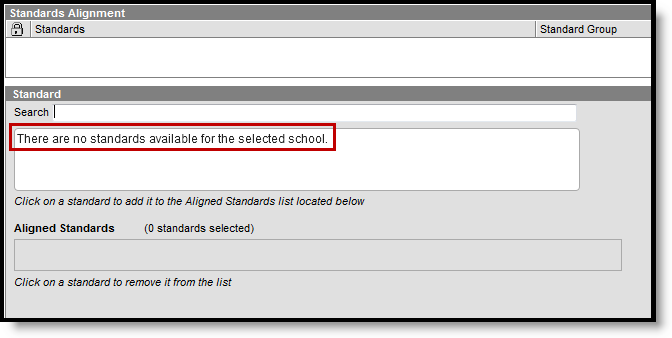 No School Standards Selected
Delete a Standard from a Course Master
- Select the Standard to delete from a course from the Standards Alignment table.
- Click the Delete icon. A warning message appears indicating the standard is about to be deleted. A warning message appears indicating the Standard is about to be deleted. If the Grading Task is used in a composite grade calculation, that calculation must be edited to not use the Standard that's being deleted.
- Click OK to continue or click Cancel.
Users cannot delete a standard if scores have been entered for it.
Copy a Standard to Another Course Master
The entire Course Master can be copied from one school to another using the Copy button on the Course Master Info tool.
Use the Copy icon to easily add the Standards associated with one Course Master (called the Source Course Master) to one or more other Course Masters in the same Course Catalog (called Destination Course Masters). The Copy icon displays when proper tool rights are assigned.
When copying standards from one course master to another:
- The Course Catalogs must be the same for the source course master and the destination course master.
- Standards that already exist in the destination course master are not copied again. This means when five standards are selected to be copied in the source course master, but three of those already exist in the destination course master, only the two that do not exist in the course master are copied.
- When a Course Catalog is locked for standards, the copy process pushes the standard to the destination courses.
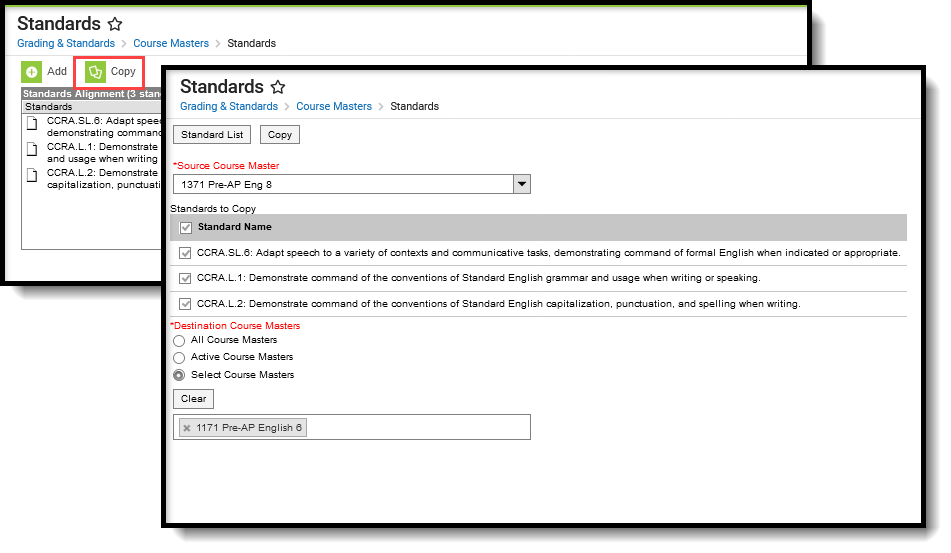 Copy Course Master Standards
- Select a specific standard to copy or just click the Copy icon without selecting a standard. When a specific standard is selected to copy, that standard is the only one selected to copy; when no standards are selected to copy, all of the standards in that Course Master are automatically selected to copy.
- Select the Source Course Master from the dropdown list. This displays the course master to which the current standards are assigned. To change this selection, begin typing in the dropdown field.
- Mark the Standardsto Copy. Or, clear the selections by clicking the checkbox in the gray Standard Name header.
- Select the Destination Course Master:
- All Course Masters: copies standard(s) to all course masters in the course catalog.
- Active Course Masters: copies standards(s) to all course masters in the course catalog that currently have the Active flag marked.
- Select Course Masters: copies standards(s) to the selected course masters. To select a master, type the Number or Name in the search field. Multiple masters can be selected. Click Clear to remove all masters from the list.
- Click the Save button to copy the selected standards to the destination course master. This action saves the selection; the standards are not copied until a school year is selected (see the information below).
When the copy is complete, and the catalog is locked, an alert displays asking to which calendar years the information should be pushed. Select the school year from the dropdown and click OK.
A confirmation displays indicating the selected standards from the Source Course Master have been copied to the Destination Course Masters. At this point, the standards are copied and are displayed on the Course Master Standards tool of the Destination Course Master(s).
If there are no standards to copy, an alert displays indicating all selected standards already exist in the destination course master.
To return to the main view of Course Master Standards, click the Standards List button.
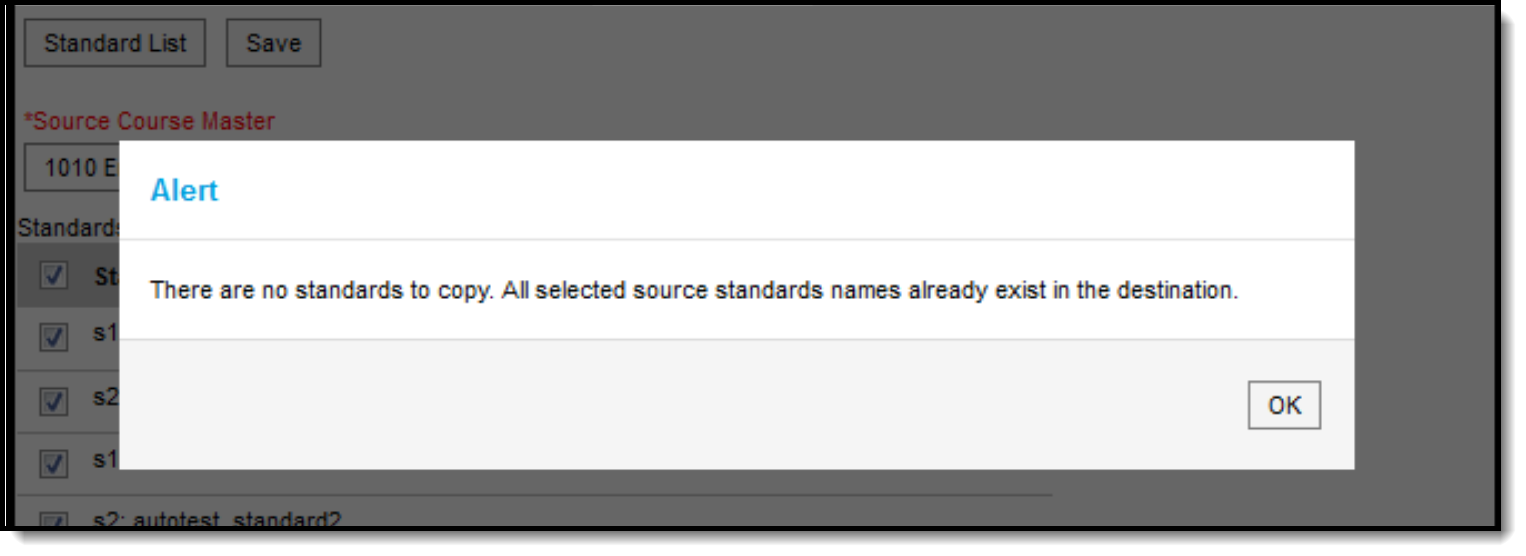 Alert Indicating No Standards were Copies