This article provides some step-by-step recommendations and best practice instructions for Food Service end of school year processes. This includes student account and PIN processes, mailing letters to households concerning student balances, and terminal maintenance.
Inactivate Graduated Student Accounts
Tool Search: Account Management Wizard
Students must be marked as inactive after they have graduated from school. The student's PINs can be removed and returned to Campus for future use by other students. The Mode options under the Account Management Wizard provide options for users to manage student account information and balances.
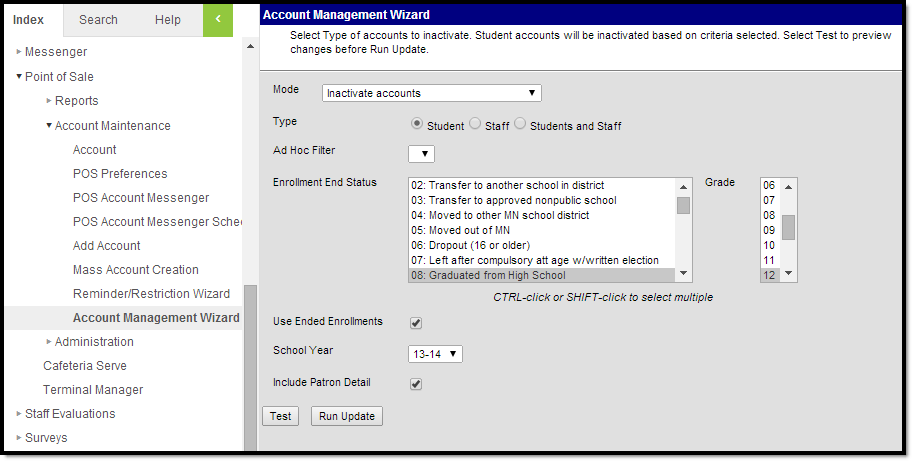
- Select Inactive accounts from the Mode dropdown.
- Choose the Student option as the Type.
- Optional: select an Ad Hoc Filter.
- Scroll down the Enrollment End Status field and select Graduated from High School.
- Select the appropriate grade (e.g., 12) from the Grade field.
- Mark the Use Ended Enrollments box.
- Select the current School Year that is ending.
- Mark the Include Patron Detail box to view student names with the total number of graduated students.
- Click the Test button to view the results of the report before making changes to the database. To finalize these changes, click on Run Update. The results appear in another window.
Remove Student PINs
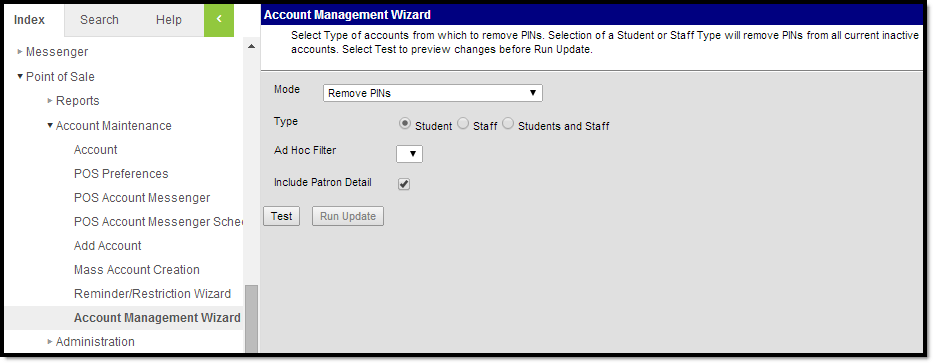
- Select Remove PINs from the Mode dropdown.
- Choose the Student option as the Type.
- Select the Ad Hoc Filter from the dropdown options to narrow the number of students whose PINs will be removed.
- Mark the Include Patron Detail box to view student names instead of just the total number of graduated students.
- Click the Test button to view the results of the report before making changes to the database. To finalize these changes, click on Run Update. The results appear in another window.
Inactivate Graduated Student Accounts and Remove Student PINs
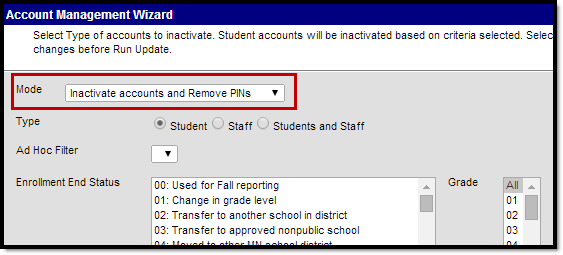
You can also mark graduating student accounts as inactive and remove their PINs from the system at once by selecting Inactive accounts and Remove PINs from the Mode dropdown and completing the report editor. With this option, an Ad Hoc Filter is not necessary to remove PINs - the student's PINs that are removed are those with the selected Enrollment End Status. For end-of-year purposes, this is due to graduation. This option is used most often by districts.
Adjust Inactive Student Account Balances
Inactive student accounts with positive or negative balances at the end of the school year can be adjusted. This leaves a description of the adjustment on the student's Journal tab.
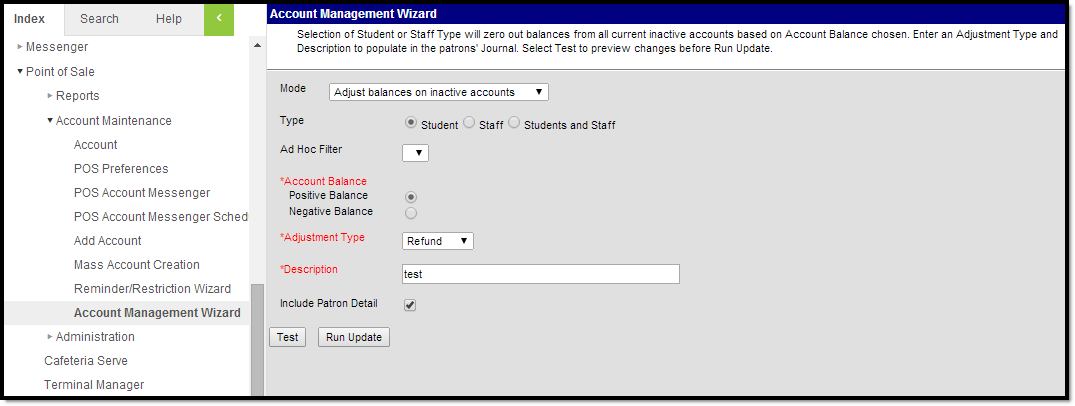
- Select Adjust balances on inactive accounts option from the Mode dropdown.
- Choose the Student option as the Type.
- Select an Ad Hoc Filter. (Optional)
- Mark either Positive Balance or Negative Balance as the Account Balance option.
- Choose an Adjustment Type. Default options include: Bad Debt, Refund, and Write-Off.
- Include a Description of the adjustment.This description can be seen on the Portal by parents as well as on the student's Journal tab.
- Mark the Include Patron Detail box to view student names instead of just total numbers.
- Click the Test button to view the results of the report before making changes to the database. To finalize these changes, click Run Update. The results appear in another window.
Run the Adjustment Report
Tool Search: Reports
After student accounts have been adjusted, districts can reference these changes by running an Adjustment Report to view these records.
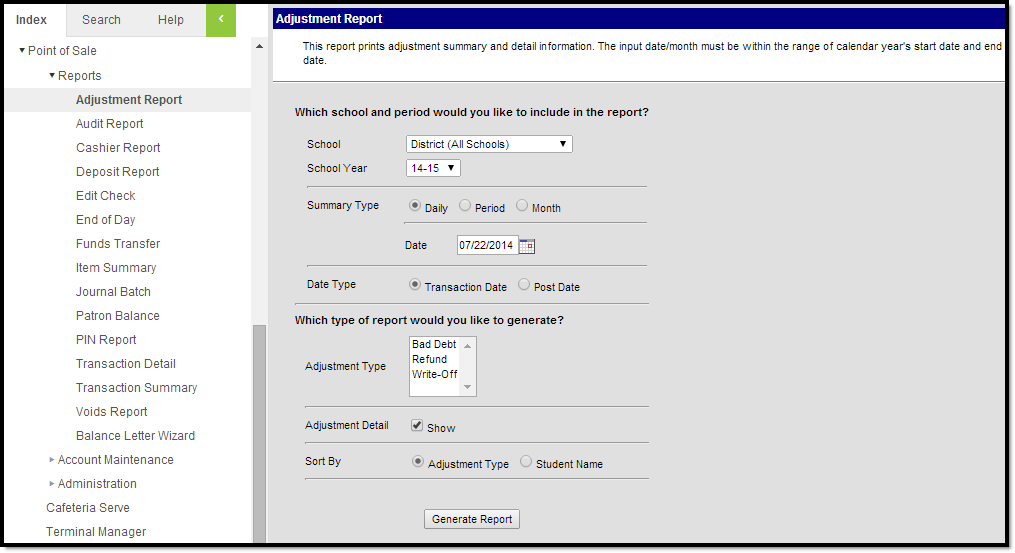
- Select an individual school or choose District (All Schools) from the School dropdown.
- Select a School Year.
- Select a Summary Type. Options include: Daily, Period, and Month.
- Select a Date Type. Options include the Transaction Date or the Post Date.
- Choose an Adjustment Type for the report. Default options include: Bad Debt, Refund, and Write-Off.
The Date options depend on the Summary Type selected. For any date, the input date must be within the range of the calendar year's start date and end date. Input a day, start date, and end date, or month in which to run the report.
- Mark the Adjustment Detail box.
- Select how you would like to sort the report from the Sort by options: Adjustment Type or Student Name.
- Select Generate Report. The results appear in another window.
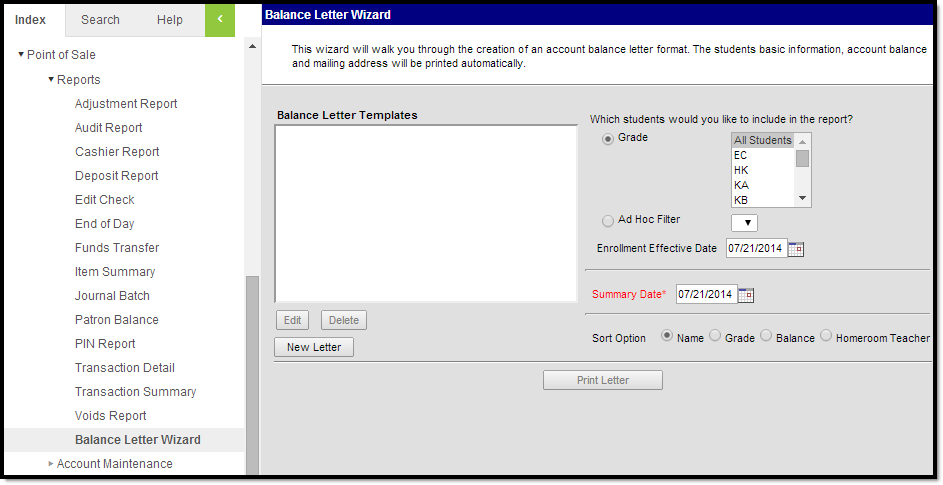
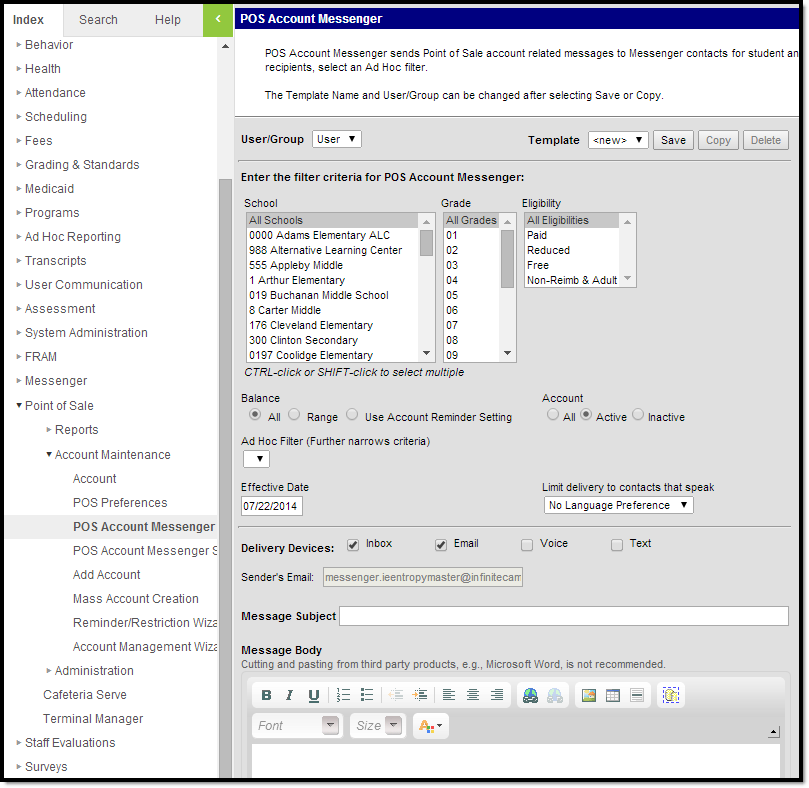
Send Letters to Households
Districts can send out letters to households notifying them of the student's account current balance through the Patron Balance report. Districts can also send a letter with the use of the Balance Letter Wizard or through POS Account Messenger.
To send a letter to a household regarding an account's low balance through the Patron Balance report:
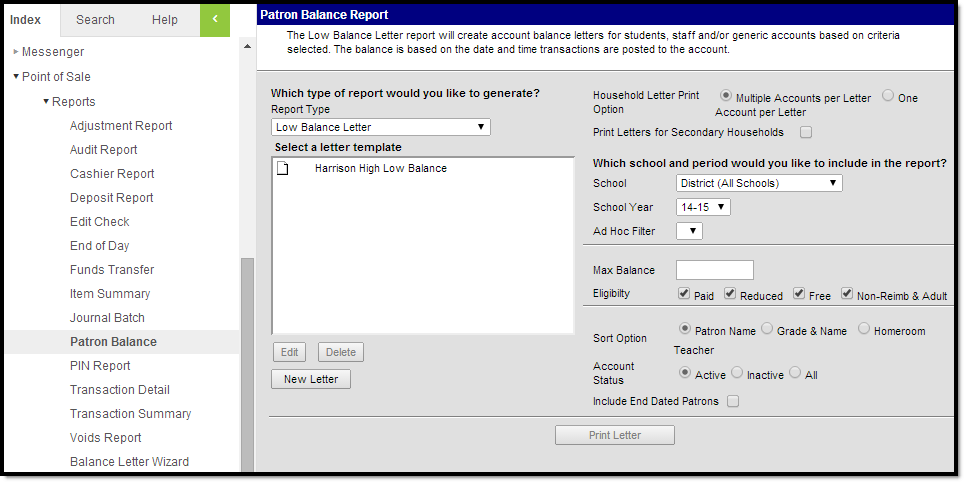
- Select Low Balance Letter from the Report Type dropdown.
- Choose a Household Letter Print Option. Select Multiple Accounts per Letter if there are multiple students with Food Service accounts residing in the same household or select One Account per Letter.
- Mark the Print Letters for Secondary Households check box. (Optional)
- Reports can be run for individual schools and all schools in the district. Select a school or choose District (All Schools) from the School dropdown.
- Select a School Year.
- Select an Ad Hoc Filter. (Optional)
- Input a Maximum Balance value. (Optional)
- Select Eligibility options. Check box options include: Paid, Reduced, Free, and Non-reimb & Adult.
- Select Sort Options. Options include: Patron Name, Grade & Name, and Homeroom Teacher.
- Select an Account Status. Options include: Active, Inactive, and All.
- Mark the Include End Dated Patrons check box. (Optional)
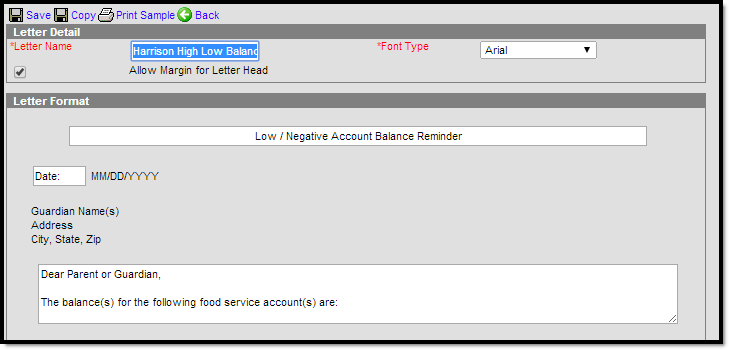
- Select an existing template from the Select a letter template options or create a new template by selecting New Letter without selecting a template. Complete one of the following options:
Option Procedure Select a letter template If a template is selected, click Edit. A template letter detail will appear.
Anything in a white text box will print as it shows in the detail editor.New Letter If a template is not selected, click New Letter and create a new template.
13. After the letter editor detail is modified to fit your specifications, click Save, Copy, Print Sample, or Back to further edit the letter options.
14. Select Print Letter.
For more details about Patron Balance information and reporting, see the Patron Balance page.

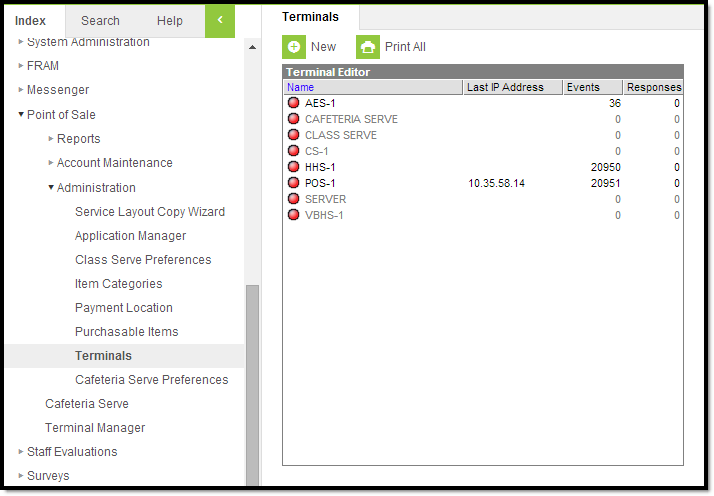
Terminal Maintenance
Tool Search: Terminals
The Events column of the Terminals editor of Point of Sales Administration should be at or very close to 0 (zero) for all terminals on or after the last day of serving. A terminal that has events that only increase and do not reduce may indicate a terminal is no longer in use. To keep performance and messaging optimal, terminals no longer in use should be deactivated.
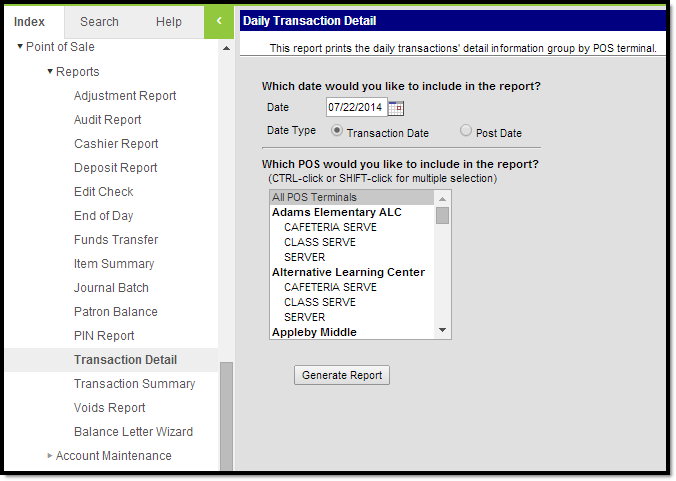
Best practices for verifying that the Event column is accurate for the Point of Sale terminals:
- It is recommended that cashiers write down the name of the last student who went through their lunch line on the last day of school.
- Generate a Daily Transaction Detail Report for the last day of school and check for the name of the student who went through the lunch lines last to verify the last transaction has been posted successfully.
Deactivating Terminals
Once the last successful transaction has been verified, the terminals that will not be used until the following school year can be inactivated.
This can be done by:
- Going to Point of Sale > Administration > Terminals.
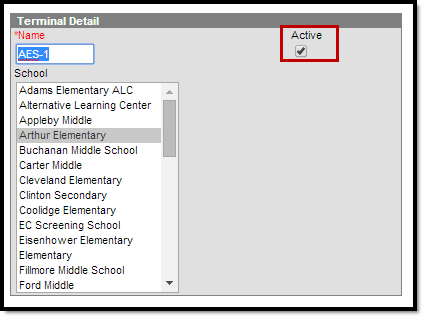
- Select a Terminal; a Terminal Detail will appear for that terminal.
- Unmark the Active check box.
- Save.
When the next school year is about to begin, mark the terminal as Active once more and complete a POS Data Reload. For instructions on the POS Data Reload process, see the Terminal Manager page.