Tool Search: Element Replacement
The Element Replacement tool allows users to replace deactivated Ad hoc fields with the current field equivalent within Ad hoc filters, Ad hoc Letter templates, Behavior Letter templates, Attendance Messenger, Attendance Letters and Messenger templates. This tool also allows users to modify existing filters and templates containing deactivated Ad hoc fields without having to navigate away from the tool or replace the element with its current field equivalent. Additionally, replacing a field with the Element Replacement tool will replace the field and the operator's value if the replaced field was being used as the value.
 Element Replacement Wizard
Users must have at least R(ead) tool rights for this tool in order to replace deactivated Ad hoc elements.
For more information about Tool Rights and how they function, see the Tool Rights article.
Replace Deactivated Ad Hoc Fields
User can replace deactivated Ad hoc fields with the current field equivalent within Ad hoc filters and letter templates by using the Element Replacement tool.
 Replacing Deactivated Elements
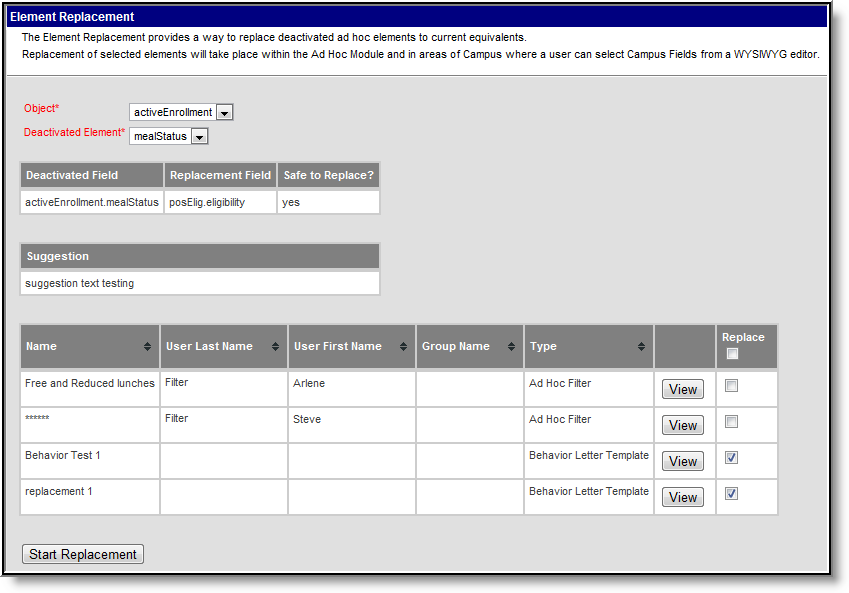
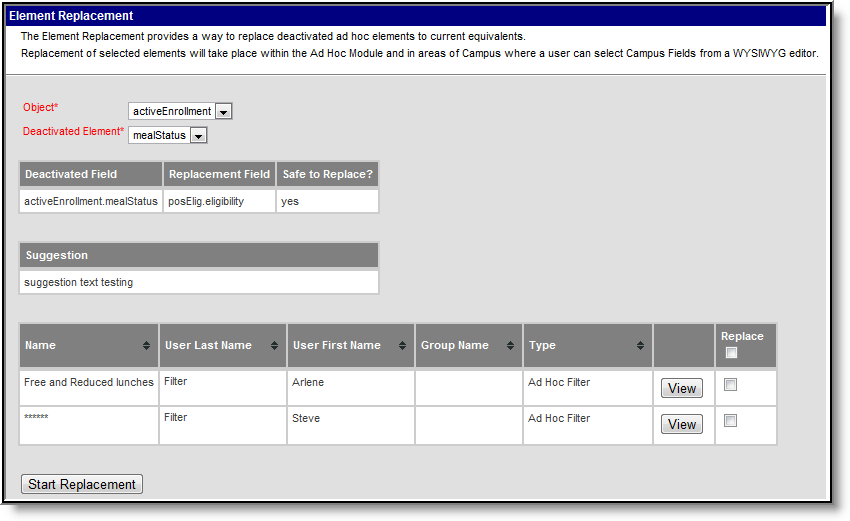
- Select the Object containing the deactivated element.
- Select the Deactivated Element to be replaced. In the example above, the field activeEnrollment.mealStatus is going to be replaced.
- Once an Object and Deactivated Element value is selected, additional informational fields will appear.
- Deactivated Field - This indicates the deactivated field that is going to be replaced.
- Replacement Field - This indicates the field that is going to replace the deactivated field.
- Safe to Replace?
- Yes - Indicates conversion between the deactivated field and the replacement field can occur without issue. Users are safe to replace elements with this value.
- No - Indicates the replacement field does not correctly match the deactivated field and conversion issues may occur. Often this message occurs when the replacement field is a different data type than the deactivated field (i.e., a Date field is being replaced with a checkbox). Users should view each filter/template and determine if conversion should occur prior to replacing fields. See the Editing Ad Hoc Filters/Templates section below for information on viewing and modifying each filter.
- Suggestion - Additional suggestions about the field conversion.
- Review each filter/template impacted by the element replacement.
- Name - The name of the filter/letter template.
- User Last Name - The last name of the user who created and owns the filter/template.
- User First Name - The first name of the user who created and owns the filter/template. This user will receive a message in their Process Inbox, indicating the element and filter/template changed.
- Group Name - The User Group assigned to the filter/letter/template.
- Type - The type of item being changed: Ad hoc filter, Ad hoc Letter Template, Behavior Letter Template, Messenger Template
- To view and modify the filter/template, select the View button. See the Editing Ad Hoc Filters/Templates section below for more information.
- Mark the Replace checkbox for each filter/template to have the element replaced.
- Select the Start Replacement button. The Element Replacement Test Mode editor will appear.
The Element Replacement Test Mode editor will display a summary of all filters/templates that will have the field replaced. Verify the summary is correct and select the Continue with the Replacement button. The Element Replacement Result editor will appear.
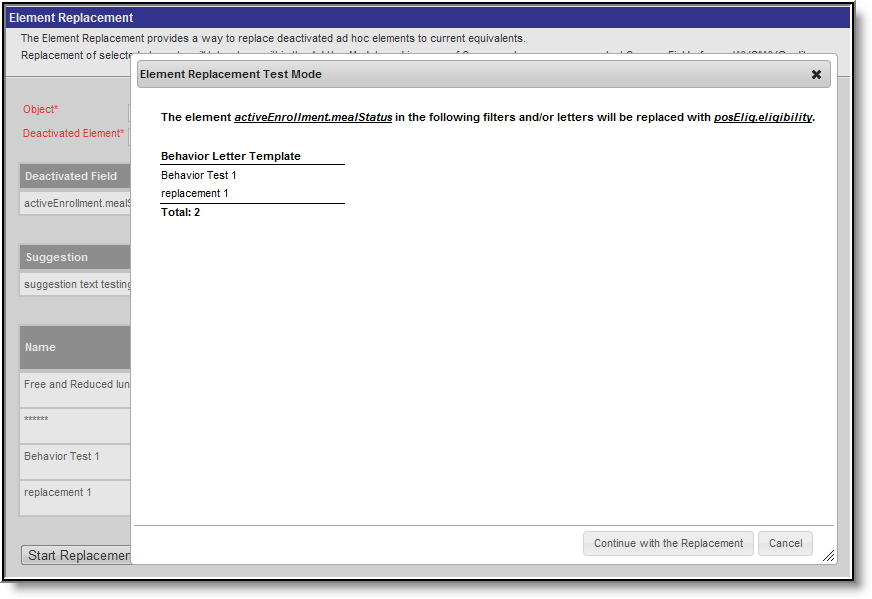 Element Replacement Test Mode
The Element Replacement Result editor summarizes which filters/templates were modified and allows you to print these results. To generate these results in PDF or DOCX format, click the Generate Report button, select a print format and click Generate Report. To continue without printing this report, click the OK button.
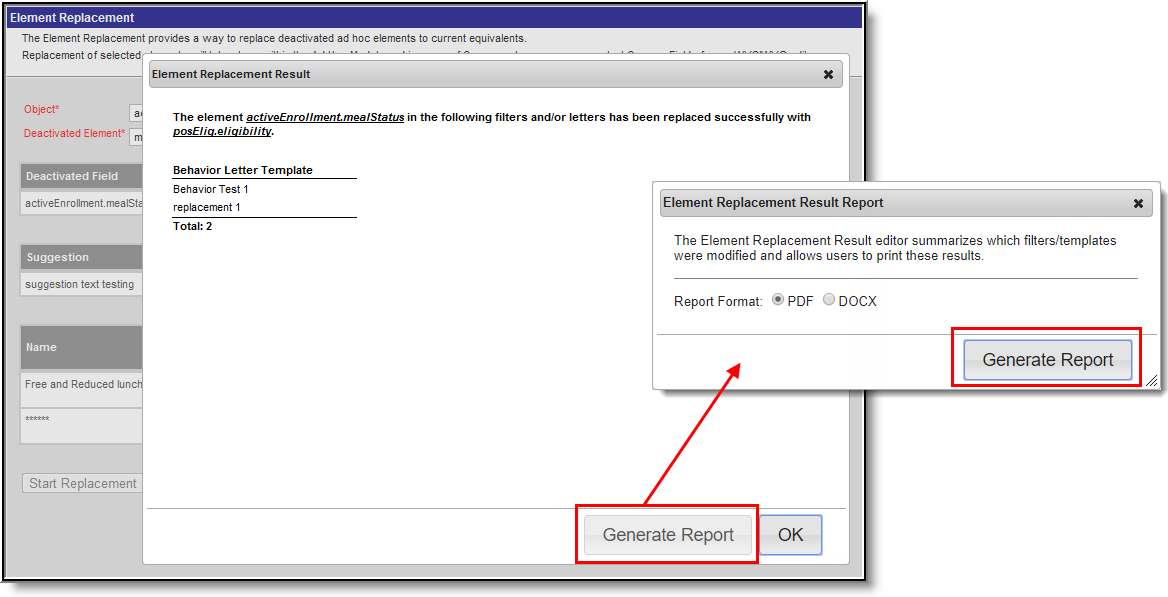 Element Replacement Result
The user and/or members of the user group assigned to the filter(s) updated will receive notification of these changes within their Process Inbox.
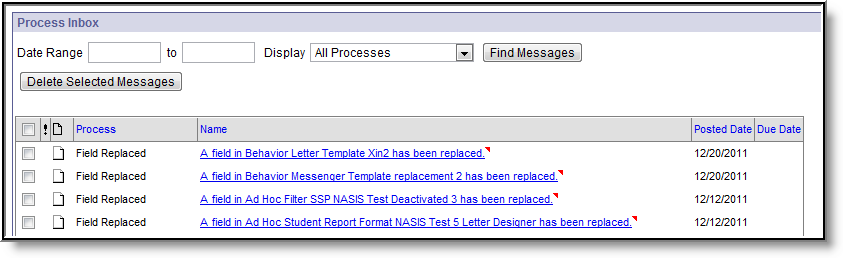 Message Indicating Filter/Template Change
The Element Replacement tool also displays an updated list of filters impacted by the Object and Deactivated Element values selected.
 Updated List of Impacted Filters/Templates
Edit Ad Hoc Filters and Templates
Users can identify which filters/templates are impacted by the Object and Deactivated Element selected and modify the filter/template within the Element Replacement tool. This allows users to remove a deactivated field instead of replacing it.
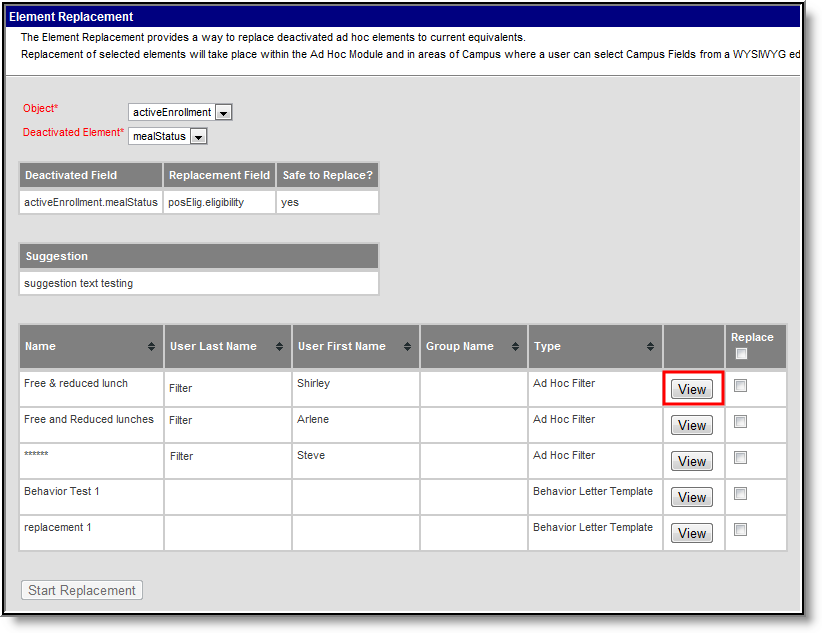 Viewing an Impacted Filter/Template
To view the current setup of a filter/template, select the corresponding View button. The Filter/Letter Viewer or Message Designer Wizard will appear.
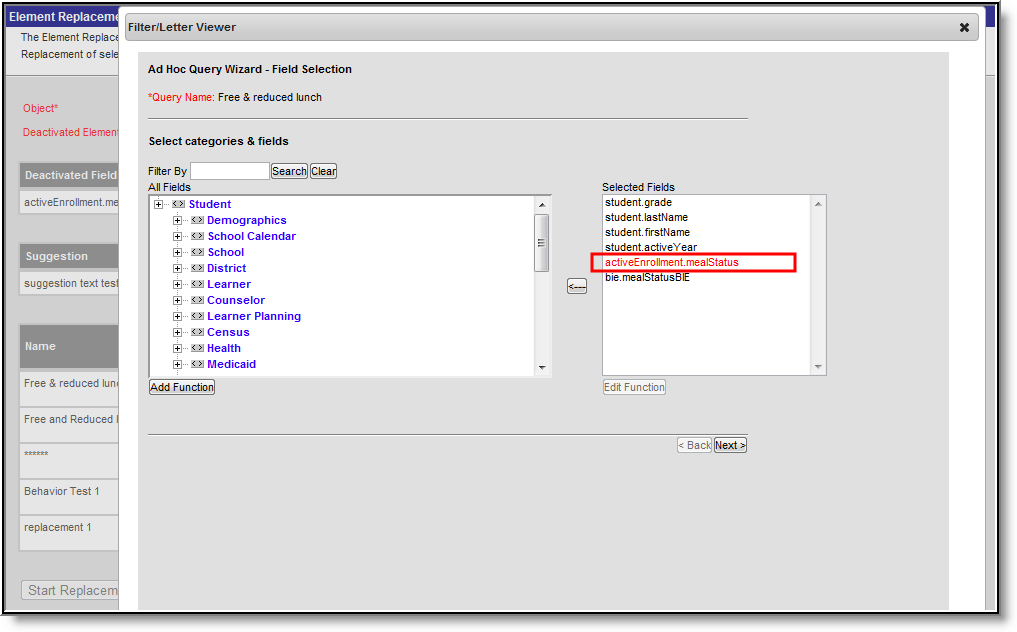 Modifying a Filter/Template
For the Filter/Letter Viewer, the deactivated field will appear in red. From here, users can modify and re-save the filter as necessary.
Deactivated fields will not appear in red within WYSIWYG editors due to the fact that users can modify font colors.
For the Message Designer Wizard, the deactivated field within the letter will match the field listed in the Deactivated Field on the Element Replacement editor. Users can modify and re-save the template as necessary.
Removing the deactivated field and re-saving a filter/template will remove the filter/template from appearing on the Element Replacement tool as it no longer requires element replacement.
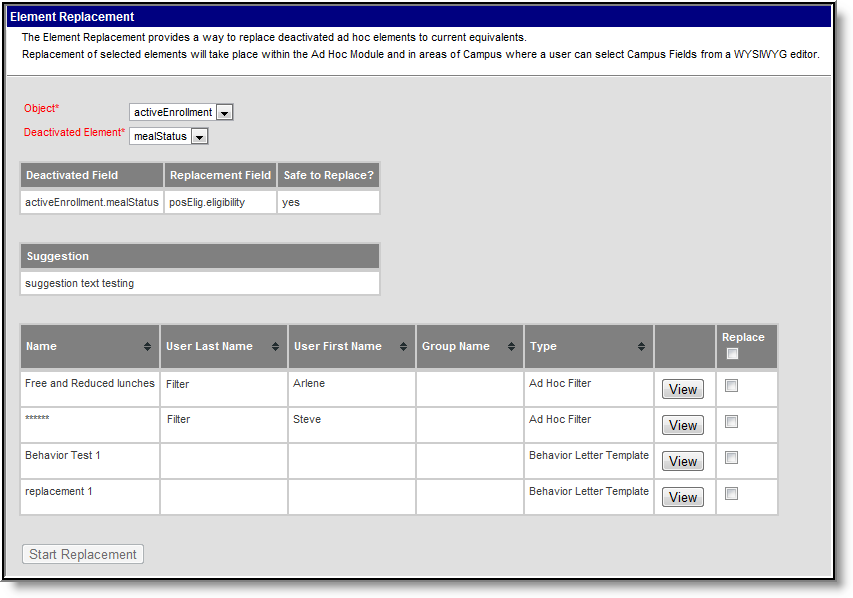 Element Replacement Tool
For example, the filter viewed above was modified and had the deactivated element activeEnrollment.mealStatus removed. Because this filter no longer requires the element to be replaced, the filter no longer reports on the Element Replacement tool.
