Location: Display Options > click Batch Edit
The Batch Edits options in the Display Options tool enable making mass updates to Display Options templates, and calendar and term settings. There are three types of batch tools available:
| Copy Template | Edit Templates | Edit Calendar and Term Settings |
| Click the Copy Template option to copy the source template's display options, either to a new template at the destination school, or by overwriting the options in existing template(s). | Click the Edit Templates option to make edits to the Display Options for multiple templates en masse. | Click the Edit Calendar and Term Settings option to update those settings for multiple schools en masse, which include the template assigned, whether access to a calendar has been enabled or extended, and when terms are enabled. |
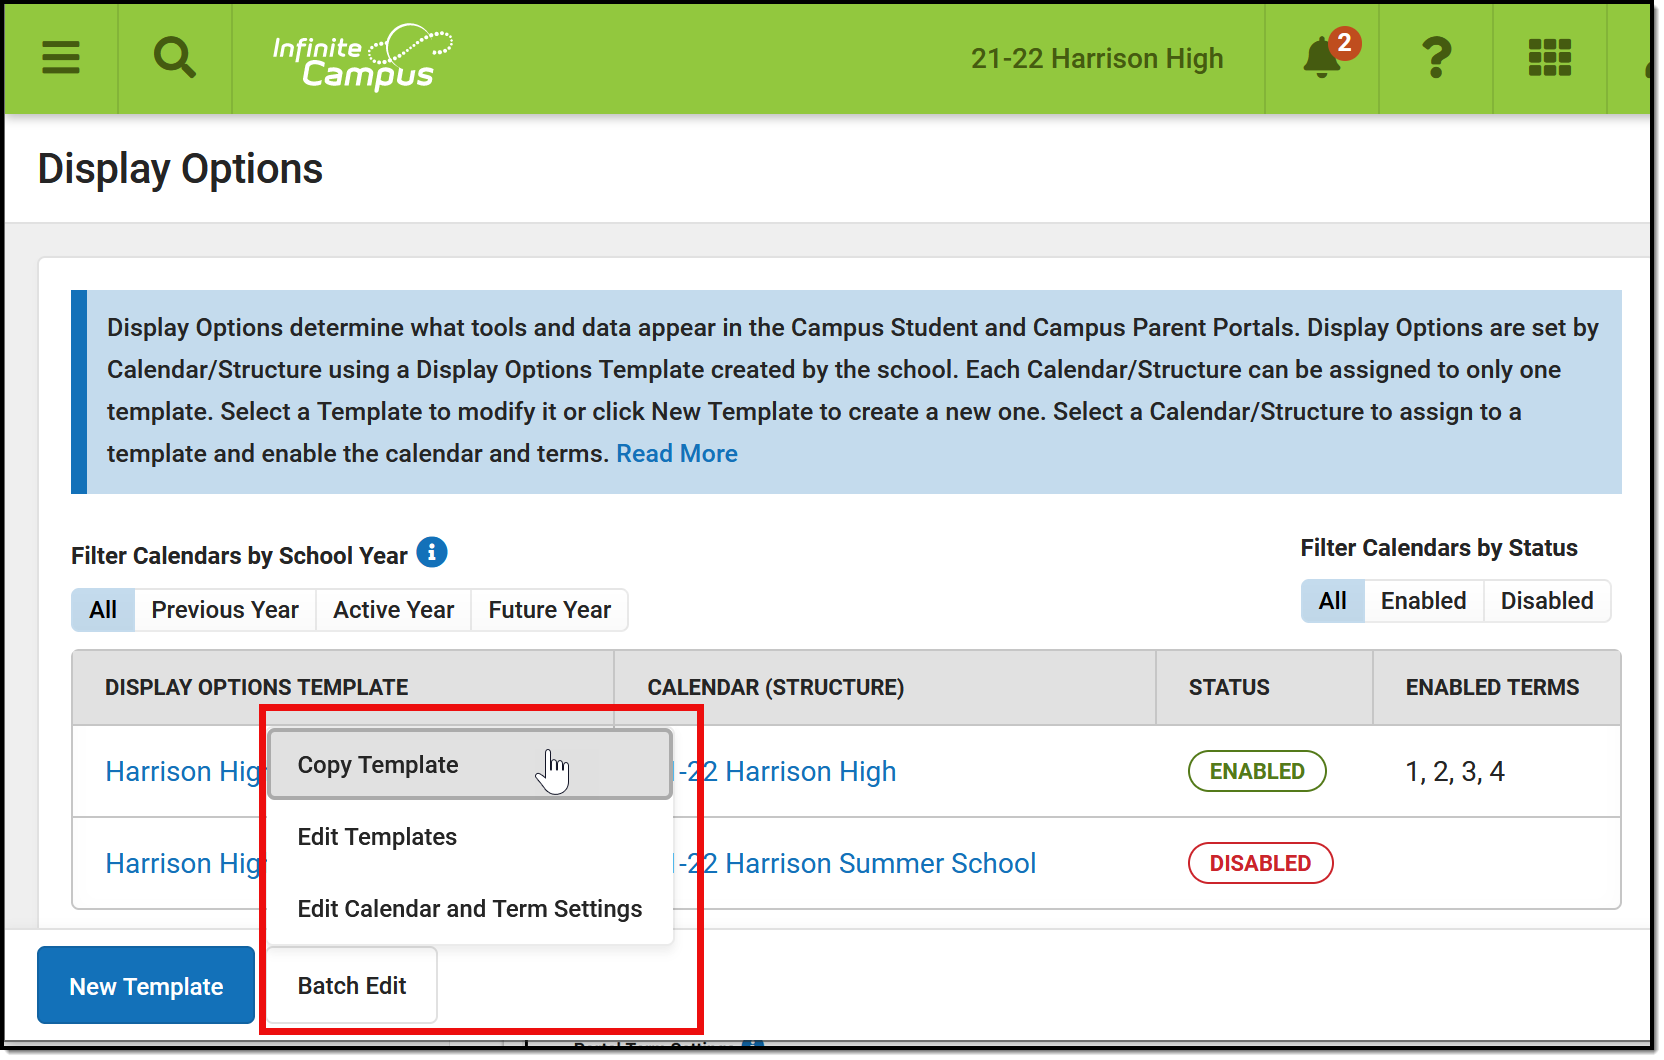 Select a Batch Edit option to copy a template or update templates or settings en masse.
Questions? Check out the Portal Preferences FAQ article.
Copy Template
Use the Copy Template option to copy a template in the source school to the destination school(s). The copied template can be added to the destination school(s) either as a new template, or replacing an existing template.
In the example portrayed below, I'm copying a template I've made in one elementary school to all elementary schools in the district, to save time setting up each school's template.
| Click to enlarge | ||
Step 1 | First, select the Source School and Source Template that will be copied. Click View to see the display options and settings of the selected template. | 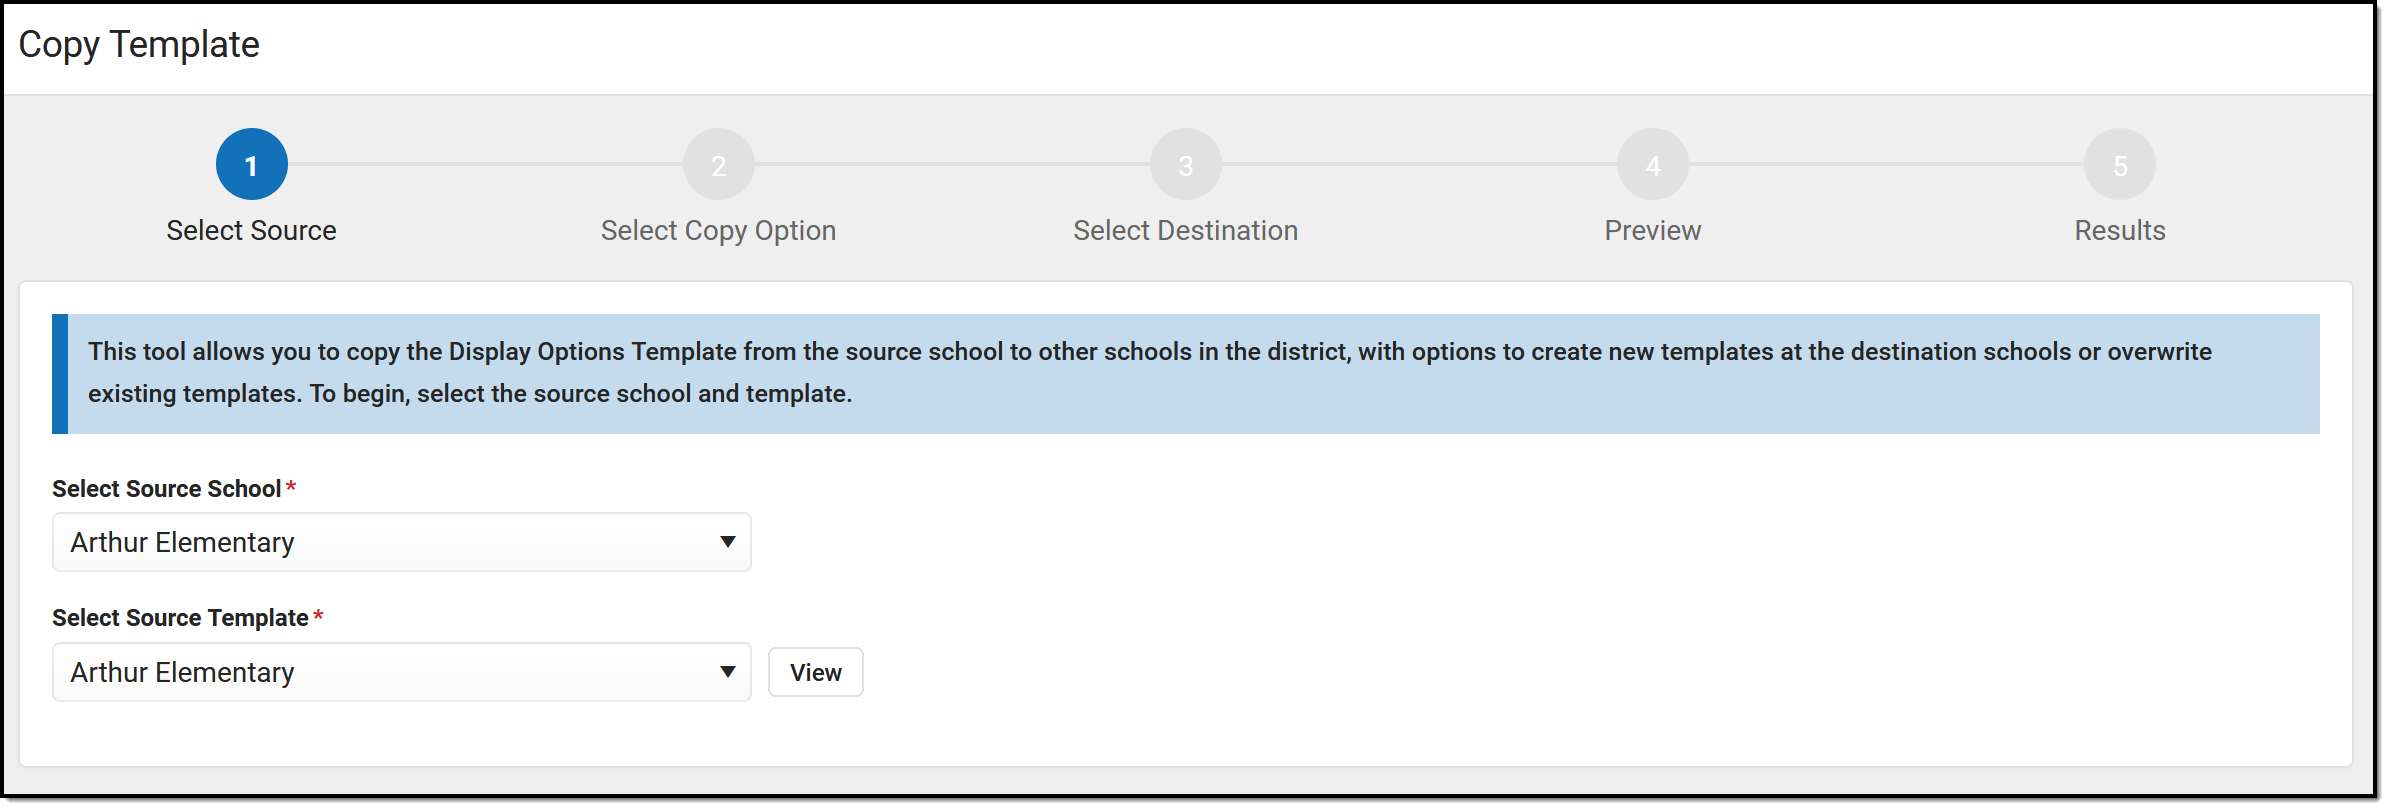 |
Step 2 | Next, indicate if the copied template should be added as a New template in the destination school(s) or if it should Update an existing template. Note: Updating an existing template overwrites the current options selected, except the name and description. | 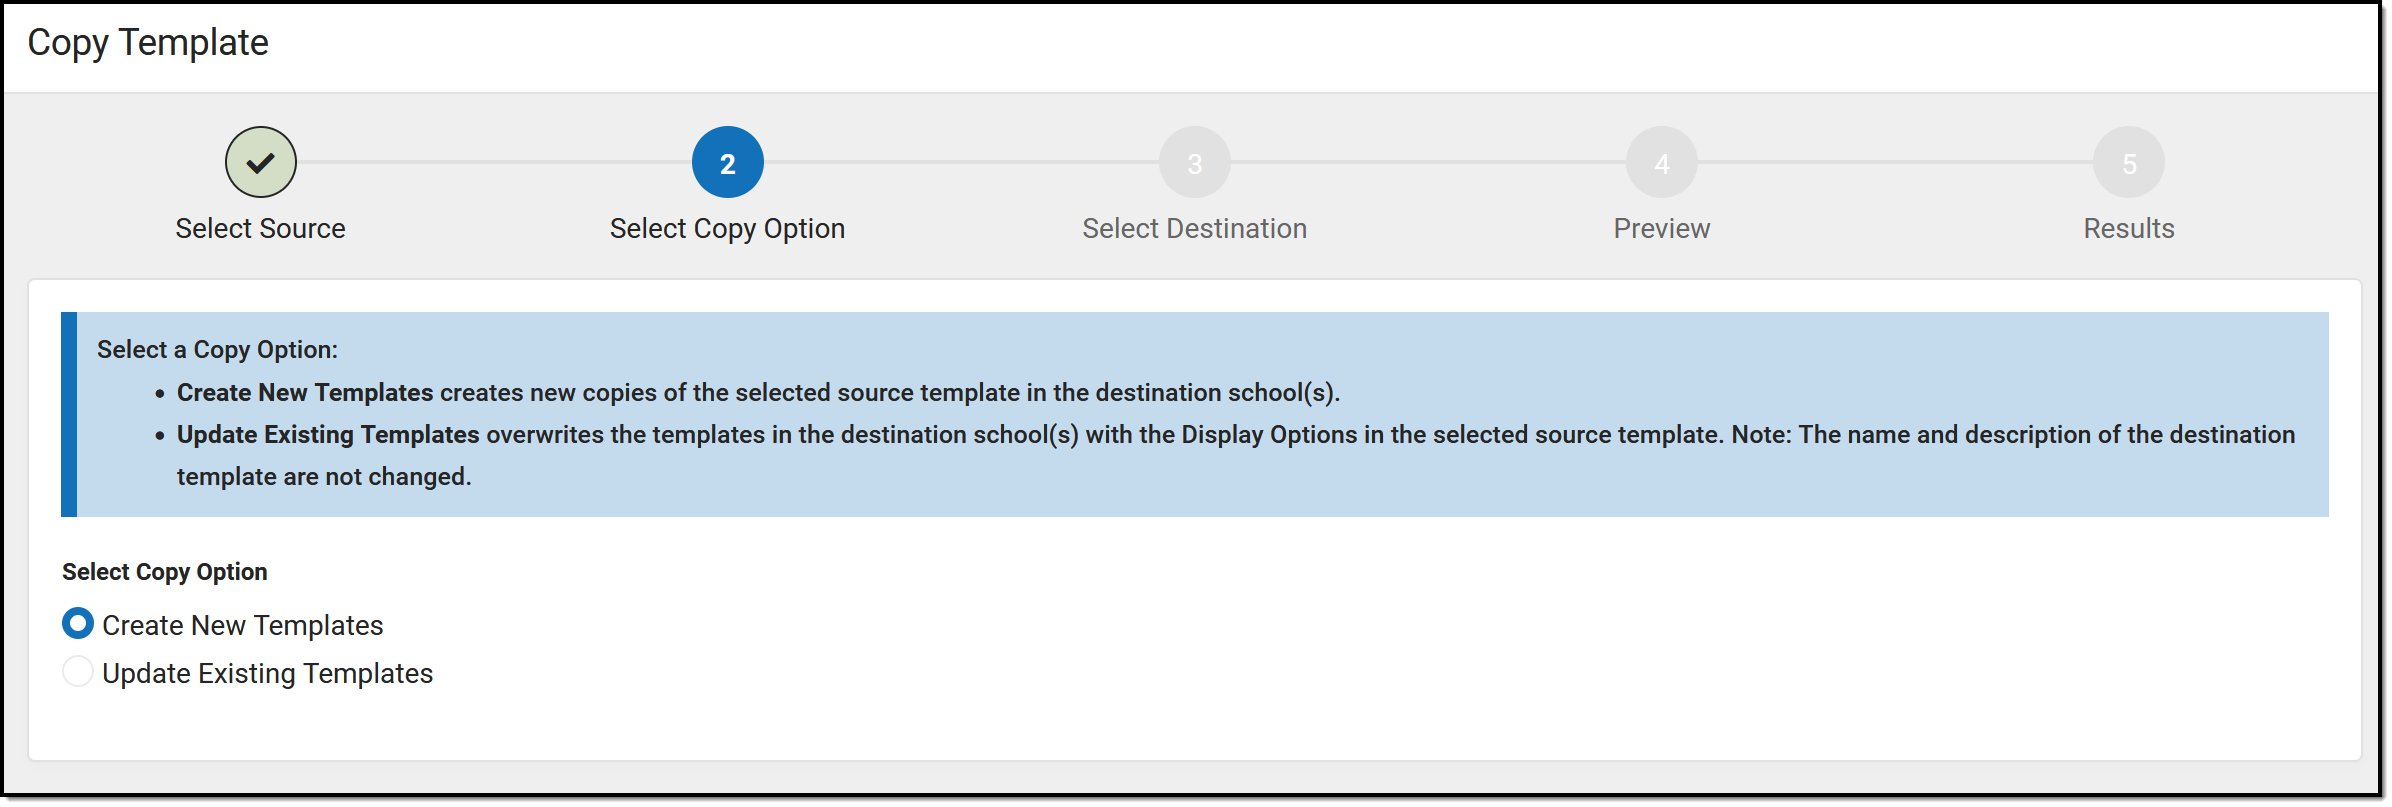 |
Step 3 | In the third screen, select the Destination school(s) that will receive the copied template. Filter the list of schools using the text field at the top, if desired. Enter a Name for each template, and a Description if desired. Or, use the fill options for Name and/or Description. The Fill dropdown includes options to append or prepend the template with the school name. In this example, I am copying the calendar from Arthur Elementary to all my other elementary schools, so I filter the list by only elementary schools, select all of them using the checkbox in the header, and then unmark Arthur, since that school is the source of the template I'm copying. I then filled the Template Name fields with the name Summer School and prepend with each school's name. |  |
Step 4 | Prior to copying the templates, review your changes. Click Create if creating new templates, or Update if updating existing ones. Remember, updating a template overwrites it's options with those selected in the source template. | 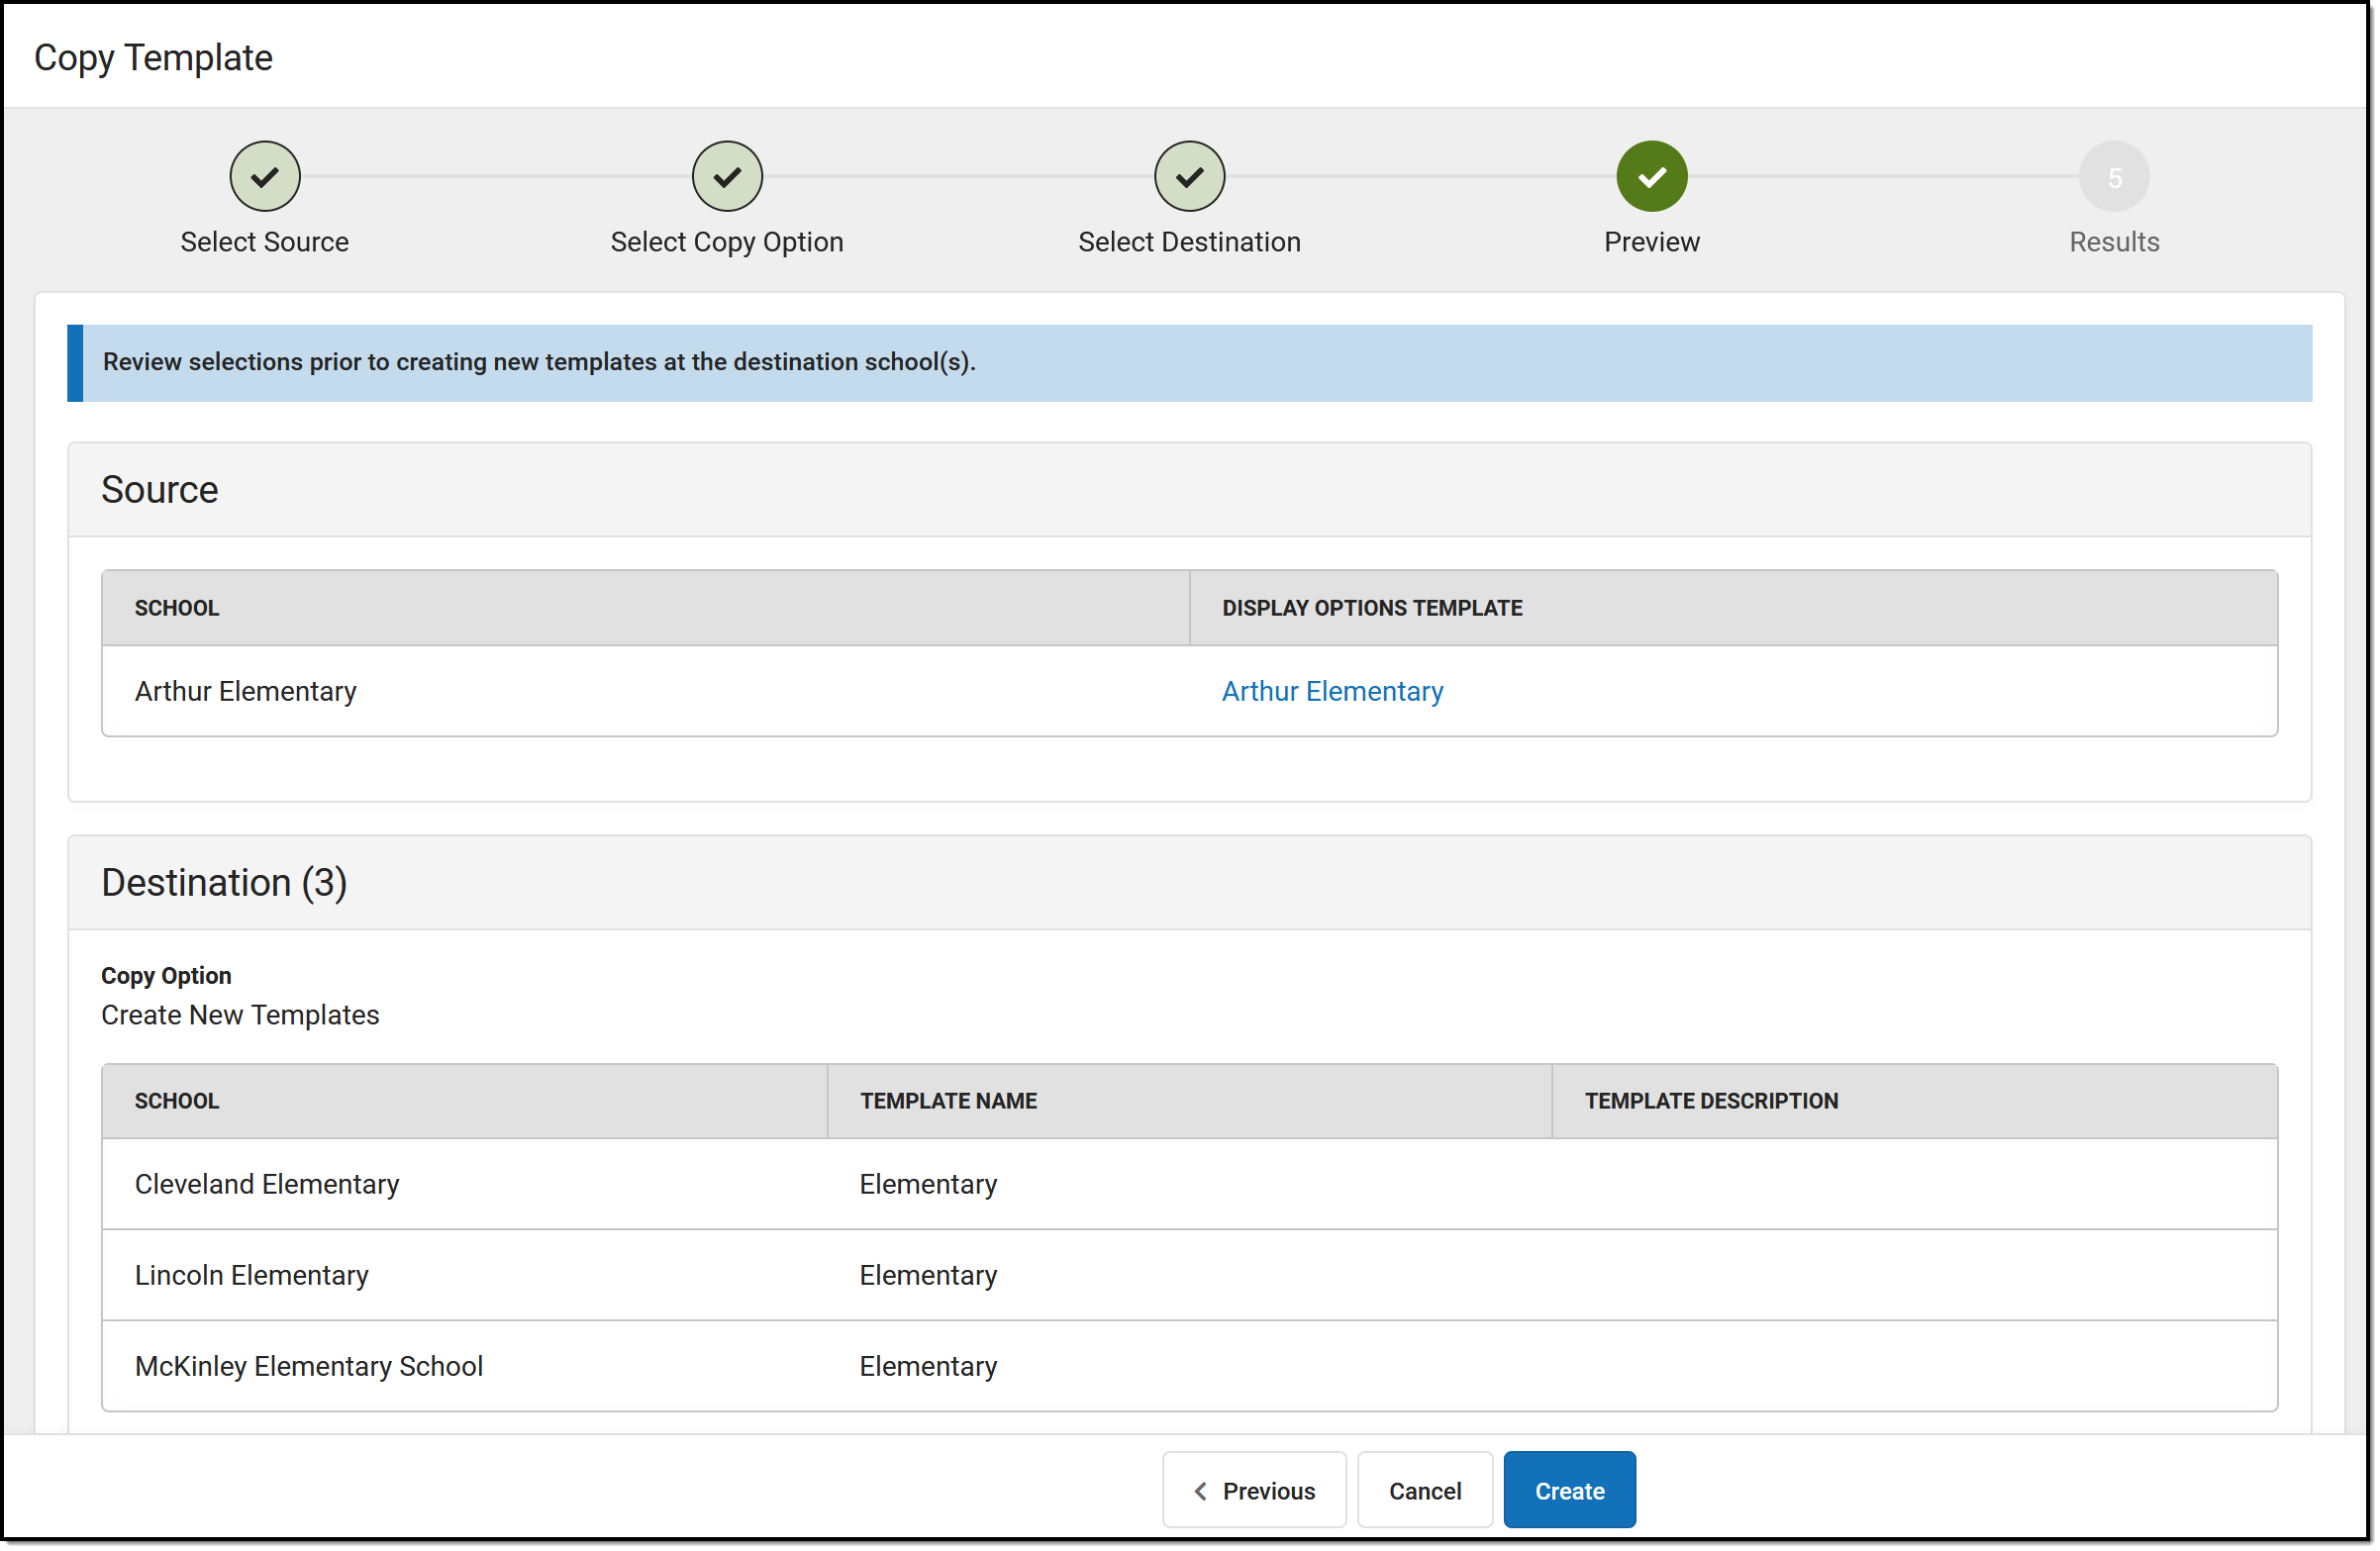 |
Step 5 | Once templates have been created or updated, the results screen displays, summarizing the templates created or updated. Click Repeat to return to the beginning of the Edit process. | 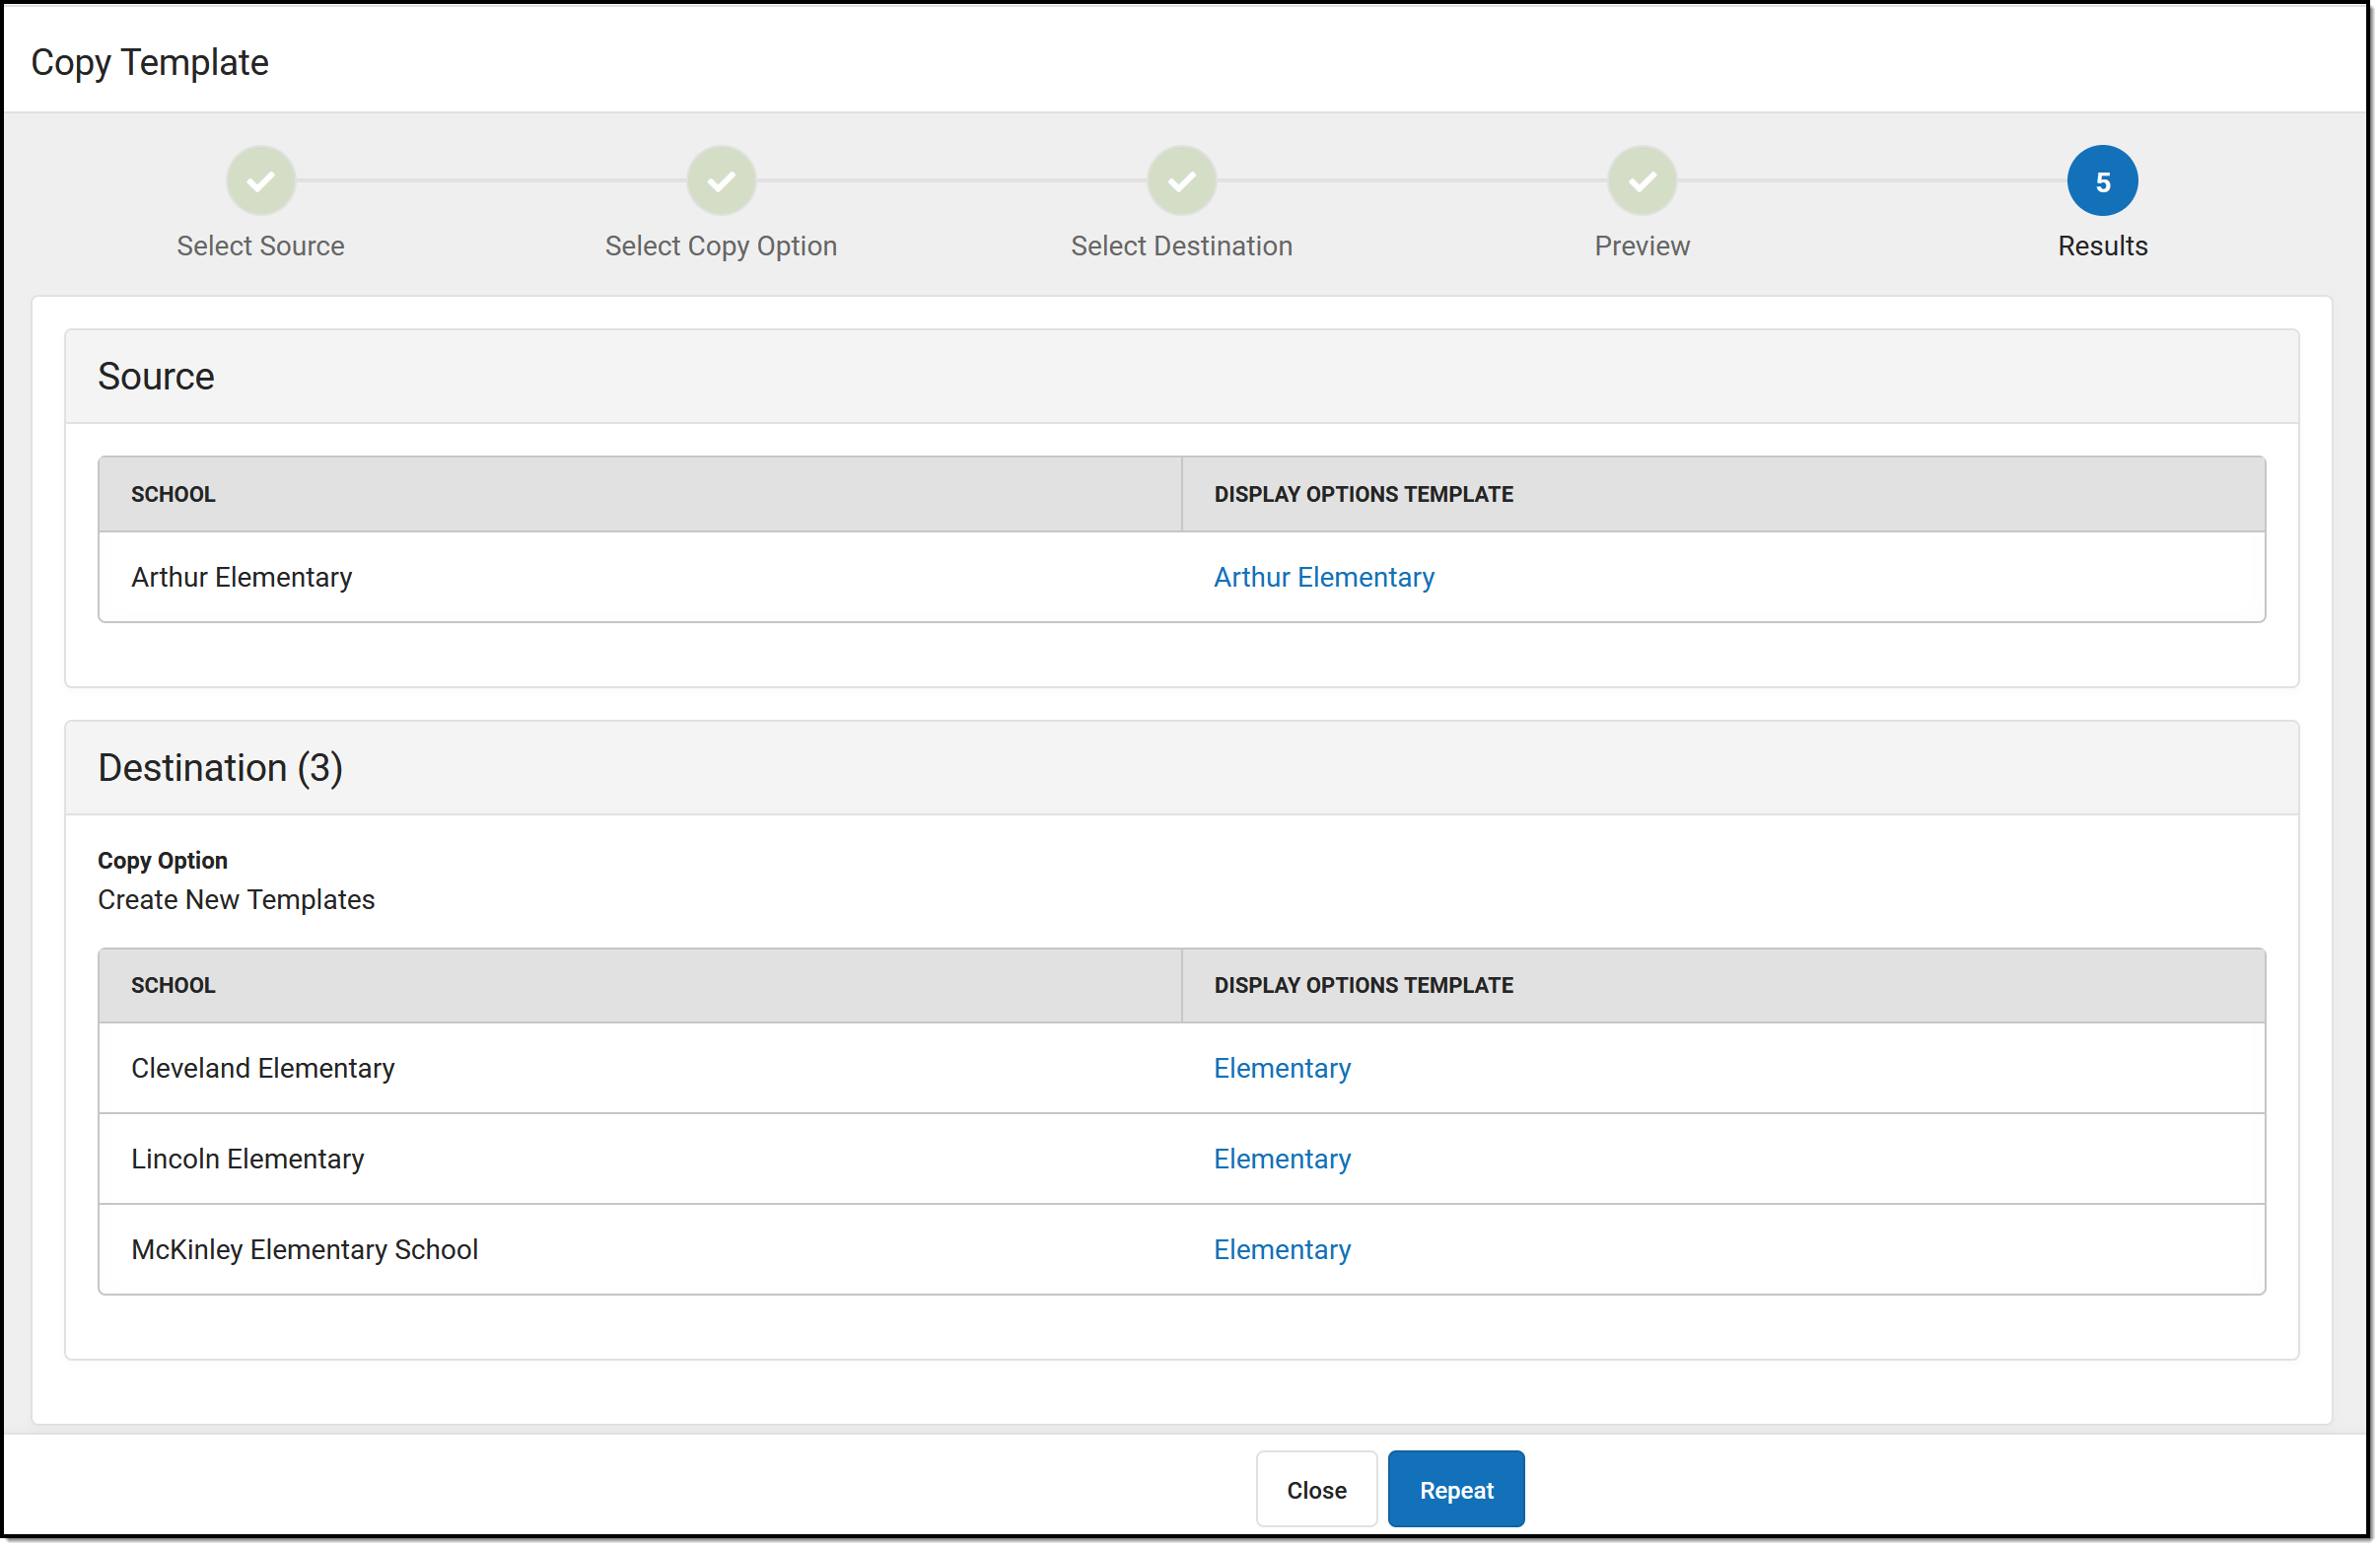 |
Edit Templates
Use the Edit Templates option to update the Display Options selected for multiple templates at once.
In the example portrayed below, I'm enabling Posted Grades and Term GPA for high schools in my district, now that the Grading Window has been closed at the end of the term.
| Click to enlarge | ||
Step 1 | In the first step, select which templates to update, which are grouped by school. Filter templates by school name or template name using the search bars at the top. Click Next to continue. | 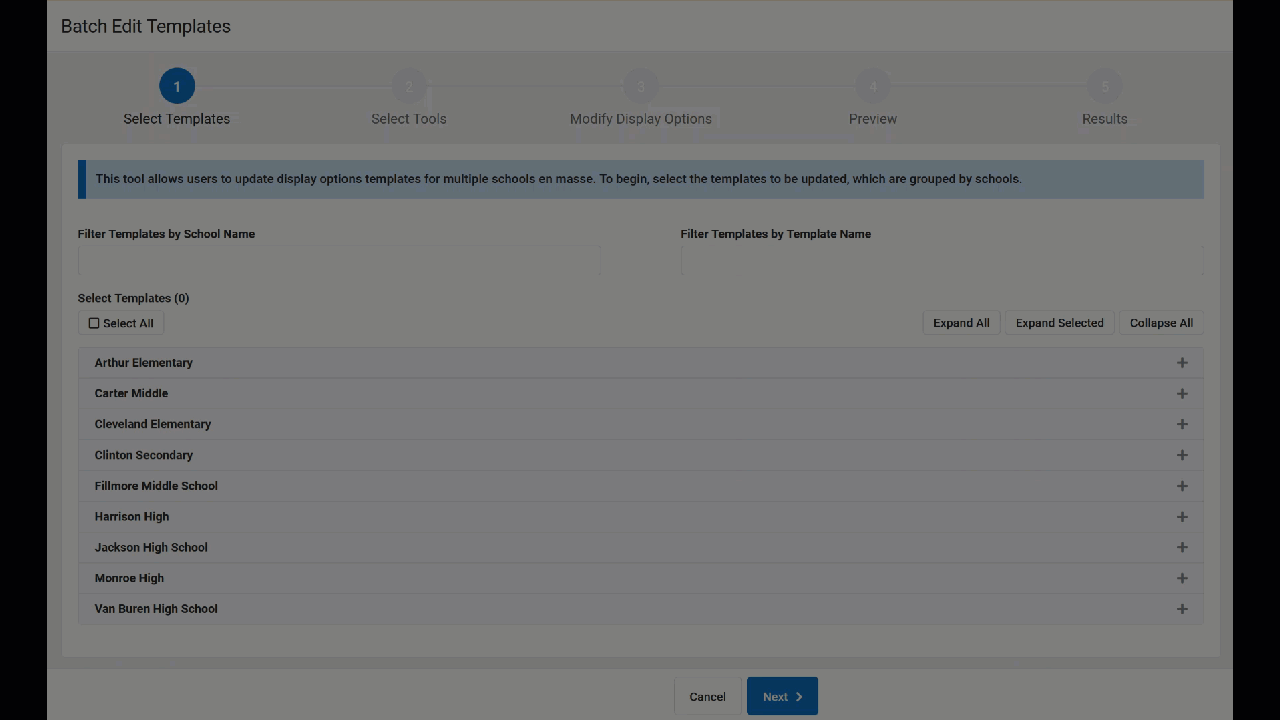 |
Step 2 | Next, select which tools should be updated. Specific display options for the selected tools display in the next step. | 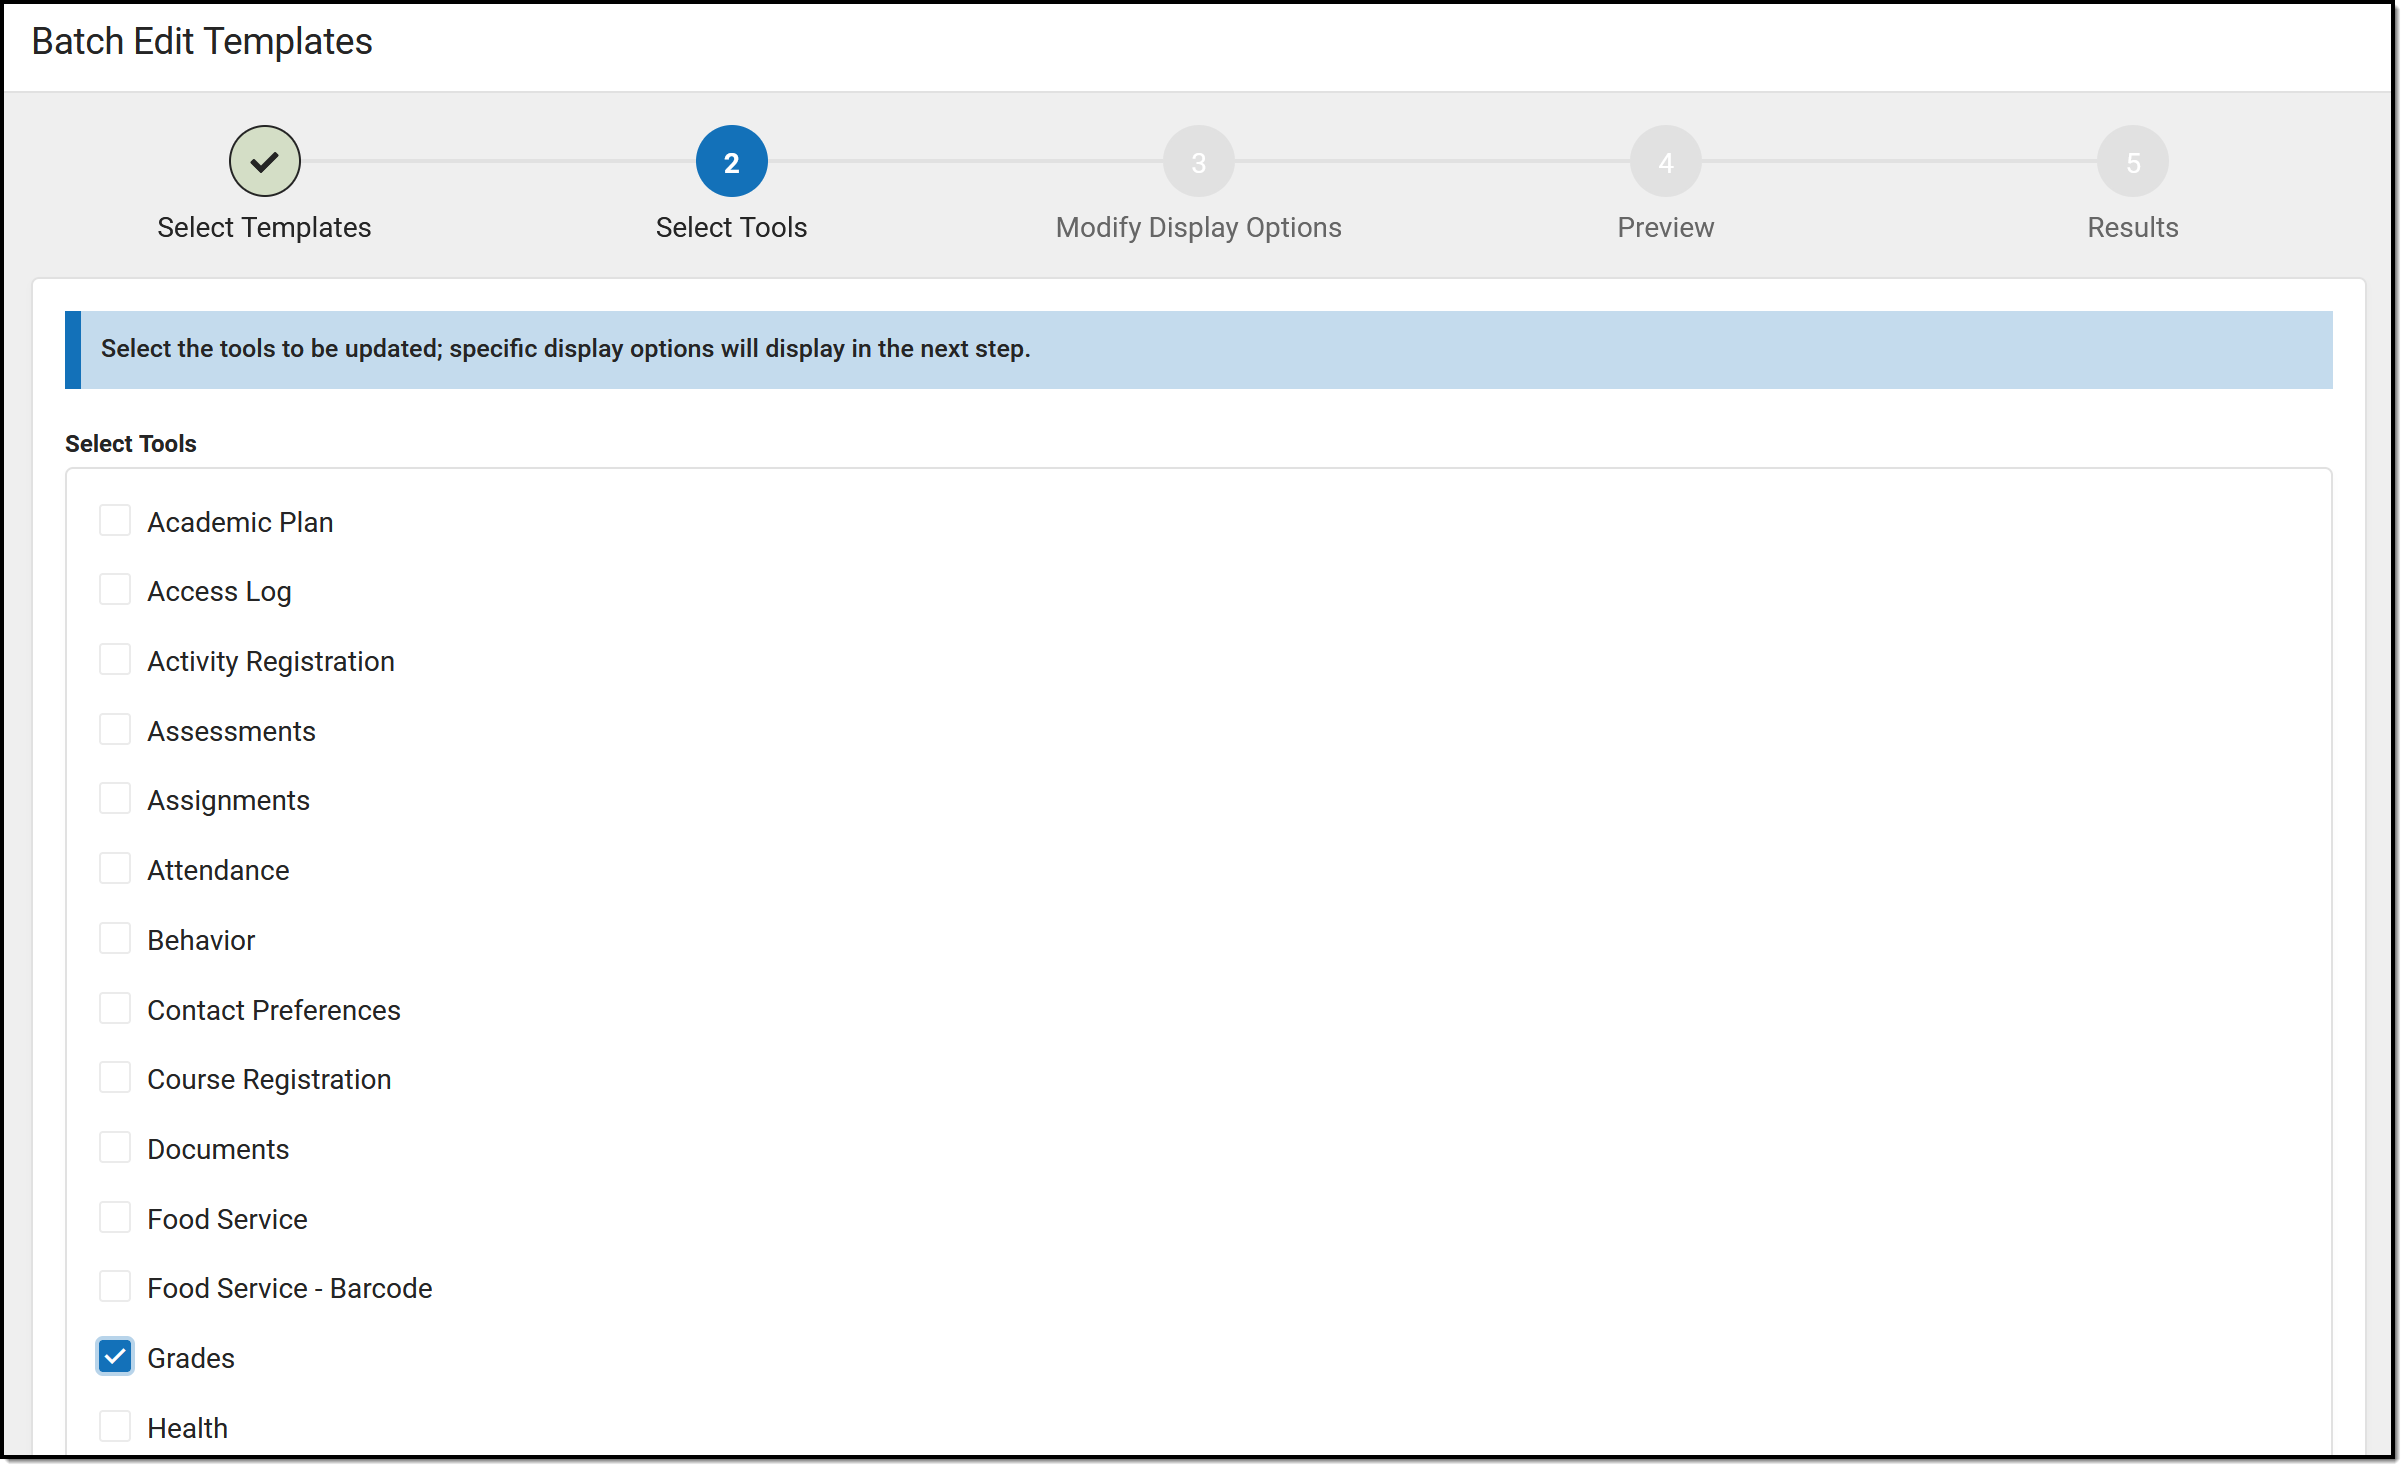 |
Step 3 | In step 3, update specific display options using the Student and Parent dropdown lists for each option. Tip: When disabling a tool, only the main tool needs to be set to Disabled, the sub-options can remain unchanged. Their status will be remembered the next time the tool is enabled. In this example, the Grades tool is already enabled, so I leave the tool setting unchanged and update the Posted Grades and Term GPA options to be Enabled. | 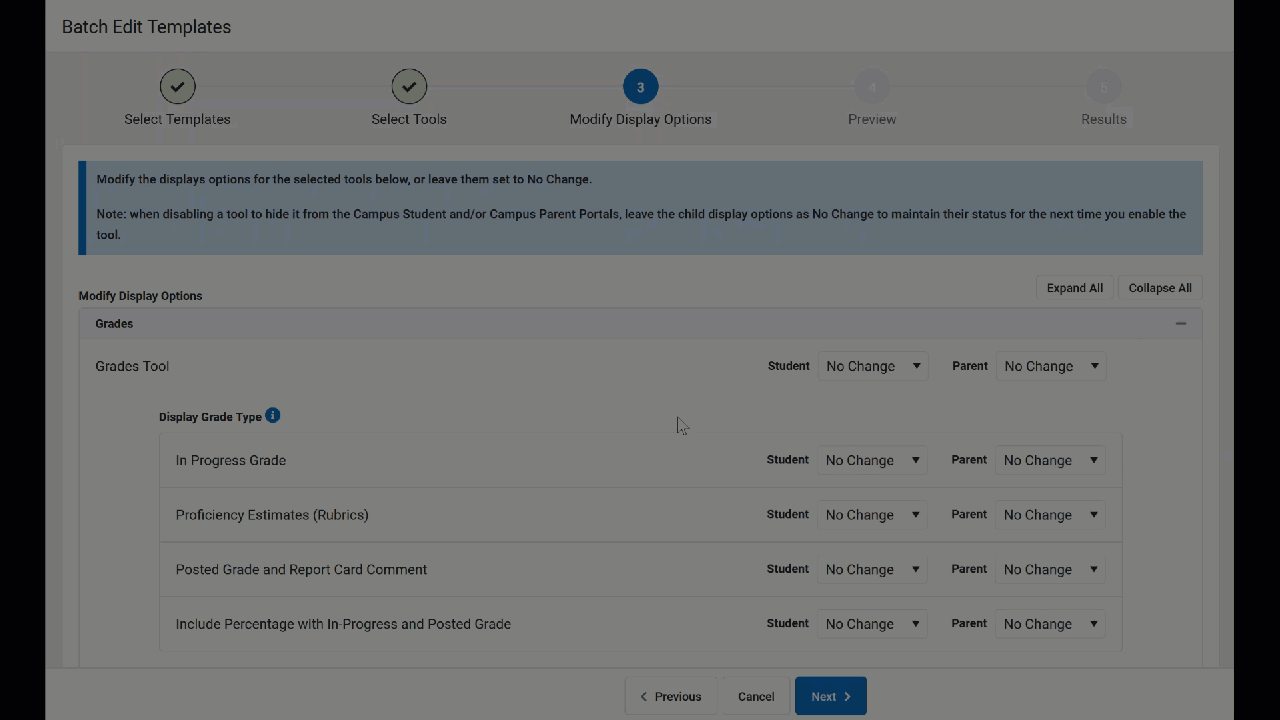 |
Step 4 | Before updating templates, carefully review your changes in step 4. The templates that will be updated are listed at the top, followed by the individual changes. | 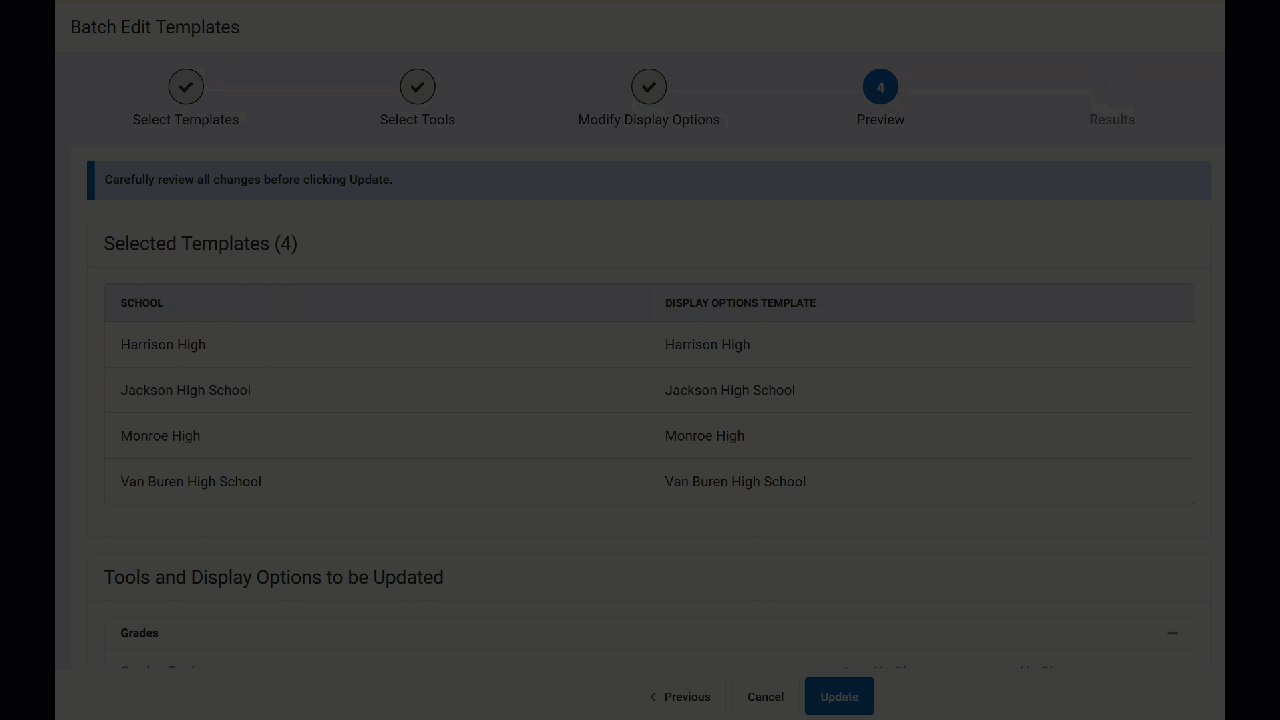 |
Step 5 | Once the update is complete, a results screen displays which summarizes all of the changes. Click Repeat to return to the beginning of the Edit process. | 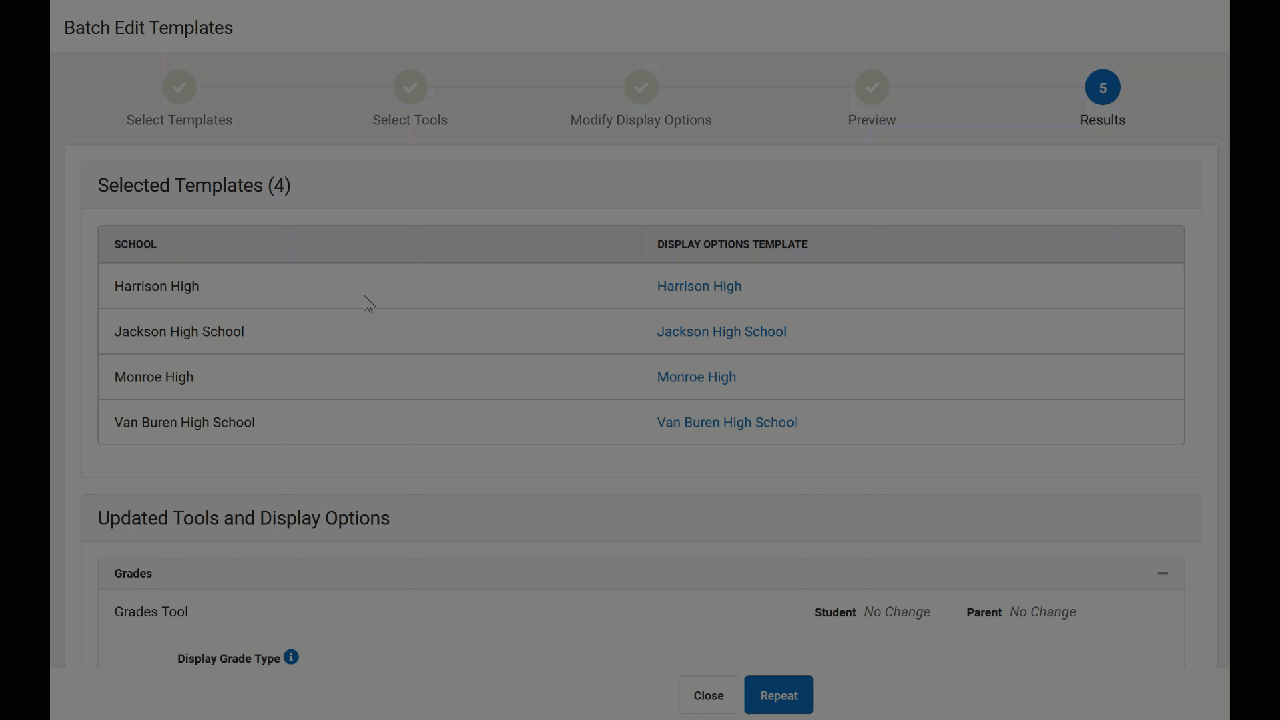 |
Edit Calendar and Term Settings
Use the Edit Calendar and Term Settings option to modify the calendar and term settings in the Display Options tool for multiple schools en masse. This could include:
- Modifying the Template selected for a calendar.
- Enabling a calendar or extending access to a calendar's data
- Modify when terms are enabled.
In the example portrayed below, I'm extending access to data in the regular school year calendar beyond the end date of those calendars for high schools in my district. This action allows data from the previous school year to remain available in Campus Student and Campus Parent into the summer school calendar of the new school year.
| Click to enlarge | ||
Step 1 | On the first screen, select which calendar to update. Calendars are grouped by school; filter the list of calendar by school name or by the calendar's template using the filter fields at the top. Calendars can also be filtered by whether the school year is the active, previous, or future year or by whether the calendar is currently enabled. | 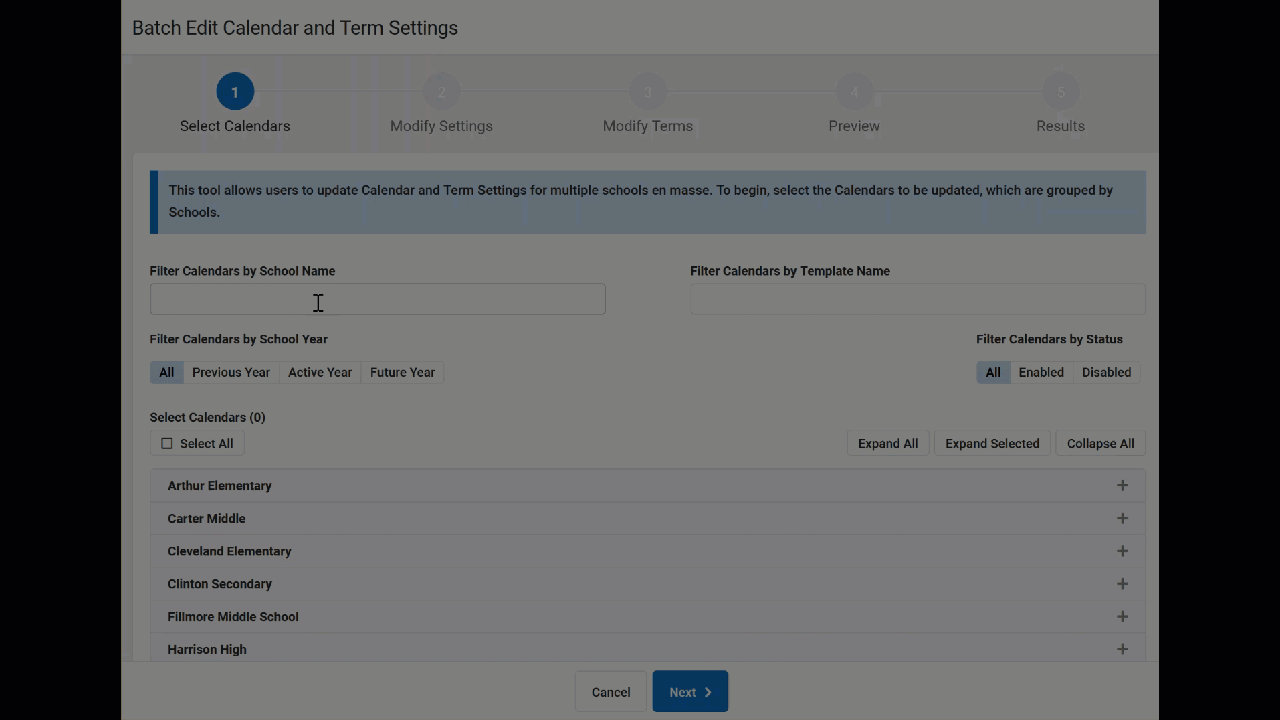 |
Step 2 | Next, modify any calendar settings for each selected calendar. See the Calendar Settings section of the Display Options article for more information about these settings. Options include:
In this example, I'm extending access to calendar data 30 days into the next calendar. | 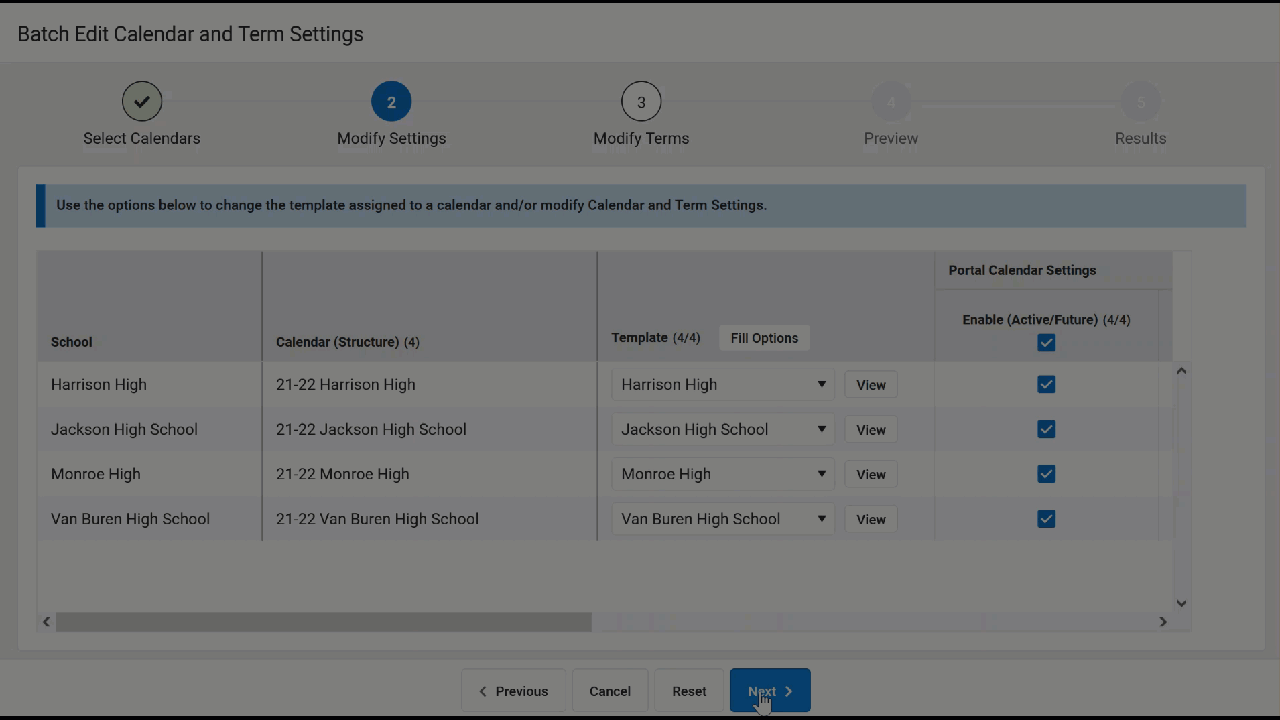 |
Step 3 | In step 3, enable or disable terms that are not already automatically enabled based on the Terms Settings. Note: If a term is enabled automatically, it cannot be disabled. | 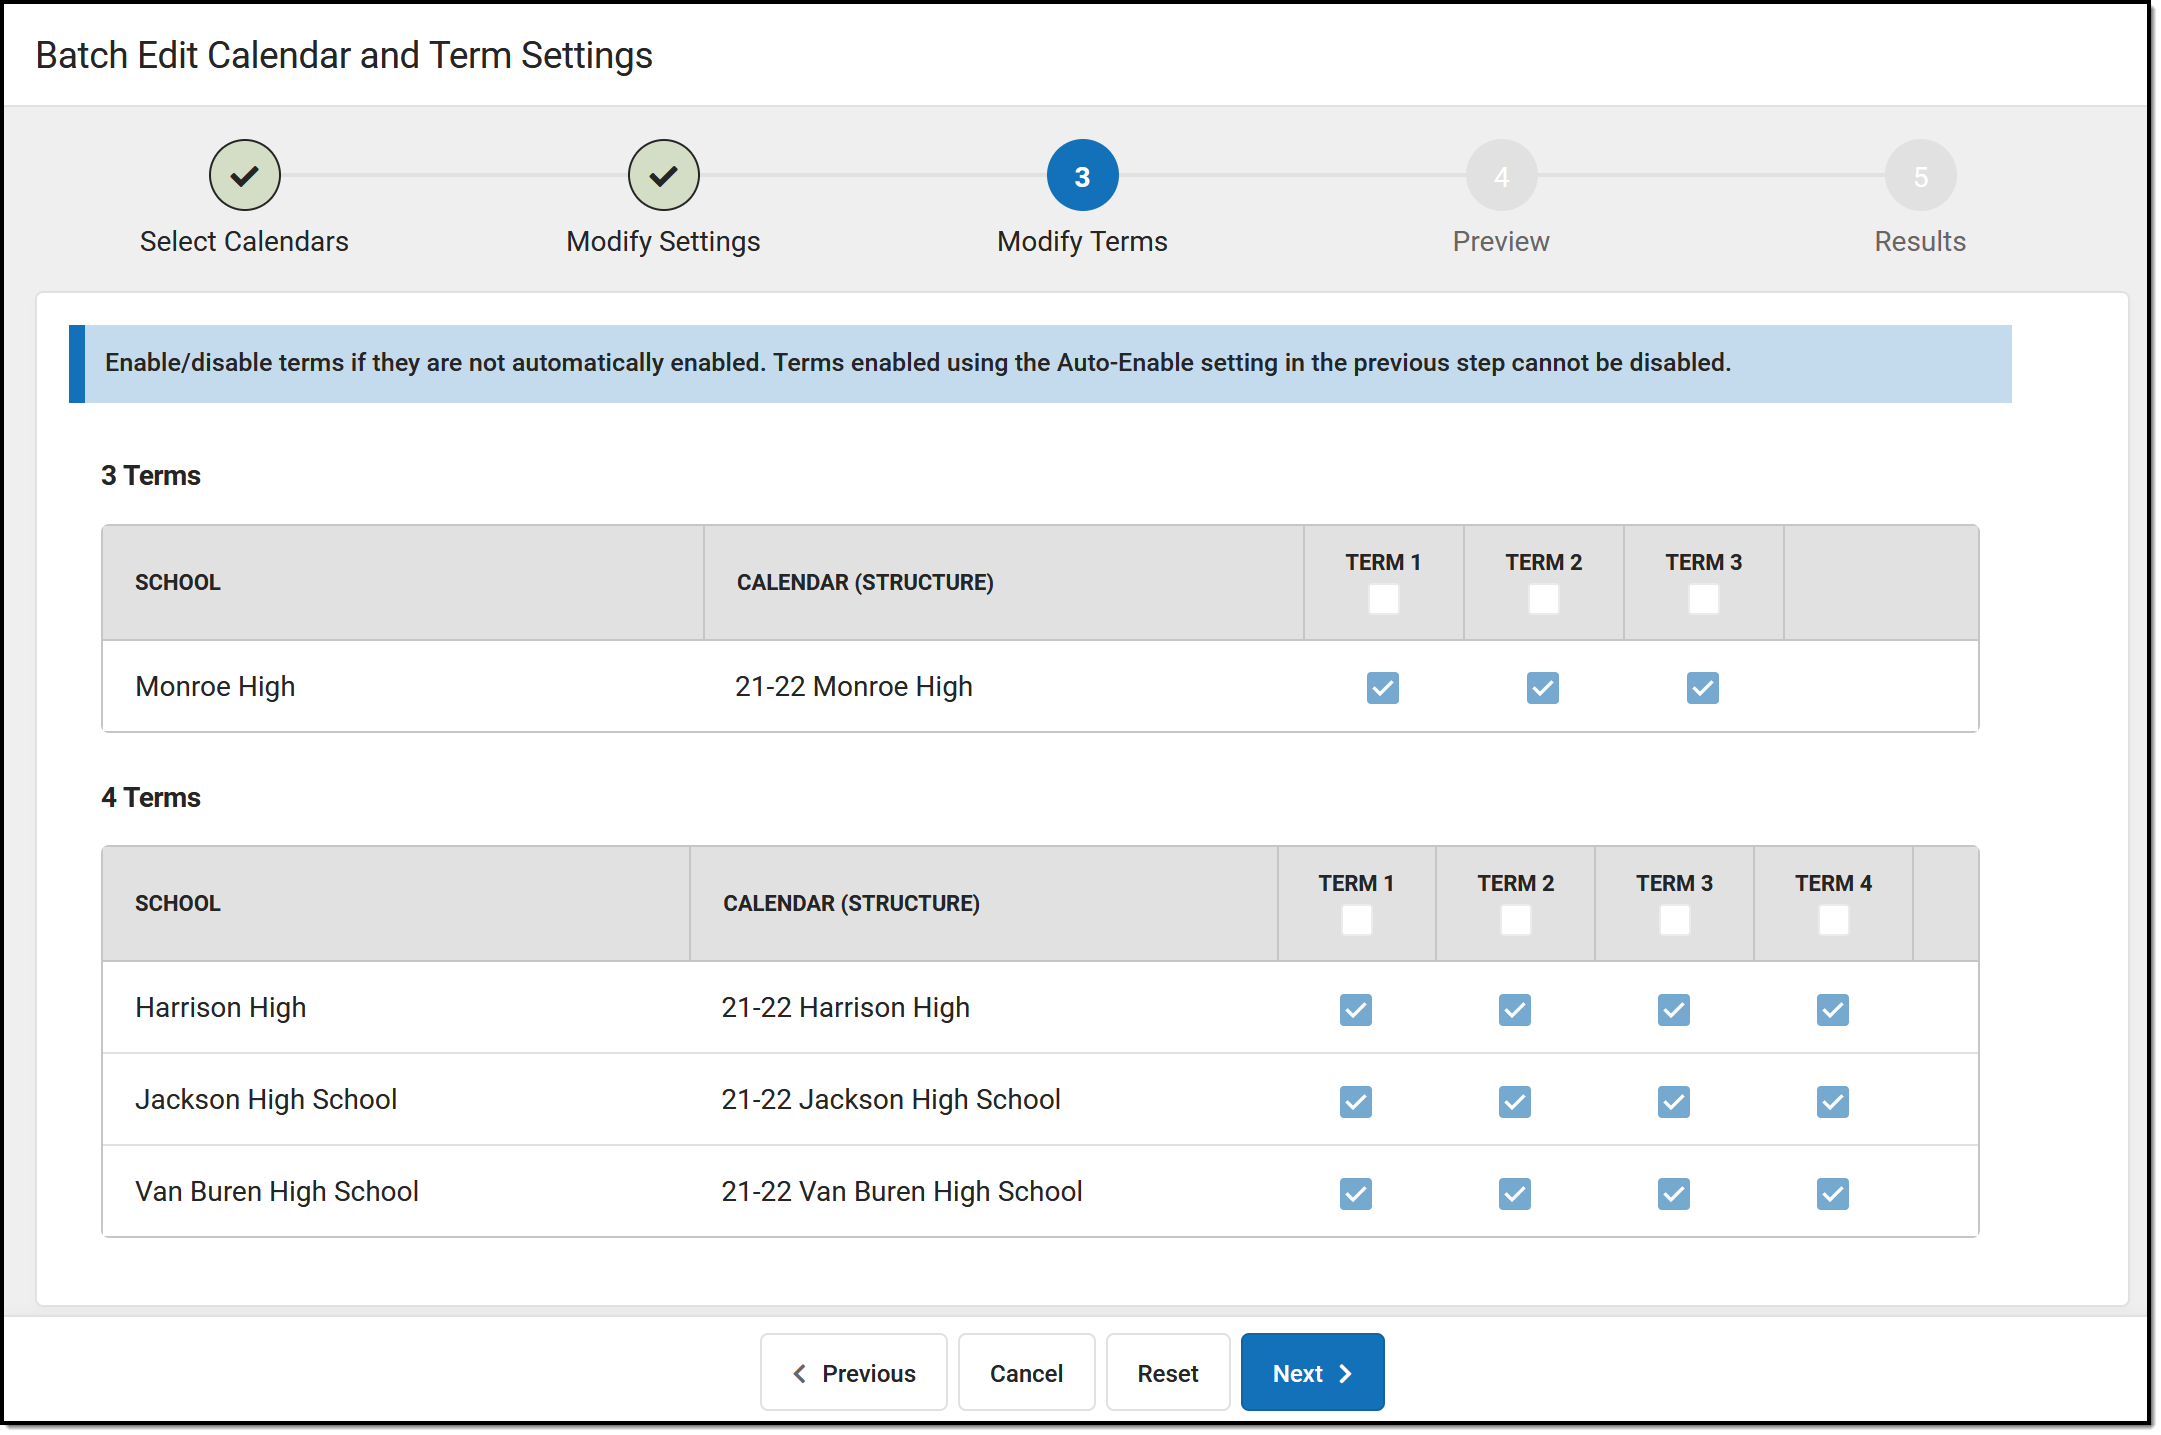 |
Step 4 | Finally, preview changes before updating settings. Changes display in bold text, as shown in this example. Click Update to apply changes. | 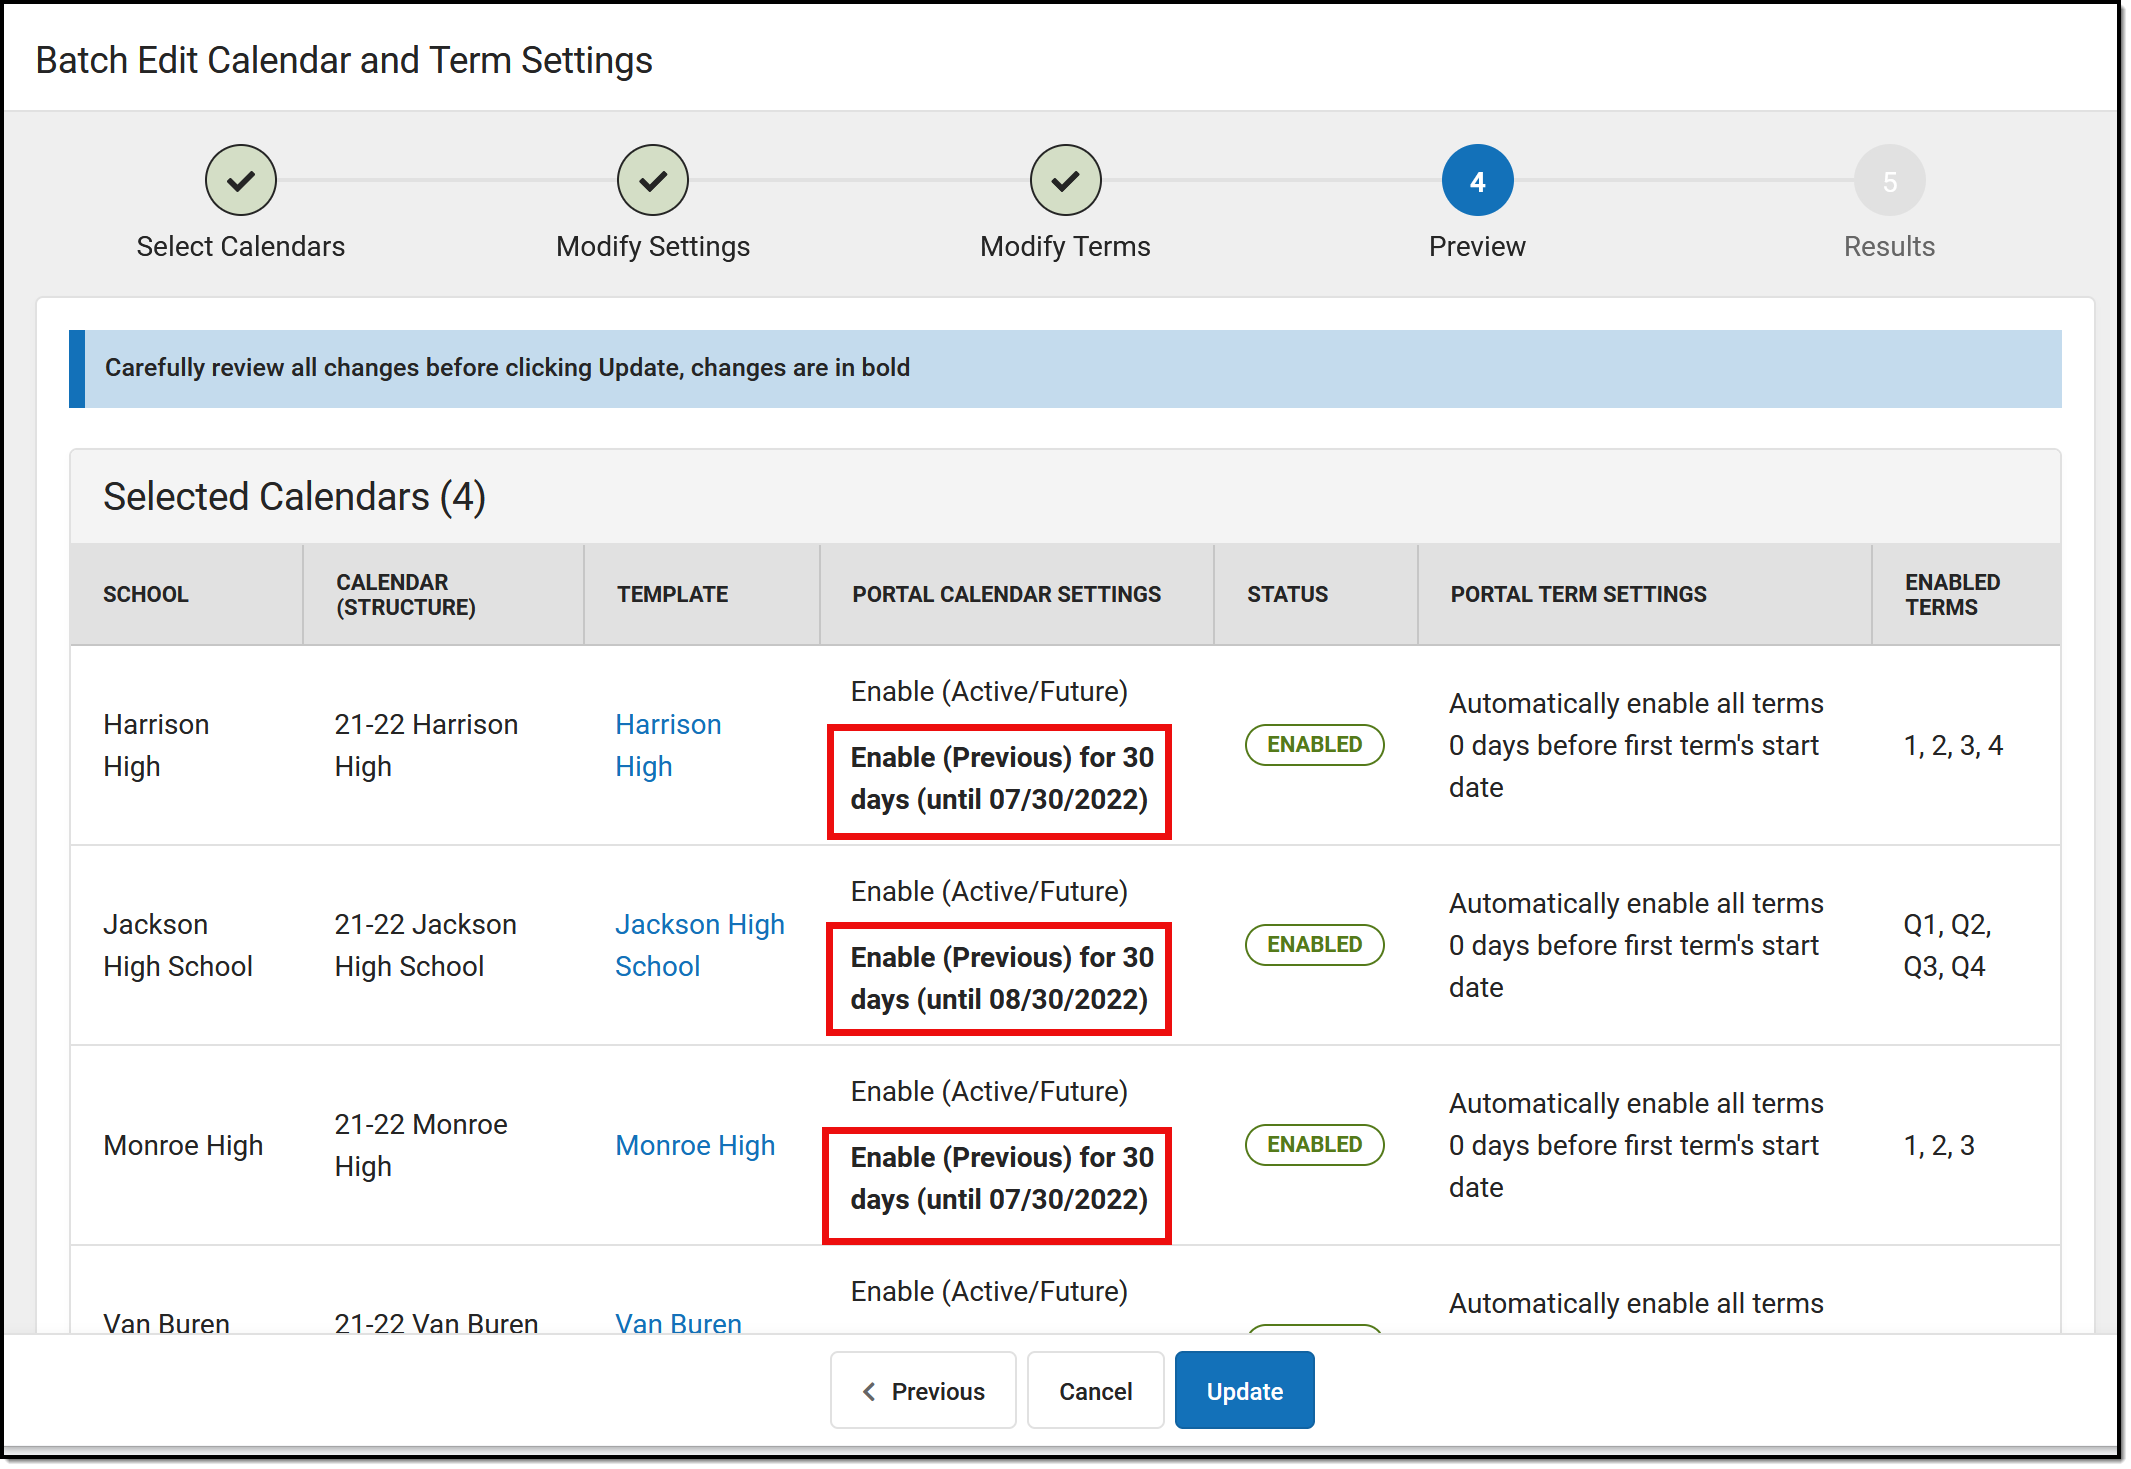 |
Step 5 | Once the update is complete, a results screen displays which summarizes all of the changes. Click Repeat to return to the beginning of the Edit process. |  |
Template Fill Options
The Fill Options button in the Template column opens a side panel with advanced fill options
These fill options are most effective when a district using a consistent naming convention for their templates.
To use this advanced fill option, select a parameter for the fill in the Fill Templates with Name dropdown list: Contains, Starts With, Ends With, or Equals. Then enter the template name or part of the name as the Value. Indicate in the Fill dropdown list if the fill template logic should apply to all calendars or just those that do not currently have a template assigned.
| Summer School Fill Scenario: First, I create a summer school template at one school. Then, I use the Copy Templates option to copy that template to all of my schools that have a summer school calendar, giving the templates names that match their schools, such as Harrison Summer School, Monroe Summer School, etc. Once the template is copied, I can update each of the copies based on that school's needs. Next, I use the the Edit Calendar and Term Settings option. In Step 1, I select all of the summer school calendars in my district. In Step 2, I click this Fill Options button, select Contains and enter a value of Summer School. When I click Fill, each calendar is filled with it's corresponding Summer School template. |
| Grading Window Fill Scenario: First, I create a template based on what I want available to parents and students while the grading window is open, and then copy that template to all of my high schools, leaving the name as Grading Window for all. Then use Edit and Calendar Term Settings and click Fill Options in Step 2. Then, I select Equals and enter a Value of Grading Window. When I click Fill, all of the templates populate with this Grading Window template. |
