Tool Search: Special Ed Documents
Special Ed Documents can be set up to allow parents/guardians and/or students to electronically sign documents made available on Campus Parent and/or Campus Student. Both Locked and Draft Special Ed IEPs, Evaluations, Progress Reports, and Prior Written Notices (Ohio only) display on the Portal. Parents/guardians and students can review these documents and then electronically sign a consent form attesting to the document's accuracy. Certain state users also have additional eSignature functionality.
This article documents the different ways Special Ed Documents can be signed. One way is to use the Custom Forms eSignature functionality within Campus; another is a third-party program such as DocuSign. Also listed is the core eSignature solution for those states that have it. See the following state articles for information on each state's specific information:
- Delaware Plan eSignature Editors
- Massachusetts Plan eSignature Editors
- Nebraska Plan eSignature Editors
- Nevada Plan eSignature Editors
- Pennsylvania Plan eSignature Editors
- South Dakota Plan eSignature Editors
Note: the Custom Form eSignature functionality is only available on the Forms tool.
Setup
Tool Rights
Tool Search: Tool Rights
Make sure the user requesting the eSignature has the appropriate tool rights to Request eSignature on Portal (Student Information > Special Ed > Special Ed Documents > Plan > Request eSignature on Portal). This tool right is either on or off, meaning assigning any of the RWAD rights allows the user to send an eSignature request. For example, marking the Delete checkbox provides the same rights as marking the Read checkbox.
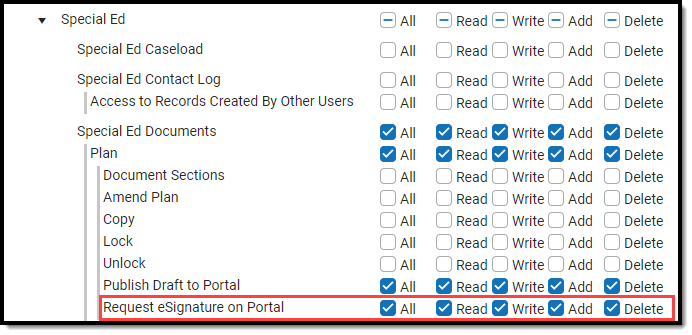 Request eSignature on Portal Tool Right
Set Portal Preferences
Tool: Display Options
Mark the Portal Preference Display Option, Request eSignature Special Education Plan for Parent (Display Options > Documents > Reports/Plans > Request eSignature Special Education Plan). Marking Student sends the student a read-only copy of the plan.
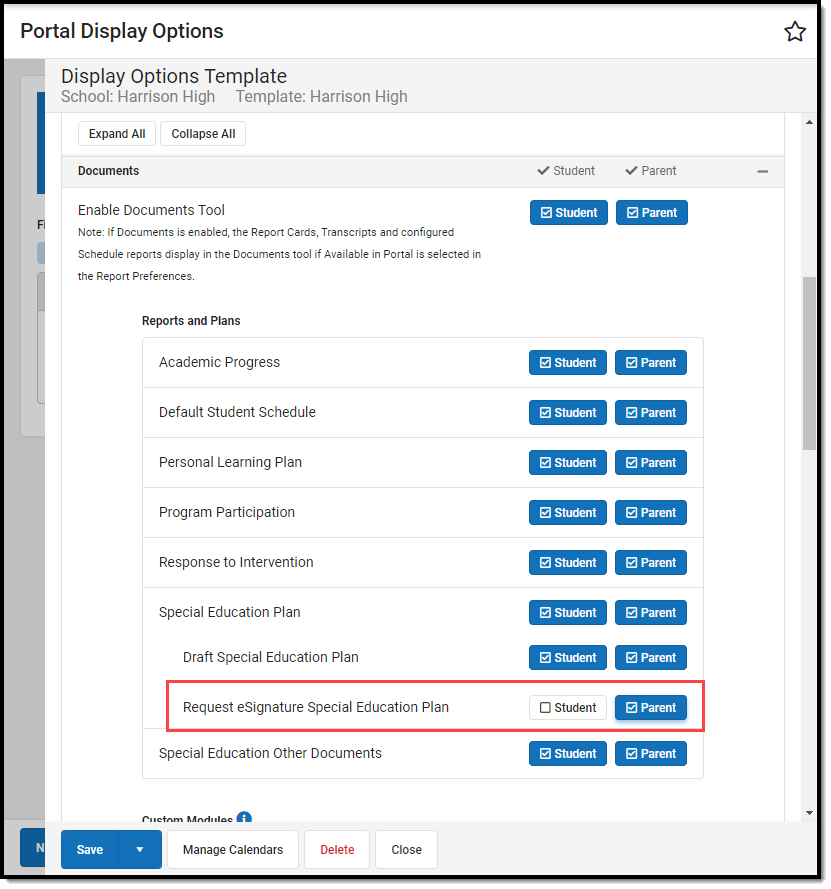 Request eSignature Special Education Plan Portal Display Option
Establish Relationships and Portal Accounts
Tool Search: Relationships
Guardians are eligible to receive an eSignature request when the Guardian and Portal checkboxes are marked on the student's Relationships tool. The guardian must have logged into the Portal at least once to receive the eSignature request.
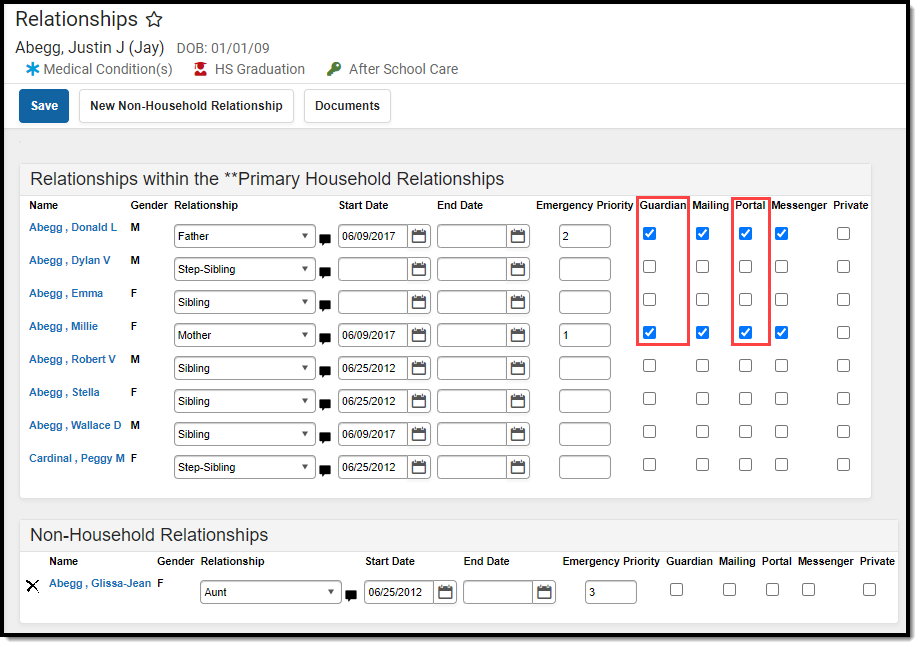 Relationships Tool Guardian and Portal Checkboxes
Create and Enter Plan Information
Tool Search: Special Ed Documents
Fill out the plan in Campus. For information on which editors are required to be electronically signed, see your state's specific articles.
- Delaware Plan eSignature Editors
- Massachusetts Plan eSignature Editors
- Nebraska Plan eSignature Editors
- Nevada Plan eSignature Editors
- Pennsylvania Plan eSignature Editors
- South Dakota Plan eSignature Editors
Request eSignature
Tool Search: Special Ed Documents
After completing the plan setup, the plan is ready to send to the guardian for eSignature. Select the plan and then click the Request/Remove eSignature button.  Request eSignature on Portal Button
A dialog displays asking the user to select one guardian from the list provided under the Select Guardians section. At this time, only one guardian can sign the plan.
Guardian(s) without active portal accounts display in the Guardian(s) - Parent portal account not active section.
 Request eSignature Dialog
Click Ok to send the eSignature request. A checkmark icon![]() displays next to the plan's name, indicating that it has successfully been sent to the guardian. Information in the Document Detail also lists when the eSignature Request was sent and to which guardian.
displays next to the plan's name, indicating that it has successfully been sent to the guardian. Information in the Document Detail also lists when the eSignature Request was sent and to which guardian.
![]() Checkmark Icon and Document Detail eSignature Information
Checkmark Icon and Document Detail eSignature Information
Remove eSignature
The user can pull the plan from the Portal at any time by clicking the Request/Remove eSignature button. This allows the user to make changes to the plan before the guardian has a chance to sign. A warning displays confirming the removal of the plan from Portal. Click Ok to confirm or Cancel to go back.
Removing the plan from Portal after the guardian has signed invalidates those signatures.
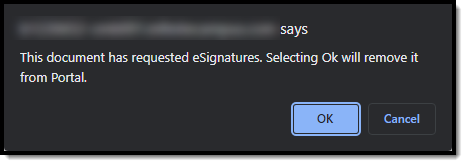 Remove eSignatures Warning
Guardian Review
Tool Search: Campus Parent Portal, Campus Student Portal (read-only)
Once an eSignature request has been sent, the guardian can access the plan from three locations: a bell notification link, under the Documents Need Attention section on the Home screen, and the Documents tool.
 Documents Need Attention on the Home screen
A status of Needs Attention displays next to the plan's name on the Documents tool.
 Plan Needs Attention Status on Documents Tool
Terms and Conditions
Upon opening the document, the Terms and Conditions dialog displays, explaining that the guardian must accept the Terms and Conditions for Electronic Signature before saving and submitting the plan. A link in the dialog brings the user to a PDF detailing the terms.
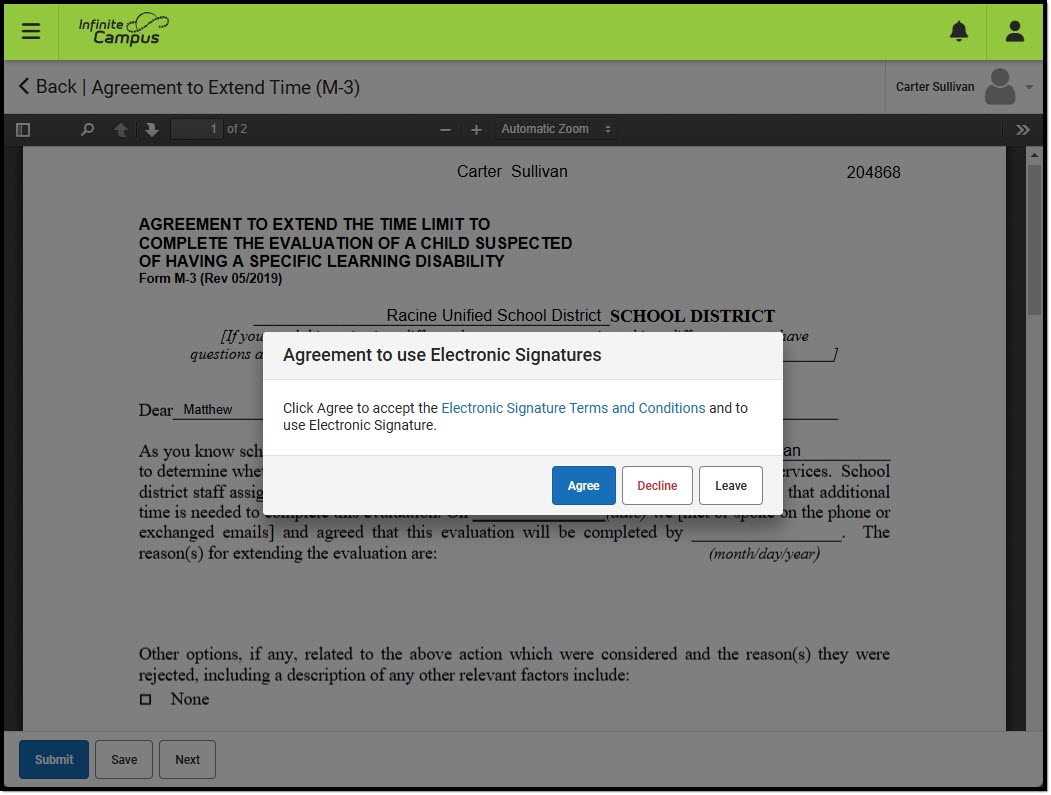 Agreement to Use Electronic Signature Dialog
After the guardian accepts the terms, the Terms window no longer displays.
Decline Terms
When the guardian declines the terms, a physical copy of the plan must be printed, signed, and returned to the school. Click the Decline button to decline the terms. A dialog displays to confirm the action of declining the terms.
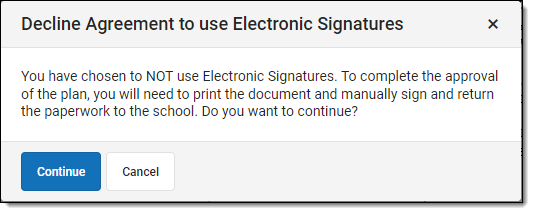 Decline Terms Dialog
When a guardian declines the terms, a status of Declined Terms and Conditions and Pending displays next to the plan's name on the Documents tool.
 Declined Terms and Conditions and Pending Status
Sign and Submit
After agreeing to the terms, several signatures and their corresponding checkboxes must be filled out before the guardian can submit. Blank eSignature Example
Mark all desired checkboxes in red and click the paper and pencil icon on the signature lines to sign electronically. The Next button navigates the guardian directly to the next item on the plan that needs attention. Click Save to save progress.
 Completed eSignature Example
After all signatures are captured and the checkboxes are marked, click Submit. On the Documents tool, a status of Signed and Pending displays next to the plan name, and the guardian can view a read-only copy of the plan.
 Signed and Pending Status
Student and Non-Signing Guardian View
The student and any other guardians who have not been chosen to sign can view a read-only version of the plan. A Draft watermark displays indicating the plan has not yet been completed.
 Non-Signing Guardian View
Complete
Tool Search: Special Ed Documents
After a guardian has signed OR declined the Terms and Conditions for eSignature, additional completion steps are needed on the Special Ed Documents tool. An exclamation mark icon![]() displays next to the plan's name indicating action is needed.
displays next to the plan's name indicating action is needed.
 Exclamation Mark Icon
Guardian Declined Terms
When a guardian declines the Terms and Conditions for eSignature, a message displays on the Document Detail indicating the terms were declined. A physical copy is needed to obtain guardian signatures at this time.
 Guardian Declined Terms and Conditions
Guardian Declined Plan
When the guardian accepts the Terms and Conditions but disagrees with the plan's contents, the Document Detail indicates the plan was declined, and a PDF copy of the signed plan displays in the Copies folder.
 Guardian Declines Plan
Guardian Agreed Terms and Plan
When a guardian accepts the Terms and Conditions, agrees to the plan's contents, and electronically signs the plan, a message displays on the Document Detail indicating who signed the plan, and a PDF copy of the signed plan displays in the Copies folder.
Any changes made to the plan at this stage invalidate the signatures. When changes need to be made to the plan, an additional eSignature Request must be sent back to the guardian.
 Document Detail Information
Lock
Locking the plan completes the process and syncs it to the state.
Additional lock logic may apply when the plan is not filled out completely.
Click Lock to complete the plan process. A warning displays indicating users are not able to make any changes unless they have additional Unlock Tool Rights.
 Lock Warning Message
Click OK to proceed. A locked icon![]() displays indicating the plan is locked.
displays indicating the plan is locked.
 Locked Plan
Delete
Deleting the original plan or any copies of the plan is NOT recommended.
Only the original plan can be deleted if necessary. Copies of the plan cannot be deleted unless the original plan is removed first, which is NOT recommended. Select the original plan and then click Delete. A warning displays explaining the consequences of deleting the plan.
 Delete Plan Warning
Click OK to perform the delete or Cancel to go back. Any copies of the plan display in the Uploaded Documents folder and can be deleted at this time.
Amend
When amending a plan with eSignatures, the eSignature for the IEP Implementation editor clears out. When the amendment process has been completed, the plan must be sent back to the parent/guardian to sign again. The amendment process is the same for plans with and without eSignature functionality. See the Amend Special Ed Documents article for the full Amend process.
Custom Forms Process
See the Custom Forms on Portal Process document for additional information.
| Step | Description | Navigation | Image
Click to Enlarge |
|---|---|---|---|
| 1. Create a Custom Form | Create a page to be sent to the Portal for eSignature. |
Student Information > General Student Administration > Custom Form Setup |
 Custom Forms Setup Custom Forms Setup |
| 2. Attach Custom Form to Student | Assign the eSignature Custom Form to the student. | Student Information > General > Forms > New | 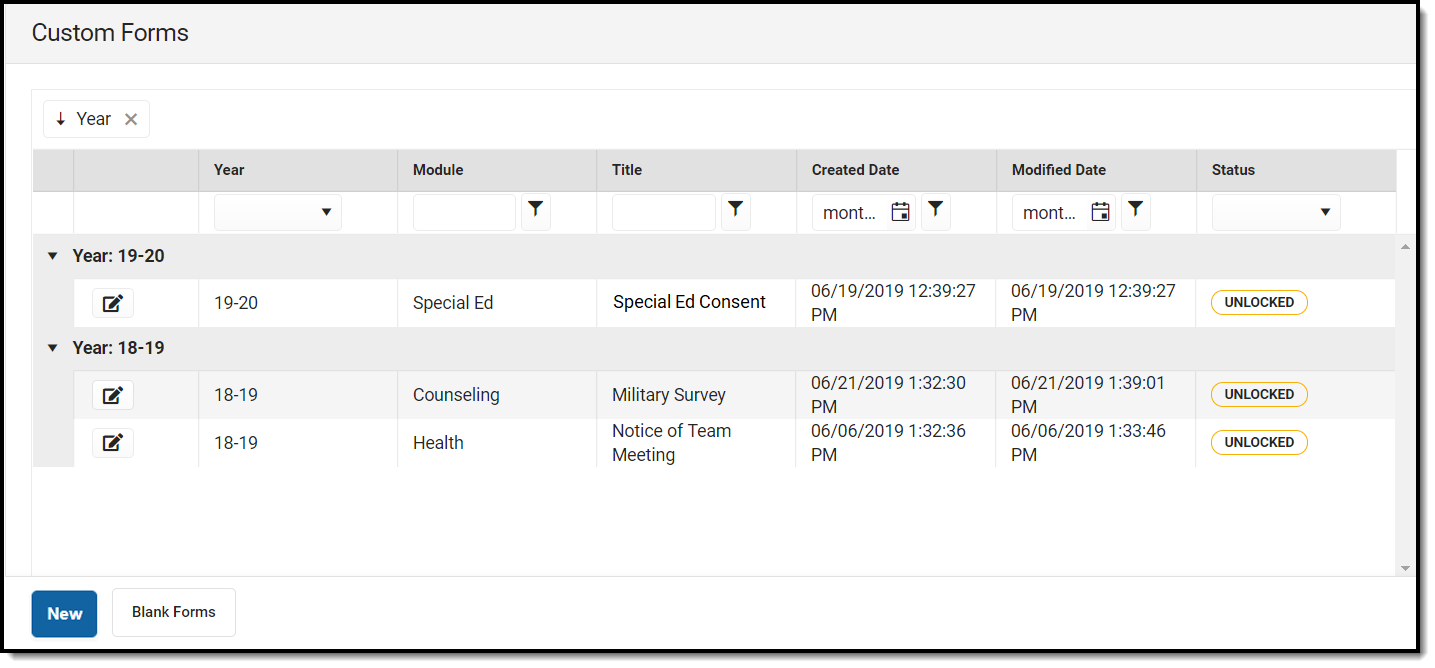 Forms tool |
| 3. Send to Portal | Click the Review Participants button, then the Request eSignatures button. | Student Information > General > Forms > Review Participants > Request eSignatures |  Request eSignatures |
| 4. Parent(s)/guardian(s) and/or Student Receives Document | The parent/guardian and student receives a notification when they have a Document that needs to be signed. | Campus Parent Portal and/or Campus Student Portal > Documents | 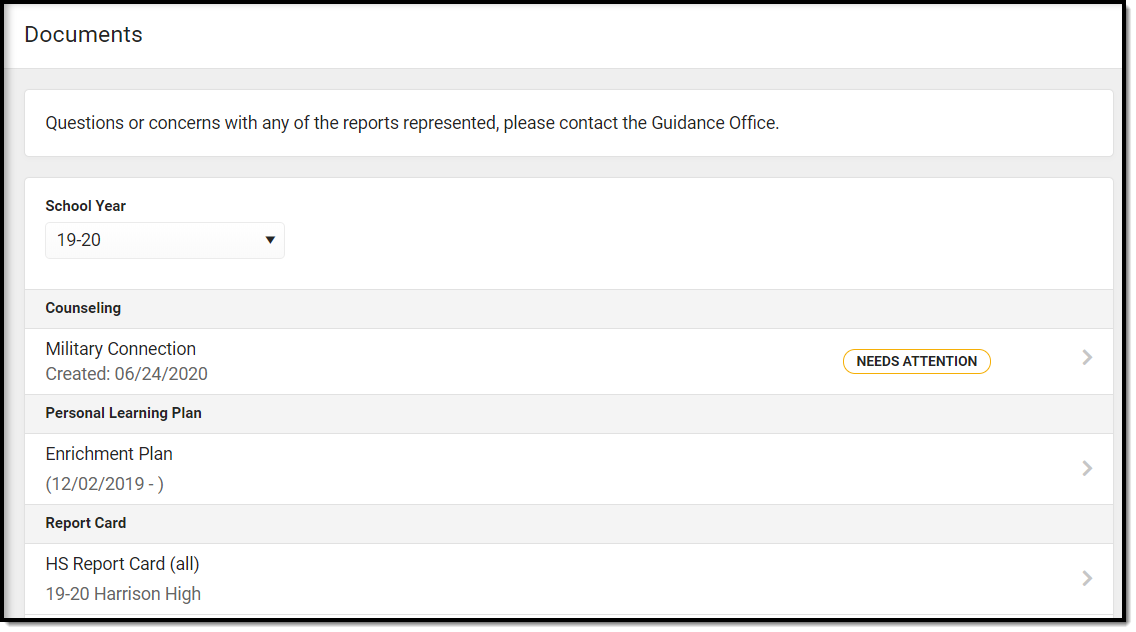 Campus Parent/Student Portal Documents Need Attention |
| 5. Parent(s)/guardian(s) and/or Student Signs or Declines Custom Form | The parent(s)/guardian(s) sign or decline the document. Click the signature icon to sign or decline, then click Submit. | Campus Parent Portal and/or Campus Student Portal > Documents > Signature icon > Submit | 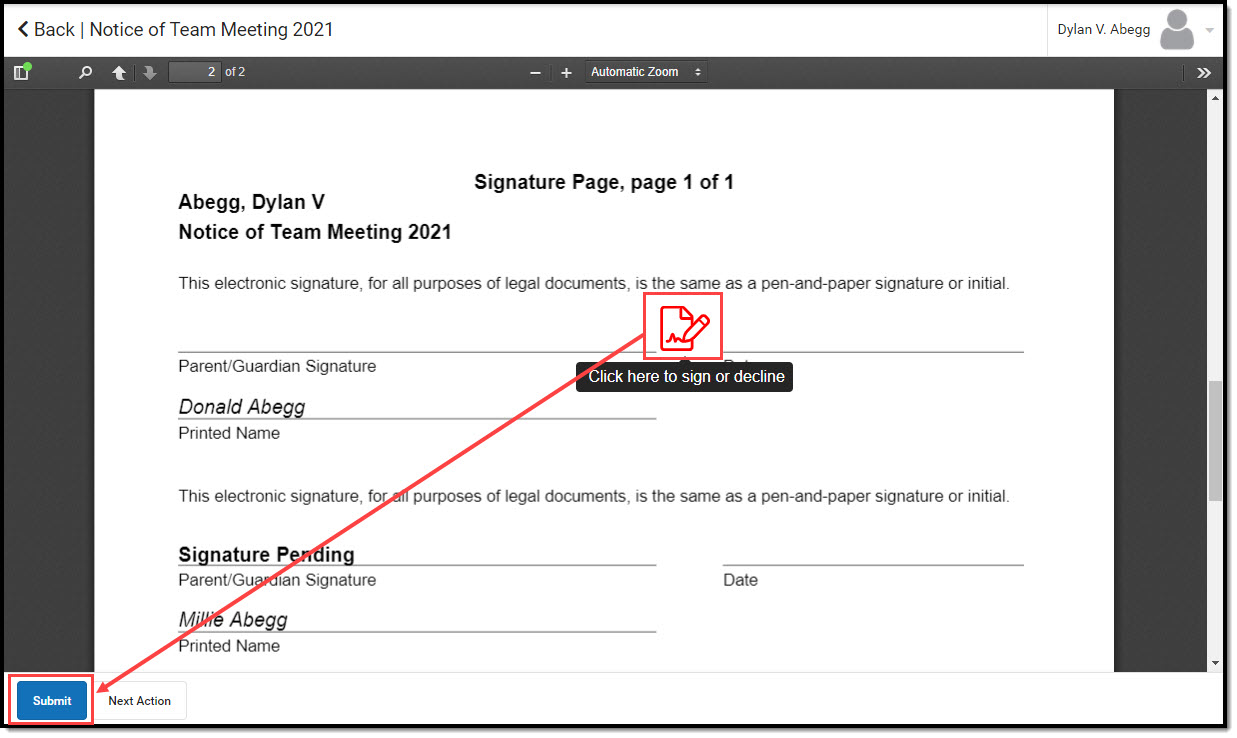 Signature Icon and Submit |
| 6. Admin/teacher receives signed or declined form | Signed or declined form received. | Student Information > General > Forms | 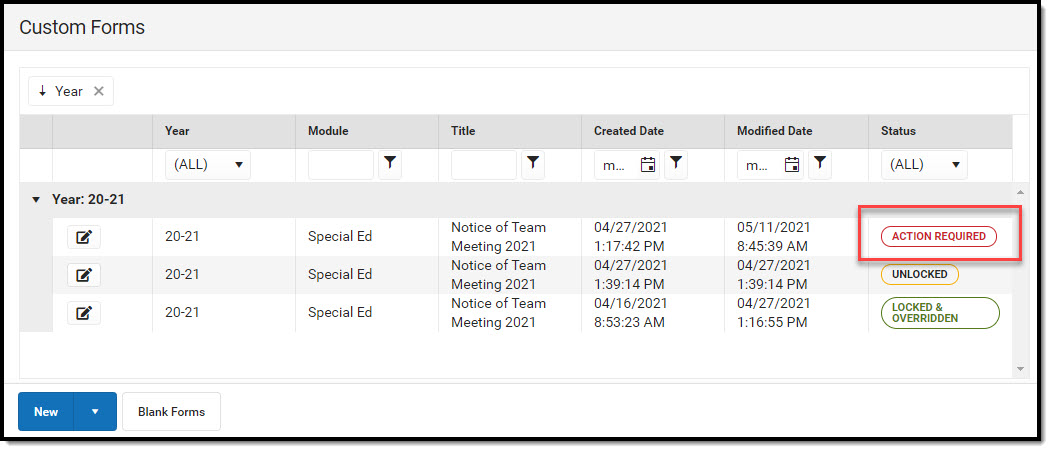 Signed or Declined Form Received |
| 7. Review Signatures and Complete | Review the signed or declined form and click Complete. | Student Information > General > Forms > Review Participants | 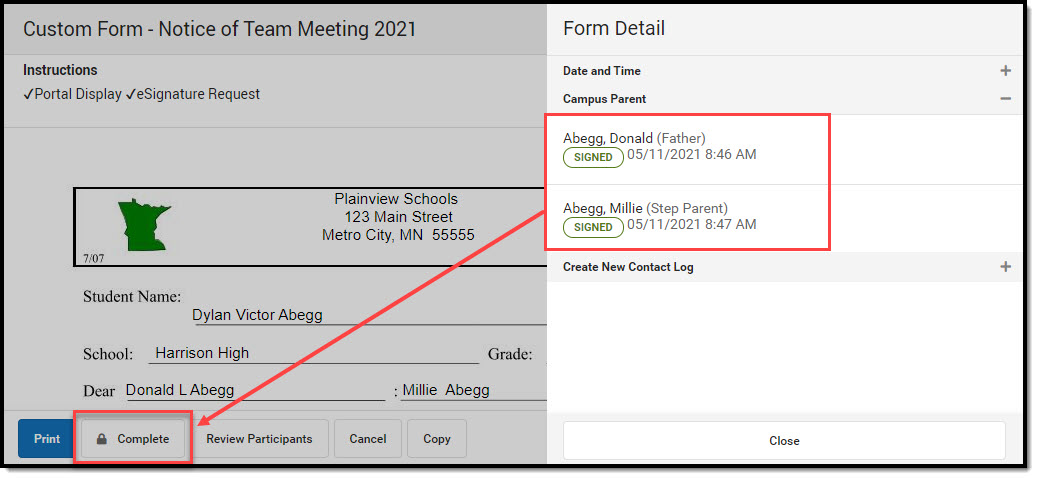 Review Signature(s) and Complete Form |
| 8. Save Custom Form as PDF | Click the Print button, then save the form as a PDF. | Student Information > General > Forms > Print > Save as PDF | 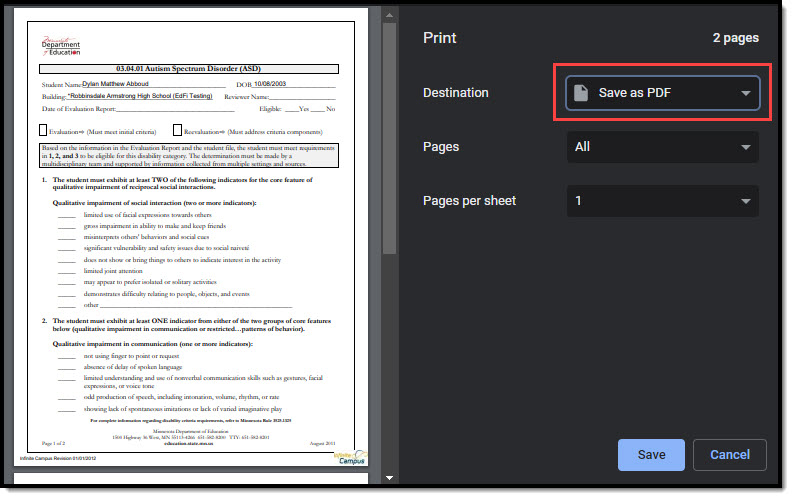 Save as PDF |
| 9. Upload PDF and Staple to Special Ed Document | Upload the PDF and Staple the document to the original Special Ed document. | Student Information > Special Ed > Special Ed Documents > Upload Document > Organization Options: Staple this document to an existing form | 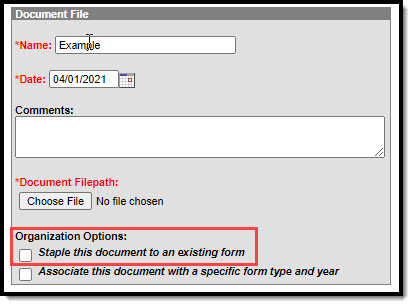 Upload and Staple Document |
Third-Party Process
Third-party eSignature applications, such as DocuSign, can be used as an alternative to Campus tooling, which allows users to add an electronic signature field directly to the Special Ed Document. This document provides a general overview of how to prepare a document for use in third-party software and completion in Campus.
| Step | Description | Navigation | Image
Click to Enlarge |
|---|---|---|---|
| 1. Save Document as PDF | Click the Print button, then save the document as a PDF. | Student Information > Special Ed > Special Ed Documents > Print > Save as PDF | 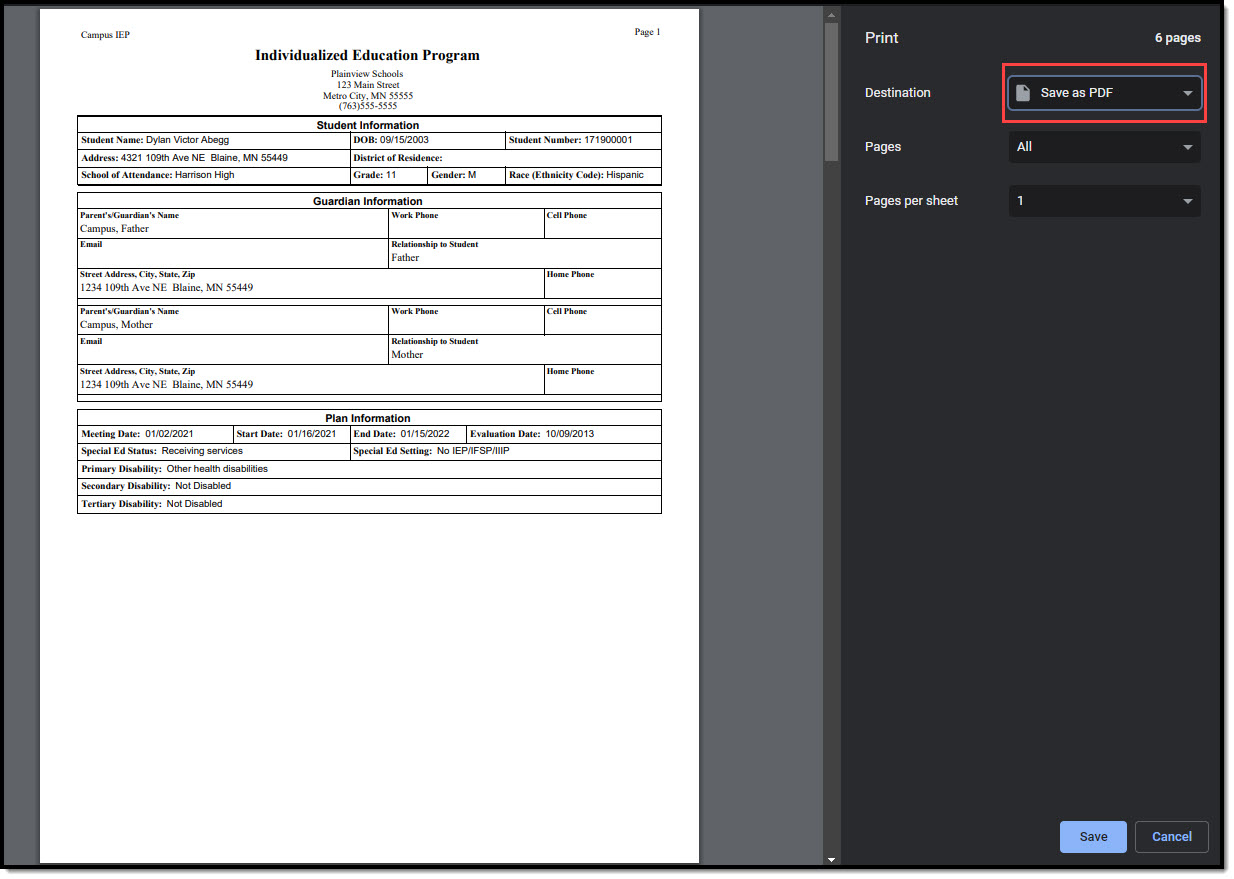 Save Special Ed Document as PDF |
| 2. Third Party eSign Process | Use the PDF to complete the eSignature Process using the third-party software. | N/A | N/A |
| 3. Upload PDF and Staple to Special Ed Document | Upload the PDF and Staple the document to the original Special Ed document. | Student Information > Special Ed > Special Ed Documents > Upload Document > Organization Options: Staple this document to an existing form |  Upload and Staple Document |
