This functionality is only available to districts that have purchased Campus Point of Sale as add-on functionality.
Tool Search: PIN Report
The PIN Report tool allows users to generate a list of PIN numbers, PIN barcode labels and PIN labels for each patron with a POS account within a school or district.
| What can I do? |
|---|
 PIN Report Tool
Generate the PIN Report
The PIN Report generates a list of current patron PIN numbers.
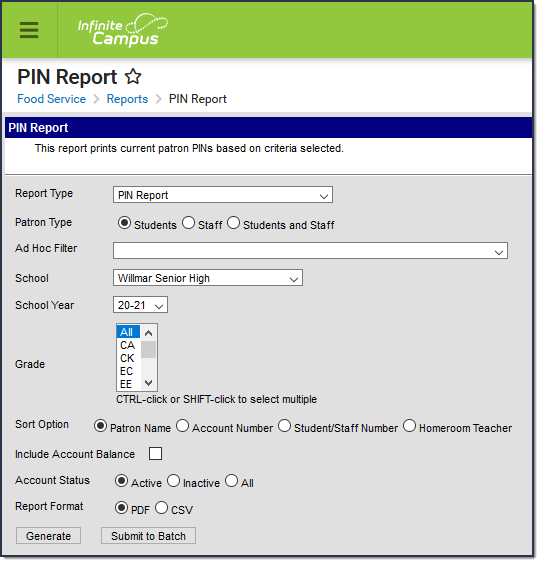
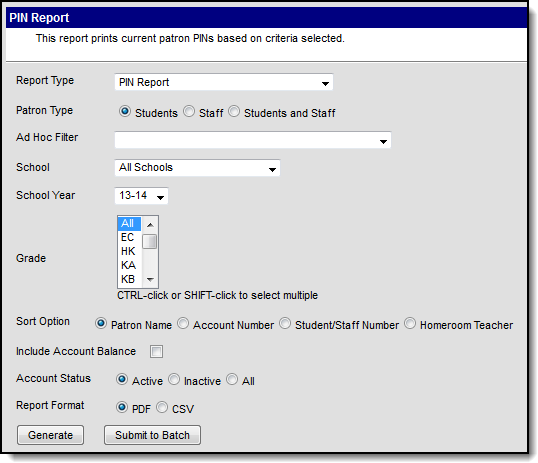 PIN Report Editor
- Select PIN Report from the Report Type dropdown list.
- Select the Patron Type.
- Select an Ad Hoc Filter. optional
- Select the School of reporting patrons. To generate the report district-wide, select the All Schools option.
- Select the School Year.
- Select the Grade(s) of patrons included in the report.
- Select the Sort Option. See the table below for details about each option.
- Mark the Include Account Balance checkbox to include current account balances for each patron within the report.
- Select the Account Status.
- Select the Report Format.
- Click the Generate button OR the Submit to Batch button.
The following table describes available field options.
Field | Description |
|---|---|
Report Type | The type of report being generated. |
Patron Type | The type of patron reporting data.
|
Ad Hoc Filter | Filters report results based on fields within the filter. Ad hoc filters are created via the Filter Designer tool. |
School | The school reporting patron data. Patrons must have an enrollment or employment record within the school selected in order to report data. |
School Year | The year reporting student data. Students must have an enrollment record within the year selected in order to report data. |
Grade | Limits report results based on students enrolled in the grade selected. |
Sort Option | Determines how patrons are sorted on the report.
|
Include Account Balance | Includes the patron's active account balance. |
Account Status | Limits report results based on whether or not the account is active.
|
Report Format | The format of the generated report. |
Generate Submit to Batch | Users have the option of submitting a report request to the batch queue by clicking Submit to Batch instead of Generate. This process allows larger reports to generate in the background, without disrupting the use of Campus. For more information about submitting a report to the batch queue, see the Batch Queue article. |
PIN Report Example
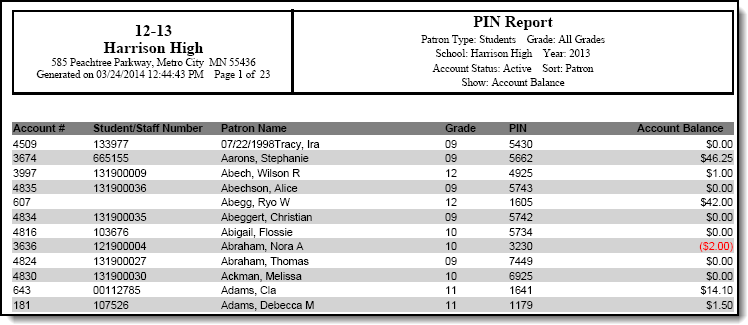 PIN Report- Sorted by Patron Name with Account Balances Included
The following table describes each report column.
Column | Description |
|---|---|
Account # | The patron's account number. |
Student/Staff Number | The patron's student or staff number. |
Patron Name | The patron's name. |
Grade | The grade the patron is currently enrolled in. |
PIN | The patron's PIN. |
Account Balance | The patron's current account balance. This column only appears if the Include Account Balance checkbox is marked on the report editor. |
Generate PIN Barcode Labels
The PIN Barcode Labels report generates a list of PIN barcode labels for affixing to District ID cards and other items used for scanning in a Food Service line.
The report is formatted to print on labels with dimensions of 1" x 2-5/8", such as the Avery 5160. See the Printing Labels article for more information.
Infinite Campus only supports barcodes generated directly from Campus.
If you plan to print the barcodes directly onto a card/badge, you must add use the 3 of 9 Barcode Font and make sure the barcode is not bold.
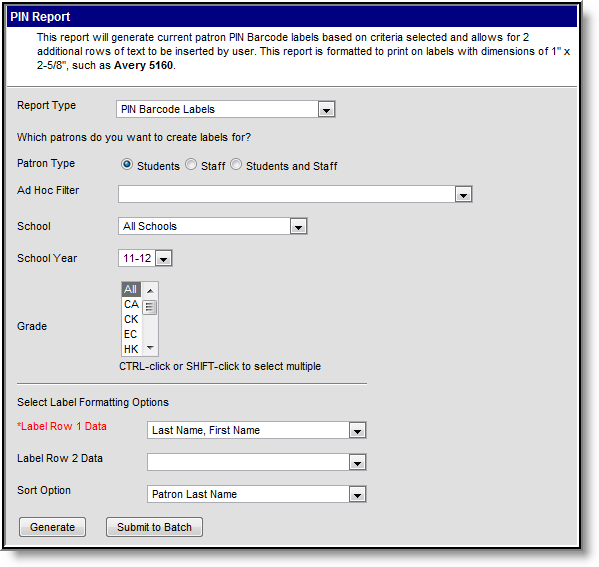 PIN Barcode Labels
To generate the PIN Barcode Labels:
- Select PIN Barcode Labels from the Report Type dropdown list.
- Select the Patron Type.
- Select an Ad Hoc Filter, if desired.
- Select the School of reporting patrons. To generate the report district-wide, select the All Schools option.
- Select the School Year.
- Select the Grade(s) of patrons included in the report.
- Select Label Row 1 Data. See the table below for more information.
- Select Label Row 2 Data, if desired. See the table below for more information.
- Select the Sort Option. See the table below for more information about each option.
- Click the Generate button OR the Submit to Batch button.
The following table describes available field options.
Field | Description |
|---|---|
Report Type | Indicates the report type. |
Patron Type | The type of patron reporting data.
|
Ad Hoc Filter | Filters report results based on fields within the filter. Ad hoc filters are created via the Filter Designer tool. |
School | The school reporting patron data. Patrons must have an enrollment or employment record within the school selected in order to report data. |
School Year | The year reporting student data. Students must have an enrollment or employment record within the year selected in order to report data. |
Grade | Limits report results based on students enrolled in the grade selected. |
Label Row 1 Data | Indicates what patron information is reported above the barcode.
|
Label Row 2 Data | Adds an additional line of patron information underneath Label Row 1 Data. Options are the same as defined in the Label Row 1 Data column. |
Sort Option | Determines how patrons are sorted on the report based on the Label Row 1 Data value selected.
|
Generate Submit to Batch | Users have the option of submitting a report request to the batch queue by clicking Submit to Batch instead of Generate. This process allows larger reports to generate in the background, without disrupting the use of Campus. For more information about submitting a report to the batch queue, see the Batch Queue article. |
PIN Barcode Labels Example
PIN Barcode Labels are generated for all patrons meeting report criteria with label row data based on values entered in the Label Row 1 Data and Label Row 2 Data fields.
Campus supports Code 39 barcodes.
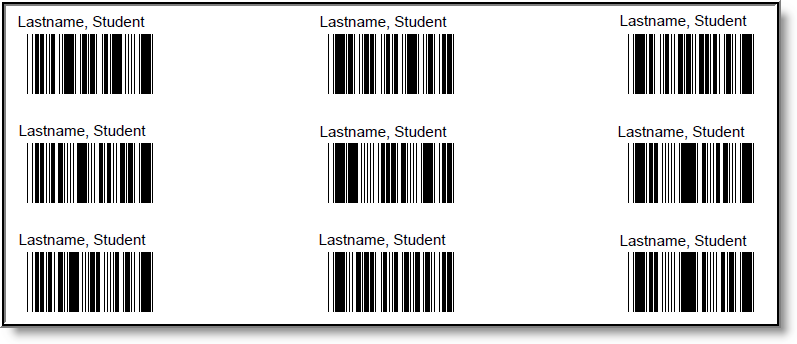 Example of PIN Barcode Labels Report
Generate PIN Labels
The PIN Labels report generates a list of PIN labels for affixing to letters and mailing envelopes for correspondence with patrons.
The report is formatted to print on labels with dimensions of 1" x 2-5/8", such as the Avery 5160. See the Printing Labels article for more information.
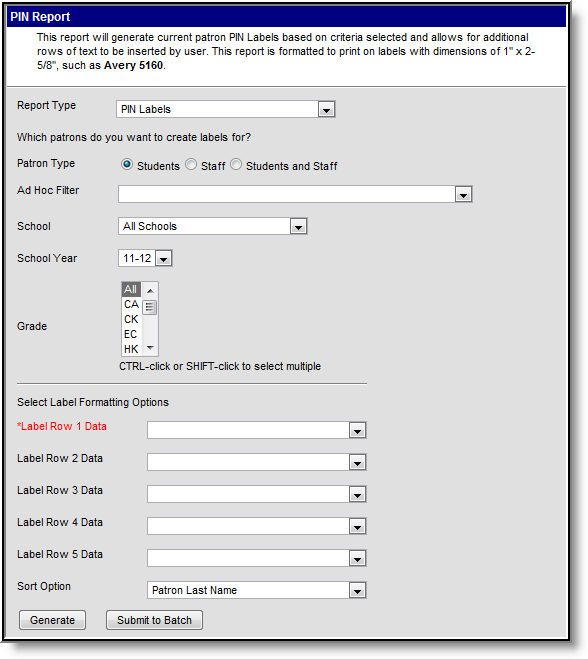 PIN Labels Editor
To generate PIN labels:
- Select PIN Labels from the Report Type dropdown list.
- Select the Patron Type.
- Select the Grade(s) of patrons included in the report.
- Select an Ad Hoc Filter, if desired.
- Select the School of reporting patrons. To generate the report district-wide, select the All Schools option.
- Select the School Year.
- Select Label Row 1 Data. See the table below for more information.
- Select Label Row 2 - 5 Data fields, if desired. See the table below for more information.
- Select the Sort Option. See the table below for more information about each option.
- Click the Generate button OR the Submit to Batch button.
The following table describes available field options.
Field | Description |
|---|---|
Report Type | Indicates the report type. |
Patron Type | The type of patron reporting data.
|
Ad Hoc Filter | Filters report results based on fields within the filter. Ad hoc filters are created via the Filter Designer tool. |
School | The school reporting patron data. Patrons must have an enrollment or employment record within the school selected in order to report data. |
School Year | The year reporting student data. Students must have an enrollment record within the year selected in order to report data. |
Grade | Limits report results based on students enrolled in the grade selected. |
Label Row 1 Data | Indicates what patron information is reported on the first row of the label.
|
Label Row 2 Data | Indicates what patron information is reported on the second row of the label. Available options are described in Label Row 1 Data column. |
Label Row 3 Data | Indicates what patron information is reported on the third row of the label. Available options are described in Label Row 1 Data column. |
Label Row 4 Data | Indicates what patron information is reported on the fourth row of the label. Available options are described in Label Row 1 Data column. |
Label Row 5 Data | Indicates what patron information is reported on the fifth row of the label. Available options are described in Label Row 1 Data column. |
Sort Option | Determines how patrons are sorted on the report based on the Label Row 1 Data value selected.
|
Generate Submit to Batch | Users have the option of submitting a report request to the batch queue by clicking Submit to Batch instead of Generate. This process allows larger reports to generate in the background, without disrupting the use of Campus. For more information about submitting a report to the batch queue, see the Batch Queue article. |
PIN Labels Example
PIN Labels are generated for all patrons meeting report criteria with label row data based on values entered in the Label Row 1 - 5 Data fields.
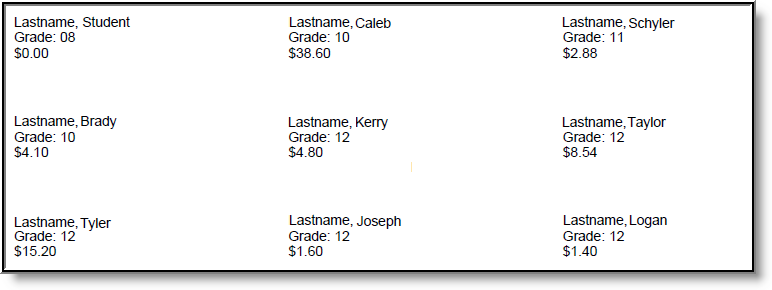 Example of PIN Labels with Last Name, First Name, Grade and Account Balance Data
