Tool Search: Assessment Center
Assessment Data Mapping and Importing
The Assessment Center lets schools import local or district student test scores and assessment results from external agencies into Infinite Campus. Imported scores appear on the Student Assessment screen and may also display on transcripts.
Vertical File Score Importing functionality was added in the Campus.2607 release. Please see the Vertical File Score Import article for details about that import process, which differs slightly from the Horizontal File Score process outlined below.
 Assessment Center
Prerequisite
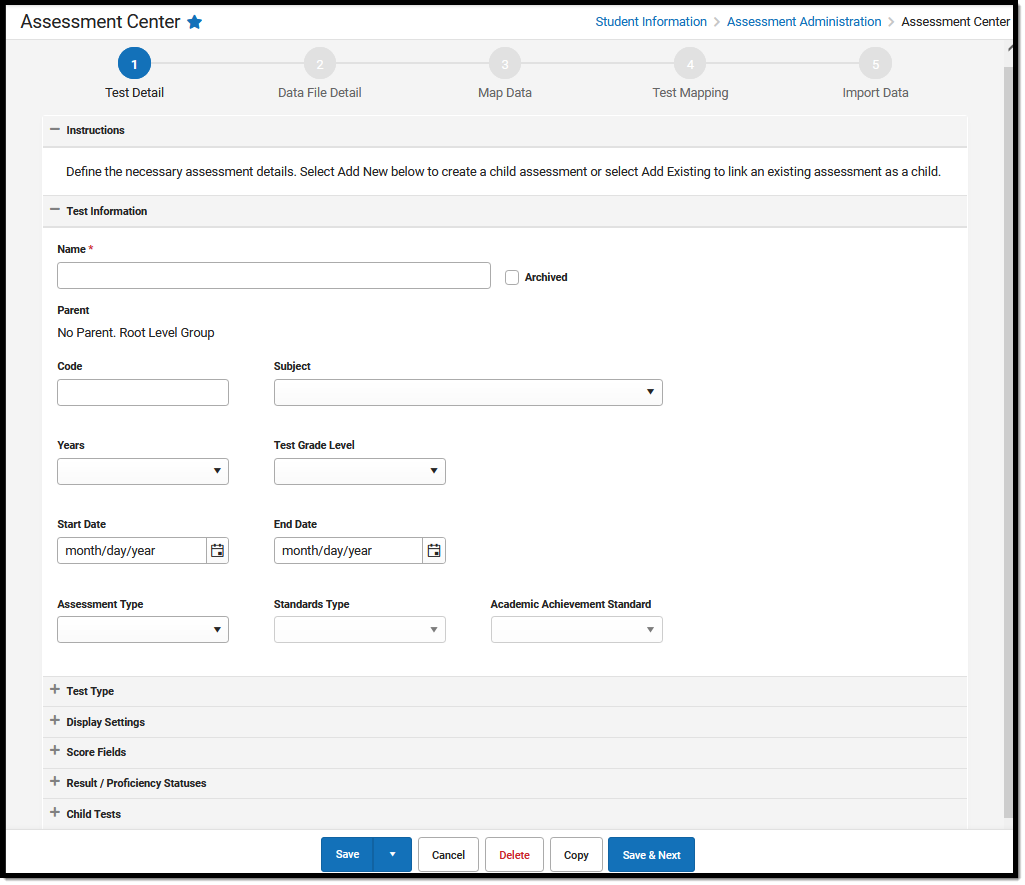
Before importing data, ensure the assessment exists. If not, create it under Step 1- Test Detail and define details such as:
- Test Information
- Test Type
- Display Settings
- Score Fields
- Result / Proficiency Statuses
- Child Tests
Data Detail File
Step 2 - Data Detail File becomes available when either the 'Save' button or the 'Save & Next' button is selected after the Test Details are documented. If the assessment was previously created, select it on the Assessment Center homepage and then click the Data Detail File icon at the top of the screen. Alternatively, select the 'Save & Next' button at the bottom of the page to proceed to the Data Detail File screen.
A Student Identifier and 'Score.date' are required for Step-3 Map Data. Ensure that these data elements are included in the source file before uploading.
Data files are NOT saved for future use.
 Assessment Center- Step 2 Data File Detail
Upload Data File
| Step | Description |
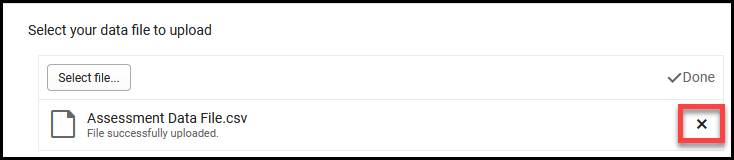
| 1 | Select a comma-delimited (.csv) file to upload. The file is used later in Step 3 - Map Data to create/edit the data mapping to be imported. Only Comma-Delimited file types are currently accepted. This file type, also known as a Comma-Separated Value (.csv), separates each value in the file with a comma. It is a standard file type that is easily read and understood by various data manipulation programs. If the wrong file is uploaded in error, select the 'X' icon on the right to remove the file.
|
| 2 | Mark 'Source File Includes Header' if the file contains a header row. |
| 3 | Choose the identifier type to link test scores to students (State ID, Student Number, Person ID, etc.). |
| 4 | Click 'Save' or 'Save & Next'. |
Data File Detail Field Descriptions
| Field | Information |
| Upload Data File | |
| Select Your Data File to Upload | Upload options:
|
| Source File Includes Header | Mark the checkbox if the data file contains a header row for identification purposes. The first row of the file is ignored when importing. 'Fuzzy Matching' is applied to column names from the source file to field names in the test score table in Step-3 Map Data when this is selected. |
| Which fields will map to student identifiers? | Select the type of identifier to be used in linking test scores to students:
Student Identifier is a required data mapping element. |
Map Data
Step 3 - Map Data is an option when either the 'Save' button or 'Save & Next' button is selected after the assessment data file has been uploaded. This step allows the user to map the data from the uploaded assessment data file to the database fields for import to a student's record in Campus.
A Student Identifier and 'Score.date' are required data mapping elements.
 Assessment Center- Step 3 Map Data
Map a Data File
| Step | Description |
| 1 | Map each column in the uploaded file to a Campus database field using the drop-down list.
|
| 2 | Select the Options button to confirm or modify the following:
|
| 3 | Resolve flagged items |
| 4 | Click the 'Save' button or the 'Save & Next' button after the mapping is completed and all action items are designated with a green check mark |
 before saving.
Map Data Field Descriptions
Instructions
Map the data from the selected source file to the database fields you want to import.
| Button | Information |
| About Mapping Data | Provides in-product information pertinent to the following:
|
Data Mapping Detail Fields
| Field | Information |
| Required Fields | These fields are required to save.
 indicates this field still needs to be mapped. indicates this field still needs to be mapped. |
| Source File | Lists identifying information about the uploaded data file, including:
|
Data Columns for Import Fields
| Field | Information |
| Restore Deleted Columns | Returns previously deleted columns to the current view/dataset. Use this option to recover columns that were removed during customization or editing. |
| Apply Fuzzy Matching Logic | This option is only displayed when the 'Source File Includes Header' checkbox is selected on Step 2 - Data File Detail.
Fuzzy Matching applies automatically only when Step 3-Map Data has not been saved. Fuzzy Matching logic is applied to unmapped columns. The logic only looks at the column heading and compares it to all the score fields available in 'dbo.testScore'. |
| Default | Displays all columns. |
| Show Only Mapped Columns | Displays mapped columns when marked. |
| Only display Score Fields that were checked in Test Details | Shows mapped student identifier fields and score fields indicated in Step 1- Test Details. |
| Display Column Identifier as | Display column indicators based on the selected format:
|
Assessment Data Grid Field Descriptions
When the 'Source File Includes Header' checkbox is marked on Step 2—Data File Detail, 'Fuzzy Matching' is applied to column names from the source file to field names in the test score table.
| Field | Information |
| Number/Alpha | Column identifier. |
| Column Header | Displays the column header from the source file. |
| Map to database field | Drop list options to map the column to a database field. Type the name of the field in the search area to filter options. |
| Options | Column Options
|
Green Check Mark  |
"Action on" and all required options have been set. |
Red Exclamation Mark  |
Action item needs to be set. |
Test Mapping
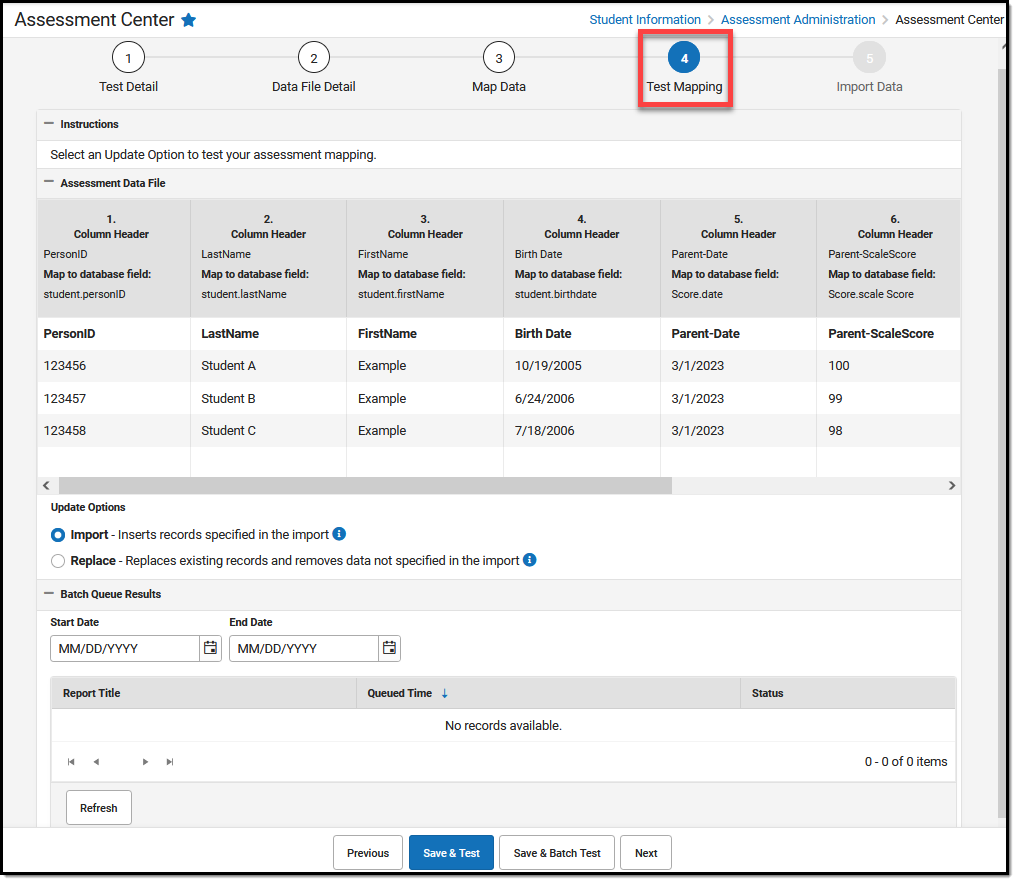
'Save & Test' or 'Save & Batch Test' must be run before advancing to Step 5-Import Data. Testing helps greatly reduce or even completely eliminate the cleanup action needed after the assessment data has been imported.
 Assessment Center- Step 4 Test Mapping

Step 4 -Test Mapping becomes available when either the 'Save' button or the 'Save & Next' button is selected after the mapping is completed with no action items designated with  . This step enables the user to verify data mappings for accuracy and make necessary adjustments before importing.
- Run 'Save & Test' or 'Save & Batch Test' to validate mappings.
- Resolve all errors and warnings before proceeding.
Test Mapping Field Descriptions
| Field | Information |
| Update Options |
|
| Batch Queue Results | Displays a list of the batch test items, including the:
The list can be filtered by entering a date range using the Start Date / End Date fields. |
| Save & Test / Save & Batch Test | One of these options must be selected before proceeding to Step 5: Import Data. Testing helps greatly reduce or even eliminate the need for cleanup actions after the assessment date file has been imported. It is recommended that you use the Save & Batch Test option when testing large files. The standard Save & Test process may time out because of the district's browser and router settings. Refer to the Batch Queue article for more information. |
Test Mapping Example
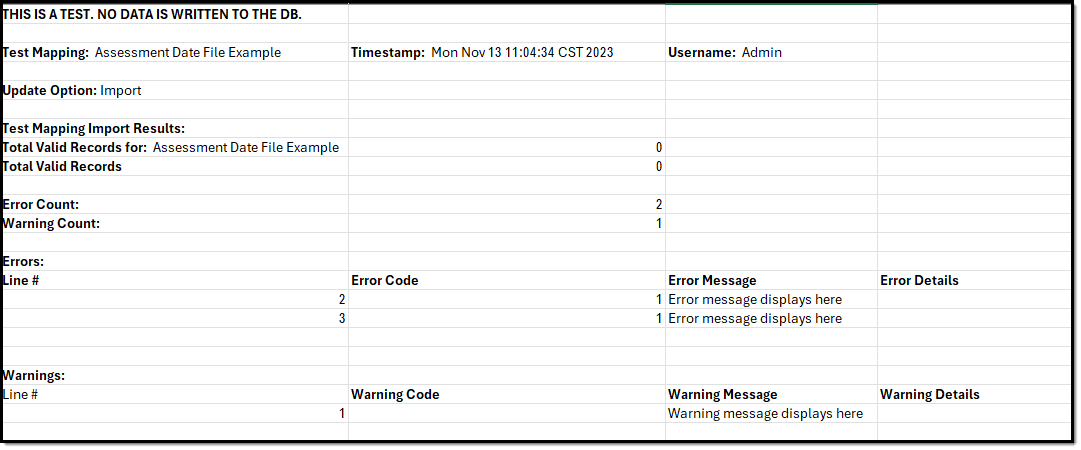
A report displays a list of potential issues. This is a TEST. No data is written to the database. All errors and warnings should be resolved before importing data to the Campus database.
 Test Mapping Example
Test Mapping Field Descriptions
| Field | Information |
| Test Mapping | Name of data file. |
| Timestamp | Day, date, and time the test was generated. |
| Username | Name assigned to the user who generated the test. |
| Update Option | Indicates the Update Option used to test the assessment mapping.
|
| Test Mapping Import Results | |
| Total Valid Records for | Displays the name of the uploaded file and the number of valid records. |
| Total Valid Records | The number of valid records. |
| Error Count | The number of errors detected in the mapping. These should be corrected before the import. |
| Warning Count | The number of warnings detected in the mapping. These should be addressed before the import. |
| Errors / Line # | The line number where the error exists. |
| Error Code | The code of the error. |
| Error Message | Message identifying/explaining the error. |
| Error Details | Additional error information (if applicable). |
| Warnings / Line # | The line number where the warning exists. |
| Warning Code | The code of the warning. |
| Warning Message | Message identifying/explaining the warning. |
| Warning Details | Additional warning information (if applicable). |
Import Data
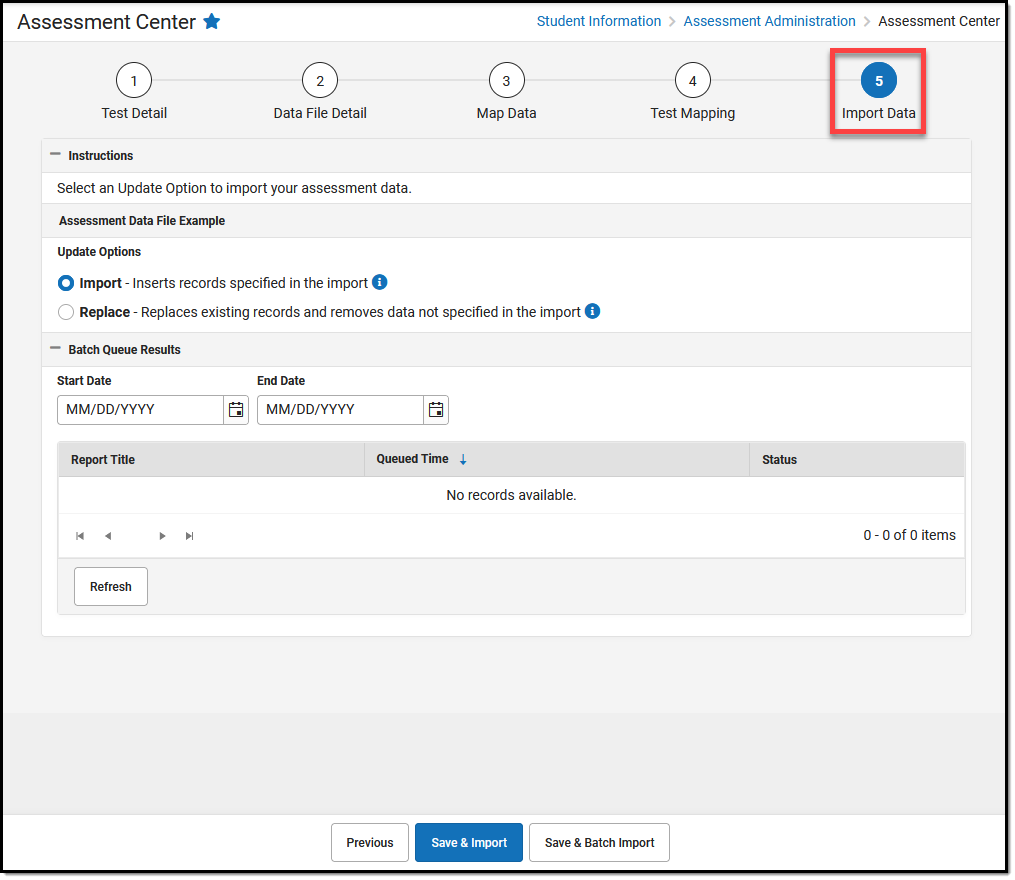 Assessment Center - Step 5 Import Data
Step 5 - Import Data is an option when either the 'Save & Test' button or the 'Save & Batch Test' button is selected on the Test Mapping screen. This step allows the user to import the mapped data to their Campus system after all errors and warnings from the test mapping have been resolved.
- After successful testing, import the data using one of these options:
• Import: Inserts new records if no match exists.
• Replace: Updates existing records and removes unspecified data. - Use Batch Queue for large files to avoid timeouts. Filter results by date range if needed.
Import Data Field Descriptions
| Field | Information |
| Update Options | Select an update option to import the assessment data.
|
| Batch Queue Results | Displays a list of the batch import items, including:
The list can be filtered by entering a date range using the Start Date / End Date fields. |
| Save & Import / Save & Batch Import | If you are importing large files, it is recommended that you use the Save & Batch Import option. The standard Save & Import process may time out because of the district's browser and router settings. Refer to the Batch Queue article for more information. |
