In order for verified credits to post correctly to student transcripts, Credit Groups and Assessments need to be set up correctly. The following table provides a workflow for setting up these items. Then, specific guidelines are included to provide more details on the process.
Verified Credits Workflow
| Number | Task | Campus Interface |
|---|---|---|
| 1. | Create and assign Verified Credit State Code to Credit Groups. | Grading and Standards > Credit Groups |
| 2. | Create the End of Course Assessment structure. | Assessments > Test Setup |
| 3. | Assign grading tasks that post to student transcripts to the course. | Scheduling > Courses > Course > Grading Tasks |
| 4. | Assign the End of Course Assessment to the course. | Scheduling > Courses > Course > Assessments |
| 5. | At the end of the course (semester, end of term, etc.), post grades to student transcripts. | System Administration > Student Portfolio > Transcript Post > Post Grades To Transcripts |
| 6. | Import End of Course Assessments using the Score Import Wizard. | Assessments > Score Import Wizard |
| 7. | Use the Post Transcript tool to post verified credits to the transcript. | System Administration > Student Portfolio > Transcript Post > Post Verified Credits To Transcripts |
Credit Groups
Tool Search: Credit Groups
See the Credit Groups article for more information.
Credit Groups define how credits earned by students are counted on the transcripts and are used in tracking a student's progress towards graduation. A State Code field can be chosen, indicating this Credit Group is for Verified Credits. This means a course may have more than one credit group assigned to it - one for verified credits, one for regular (non-verified credits).
 Assign Verified Credits to Credit Groups
Determine how these credits groups should display when printing transcripts, as depicted in the following table. Click the image for a larger view.
| Transcript Print | Credit Group Setup |
|---|---|
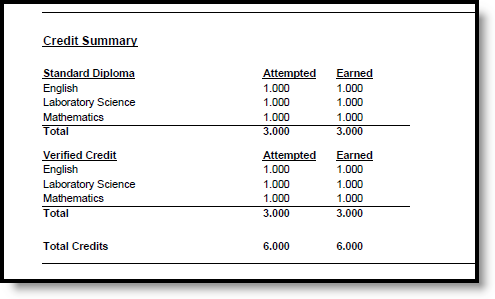
Verified Credits and Standard Credits print separately
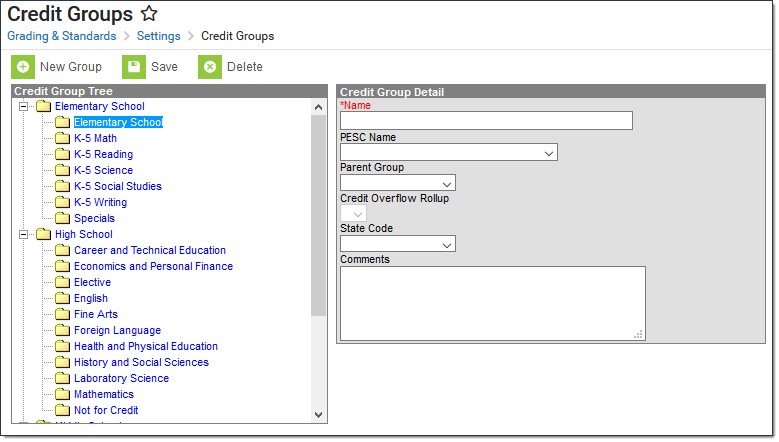
| Standard Credits Create a Credit Group easily identifying it as a standard credits group. Then, create a child credit group for each subject area where a student can receive credits. The child credit groups will have the Parent Group field populated with the name of the standard credit group. In the image below, the Credit Group is named Standard Diploma, and the child credit group is named English.
Leave the State Code field blank. Verified Credits Create a Credit Group identifying is as a verified credits group. Then, create a child credit group for each subject area where a student can receive verified credits. In the image below, the verified credit group name is Verified Credit. Note that the State Code field is populated with VC: Verified Credit.
The child credit groups also have the state code field populated. |
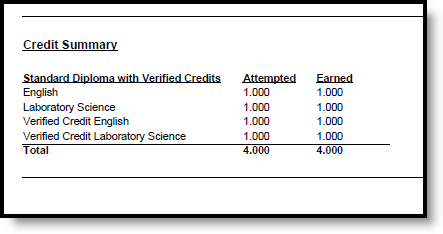
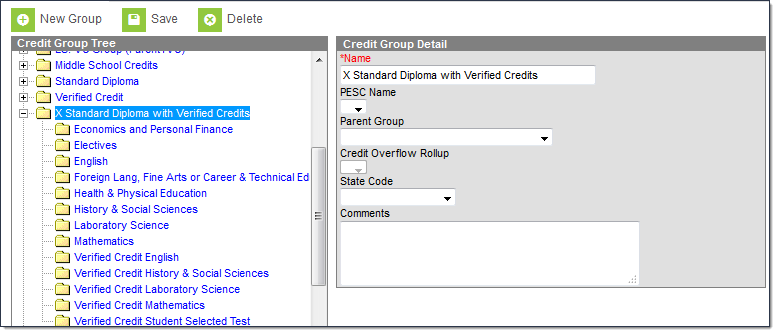
Verified Credits and Standard Credits print together
Verified Credits and Standard Credits Print Together Example | Create a Credit Group named accordingly, indicating both standard and verified credits are reported together. When creating the child credit groups, standard credit groups will not have the State Code field populated, while verified credits will. This means a child group for English and a child group of Verified Credit English needs to be created.
Repeat this process for each subject in which the student can receive standard and verified credits. Remember, the Parent Group needs to be populated for each of these child groups. |


End of Course Assessment Structure
See the Test Setup article for more information.
Students are awarded verified credits based on the passing of an end of course assessment. For each credit area where verified credits are given, an End of Course Assessment needs to be created and assigned to the appropriate course.
| Task | Image |
|---|---|
Name the End of Course Assessments appropriately to show they are the end of course assessment. A Test Name of Math isn't necessarily an end of course assessment for math, but End of Course Math or EOC Algebra is more descriptive. | 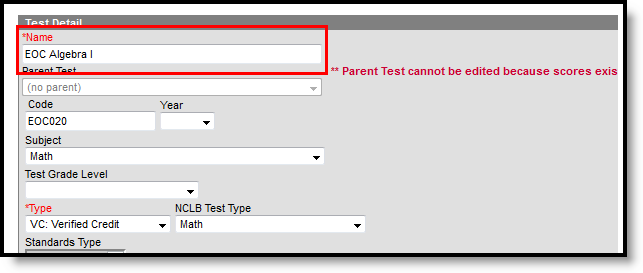 EOC Algebra I Test Example
|
| Set the Type field to be VC: Verified Credit or VS: Verified Substitute. | 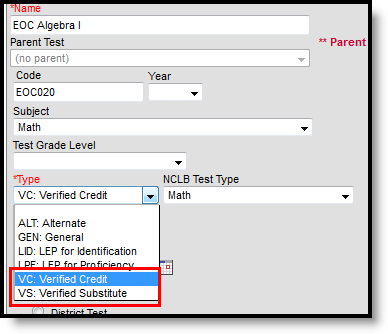 Type Dropdown - Verified Credit and Verified Substitute
|
| Mark AT LEAST the Result score field. Others can be chosen as well, but the Result value is used to determine the passing score. | 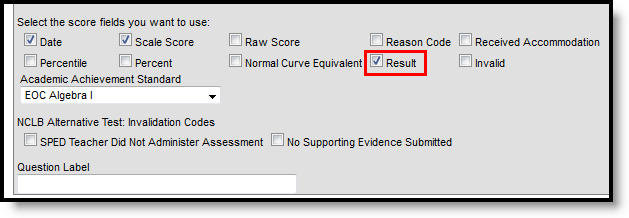 Score Fields - Result Checkbox Marked
|
| Enter Result Statuses for the assessment, marking at least one as a Passing Score. | 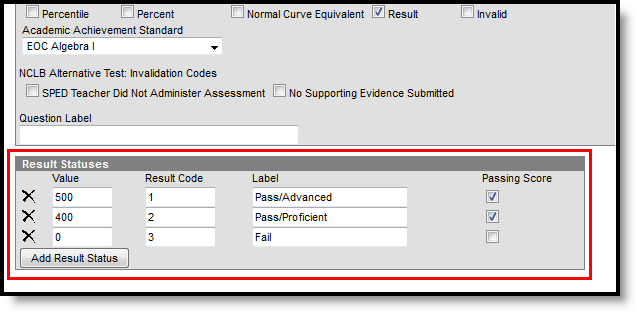 Result Statuses
|
End of Course Assessment Assigned to Course
See the Assessment (Courses) article for more information.
After creating the End of Course Assessment, it needs to be assigned to the course.
| Task | Image |
|---|---|
| Locate the course in Scheduling module and navigate to the Assessments tab. | N/A |
| Click the New icon and select the End of Course Assessment for this course in the dropdown list. | 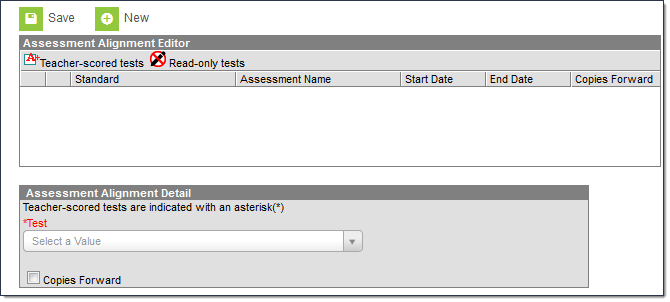 Assessment Alignment Editor Assessment Alignment Editor
|
| Select the Verified Credit Name and enter Verified Credit Amount. | 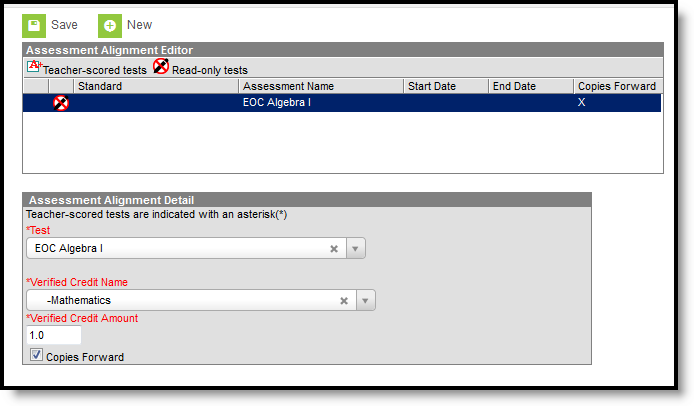 Assessment Alignment Detail Assessment Alignment Detail
|
Determine if this assessment should be included future calendars that offer this course. If yes, mark the Copies Forward checkbox. If no, do not mark the checkbox. Click the Save icon when finished. | 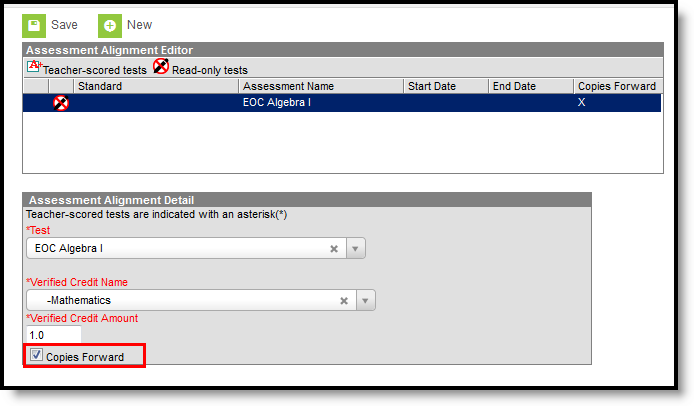 Copies Forward Checkbox Copies Forward Checkbox
|
Score Import Wizard
See the Score Import Wizard article for more information.
After all End of Course Assessments have been graded, import the scores using the Score Import Wizard.
| Task | Image |
|---|---|
| Locate the file of assessment scores received from the state. | N/A |
| Create a new Score Import mapping based on the fields in the above file. Upload the saved CSV file, and click Upload and Continue. | 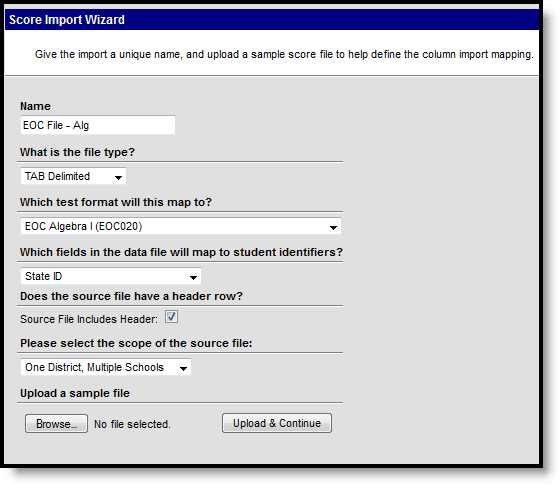 Score Import Wizard Score Import Wizard |
| Map the fields accordingly. At minimum, import the score result. This is necessary to calculate the result of the assessment. Test the import, make final changes, and then import. Choose data from the file that identifies the student uniquely - state ID, birth date, etc. | 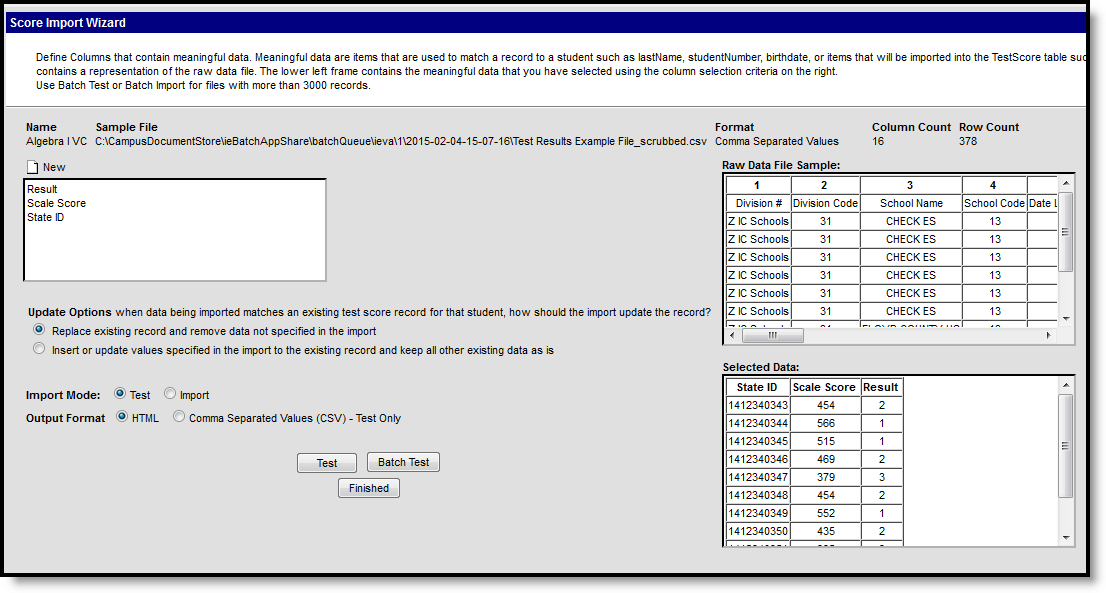 Map Fields, Select Student Identifiers, Test Results, Map Fields, Select Student Identifiers, Test Results, |
| Check the student's Assessment tool to verify scores were imported properly. | 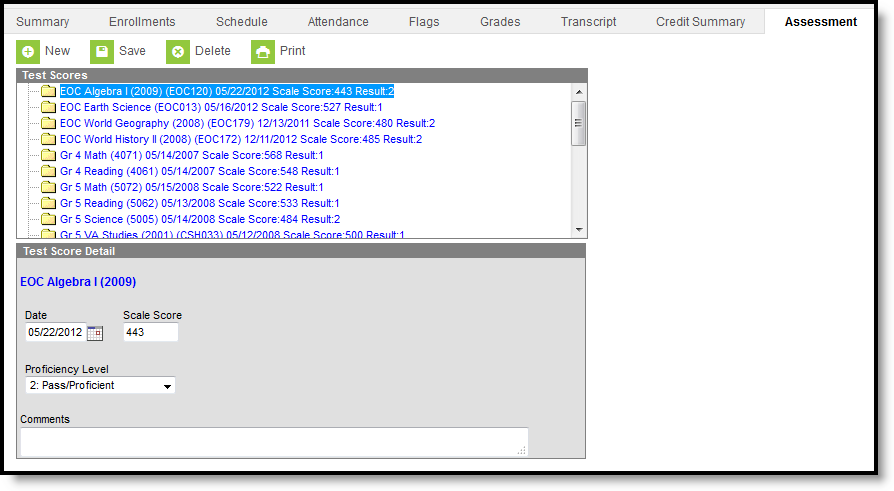 Student Assessment Tool Student Assessment Tool |
