This article provides information on how to create a custom form for students that withdraw from a school for Arizona school districts.
This article only pertains to Arizona school districts.
Create a Fillable Form in Adobe
This step is NOT done in Infinite Campus.
- Open a Form in Adobe Pro. Make sure to open just the form page and not the instructional pages as well.
- Open the Tools menu and click Prepare Form.
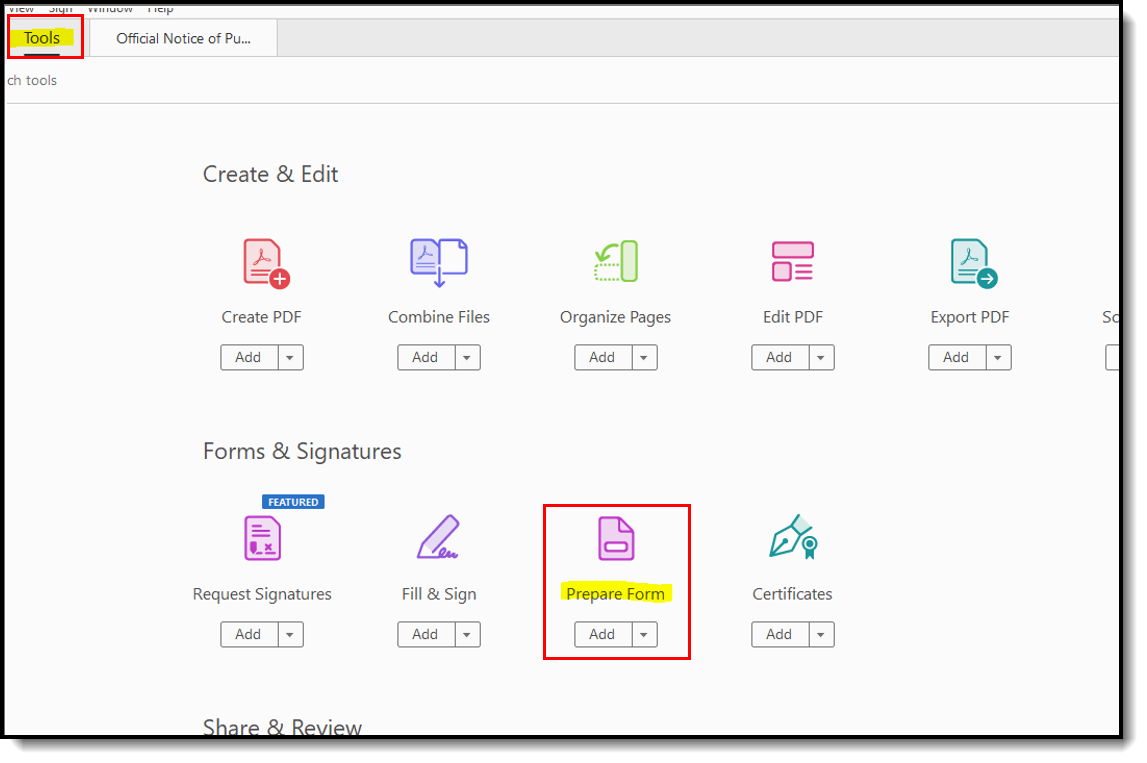
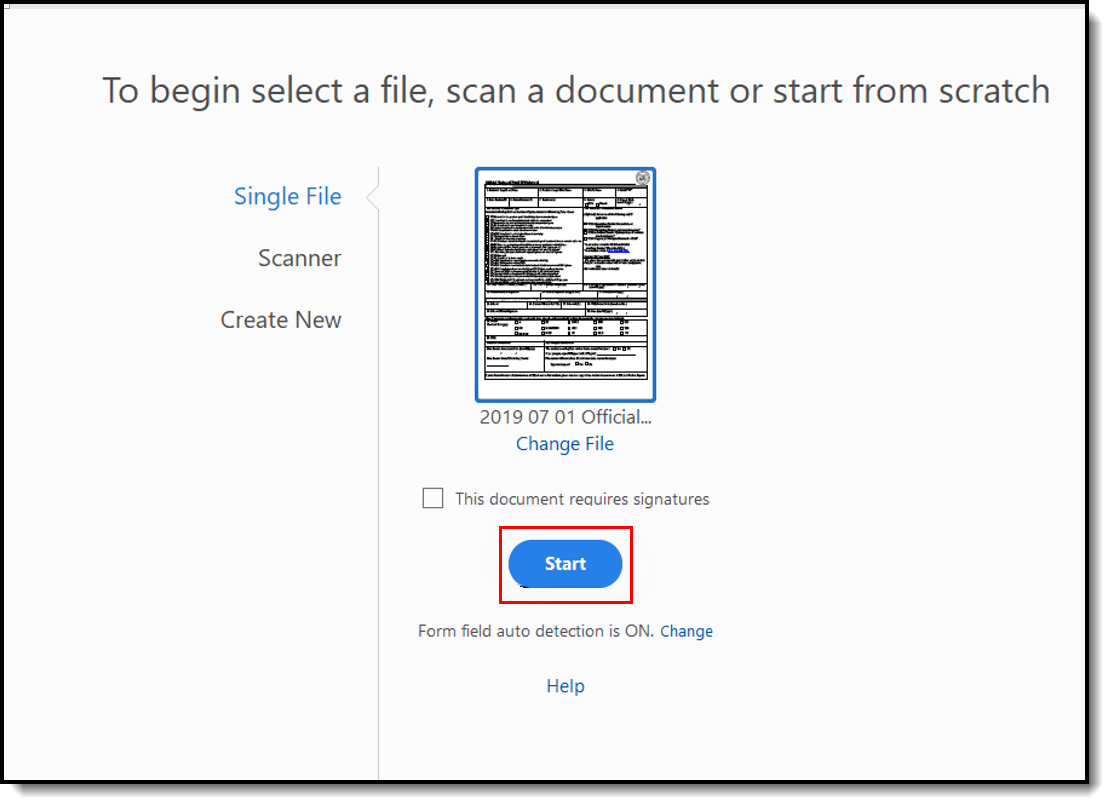
- Ensure the form open is selected and click Start.
- Update/add form fields as needed:
- Fields that were automatically added can be deleted or renamed if necessary.
- New form fields can be added to any locations where a form field was not created.


Create a Custom Form
Tool Search: Custom Form Setup
Step 1. Upload Form into Campus
- Select the arrow next to the New button and choose Interactive Form.
- Populate the Module in which the form should belong. Note: If you do not have a module created or need a new one for this form, refer to the Custom Module Setup article for guidance.
- Add a Name for the form.
- Select the PDF of the withdrawal form with the fields you created and upload the form.
- Determine if the form should display on Campus Parent or Campus Student.
- When Campus Parent is marked, determine the Guardian eSignature Requirement:
- When Campus Student is marked, determine the Student eSignature Requirement.
- Mark the Roster checkbox when the PDF should display on the Roster.
- Populate the Sequence when the form should display in a certain order against other forms.
- Determine whether users can type Overflow text beyond the space in any fields.
- Provide any Comments or Instructions necessary for the form.
- Click Save & Next.
 Interactive Custom Form Upload
Step 2. Prepopulate Fields
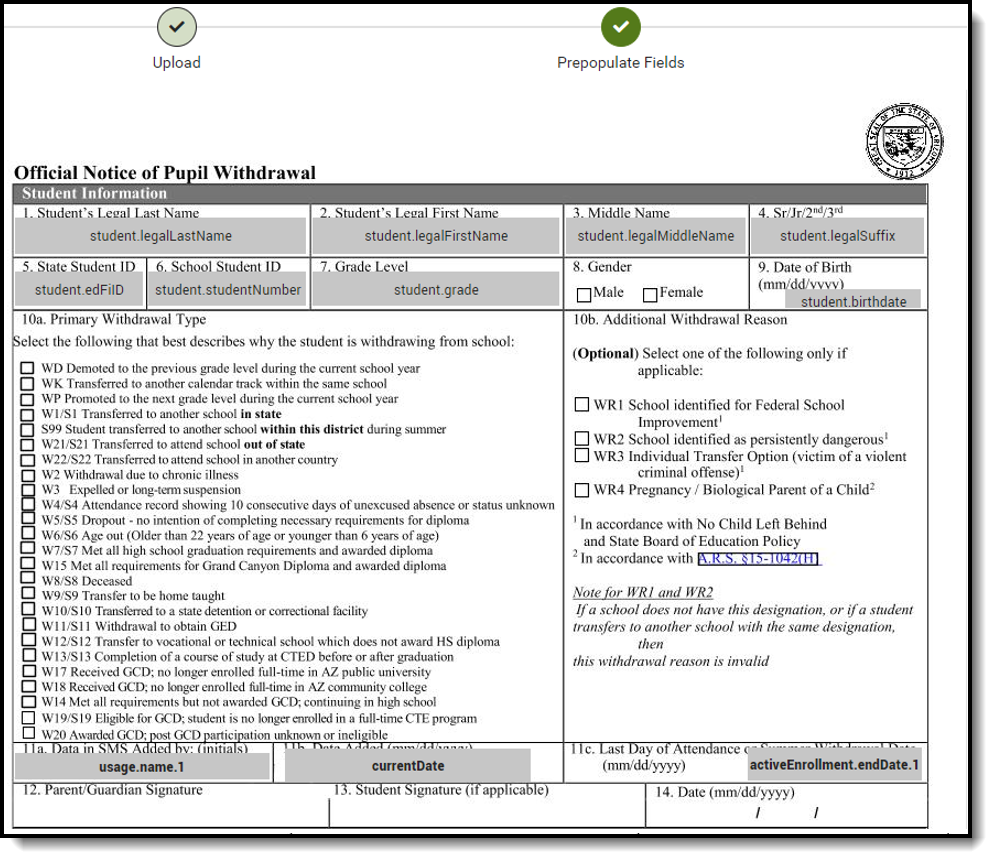
- Click on each field in the form and connect it to the Ad hoc field that should prepopulate. Note: Campus is currently limited to prepopulating text and date fields. Checkbox fields cannot be prepopulated in a custom form and need to be filled out once the form is created for a student. See the list of recommended Ad hoc fields below.
- Click Save & Next.
Recommended Ad hoc Fields for Mapping
| Field Name | Ad hoc Field Name |
|---|---|
| Student Legal Last Name | student.legalLastName |
| Student Legal First Name | student.legalFirstName |
| Middle Name | student.legalMiddleName |
| Suffix | student.legalSuffix |
| State Student ID | student.edFiID |
| School Student ID | student.studentNumber |
| Grade Level | student.grade |
| Date of Birth | student.birthdate |
| Data in SMS added by | user |
| Date Added | currentDate |
| Last Day of Attendance This pulls the enrollment end date from the most recent enrollment. |
activeEnrollment.endDate |
| School | sch.name |
| District/Charter # | dist.number.1 |
| School # | sch.number.1 |
| Withdrawal Code Note: This pulls the enrollment end status from the most recent enrollment |
activeEnrollment.endStatus.1 |
| The AZELLA and ELL information could be populated if a Custom Tab was created that contained the specific fields needed. A user would have to populate those fields, but then have them pull into this form automatically. | |
 Custom Withdrawal Form - Page 1
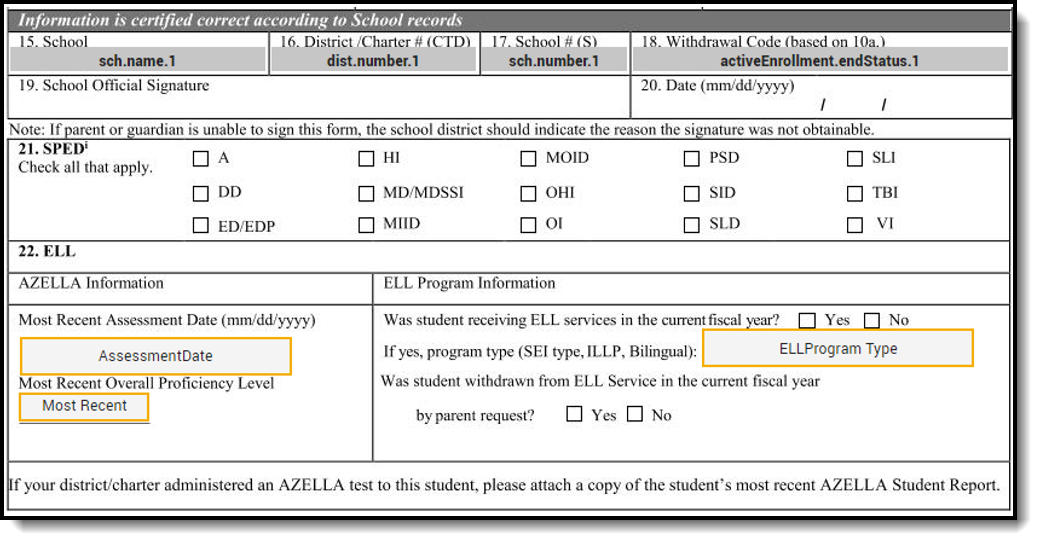 Custom Withdrawal Form - Page 2
Step 3. Define Rules
- Filter to a specific field in the Field List.
- Assign a Rule to that field.
- Repeat steps 1 and 2 for as many fields need a rule defined.
- Click Save & Next.
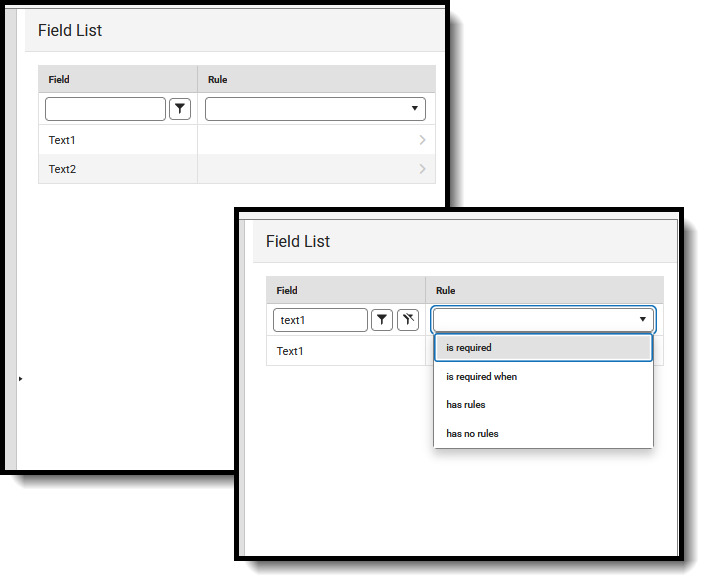 Define Fields on Custom Forms
Step 4. Publish the form
- Select a Start Date for which the form should be available and an End Date, if necessary.
- Click Save.
 Publish Custom Form
Assign the Form to a Student
Tool Search: Forms
Once the Custom Form is created, add the State Pupil Withdrawal Form to the student and click Save. Refer to the Student Forms article for guidance.
