Tool Search: Census
The Courses editor on the Census People toolset in State Edition allows the storing of course information for district personnel in situations where that district may not be using a District Edition application. This is used in accountability and staff reporting and determines if sections of courses are taught by highly qualified teachers.
 People Courses
Existing courses can be searched for and added to this tab, and in addition, new courses and sections can be created from this tab.
State Edition users will see this tab in the Census People toolset. District Edition users will not see this tab.
View Course Detail Information
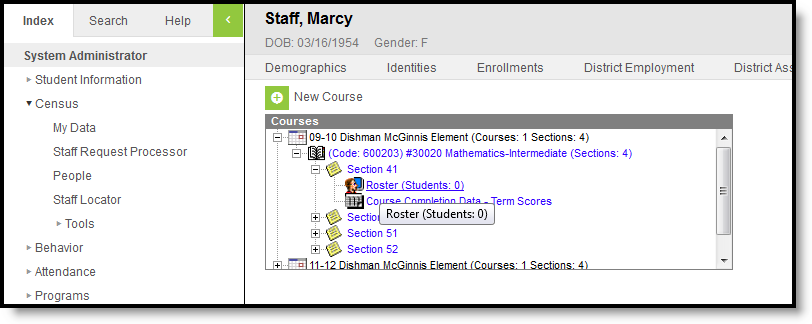
Course information where the staff person is currently assigned as the primary teacher will appear in the Courses list. Courses are sorted by Calendar, meaning the most current school year will be at the top of the Courses list.
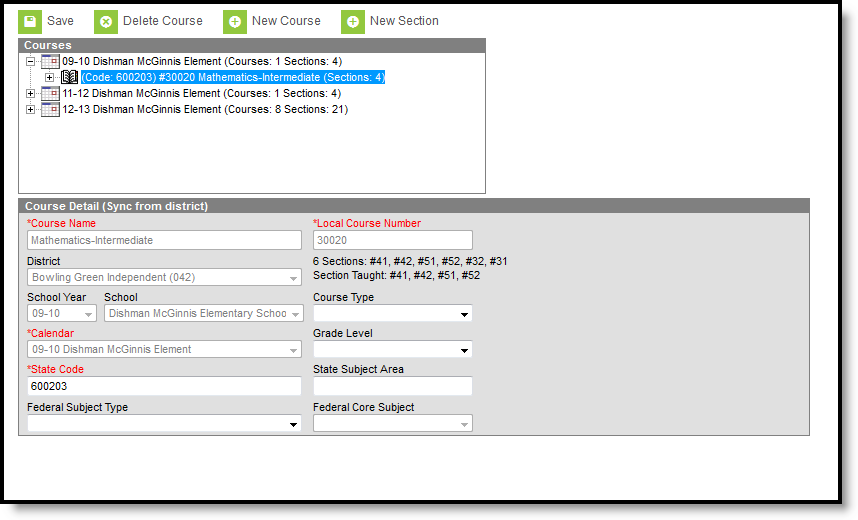
Users can view the Course information by expanding the calendar and selecting the course (displayed in the image above) or further expand the course entry and view Section detail.
 Course Detail
Search for a New Course
If a course does not appear in the list or a course has not been created, the user can search for and create a new course that will be assigned to the selected staff person.
 New Course
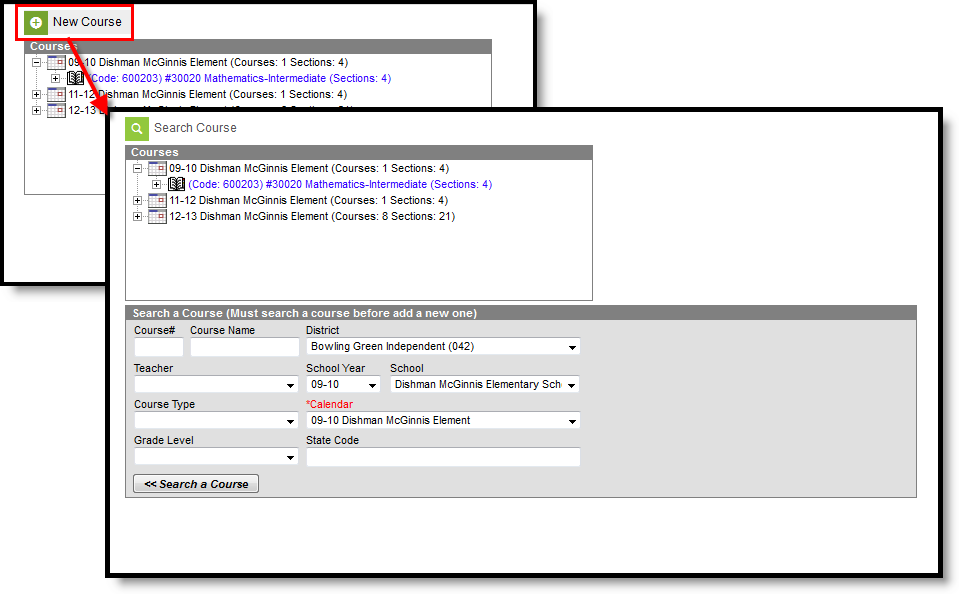
- Select the New Course icon. A Search a Course editor will appear.
- Enter the Course Number and Course Name.
- Select a District from the dropdpown list. This selection should be the district where the staff person is currently employed.
- Click the Search a Course button. Matching results will appear in the Search Index.
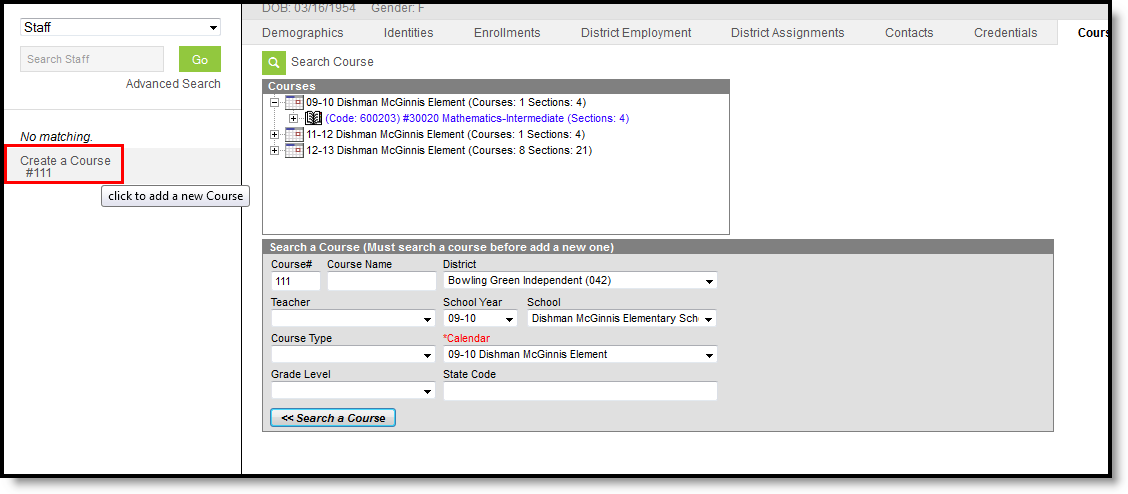
- If no matching results were found, an option to create that entered course will appear.
Create a New Course
If no matching results are found after searching for a new course, a new course can be created by clicking the Create a Course link in the Search index. Once selected, the Create a Course and a Section editor will appear.
 No Matching Course
- Enter the Course Name and Local Course Number.
- Select a District from the dropdpown list. This selection should be the district where the staff person is currently employed.
- Enter a Section Number for this course.
- Select a School Year, School and Calendar from the dropdown list. This will default to the selected year and school in the Campus toolbar.
- Select the Course Type from the dropdown list.
- Select an appropriate Grade Level from the dropdown list. This selection indicates the course is for students in that selected grade level only.
- Enter the State Code for the course.
- Enter the State Subject Area for the course.
- Select the Federal Subject Type from the dropdown list.
- If the Federal Subject Type is CORE: Core Academic Subject Area, select the Federal Core Subject from the dropdown list.
- Click the Save icon when finished. The course will be created and will appear in the Courses list at the top of the editor.
Staff members can only have courses added for the schools in which they are employed. If a user attempts to create a course for a staff person at a school where that staff person is not employed, an error message will appear if the teacher does not have a District Assignment record in the school.
Create a New Section
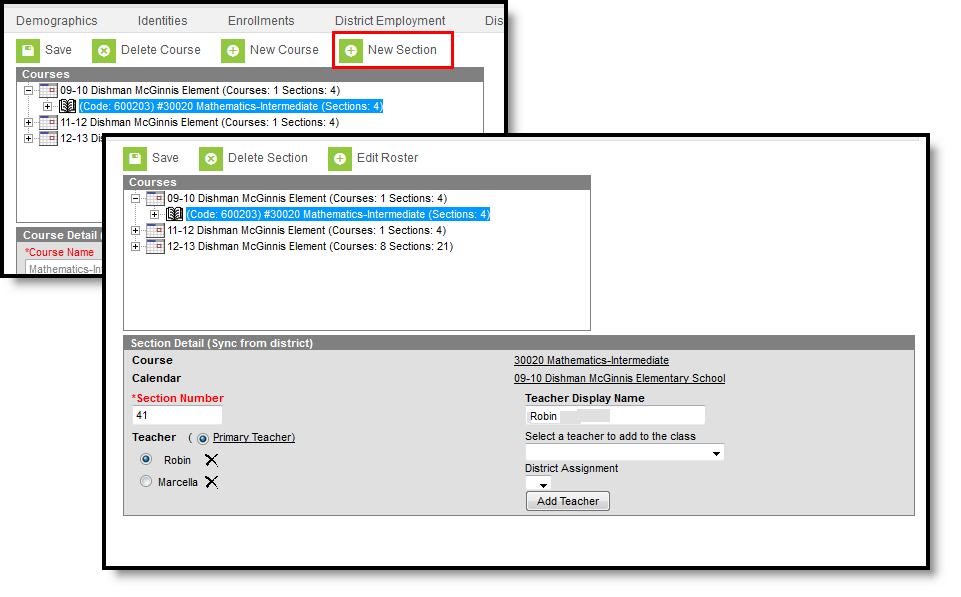
One course section is originally created when adding a new course. Additional course sections can be added by selecting the New Section button from the action bar. In addition to creating new sections, additional teachers can also be assigned to that section.
 Create a New Section
Add a New Course Section
- Select the appropriate Course from the Courses editor.
- Select the New Section icon from the action bar.
- Enter the Section Number.
- Enter the Teacher Display Name.
- Select a teacher to add to the class from the dropdown list.
- If more than one teacher is listed, select the appropriate radio button to indicate who the Primary Teacher is.
- Click the Save icon when finished.
View Teacher Selection and Information
Any number of teachers can be added to the Course Section. However, only one teacher can be marked as the Primary Teacher of that section.
- The Teacher Display Name field data will appear on student schedules, report cards, etc. This name must be manually entered.
- The Primary Teacher selection determines who is considered the main teacher of that section.
- The list of teachers from which to select will add additional teachers to the section.
Only teachers who have a District Assignment record in the school and who also have the Teacher checkbox marked on their District Assignment record will appear in the Teacher dropdown list.
 Primary Teacher Selection
View Roster Detail Information
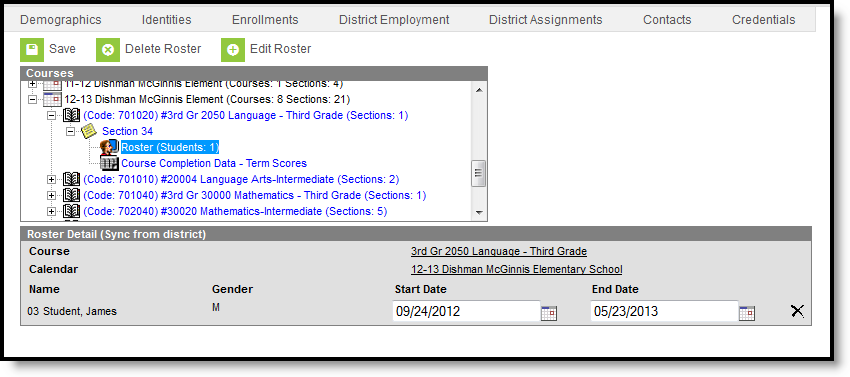
Users can view, add or delete students from Course Section Rosters by clicking the (+) next to the section and selecting the roster in the Courses window.
 Roster Detail
Once a roster is selected, the Roster Detail editor will appear, displaying the course, calendar and students tied to the roster.
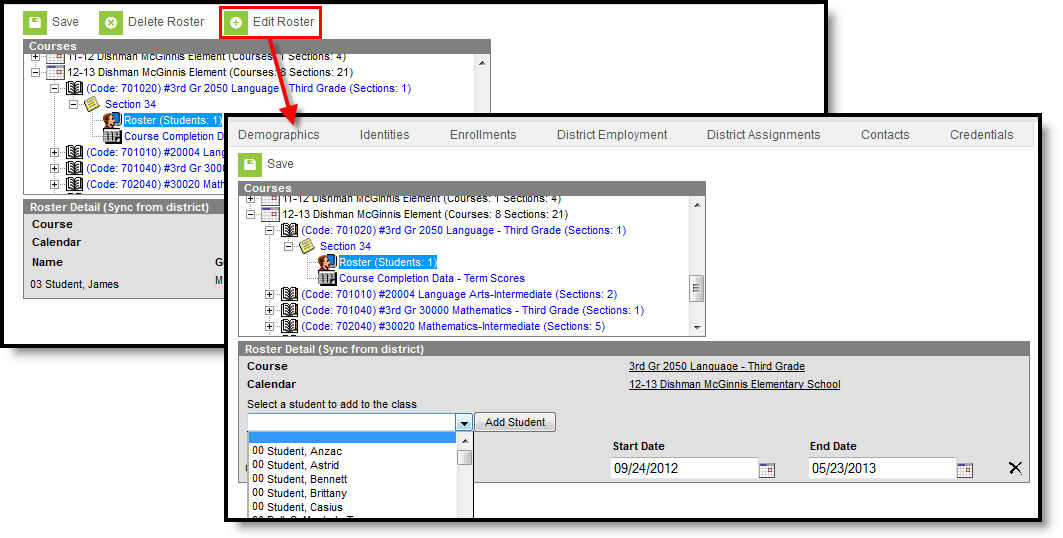
Add Students to a Roster
Individual students can be added to a staff's Course Section Roster. Select which student to add to the class and click the Add Student button. The student moves to the right side of the editor. Enter the Start Date and End Date of the student's enrollment in the course section. The Start Date is typically the first day of the course section or the date the student entered the course. The End Date is typically the last day of the course section. Once entered, select the Save icon. The student is added to the course section. The roster now reflects the added student in the count displayed in the Courses window as well as within the Roster Detail editor.
 Adding Students to a Roster
Delete a Roster/Student
Users can delete entire course section rosters or specific students within a roster.
Delete a Roster
To delete an entire roster, select the roster from the Course window and click the Delete Roster button. This deletes the information and it no longer exists at the state level.
Delete a Student from a Roster
To delete specific students from a Course Section Roster, select the roster from the Courses window and click the X next to the student's name. Users will be prompted with a warning message asking to confirm the action. Select OK to remove the student from the roster.
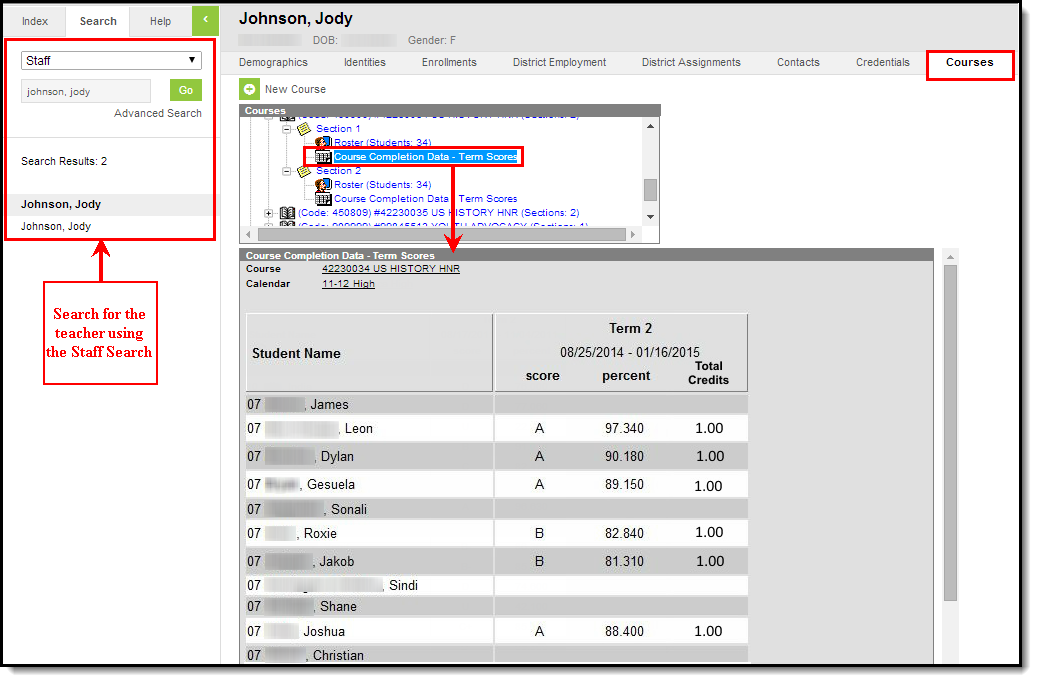
View Course Completion Data
Campus State Edition users can view Course Completion data per section per term on the Courses tab. In order for Course Completion data to appear, the following steps must first be completed:
- Districts must post course grades to transcript via the Transcript Post tool.
- State-level users must resync the TranscriptCourseSE table along with all dependencies via the Resync State Data tool.
For more details about this Course Completion workflow, see the Reporting Course Completion Data article.
 Course Completion Process
Once the steps above have been completed, course section-level Course Completion data can be viewed by selecting the Course Completion Data - Term Score link in the Courses window.
For complete analysis and reporting of Course Completion data per student per term, see the Course Completion folder of the Filter Designer tool. For steps on how to create an Ad hoc filter to view and report this data, see the Reporting Course Completion article.
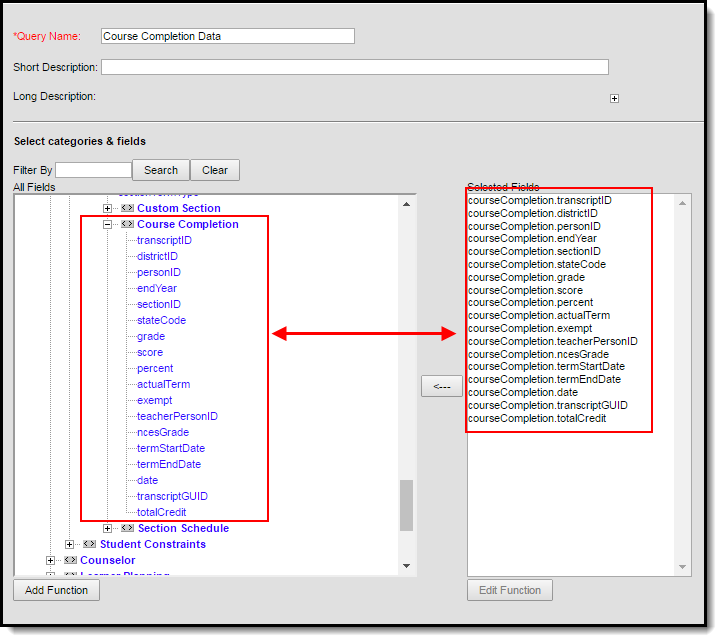 Course Completion Data within Ad hoc
