Tool Search: Data Export
The Data Export tool allows users to view the results of Ad hoc filters in multiple report formats and files. All Ad hoc filters created via the Filter Designer can be exported via the Data Export tool.
When using Custom Tab fields within the Ad Hoc Query Wizard, all students appear in the results even if they do not have a record in the custom-dated tab. When exporting fields from a Custom Tab with a Table or List Element Tab Type, Ad Hoc logic will output every possible combination for a specific date and time. The Table Tab Type stores specific times. The List Element Tab Type always stores 12:00 AM.
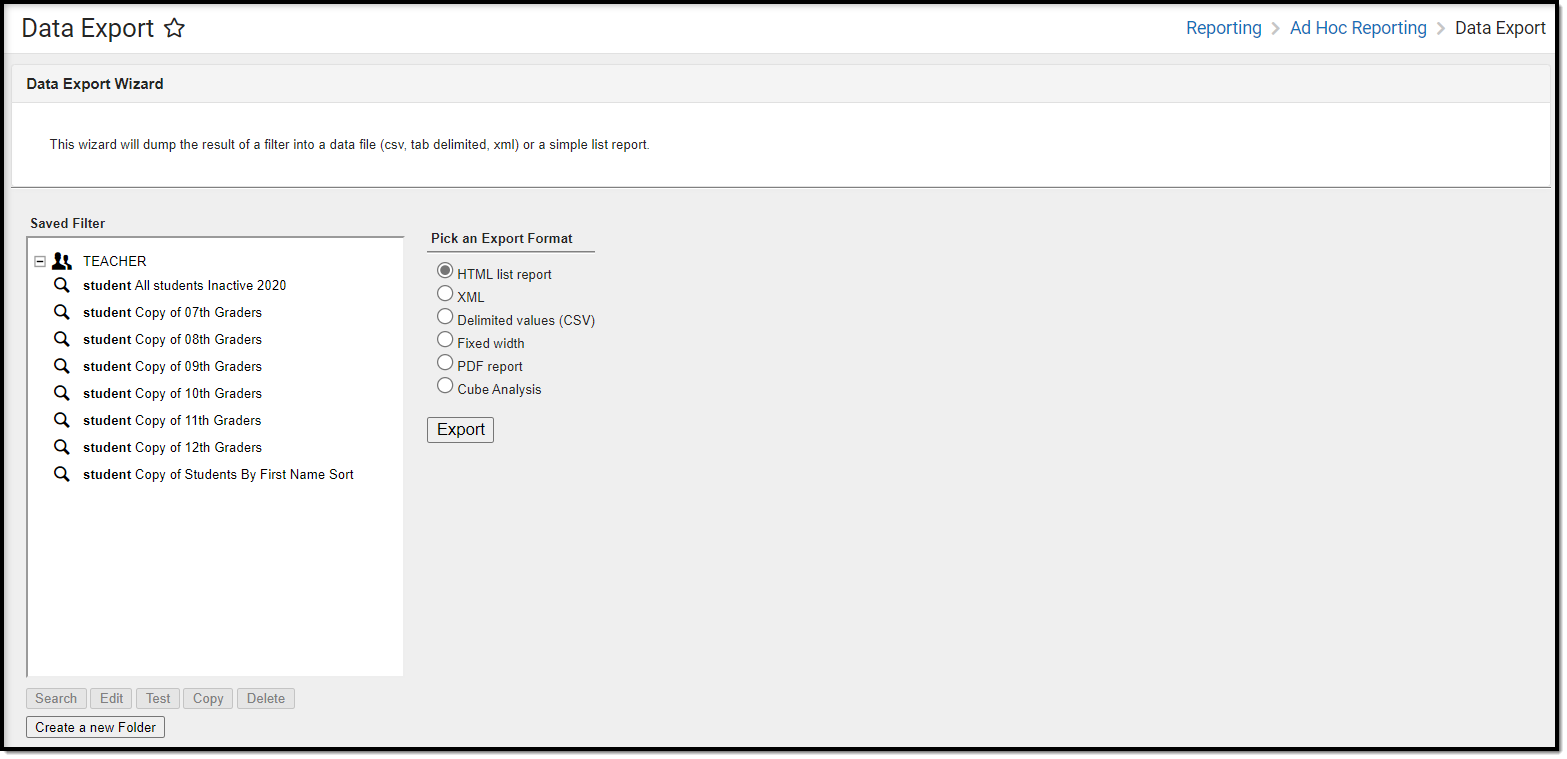 Data Export Editor
See the Data Export Tool Rights article to learn about rights needed to use this tool.
For more information about Tool Rights and how they function, see the Tool Rights article.
Field Logic
The following logic is used when reporting NULL or field values of 0 within Ad hoc filters:
- Float fields = NULL will return a blank value unless a default value exists in the Attribute/Dictionary.
- Float fields = 0 will output 0.
- Number fields with NULL values display blank unless a default value exists in the Attribute/Dictionary.
- Number fields = 0 will output as 0.
BIE SPECIFIC LOGIC:
- If an EnrollmentBIE field has a default value, a NULL field will report the default value when filtering data or exporting via the Data Export tool.
- This logic applies to all fields in the EnrollmentBIE table, except foreign keys and End Year.
CUSTOM DATED FIELD LOGIC:
- Dated Custom fields use the date for outputting records.
- All possible combinations of records for a distinct date and time report.
- Values tied to records on other dates will not show in the output for another date/time.
Calendar Selection
Specific calendars can be selected for the following saved filters:
- Query Wizard filters using a Student Data Type or a Course/Section Data Type
- Pass-Through SQL Queries using a Student Data Type or a Course/Section Data Type
- Select a saved Student Data Type and saved Course/Section filters, and select from which calendars to report data.
- Select calendars by active year, school name, or year. If a calendar is selected in the Campus Toolbar, that calendar is already selected.
Calendars cannot be selected if the query is for Census/Staff Data Types.
Only calendars to which the user is assigned calendar rights are available for selection.
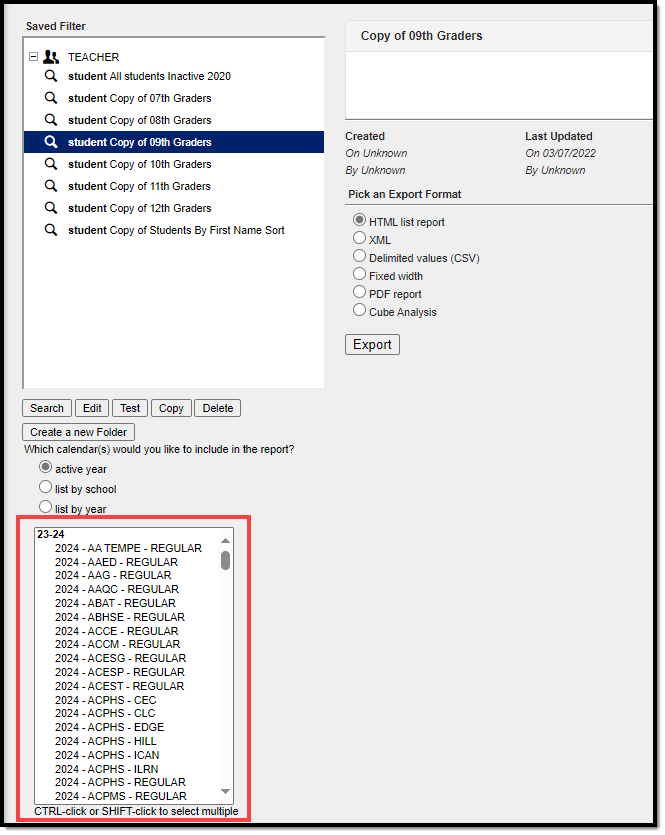 Data Export Calendar Selection
Export an Ad hoc Filter
- Select an Ad hoc filter from the Saved Filters window. This field is populated with filters created in the Filter Designer tool. A description of the filter may appear if established within the filter itself.
Select the desired format of the exported Ad hoc filter by clicking the appropriate radio button in the Pick an Export Format area. See the Data Export Fields table below for more information.
The length of each field within an Ad hoc filter must be defined in order to properly generate the Fixed Width format. Field lengths are established within the Filter Designer tool.
- Select the Export button. The exported Ad hoc filter will display in a separate window in the designated format.
Data Export Fields
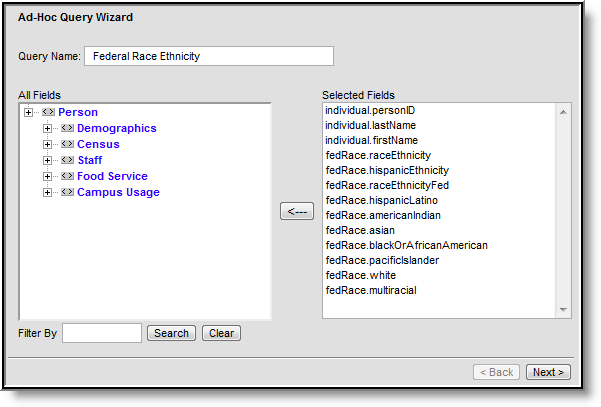
All fields within an Ad hoc filter that have a Column Header established will report that value in the header of exported Ad hoc reports. Column headers are defined in the Ad hoc Query Wizard tool.
Field | Description |
|---|---|
HTML list report | Exports the results of the Ad hoc filter in HTML format (See image 2). |
XML | Exports the results of the Ad hoc filter in XML format (See image 3). |
Delimited values (CSV) | Exports the results of the Ad hoc filter in a number of Delimited values (CSV). The Double quote data dropdown list allows users to determine when double quotations are added to exported Ad hoc filter data (see image 6). The Include Subtotals checkbox allows users to properly display aggregate totals that may be included in the filter. |
Fixed width | Exports the results of the Ad hoc filter in Fixed Width format (see image 10). |
PDF report | Exports the results of the Ad hoc filter in PDF format. Selecting the Field Name Only radio button means field names in the header will only display the field name as it exists in the database (i.e., grade is reported for the student.grade database field (see image 11)). Selecting the Table Name and Field Name radio button means both the table and field name will display in the header on the report (i.e., student.grade is reported in the header for the student.grade database field (see image 12)). |
| Cube Analysis | Exports the filter results to a pivot table. For more information about navigating and utilizing the features of a pivot table, see the Pivot Designer article. |
Search Ad hoc Filters
Users can identify which students are included in an Ad hoc filter before exporting data.
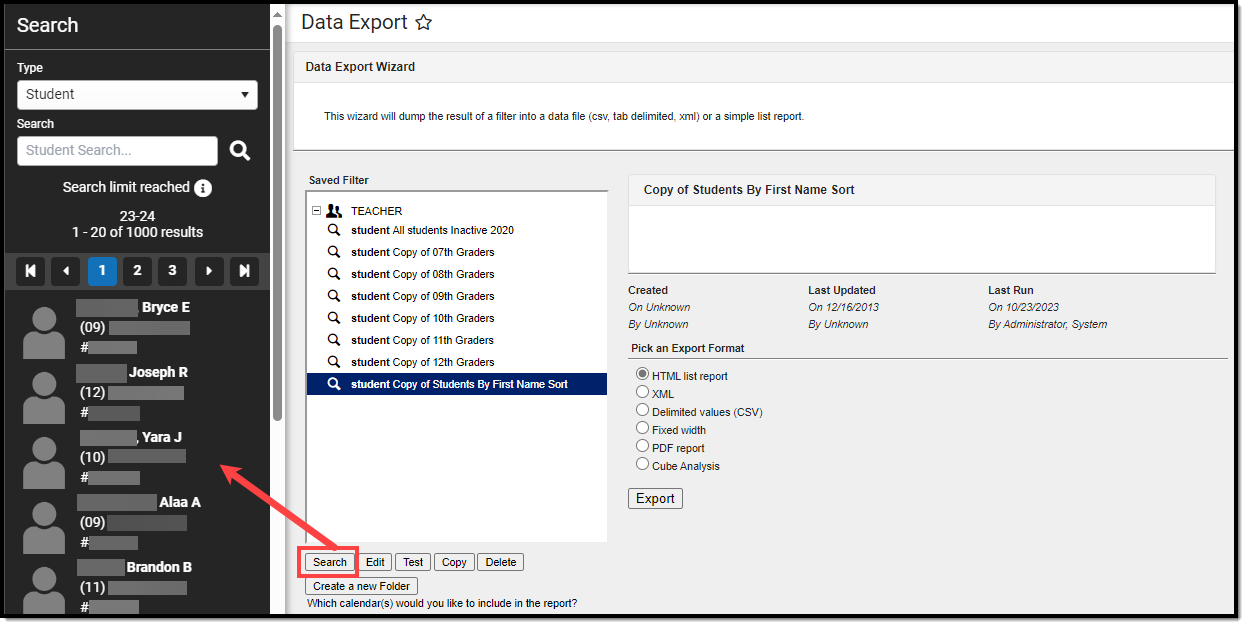 Searching Ad hoc Filters within the Data Export Wizard
- Select the filter from the Saved Filters window to generate a list of all students included within an Ad hoc filter
- Click the Search button.
- Student results appear in the Search tab on the right.
Edit Ad hoc Filters
Users can edit Ad hoc filters prior to exporting data.
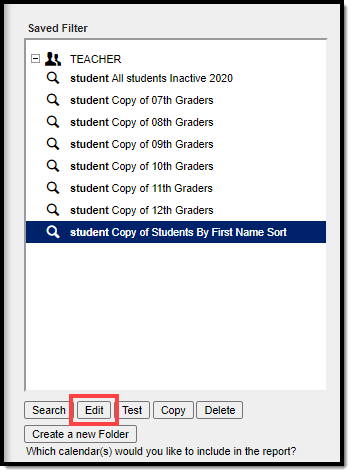 Editing an Ad hoc Filter
To edit an Ad hoc filter prior to using the Data Export tool, select the filter from the Saved Filters window and click the Edit button. Users will be directed to the Filter Designer tool with all existing fields/values selected.
 Editing and Ad hoc Filter - Filter Designer
From here, users can edit filter values as desired. For more information about creating and editing Ad hoc filters in the Filter Designer, refer to the Filter Designer page.
Delete Ad hoc Filters
Users can delete Ad hoc Filters in the Data Export tool.
 Deleting an Ad hoc Filter
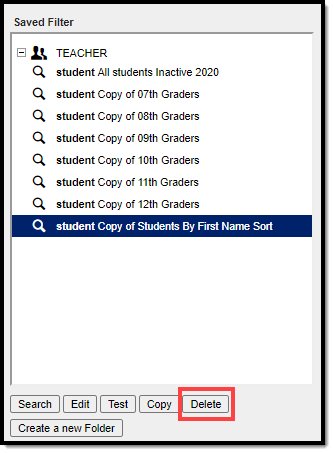
To delete an Ad hoc filter, select the filter from the Saved Filters window and click the Delete button. Users will be prompted with a confirmation pop-up message.
 Confirming Deletion of an Ad hoc Filter
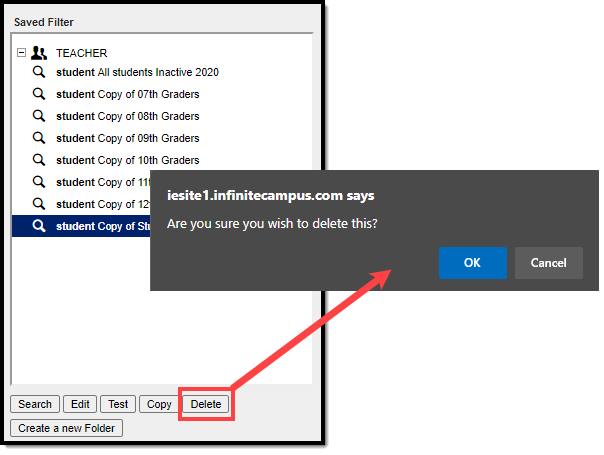
Select the OK button to permanently delete the filter. Select the Cancel button to cancel the deletion process and return to the Data Export Wizard editor.
Deleting an Ad hoc Filter in the Data Export tool permanently removes it from all areas of Infinite Campus.
Data Export Examples
The following are examples of Ad hoc filters exported in various formats.
 HTML List Report Format
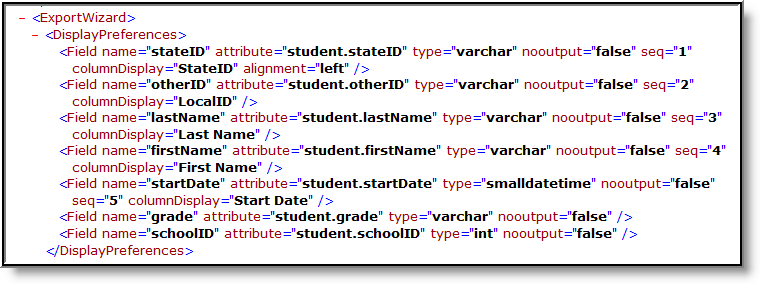 XML Format
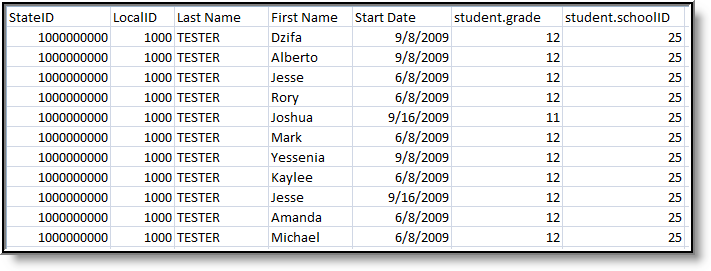 Delimited Values (CSV) - Comma Delimited
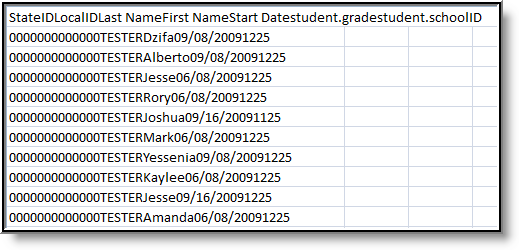
Delimited Values (CSV) - Tab Delimited
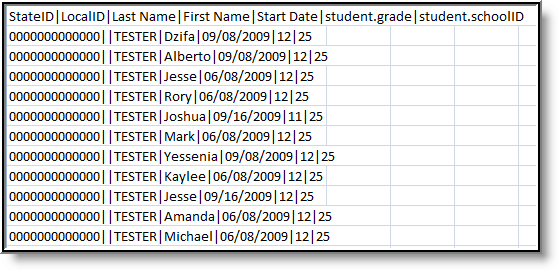 Delimited Values (CSV) - Pipe Delimited
![]()
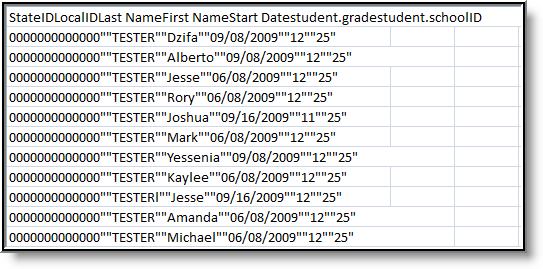
Delimited Values (CSV) - Caret Delimited with Column Display Header Included
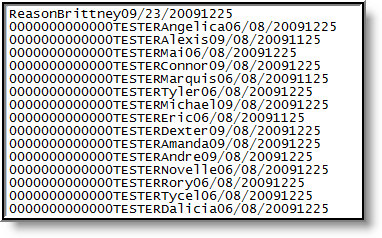 Fixed Width
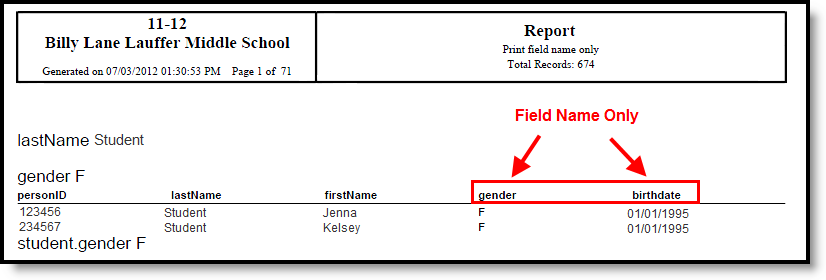 PDF Report - Field Name Only
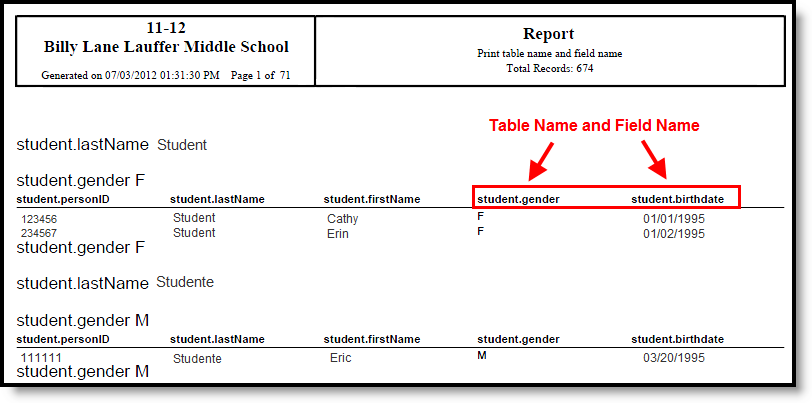 PDF Report - Table Name and Field Name
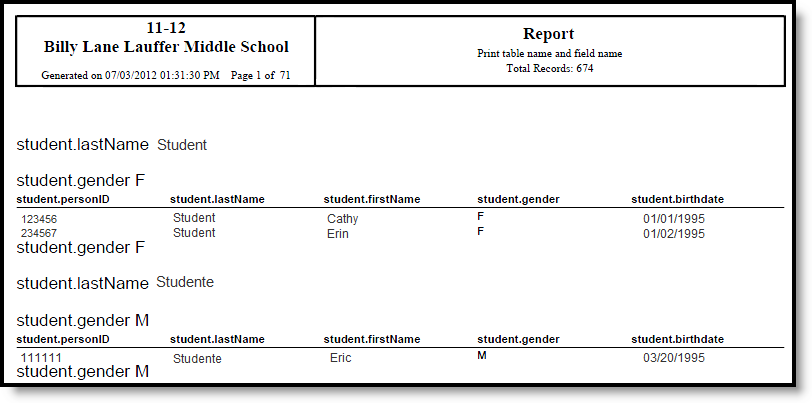 PDF Report - Grouped Fields within the Ad hoc Filter
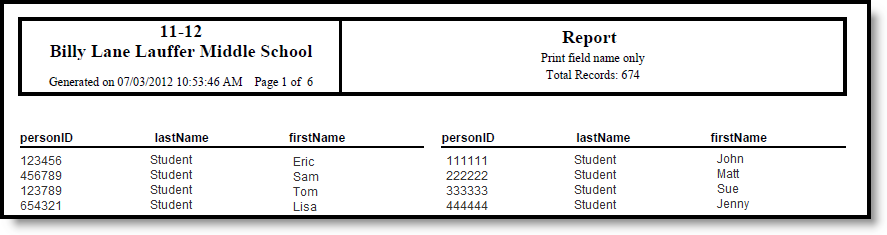 PDF Report - No Grouped Fields within the Ad hoc Filter
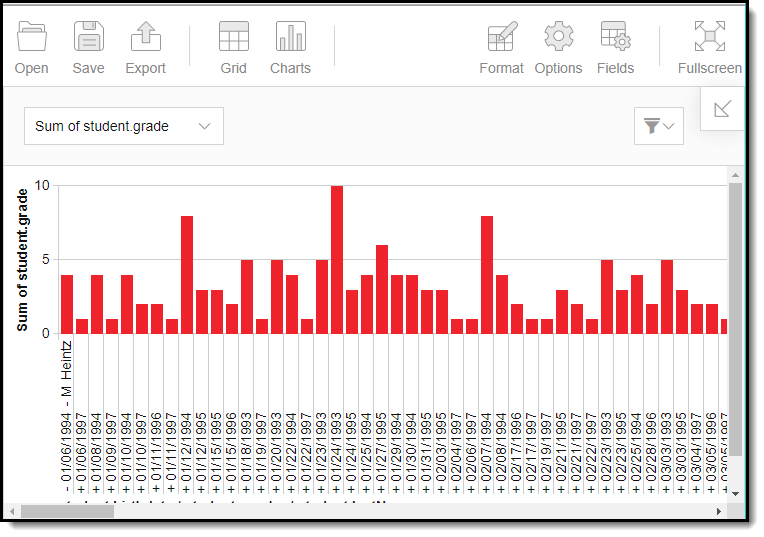 Cube Analysis - Data Displayed in a Column Chart
