This functionality is only available to districts that have purchased Campus Point of Sale as add-on functionality.
Classic View: Point of Sale > Reports > Deposit Report
Search Terms: Deposit Report
| What do I need to know? |
|---|
The report editor fields have a significant impact on report results. See the following topics for detailed information about each field. |
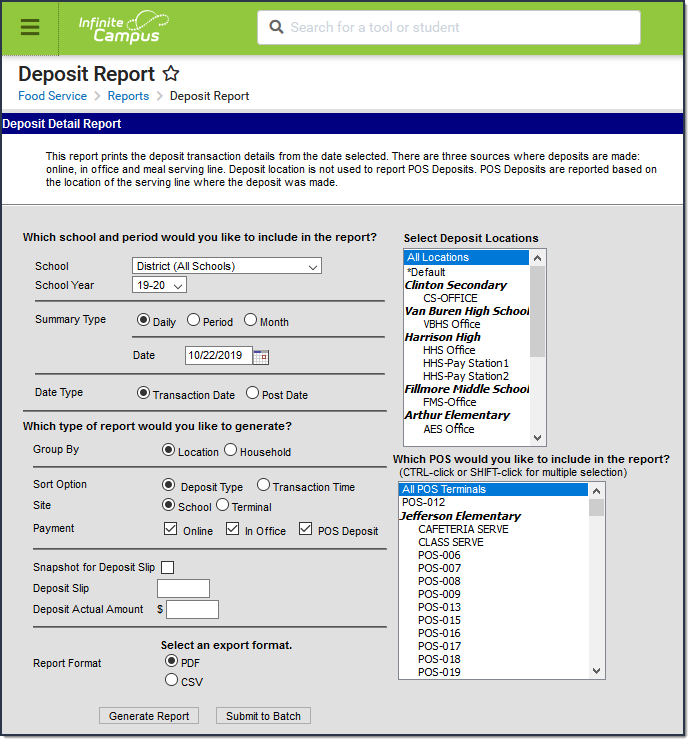 Deposit Report Editor
See the Food Service Reports Tool Rights article for information on rights needed to use this and other food service reports.
Field Descriptions (Deposit Report)
The following sections explain how the report editor fields impact report results.
School and Period Options
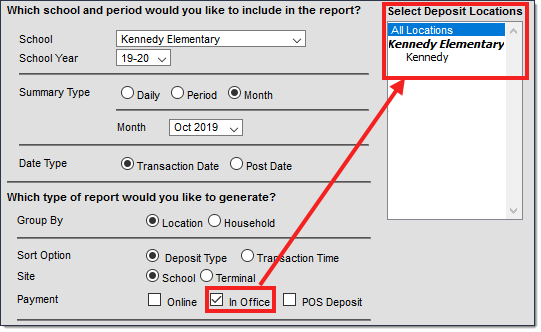
Parameters define the scope of the report, per the Which school and period would you like to include in the report? section.
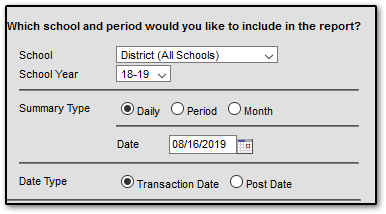 Selecting Parameters
Field | Description |
|---|---|
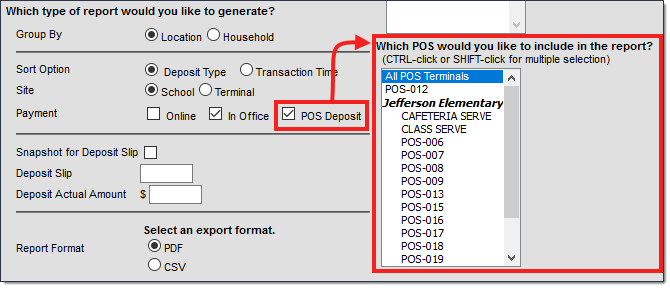
School | The school (or all schools in the district) for which the report results should be generated. The default value for this field is the school currently selected in the Campus toolbar. When you select a specific school, Campus limits the Deposit Locations for In Office Payments and the POS Terminals for POS Deposits to the locations and terminals available at the selected school. When you select the Online payment option on the editor, the Deposit Report includes Online Payments for ALL schools regardless of the School selected in the School field. |
School Year | The school year for which the report results should be generated. The default value for this field is the Year currently selected in the Campus toolbar. |
Summary Type | These options allow the user to specify the date parameter(s) of the transactions returned in the report results:
|
Date Type | These options allow the user to choose the sorting method of deposit transactions in the report results:
|
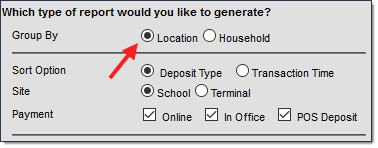
Grouping and Sorting Options
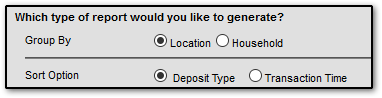
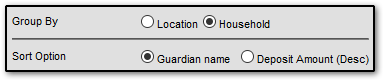
Grouping and sorting options define how the deposits display on the report, per the Which type of report would you like to generate? section.
| Field | Description | |||||||||
|---|---|---|---|---|---|---|---|---|---|---|
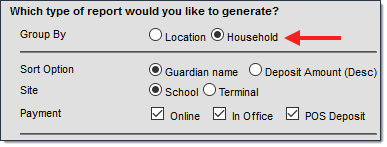
| Group By | The option you select here determines how deposits are grouped on the report.
| |||||||||
| Sort Option | Depending on the option selected in the Group By area, different fields for sorting the report results display in the Sort Option field.
| |||||||||
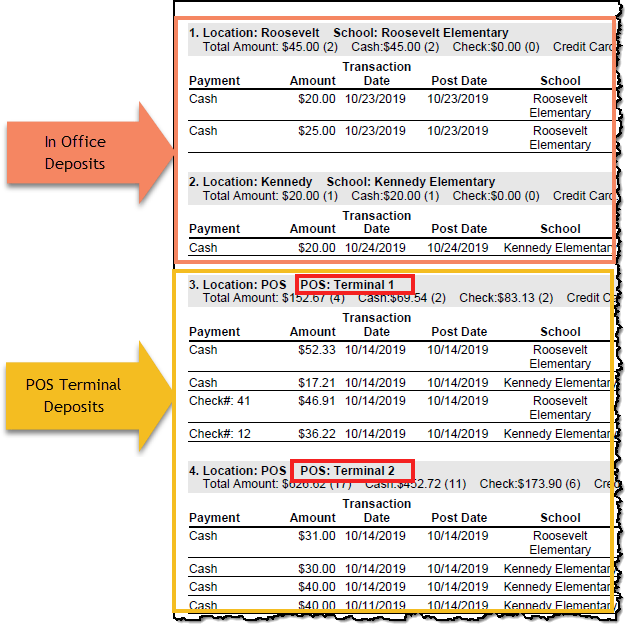
| Site | The option you select here determines how POS Terminal deposits are grouped beneath each Location. This option does NOT affect the report when it is grouped by Household. In Office deposits are always grouped by deposit location.
| |||||||||
| Payment | Payment options allow you to specify the type of deposit transactions to be included in the report results.
|
Deposit Slip Options
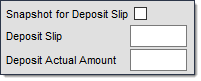
Deposit Slip Options allow you to associate a Deposit Slip number and dollar amount to the Deposit Report being generated. This information can be retrieved later in the Deposit Slip tool.
| Field | Description |
|---|---|
| Snapshot for Deposit Slip | When this checkbox is marked, Campus includes the Deposit Slip number and the Deposit Actual Amount in the header of the Deposit Report and saves the Deposit Report so that you can retrieve it later in the Deposit Slip tool. A Deposit Slip number and Deposit Actual Amount are not required for the Deposit Slip snapshot. If this checkbox is NOT marked, the Deposit Slip number and Deposit Actual Amount are included on the Deposit Report but a record is not saved for the Deposit Slip tool.
|
| Deposit Slip | The code for the Deposit Slip. If your Deposit Slip is greater than 25 characters, it is best to use the CSV Report Format. If you choose the PDF format instead, the Deposit Slip and Deposit Actual Amount will not display correctly in the report header. |
| Deposit Actual Amount | The actual deposit amount from the Deposit Slip. |

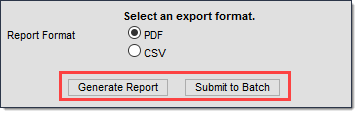
Report Format Options
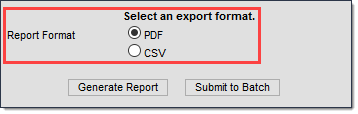
Users have the option to generate the report as a PDF file or CSV file.
If your Deposit Slip is greater than 25 characters, it is best to use the CSV Report Format. If you choose the PDF format instead, the Deposit Slip and Deposit Actual Amount will not display correctly in the report header.
Generate or Submit to Batch
Users have the option of submitting a report request to the batch queue by clicking Submit to Batch instead of Generate Report. This process allows larger reports to generate in the background, without disrupting the use of Campus. For more information about submitting a report to the batch queue, see the Batch Queue article.
Analyzing Report Results
The following sections break down each column of each report in order to allow better analysis of results.
The Deposit Report always presents results in the following order:
- Online Payment Deposits
- In Office Deposits
- POS Terminal Deposits
Grouped By Location
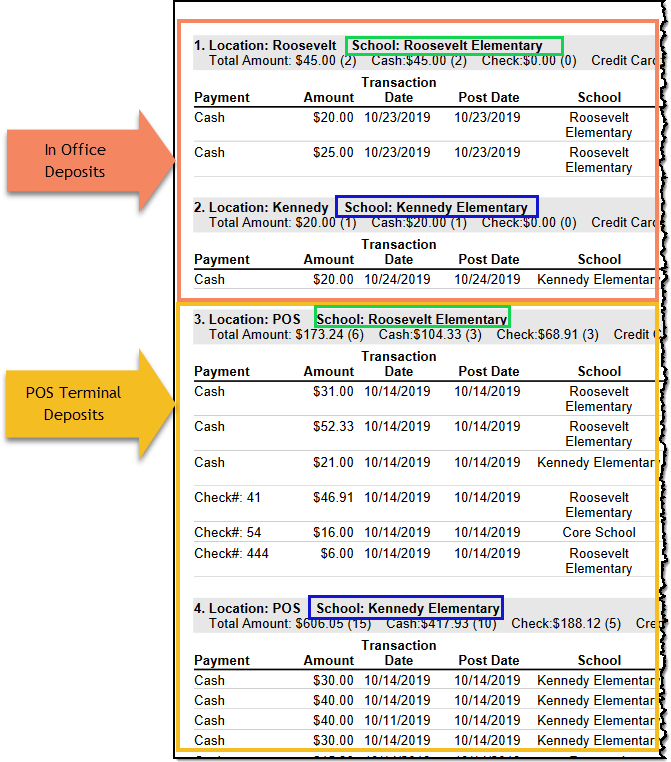
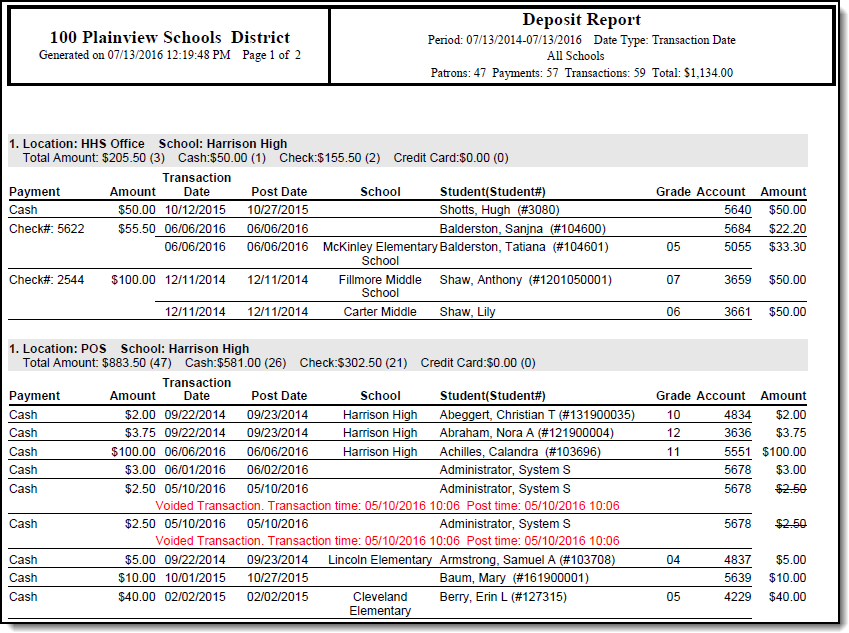
The Group By Location option generates a report listing each deposit transaction per location.
 Deposit Report (grouped by Location)
Column/Field | Description |
|---|---|
Heading Fields | |
Location | The in office location in where the deposit was made. Locations for In Office payments are defined in the Payment Location tool. Deposits made online via the Payments tool on the the Portal, always report a location of Online Payment. Deposits made at a POS Terminal always report as POS. |
School | The school in which the deposit was made. |
| Core Report Fields | |
Payment | The type of payment used for depositing money: Check, Cash or Savings (Account). |
Amount | The amount of money deposited into the patron's account. |
Transaction Date | The day on which the deposit was entered into the Point of Sale terminal. |
Post Date | The day on which the deposited money was applied to the patron's account. |
| School | The school in which the student is actively enrolled. The school only displays if the student has an active enrollment. The School may report blank if the deposit was manually entered on the FS Deposit tool or on the patron's Journal in Campus and the student did not have an active enrollment when the deposit was entered. |
Student (Student#) | The student (and corresponding Student ID) depositing money into their account. |
Grade | The grade of the student having money deposited into their account. |
Account | The account number of the account receiving the deposit. |
Amount | The amount of money deposited into the patron's account. If the amount is crossed out, this indicates the deposit was voided and information about the date of the transaction void is listed below the Transaction Date, Post Date and Student (Student#) columns. |
Grouped By Household
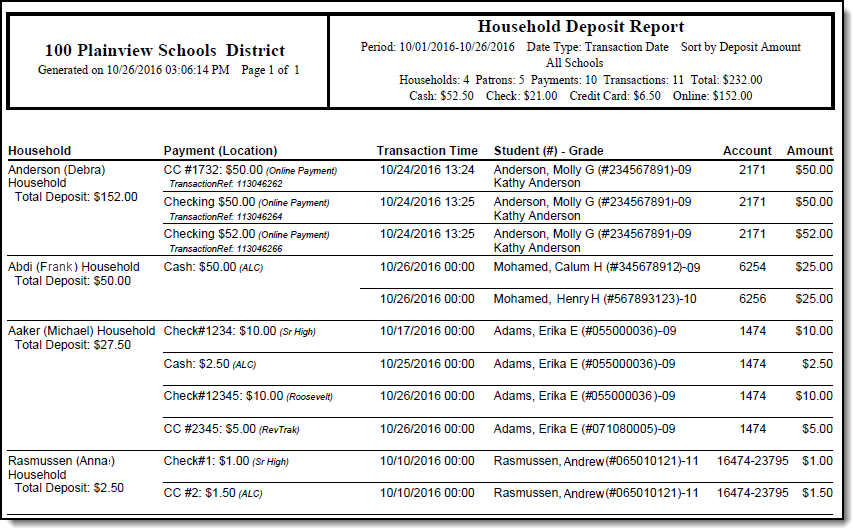
The Group By Household option generates a report listing all transactions per household.
 Deposit Report (grouped by Household)
Column/Field | Description |
|---|---|
Household | The household account receiving deposited money. |
Payment (Location) | The type of payment used for deposit (Cash, Check, Savings) and where the deposit was made. |
Transaction Time | The day and time on which the deposit transaction was entered into the Point of Sale terminal. |
Student (#) - Grade | The name, corresponding Student ID and grade level of the student depositing money into their family account. |
Account | The account number of the account receiving deposited money. |
Amount | The amount of money deposited into the patron's family account. If the amount is in red font, this indicates the deposit transaction was voided. |
