Tool Search: Special Ed Documents
This article provides information on the core functionality of Special Ed Plans and Evaluations rewritten in the New Look of Campus. See your state's specific articles for information on the editors within the plan or evaluation.
Editor Home
The Editor Home lists the editors available, their status, and Modification and Completion information.
| Header | Description |
|---|---|
| Name | The name of the editor. |
| Status | The state of the editor. Statuses can be:
The following statuses are only available for certain state-specific documents:
|
| Modified By | The date and the user by whom the editor was last edited. |
| Completed By | The date and the user who clicked the Complete button for that editor. |
General Information
The following table lists the actions available for the editors. When resizing the window, certain buttons are condensed into a single Action button.
| Button | Description |
|---|---|
| Save | Different editors have different save options. Click the arrow next to the Save & Stay button to view all saving options for any given editor.
|
| Refresh | Retrieves a new copy of data from the student's record, including enrollment, student, parent/guardian, and team member information. It also returns any accidentally deleted records. Manually entered fields do not change when the refresh button is clicked. The user must Save after clicking Refresh to capture changes. A side panel lists all the student's applicable enrollment records. See the Enrollments tool documentation for additional information. |
| Cancel | Navigates the user to the Editor Home screen or the List Screen for List editors. |
Status | Changes the status of the editor.
|
Prints the entire document. | |
| Editors | Opens a side panel listing all the available editors and their status. Select an editor from this list to navigate to that editor or click Close to collapse the side panel. |
| Previous | Navigates the user to the previous editor. |
| Next | Navigates the user to the next editor. |
Editor Types
There are two types of editors available: List or Basic editors. When navigating to a Basic editor, the list of fields within the editor is displayed. List editors display a list of all records within that editor. Clicking an existing record or the New button opens the detail view for an individual record.
Editor Lock Out and Release Logic
Only one user at a time can actively work on an editor. A person with a padlock icon (![]() ) displays in the Editors side panel, Editor Home, and List Screen of list editors, indicating which editors currently have users working on them. Hovering over the icon displays the name of the user who has checked out the editor, including the current user (you).
) displays in the Editors side panel, Editor Home, and List Screen of list editors, indicating which editors currently have users working on them. Hovering over the icon displays the name of the user who has checked out the editor, including the current user (you).
Editors that are currently being edited are read-only for all other users. The name of the person working on the editor displays in the header.
To release an editor, the user must:
- navigate to the next editor by clicking Save and Next or the Editors button and selecting the next editor from the side panel.
- click the Cancel button to return to the Editor Home screen.
- log out of the Campus application.
- navigate to a different tool in the Campus application.
Editors are automatically released when the in-application timeout limit has been exceeded. This is a back-end process and is usually around 30-60 minutes.
Template Banks
Certain fields within several editors have an Add Template icon that displays next to their name. Clicking this button displays a side panel with the available library of predetermined text for that field. Template Banks are managed in System Administration.
This feature is not available for Delaware users.
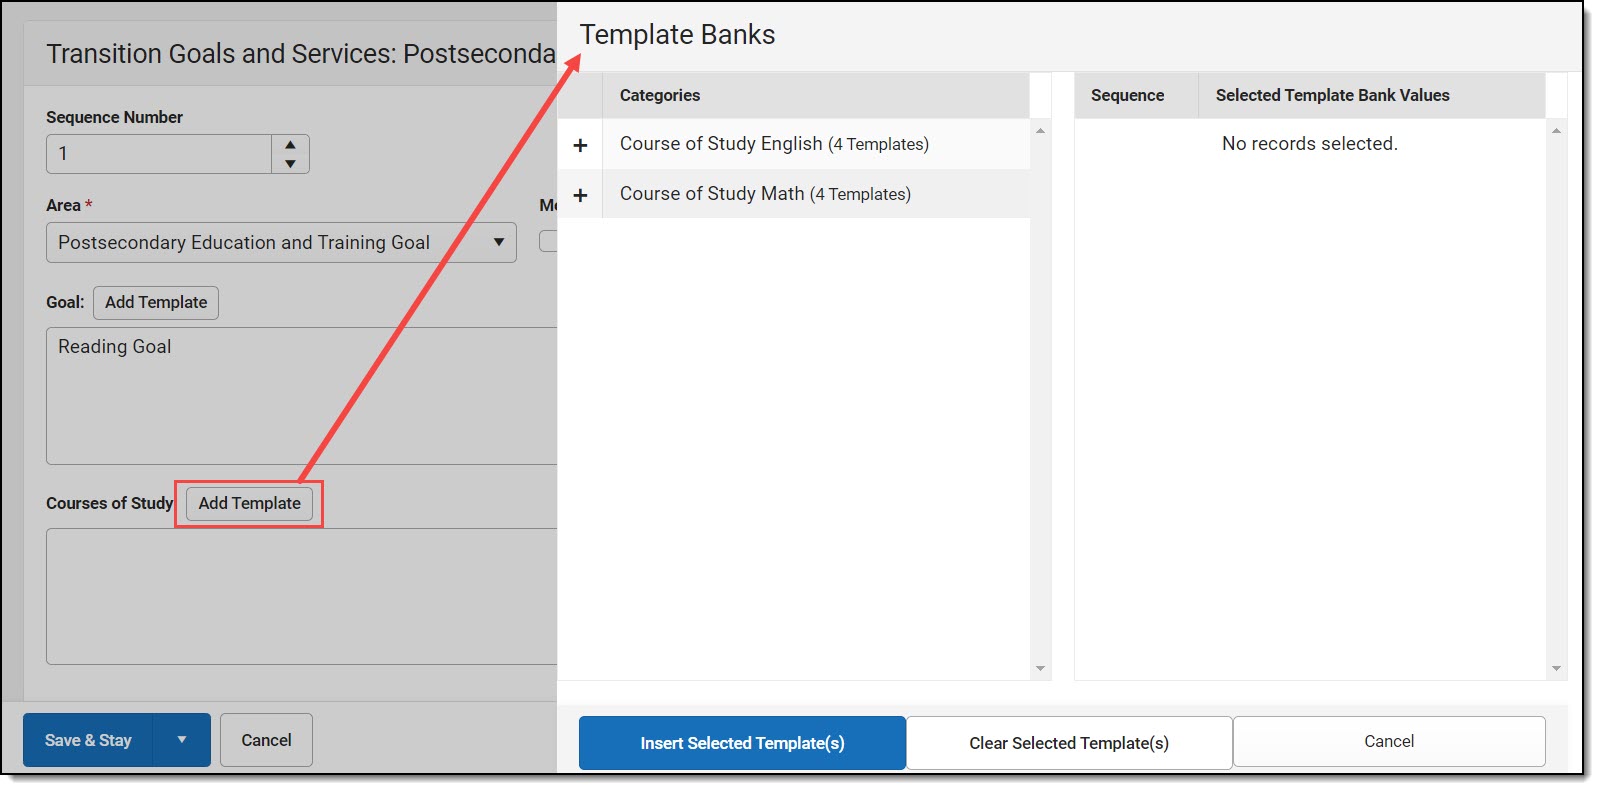 Template Bank Side PanelClick the plus (+) icons next to the category to view the available template values.
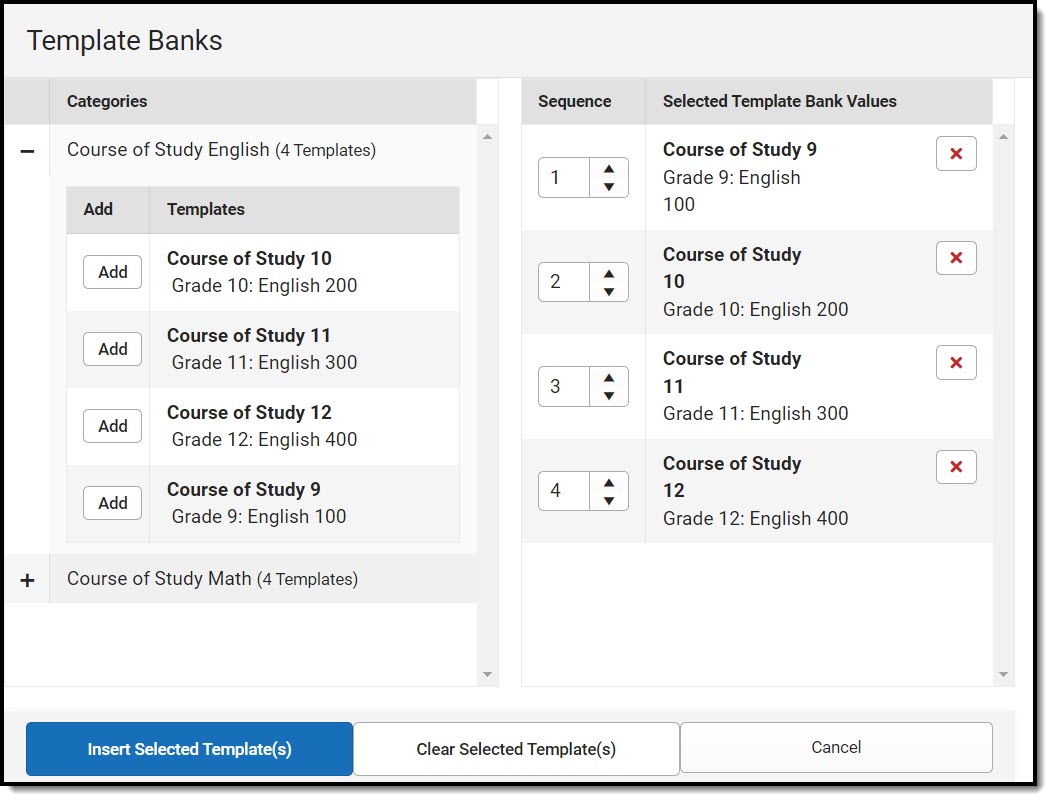 Expanded Category and Values SelectedTemplate Bank Categories display on the left, and the selected text displays on the right. Click the Add button to add the template value. This adds the template to the queue of values on the right. The red X removes selected templates, while the sequence field can be used to reorder the templates. Another option is to use the up and down arrows next to the sequence field to reorder values.
Click Cancel to go back to the document. The Clear Selected Template(s) button removes all selected template values from the right selection screen.
Once selections are finalized, click the Insert Selected Template(s) button to add the values to the field within the document in the selected order. Carriage returns separate template values.
 Example Template Bank Selections in the Document
Text Editors
Images should not be inserted into text fields.
General Best Practice Guidance
It is NOT recommended to copy/paste tables into text or WYSIWYG editors, as this may cause printing issues.
