Tool Search: Portal Request Processor
The Student Demographic Requests contain request changes for student demographic data, such as:
- First Name, Last Name, Middle Name, Suffix
- Gender
- Date of Birth
- Social Security Number
- Race/Ethnicity Designations, including any localized race/ethnicity fields that are used at a state level
These options are determined by the Portal Self Service Options.
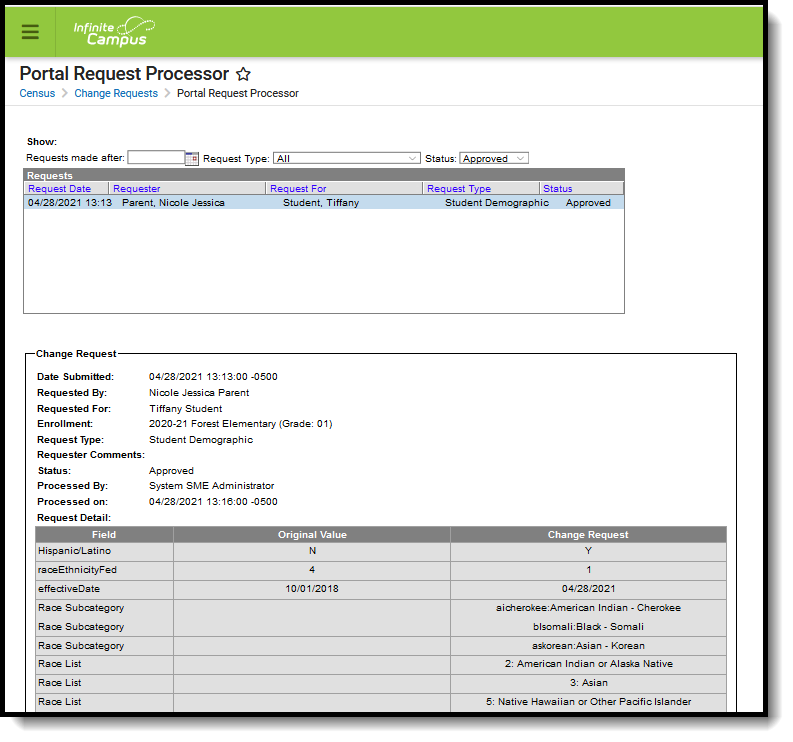 Portal Request Processor Demographic Requests
Staff who have rights to see the Portal Request Processor can view the following details about the change request:
Field | Description |
|---|---|
Date Submitted | Notes when the portal user entered the request to change information. |
Requested By | Name of the person requesting the change. |
Requested For | Name of the student or person for whom the change is being made. |
Enrollment | List of active enrollment records for the active year, including the name of the school, the school year and the student's grade level. |
Request Type | Type of request. |
Requester Comments | Comments entered by the portal user indicating why the change is being made. |
Status | Indicates if the request is pending, approved or denied. |
Request Detail | Lists the fields modified by the portal user. |
Parents/Guardians see the following, depending on Self Service options chosen by the district.
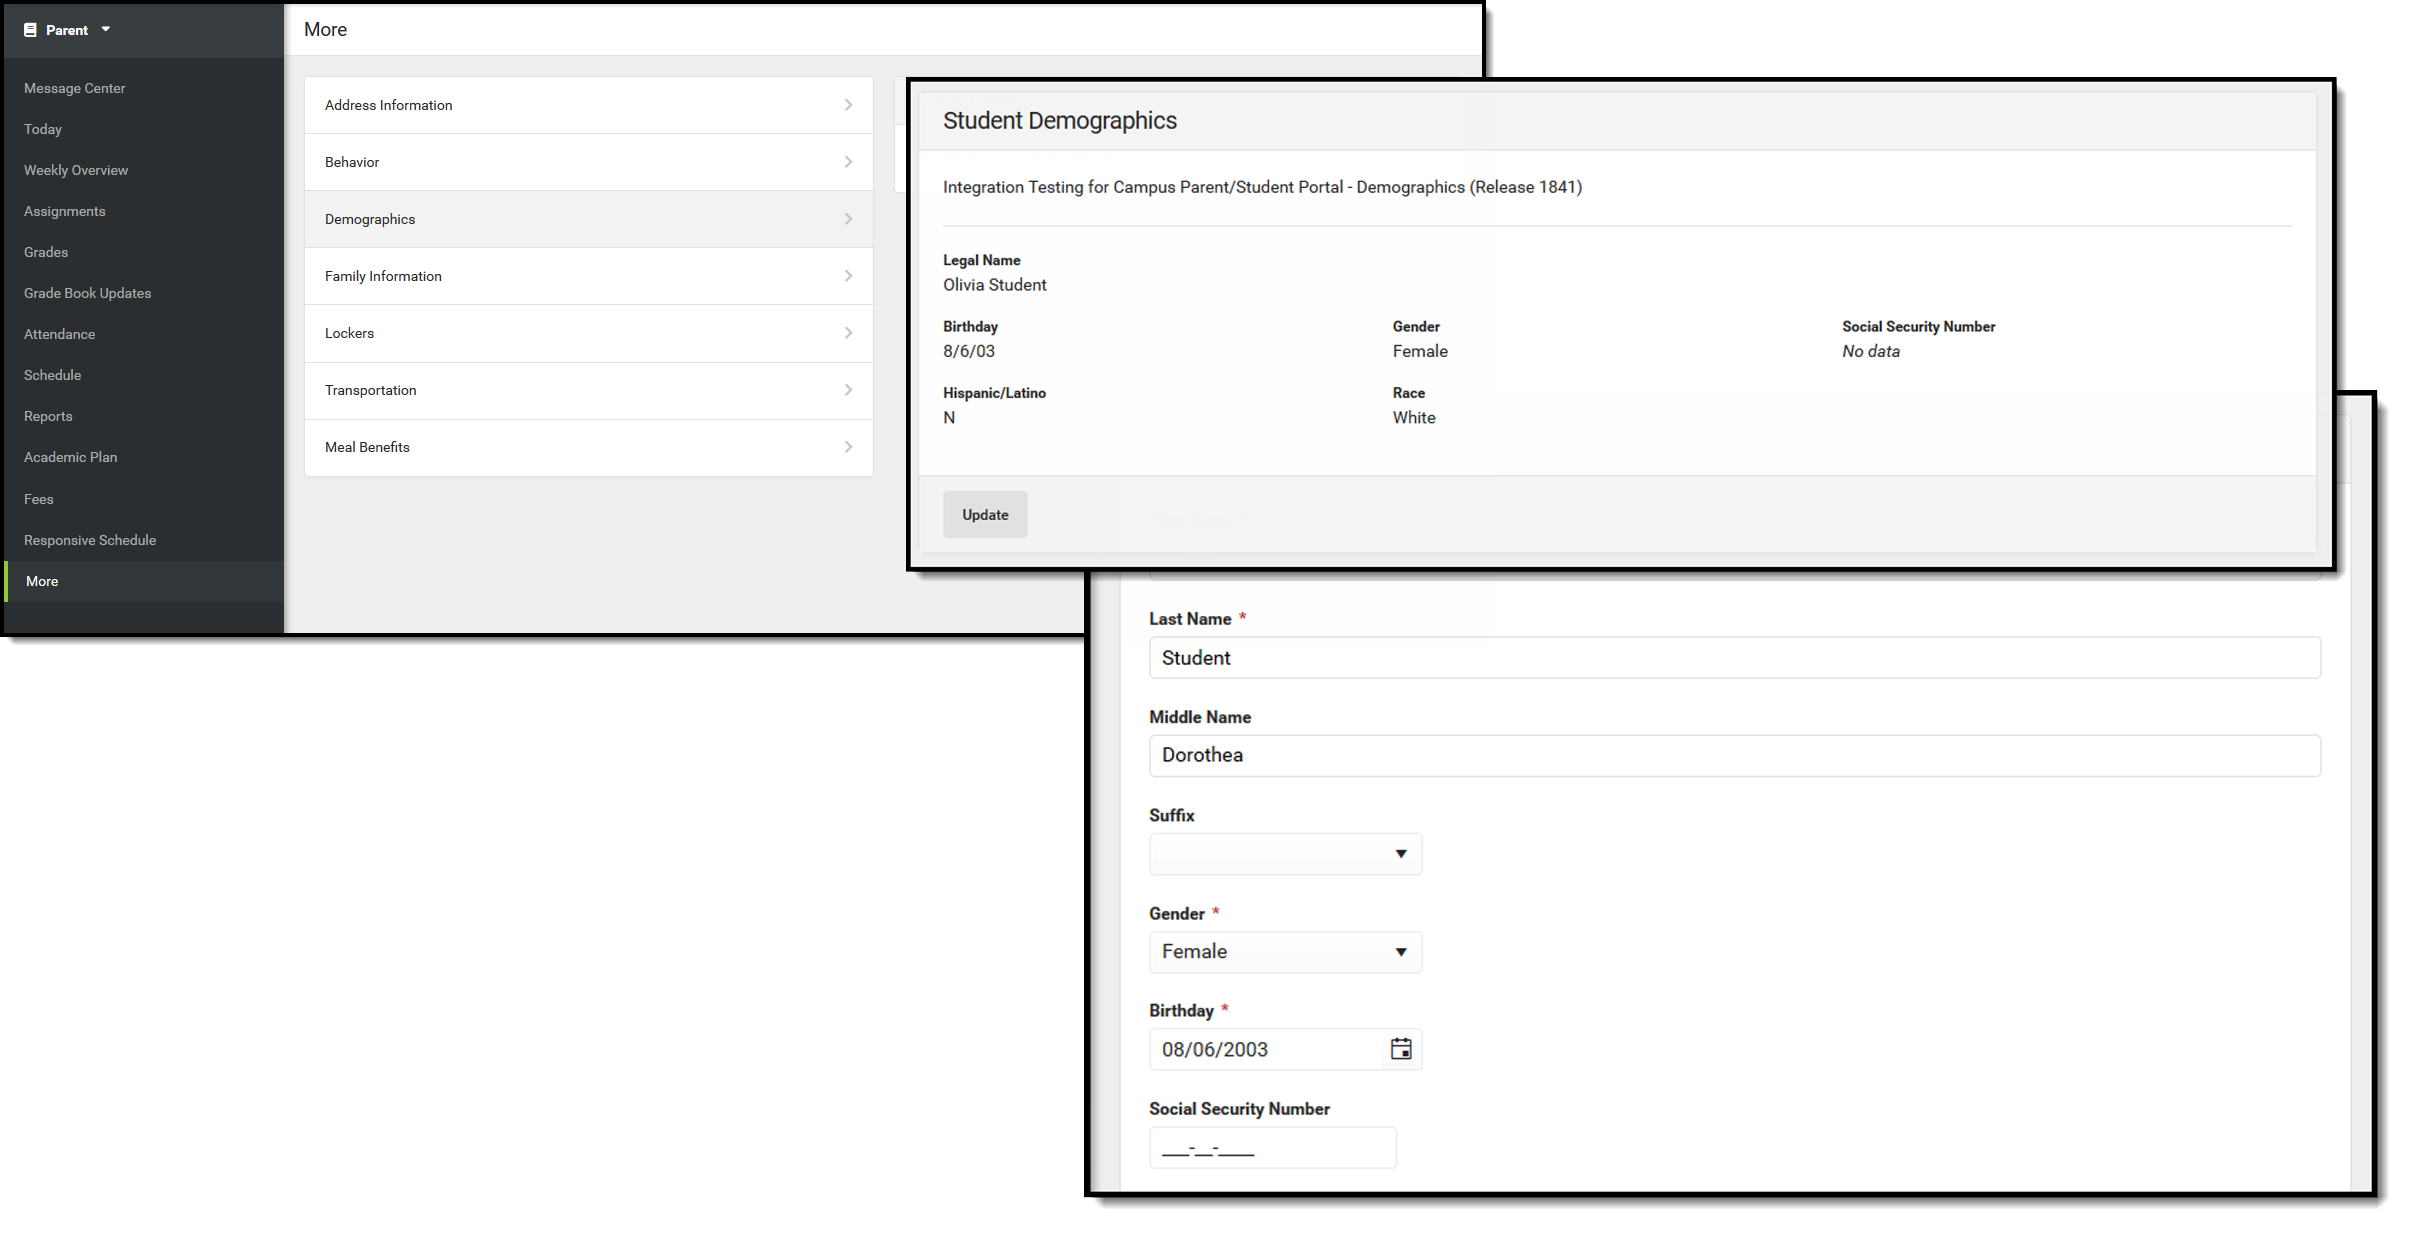 Demographics Update
Tool Rights
Staff persons who have rights to the Student Demographic Portal Request Processor have two options:
Read Functionality | Write Functionality |
|---|---|
Allows a user to view the Student Demographic requests for students enrolled in schools for which they have current calendar rights. There is no ability to approve or deny the requests. | Allows users to view, approve and deny the Student Demographic requests for students enrolled in schools for which they have current calendar rights. Staff who have these rights see the Begin Approval and Deny buttons on the Portal Request Processor. |
In addition to these rights, if the staff person does not have rights to other items that require subrights (i.e., Social Security numbers), the user is not able to approve change requests to these items.
View Student Demographic Requests
- Select a Student Demographic request from the User Request List. The information entered in the request displays in the Change Request section.
- Review the Change Request of submitted data.
Accept Student Demographic Requests
- Select a Pending request from the User Request List. The information entered in the request display in the Change Request section.
- Click the Begin Approval button.
- Review the entered information (highlighted in yellow).
- Determine if the new data should cause the creation of a new identity record (if legal information has changed) or if the new data should overwrite the existing identity record (if adding or correcting information).
When selecting a new identity record, an Effective Date is required (default date is the current date).
- Select the appropriate option in number 4 in the Save Options section.
- Enter Comments for the request.
- Select the Approve Change Request button. A confirmation of the request being approved display. This changes the information in Census People and the request now displays as such. In addition, the list of requests updates this item to have a status of Approved.
A message is sent to the person who submitted the request containing the new status and any comments that were entered.
Deny Student Demographic Requests
- Select a Pending Student Demographic Request Type request from the User Request List. The information entered in the request displays in the Change Request section.
- Click the Deny button.
- Enter Comments for the reason for denial of the request. This comment field displays to parents/guardians on the Portal.
- Click the Deny button when finished. A warning message displays indicating the request has been denied. In addition, the list of requests updates this item to have a status of Denied.
