This article provides information on configuring Cross-Site Enrollment at your District and School. It includes the complete Cross-Site Enrollment Workflow, information on enabling (and disabling) Cross-Site Enrollment, and additional information that is beneficial to know as you begin using Cross-Site Enrollment functionality.
Follow the steps outlined below to set up Cross-Site Enrollment. Then use the Checklist for Cross-Site Enrollment Setup to verify everything has been completed.
For detailed information on Cross-Site Enrollment, see the articles and videos in the Cross-Site Enrollment area of the Knowledge Base, notably the Cross-Site Configuration article.
See the Cross-Site Enrollment Workflow Video Series for more information.
NOTE:
- These tasks must be completed at the DISTRICT level for each district participating in Cross-Site Enrollment and at the SCHOOL building level for each school participating in Cross-Site Enrollment.
- For Interdistrict Cross-Site Enrollment, Campus Digital Repository (CDR) must be enabled. See the Digital Repository Preferences article for more information.
Enable Cross-Site Enrollment
The following steps MUST BE DONE in this order.
1 - District Information
Tool Search: District Information
The selection of the Cross-Site Enrollment Participation option on the District Information editor starts the process of allowing other tools to be marked for Cross-Site Enrollment. When enabled, Cross-Site Enrollment becomes visible on the School Information editor and on Course Master.
Available Options are:
- Disable - Cross-Site Enrollment is NOT available at this district.
- Intradistrict - Cross-Site Enrollment is enabled at schools WITHIN the district.
- Interdistrict - Cross-Site Enrollment is enabled at schools OUTSIDE of the district.
- Intra and Interdistrict - Cross-Site Enrollment is enabled at schools WITHIN the district and OUTSIDE of the district.
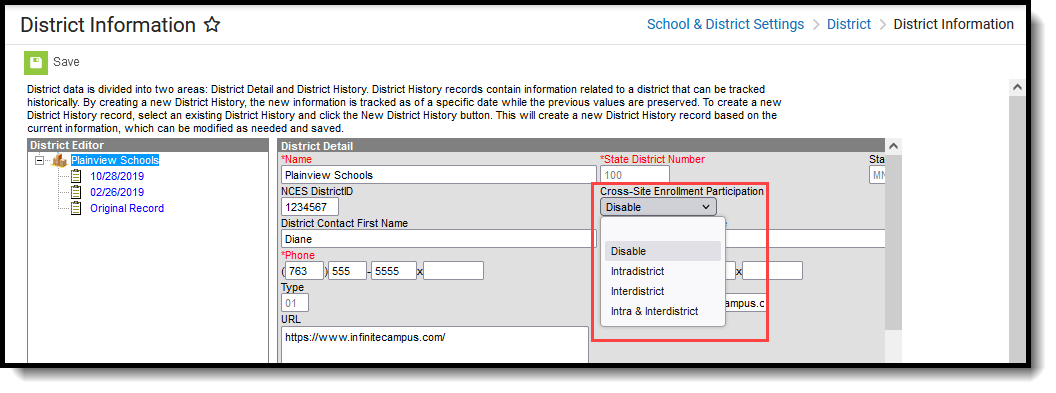 District Information - Cross-Site Enrollment Participation
2 - School Information
Tool Search: School Information
For each school that participates in Cross-Site Enrollment, mark the Cross-Site Enrollment checkbox on the School Information editor. When marked here and on the Course Master Information editor, Cross-Site Enrollment information is visible on Course Information and Section Information AFTER the courses (and sections) have been pushed from the Course Master (by clicking on the Push to Courses button).
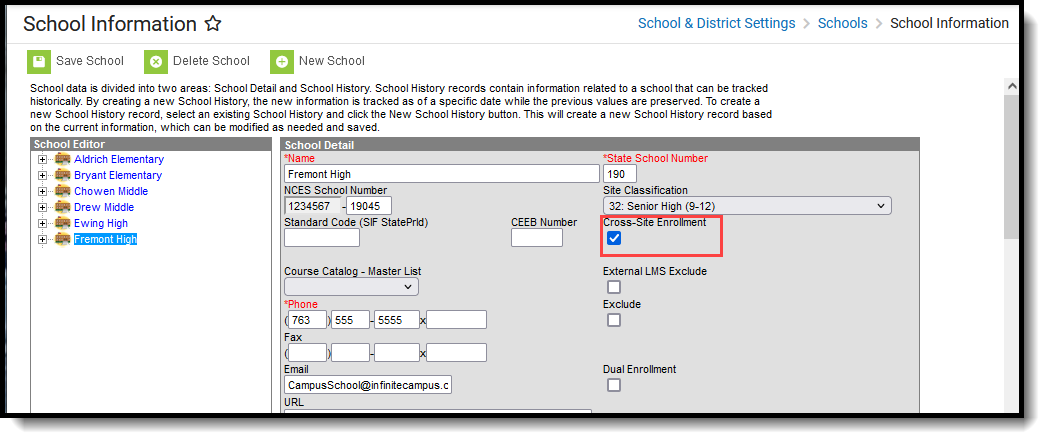 School Information - Cross-Site Enrollment Checkbox
3 - Default Sender Email Address
Verify a Default Sender Email Address is entered in Email Settings. This is used when changes are made to a student's roster at the Serving School.
4 - State Exclude Setting for Cross-Site Enrollments
Tool Search: System Preferences
Set the Default State Exclude for Cross-Site Enrollments to either Yes or No. This setting determines whether a student's partial enrollment that is created when they are scheduled into a course is included in state reports. This preference is only available when Cross-Site Enrollment functionality is turned on at the District.
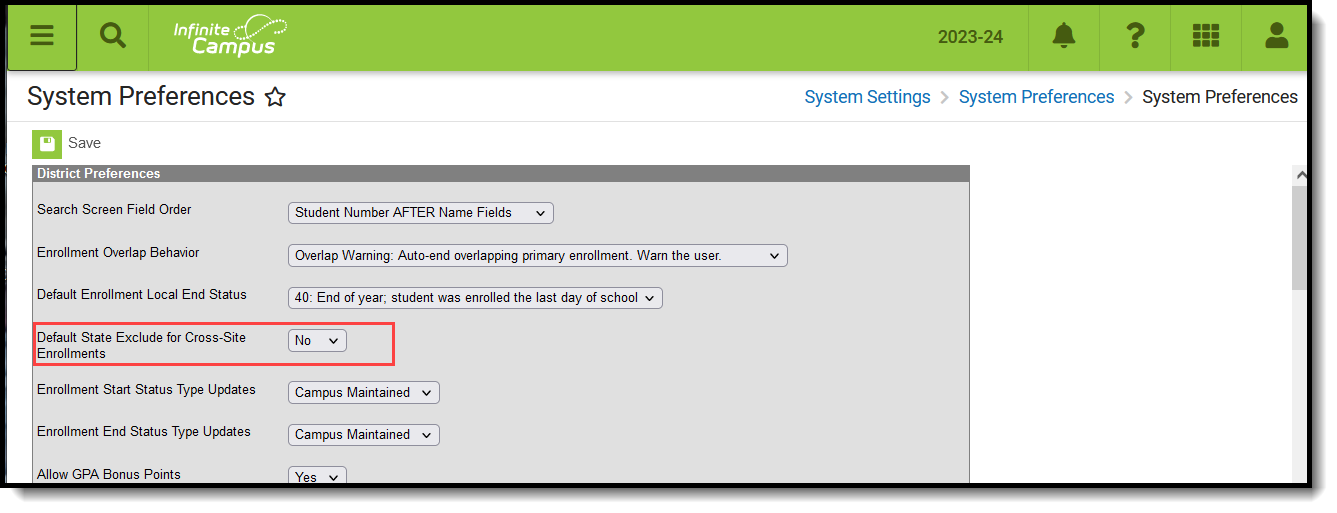 State Exclude Setting for Cross-Site Enrollments
5 - Enrollment Start and End Statuses
Tool Search: Enrollment Start Status Setup; Enrollment End Status Setup
A Cross-Site Enrollment is created for a student in the Serving School when a Cross-Site Course is added to a student's schedule. This is a Partial Enrollment and is ended when the student drops (student is removed from the roster) the Cross-Site Course or the Cross-Site Course ends (at the end of the term, for example).
An Enrollment Start Status and Enrollment End Status must be marked as Cross-Site Default prior to a course being mapped for Cross-Site Enrollment on the Mapping tool. Only one Start Status and End Status can be marked for Cross-Site Default at any time; when a new status is marked and saved for Cross-Site Default, the previous statuses that were marked are no longer marked.
A Cross-Site Default Column has been added to the Start Status Type Editor and the End Status Type Editor to quickly see which statuses are marked for Cross-Site.
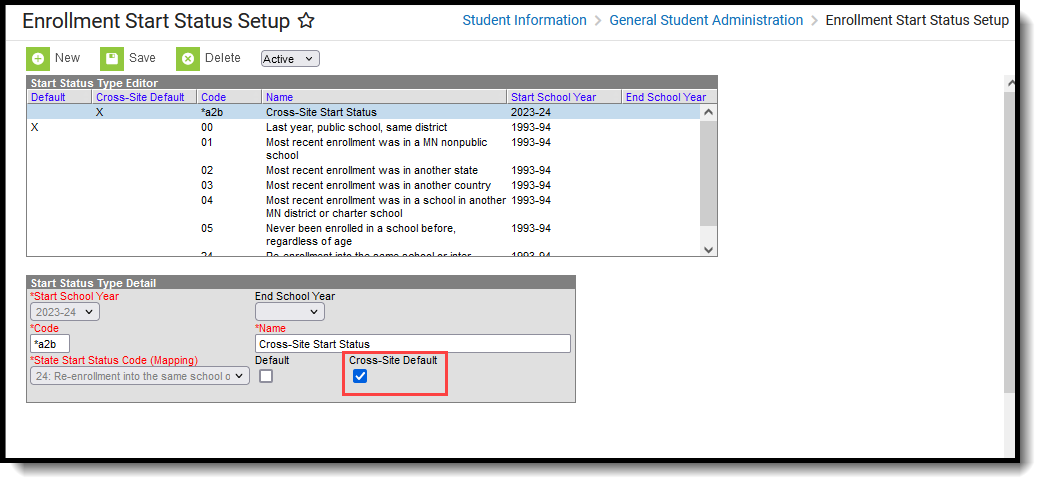 Cross-Site Default Checkbox Marked on Enrollment Start Status Setup |
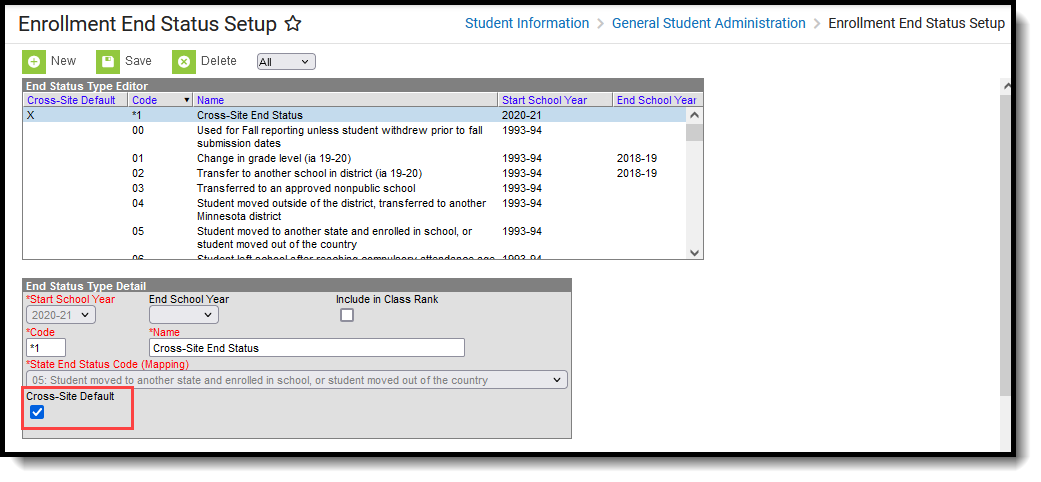 Cross-Site Default Checkbox Marked on Enrollment End Status Setup |
6 - Course Master Information
Tool Search: Course Master Information
As mentioned previously, the use of Course Master tooling is required as part of the Cross-Site Enrollment process.
When Cross-Site Enrollment is marked on the District Information editor, the Cross-Site Enrollment section on Course Master Information displays. Once it is marked here and information is pushed to courses, Cross-Site fields are visible and enabled on the Course Information editor and the Section Information editor.
 Course Master Information - Cross-Site Enrollment Selection
This can also be done for all Course Masters in the school or district using the Cross-Site Course Master Batch Enable tool.
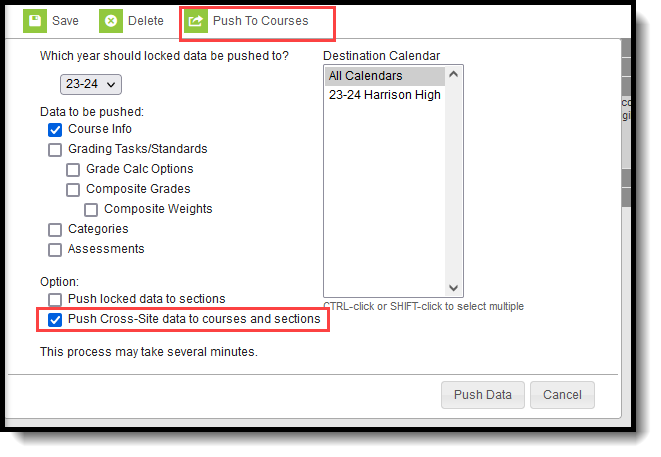
Use the Push to Courses option to update all courses in the Course Master. In the Push to Courses modal, mark the Push Cross-Site data to courses and sections.
 Push to Courses - Cross-Site Option
This can also be done using the Push All Course Masters tool to update all courses aligned to all course masters that have been enabled for Cross-Site Enrollment.
Repeat these steps for each Course Master that is enabled for Cross-Site.
7 - Course Information
Tool Search: Course Information
When Cross-Site Enrollment is marked in the Course Information editor in the calendar for the school offering the course to other schools, information for scheduling students into cross-site course sections appears in the Section Information editor.
 Course Information - Cross-Site Enrollment Selection
Responsive courses CANNOT be offered as a Cross-Site Enrollment course.
8 - Section Information
Tool Search: Section Information
When the Cross-Site Enrollment checkbox is marked at the Section level, participating schools can schedule students into this section when the Serving School has opened their enrollment for the cross-site courses. A Cross-Site Max Students number also needs to be entered, along with the Cross-Site Instructional Setting.
 Section Information - Cross-site Enrollment Section, Max Students, and Instructional Setting
The Cross-Site Max Students value determines the total number of students from participating schools that can be scheduled into the section. It cannot be more than the Max Students value entered on the section (or the course).
- Cross-Site Max Students does NOT reserve seats; it limits the total number of cross-site students within the section. When courses are offered to other schools, space is not saved for those students. For example, in a section with a Max Student value of 25, where 20 of your own students have been scheduled into the course, only 5 seats are available for Cross-Site students even when the Cross-Site Max field has a value of 10.
- Only positive, whole number values can be entered. Zero (0) is a valid entry.
Cross-Site Instructional Setting indicates how cross-site students are taught - Hybrid, On-Site or Virtual.
Cross-Site Section Information can also be modified in the Cross-Site Enrollment Setup tool.
9 - School Connections
Tool Search: School Connections
For each school that participates in Cross-Site Enrollment for Intradistrict participation, mark whether the other schools can offer courses to and accept courses from that school on the School Connections tool. When a school is not marked for offering or accepting, that school's information is not included on the Cross-Site Setup tool.
 School Connections
10 - Cross-Site Enrollment Setup
Tool Search: Cross-Site Enrollment Setup
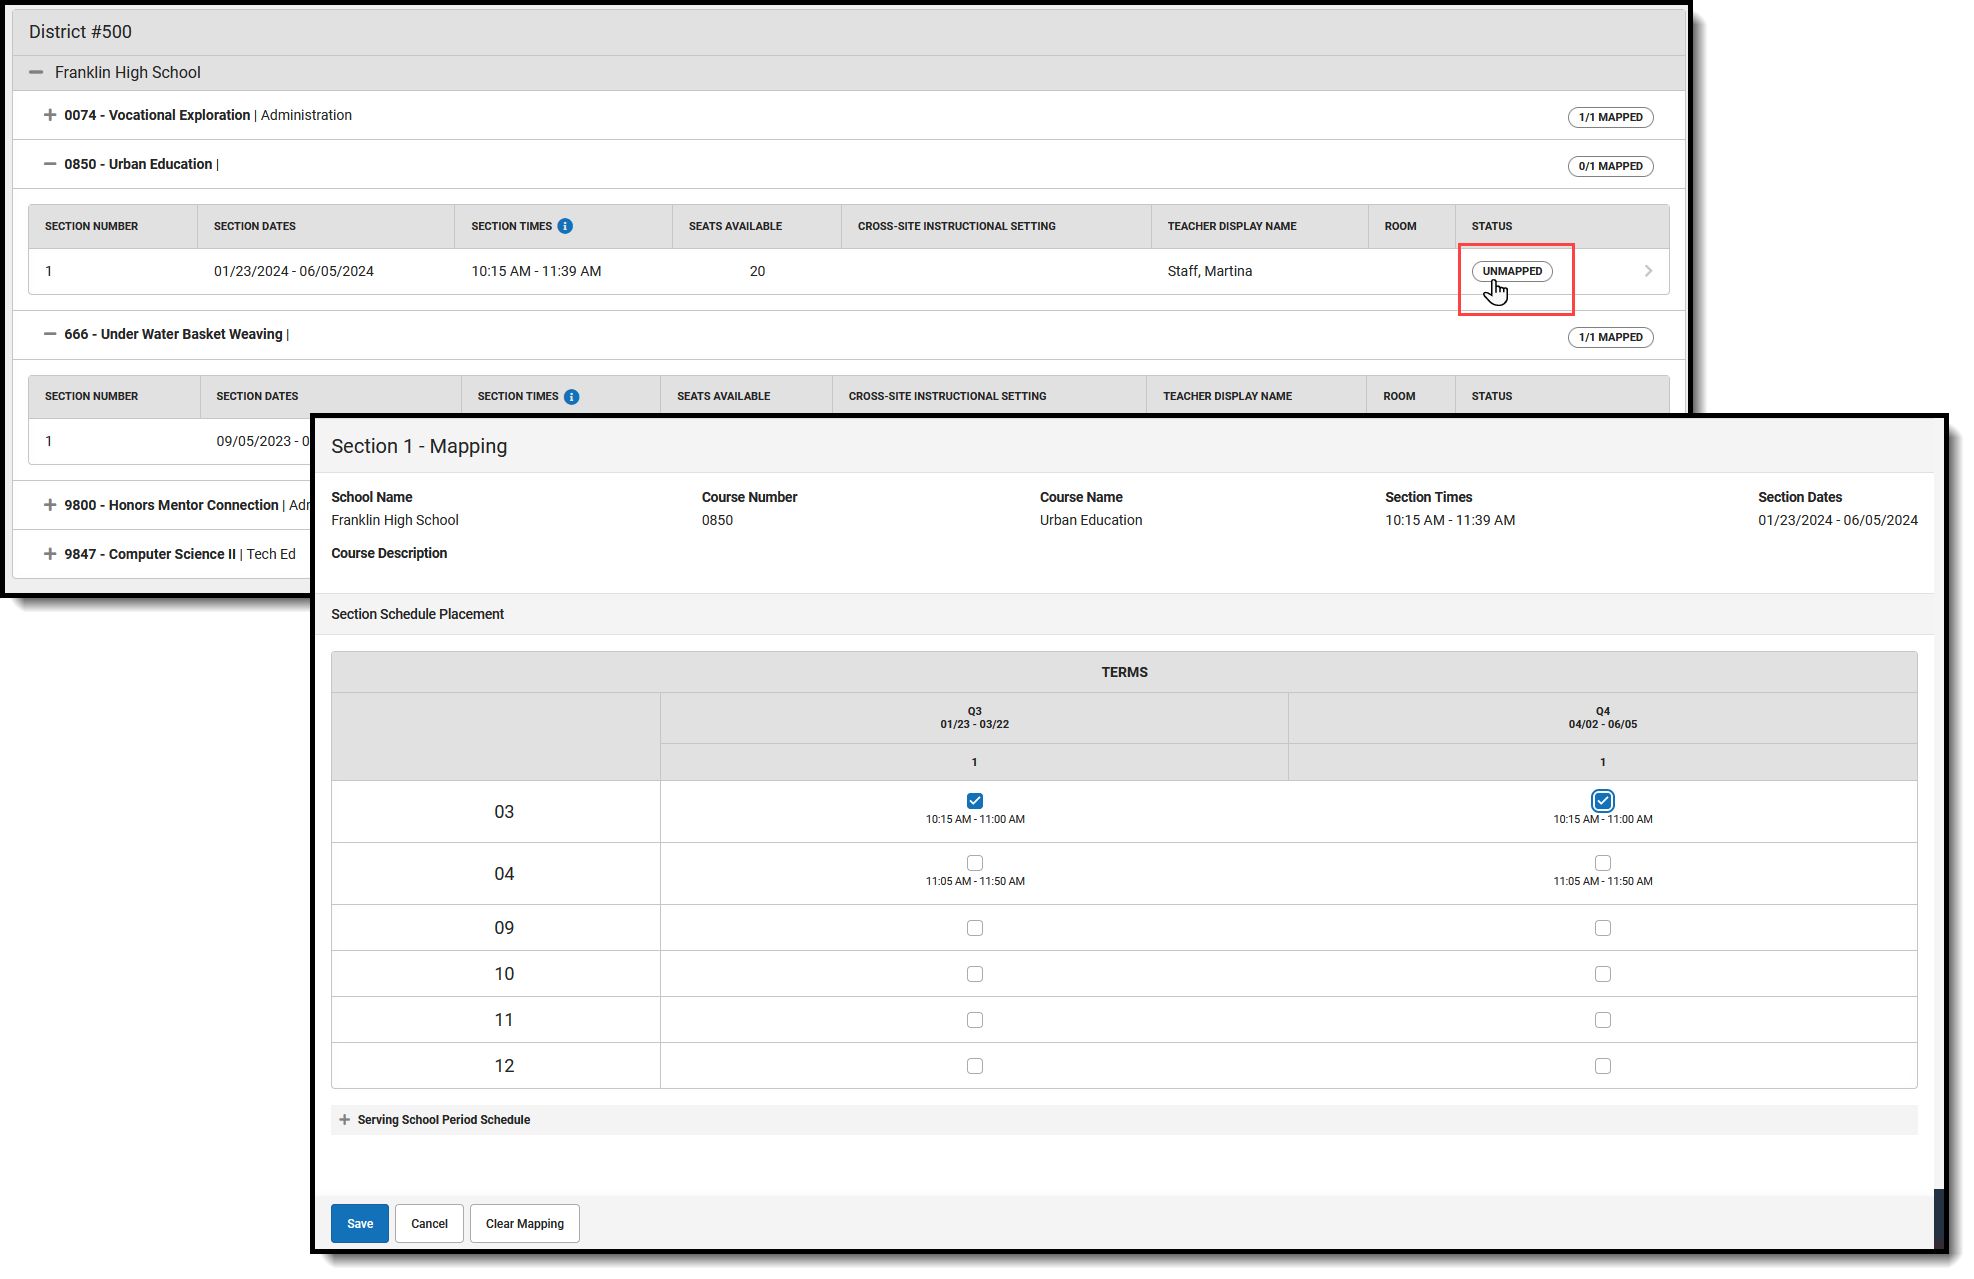
Course Sections you have accepted from the serving school need to be mapped to your school's schedule. The Cross-Site Enrollment Setup tool is used to map the Cross-Site Section to fit within your period schedule.
 Mapping Course Section
Disable Cross-Site Setup
When a school or district determines that Cross-Site needs to be disabled, the following occurs. This happens for the current school year and future school years.
| When Participation in Cross-Site Enrollment CHANGES in... | AND Students are NOT enrolled in Courses, this occurs... | AND students ARE enrolled in Serving Schools and scheduled into Courses, this occurs: |
|---|---|---|
| District Information |
|
A validation displays indicating students are scheduled into associated Course Sections and must be removed prior to disabling. |
When the Participation option CHANGES from Intradistrict to Interdistrict or CHANGES from Intradistrict & Interdistrict to Interdistrict, existing mapped courses and sections are removed.
| ||
| School Information |
|
A validation displays indicating students are scheduled into associated Course Sections and must be removed prior to disabling. |
| Course Masters |
|
A validation displays indicating students are scheduled into associated Course Sections and must be removed prior to disabling. |
| Course Information | Course information is read-only and can only be disabled via the Course Master.
This applies to Cross-Site Courses in current and future years. |
N/A |
| Section Information | Section information is disabled.
This applies to Cross-Site Course Sections in current and future years. |
A validation displays indicating students are scheduled into associated Course Sections and must be removed prior to disabling. |
Additional Information for Cross-Site Enrollment
No settings need to be modified or added for the following tools. However, knowing what happens with these tools when Cross-Site Enrollment is enabled is helpful.
Student Schedules
Tool Search: Schedule
As part of the overall Scheduling process, enrolling students in Cross-Site Courses occurs AFTER all other Scheduling at both the Home School and the Serving School is complete and the Scheduling Trial is marked Active.
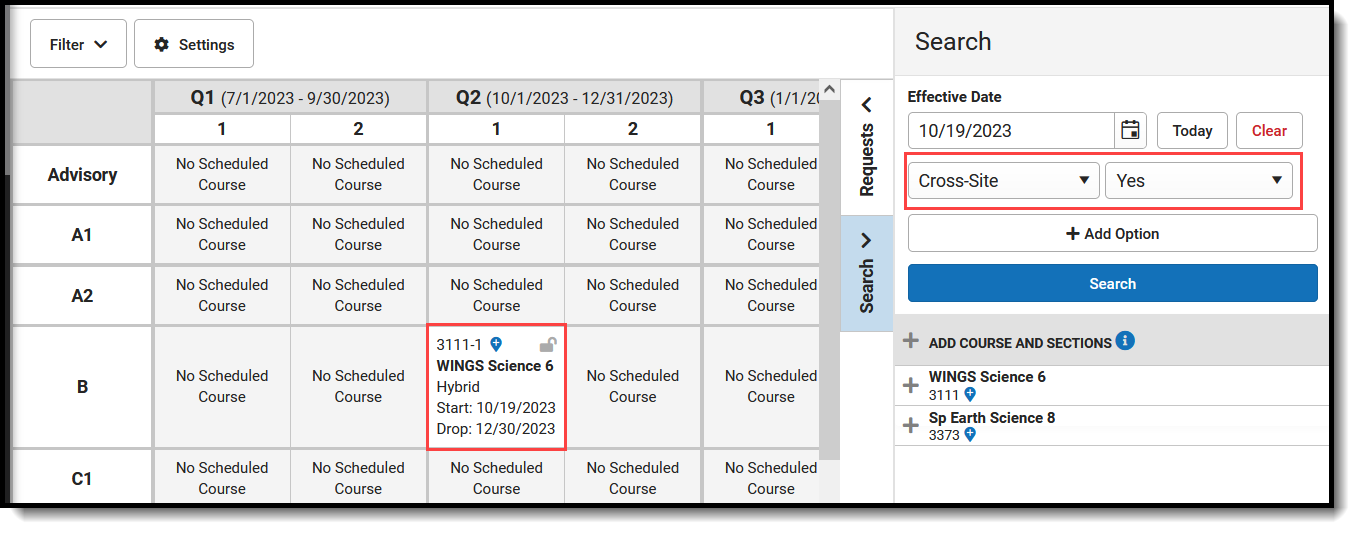
Students must be manually scheduled into Cross-Site Courses through the Walk-In Scheduler AFTER all other scheduling work has been completed at the home school. Once courses have been mapped at the Serving School and offered for scheduling for students at the Home School, they can be found in the Walk-In Scheduler for placement.
On the Search panel, set the dropdown with Course Name to Cross-Site, set the field next to it to Yes, and click Search. Available Cross-Site courses return and can be added to the student's schedule.
 Walk-In Scheduler - Cross-Site Courses
Student Enrollments
Tool Search: Enrollments
When a Cross-Site Course is added to the student's schedule, a partial enrollment for the student is created at the Serving School (where the course is offered).
State Reports and Ed-Fi Resources
State reports and Ed-Fi Resources that report roster information, attendance information, and grade information have been modified to exclude records that have a Cross-Site indicator associated with them AT THE SERVING SCHOOL. This means the student is only counted or reported with their Primary Enrollment from their Home School.
Only Primary Enrollments at the HOME SCHOOL are reported in state reports and Ed-Fi Resources.
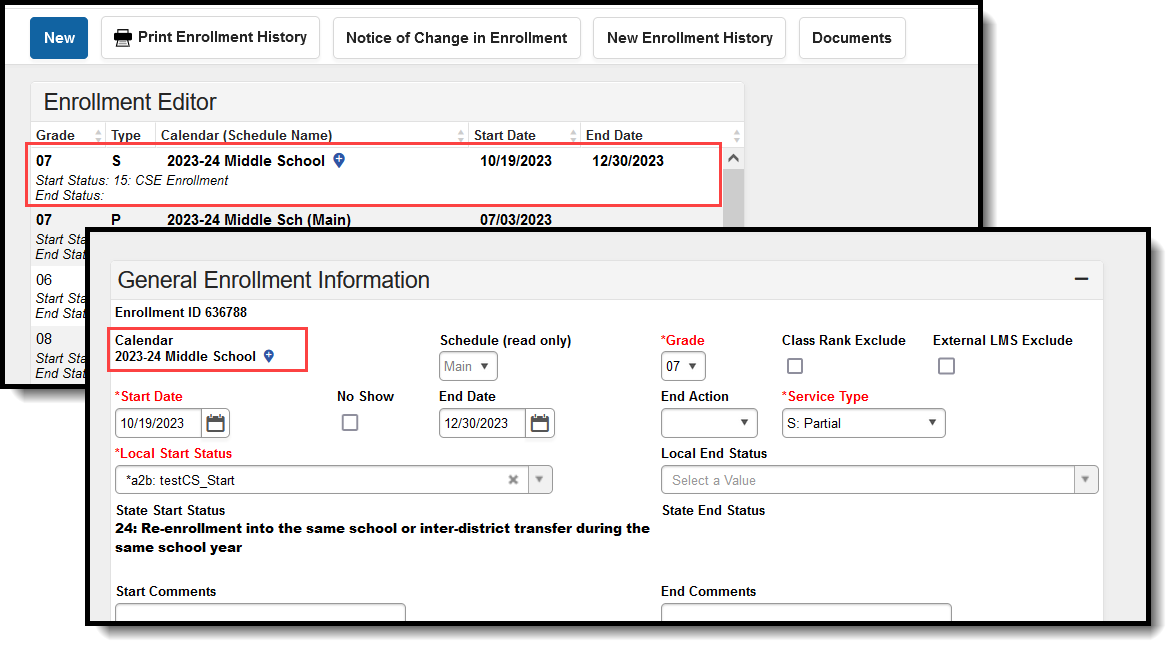 Cross-Site Enrollment Indicator
Attendance
Tool Search: Student Attendance, Daily Attendance, Attendance Entry Wizard, Classroom Monitor
Recording attendance for Cross-Site Students follows the same process as recording attendance for non-Cross-Site Students.
- The Serving School teacher enters attendance for their class, marking the Cross-Site Student as Absent or Tardy.
- The Serving School Attendance Office assigns an Attendance Code to that Attendance entry, using one of the many attendance tools available to them - Attendance Entry Wizard, Daily Attendance or Classroom Monitor.
- The student's Attendance record updates with the entered event, along with a Cross-Site indicator, showing that it was recorded by the Serving School.
- The Home School audits that event and assigns their own Attendance Code to it. Attendance Codes are not shared/transferred between schools.
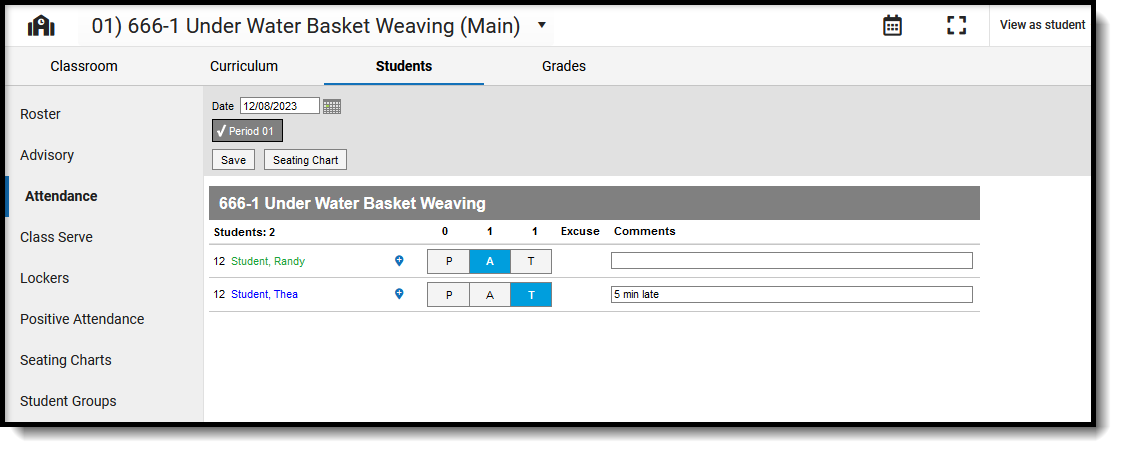 Classroom Recording of Cross-Site Attendance Events
The Home School can also enter attendance events for students taking Cross-Site Courses. This is also done the same way - from the student's Attendance tool or through the Attendance Entry Wizard. The Serving School attendance tools (Section Attendance, Classroom Attendance, etc.) are updated to reflect that event. The Serving School needs to assign their own Attendance Code to attendance events entered by the Home School, since Attendance Codes are not shared/transferred between schools.
District Grading Tools
Tool Search: Course Categories, Grades
Since the student is enrolled at a different school for the Cross-Site course, the Home School does NOT have the ability to enter grades for the student.
At the Serving School, grades and scores are entered and managed the same way they are for non-Cross-Site students.
Next Steps
- Schedule students into Cross-Site Courses.
