Tool Search: OLR Lists Bank
This documentation applies to both versions of Online Registration.
The OLR Lists Bank allows users to add translations of the dropdown lists that appear on the Online Registration portal pages. Unlike the OLR Literals Bank, the OLR Lists Bank only updates the text of the dropdown list items, not the field names.
When the Translation column is populated, that entry displays for people who have chosen that language.
To access this tool, users must also have tool rights to the Language Groups tool.
 OLR Lists Bank
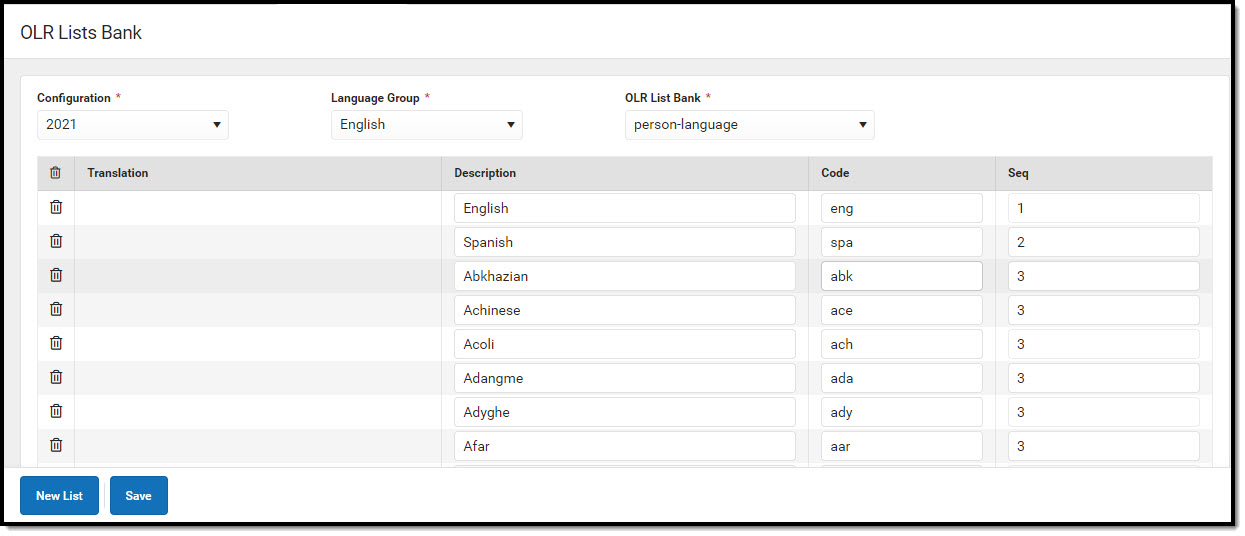
OLR Lists Bank Editor
The following items display on the editor.
| Field | Description |
|---|---|
| Configuration
Required |
The year associated with this configuration. |
| Language Group
Required |
The language for the translation. |
| OLR List Bank
Required |
This tree lists every field that can be given translated text in the selected language. English values are automatically entered; districts just need to populate the text for other languages that meet the needs of the users. |
| Translation | Displays the translated text of the available options. |
| Description | Displays the original text of the available options. |
| Code | Lists the assigned code for the options. This should not be modified. |
| Seq | Determines the order in which the translated text displays. If this value is not populated or is the same for all options, the items display alphabetically by Translation. |
Enter List Bank Translations
- Select the field from the OLR Lists dropdown for entering translated text. A Translations editor displays.
- Enter the Translation that corresponds to the Description.
- If desired, enter the Sequence.
- Repeat as needed, using the Add Translation Dictionary button to add more rows.
- Click the Save button when finished. The saved text is visible on the Online Registration portal pages.
Map Health Conditions
Locate and have available the Description and Code of the health condition from the Condition List (Student Information > Health Administration > Condition Setup).
 Health Conditions, Health Literals Values
- Select the person-Health Conditions from the OLR List Bank field.
- Click Add Row.
- Enter the Description and Code from the Condition List for the conditions that should be mapped on the List Bank Translations tool.
- Click Save. The Health Processing tool displays the mapped conditions.

Post Parent-Reported Health Conditions
In order to map the medical/mental health conditions:
- Mark the Post Health Condition for each condition that should be mapped.
- Staff need to add their initials.
- Open the conditions to review or post student conditions.
Medications do NOT post automatically.
If districts use the optional Type field when entering conditions into the Condition List (Student Information > Health Administration > Condition Setup), the Type and Condition must be entered together, with no spaces, in the OLR Lists Bank Code field.
Exporting and Importing Translations
OLR has many lists to translate, and districts often want to use a third-party vendor to complete their translations. They can now use the Import and Export options to export a file out of Infinite Campus (with or without translations) and import the file with their new translations.
Exporting a File to be Translated
- Select the Language Group you wish to export for translation.
- Click Export to File.
- Select the appropriate export option:
- All list items without existing translations - Use this if you want to have all current English text translated.
- All list items with existing translations included - Use this to generate a backup of the current text or if you want the current translated text available while translating.
- New list items only - This file will only contain list items for which there are currently no translations for the previously selected language. Use this file if you only want to update new list items without affecting any other translated text.
- If you are opening a file with prior translations or non-English characters, be sure to import the file into Excel or other spreadsheet software as a UTF-8 file.
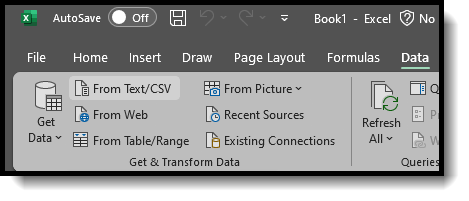
- Open Excel to a blank spreadsheet. Do not open Excel using the file itself.
- Go to Data > From Text/CSV > Select your file and click Import > Change the File Origin to 65001: Unicode (UTF-8).
- Click Load.
- Add your translations in the "TranslatedText" column. Do not translate the column header itself.
- Save the file in the UTF-8 CSV Format.

If the file is ever saved as a regular CSV, non-English characters may turn into question marks "?" and render the translations useless.

Importing a File that has been Translated
- Ensure your file is saved in the UTF-8 CSV Format.
If the file was not saved as a UTF-8 CSV, check to see if any non-English characters in the translations turned into question marks "?". If they have, fix those translations and re-save the file as a UTF-8 CSV.
- Click Import From File.
- Click Select Files and select the file you wish to import.
- Click Import.
