Tool Search: Data Access Tracker Report
The Data Access Tracker Report provides principals, superintendents, and other appropriate staff members with the ability to audit and review information about all users who viewed one or more specific student or users’ data, when they viewed this data, and what tools they used to view this data. Districts can monitor data access and protect personal, private, or sensitive student data by identifying exactly who is accessing this information and determining if the access was appropriate.
Data Access Tracker is available as part of the Campus Data Suite. Campus Data Suite is available for self-hosted and Cloud Choice hosted Districts.
This article covers the following topics:
Auditing Records Accessed By a Specific Person(s)
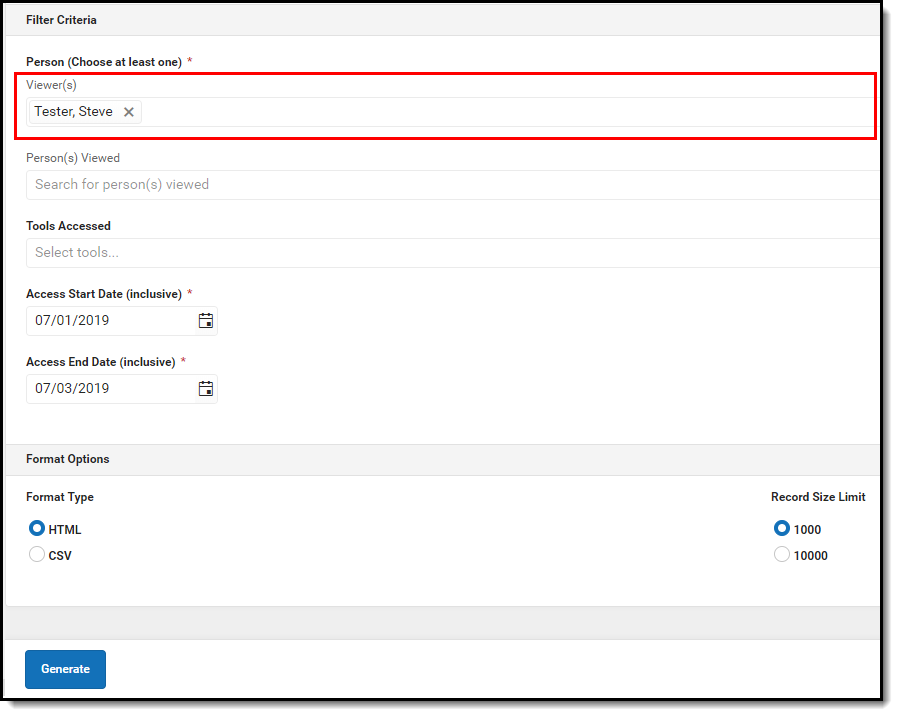
One scenario for using this report is to audit what records were viewed by a specific person(s) during a specific time frame. For example, in the image below, the report indicates all records viewed by Steve Tester between 07/01/2019 and 07/03/2019.
To review this data:
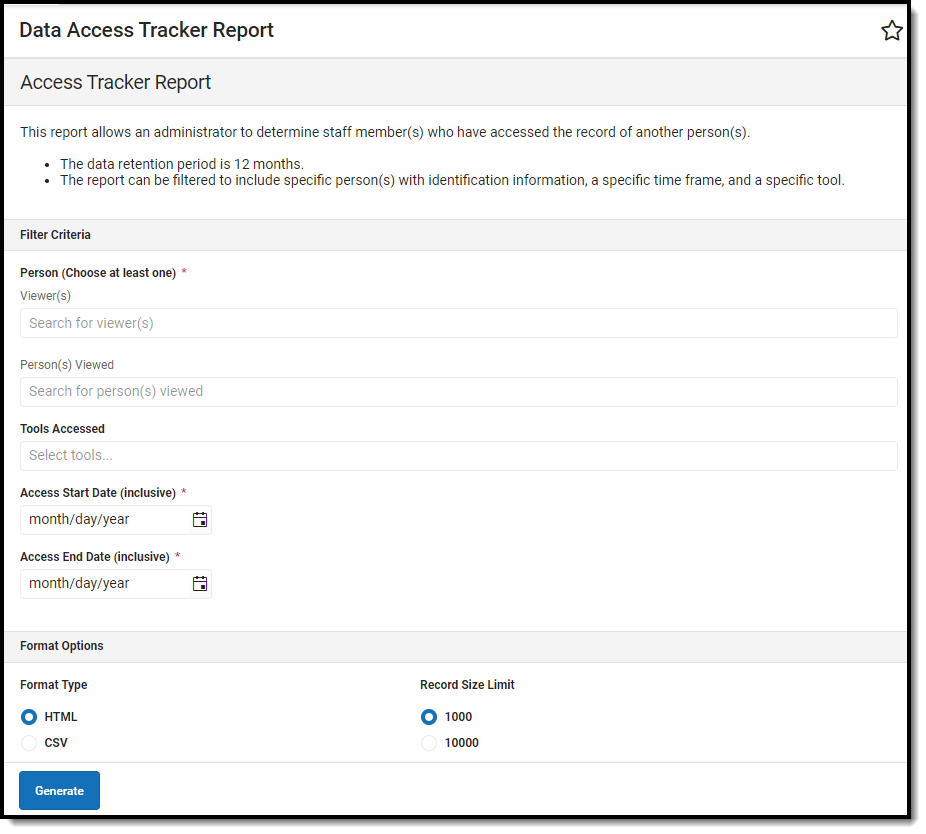
- Enter the name of the Viewer(s). This is the person(s) you wish to audit the records they viewed.
- Enter the Access Start Date. This is the first day in the audit time frame. Records accessed on this day through the Access End Date are reported.
- Enter the Access End Date. This is the last day in the audit time frame.
- Select the Format Type.
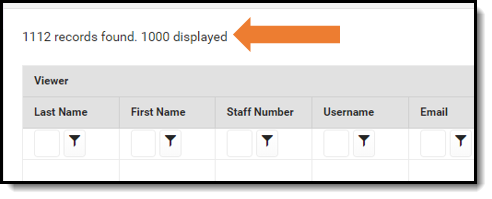
- Determine the Record Size Limit. If the number of records reported exceeds this limit, you will receive a notification and will not be able to view records beyond this size limit.
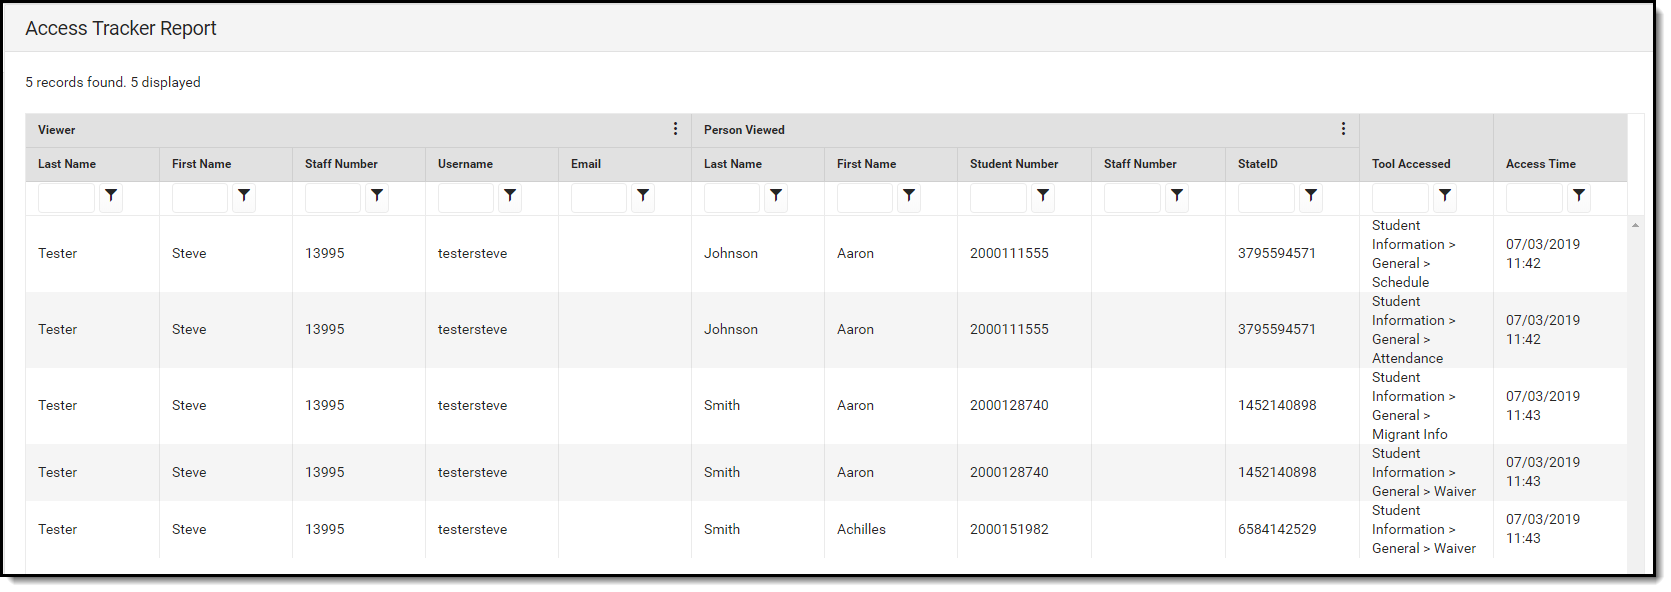
- Click Generate. The screen will refresh and present applicable records (Image 4).

Reported records will appear in a table, describing data about the viewer (Last Name, First Name, Staff Number, Username, Email), information about the person (records) viewed (Last Name, First Name, Student Number, Staff Number, State ID), the tool used to view the records, and the timestamp of when the viewer viewed the records.
Auditing Records Accessed for a Specific Tool(s) by a Specific Person(s)
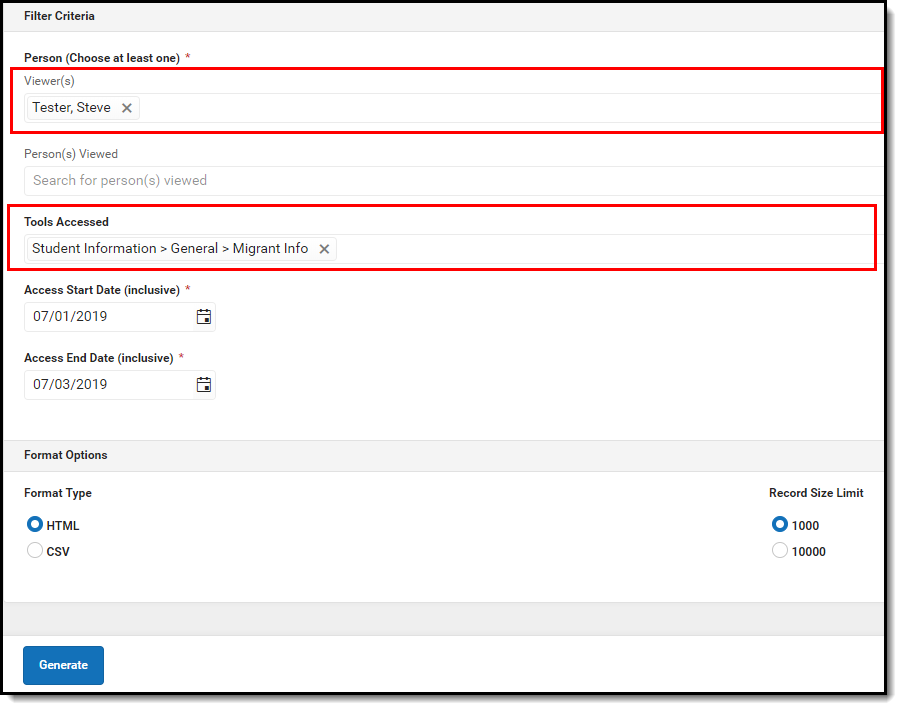
This report can help you identify which records were viewed for a specific tool by a specific person(s). For example in the image below. the report would indicate which Migrant Info records were viewed by Steve Tester between 07/01/2019-07/03/2019.
To review this data:
- Enter the name of the Viewer(s). This is the person(s) you wish to audit the records they viewed.
- Enter the Tools Accessed. This is the tool(s) accessed by the viewer to view records.
- Enter the Access Start Date. This is the first day in the audit time frame. Records accessed on this day through the Access End Date are reported.
- Enter the Access End Date. This is the last day in the audit time frame.
- Select the Format Type.
- Determine the Record Size Limit. If the number of records reported exceeds this limit, you will receive a notification and will not be able to view records beyond this size limit.
- Click Generate. The screen will refresh and present applicable records.
Reported records will appear in a table, describing data about the viewer (Last Name, First Name, Staff Number, Username, Email), information about the person (records) viewed (Last Name, First Name, Student Number, Staff Number, State ID), the tool used to view the records, and the timestamp of when the viewer viewed the records (Image 6).

Auditing Who Accessed Records for a Specific Person(s)
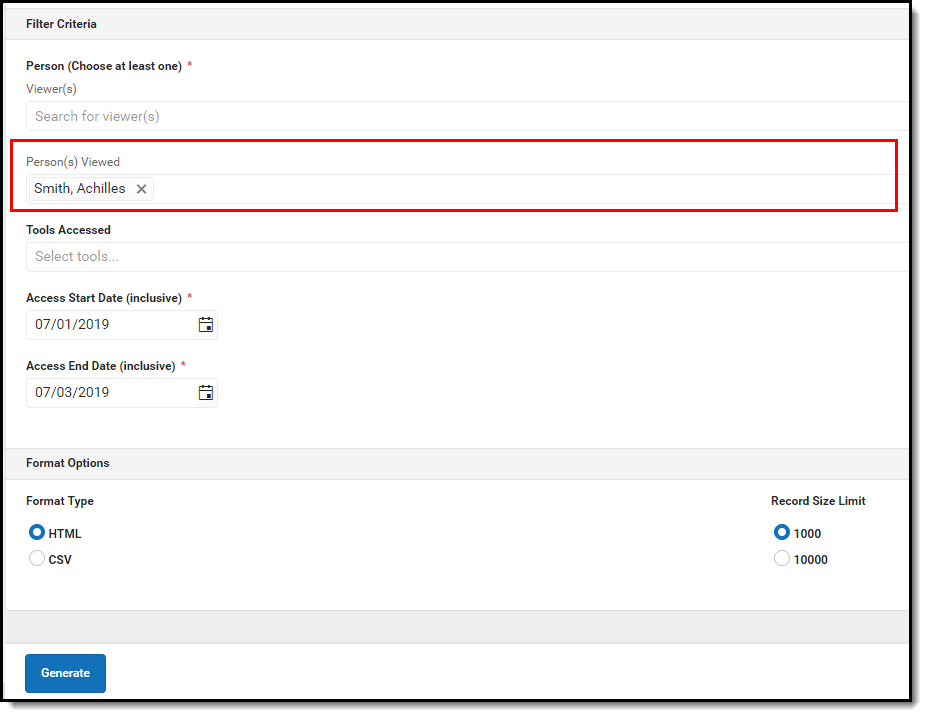
An important scenario for auditing records is to review which people viewed the records of a specific person or student(s). For example in the image below, the report would indicate who viewed Achilles Smith's records during a time frame of 07/01/2019-07/03/2019.
To review this data:
- Enter the name of the Person(s) Viewed. This is the person(s) who had their records accessed during the time frame entered.
- Enter the Access Start Date. This is the first day in the audit time frame. Records accessed on this day through the Access End Date are reported.
- Enter the Access End Date. This is the last day in the audit time frame.
- Select the Format Type.
- Determine the Record Size Limit. If the number of records reported exceeds this limit, you will receive a notification and will not be able to view records beyond this size limit.
- Click Generate. The screen will refresh and present applicable records (Image 8).
Reported records will appear in a table, describing data about the viewer (Last Name, First Name, Staff Number, Username, Email), information about the person (records) viewed (Last Name, First Name, Student Number, Staff Number, State ID), the tool used to view the records, and the timestamp of when the viewer viewed the records (Image 8).

Auditing Who Accessed Records for a Specific Tool(s) for a Specific Person(s)
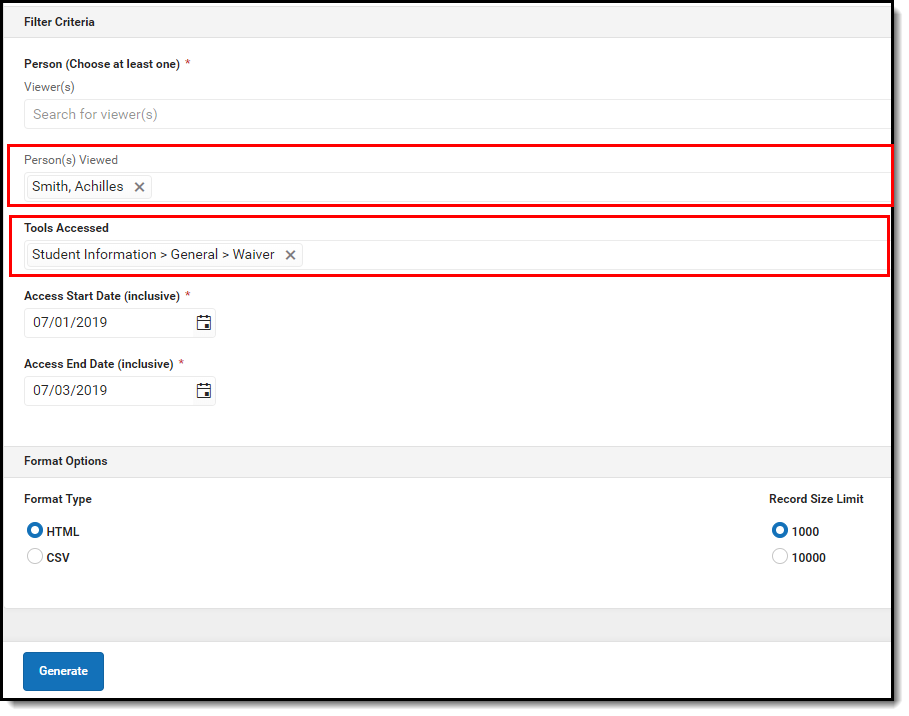
Another scenario for auditing is to review who viewed the records for a specific tool and person. For example in the image below, the report would indicate who viewed Achilles Smith's Waiver records.
To review this data:
- Enter the name of the Person(s) Viewed. This is the person(s) who had their records accessed during the time frame entered.
- Enter the Tools Accessed. This is the tool(s) accessed by the viewer to view records.
- Enter the Access Start Date. This is the first day in the audit time frame. Records accessed on this day through the Access End Date are reported.
- Enter the Access End Date. This is the last day in the audit time frame.
- Select the Format Type.
- Determine the Record Size Limit. If the number of records reported exceeds this limit, you will receive a notification and will not be able to view records beyond this size limit.
- Click Generate. The screen will refresh and present applicable records (Image 8).
Reported records will appear in a table, describing data about the viewer (Last Name, First Name, Staff Number, Username, Email), information about the person (records) viewed (Last Name, First Name, Student Number, Staff Number, State ID), the tool used to view the records, and the timestamp of when the viewer viewed the records (Image 10).

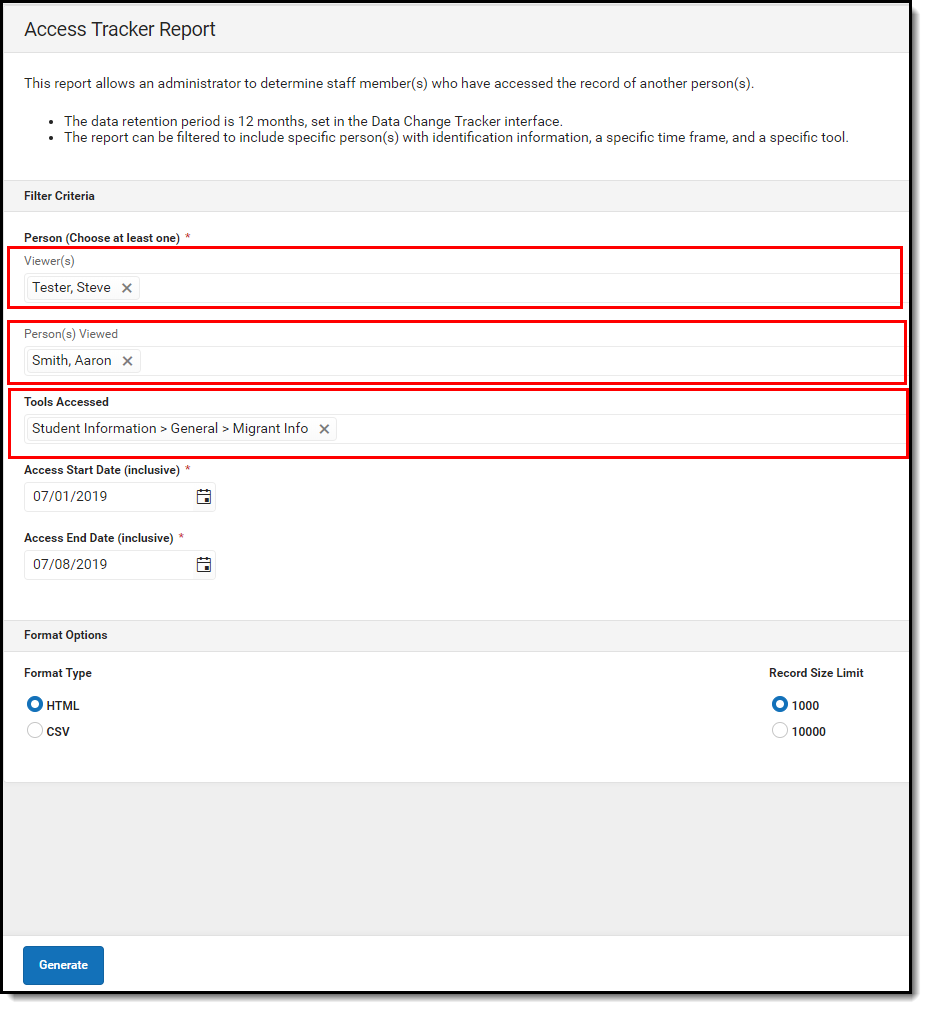
Auditing Which Records a Specific Person Viewed for a Specific Tool(s) and Person(s)
This report can also audit which records were viewed by a specific person(s) for a specific tool and person(s). For example in the image below, the report will indicate all Migrant Info records Steve Tester viewed for Aaron Smith (Image 11).
To review this data:
- Enter the name of the Viewer(s). This is the person(s) you wish to audit the records they viewed.
- Enter the name of the Person(s) Viewed. This is the person(s) who had their records accessed during the time frame entered.
- Enter the Tools Accessed. This is the tool(s) accessed by the viewer to view records.
- Enter the Access Start Date. This is the first day in the audit time frame. Records accessed on this day through the Access End Date are reported.
- Enter the Access End Date. This is the last day in the audit time frame.
- Select the Format Type.
- Determine the Record Size Limit. If the number of records reported exceeds this limit, you will receive a notification and will not be able to view records beyond this size limit.
- Click Generate. The screen will refresh and present applicable records (Image 8).
Reported records will appear in a table, describing data about the viewer (Last Name, First Name, Staff Number, Username, Email), information about the person (records) viewed (Last Name, First Name, Student Number, Staff Number, State ID), the tool used to view the records, and the timestamp of when the viewer viewed the records (Image 12).

Filtering Report Data
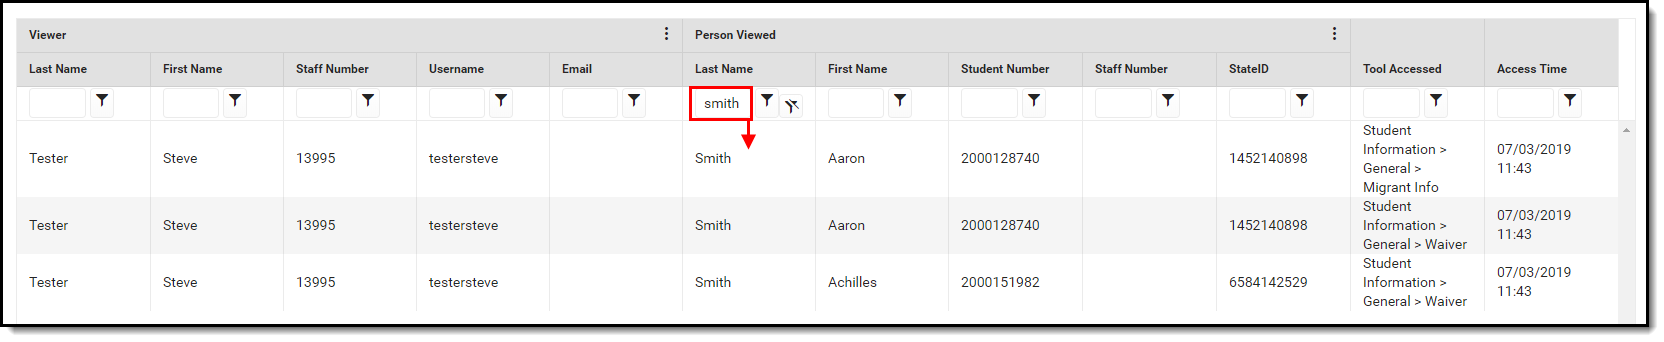
To assist in auditing report data for a large number of records, each column in the HTML format can be filtered using the text field found under the column name (see image below). For example, entering 'smith' for the Last Name column filtered records to only those with a Last Name value matching 'smith'. You can continue to refine data further by entering filter criteria in a additional columns, such as entering 'Aaron' under the First Name column to filter report data to only records with a Last Name = smith and a First Name = Aaron.
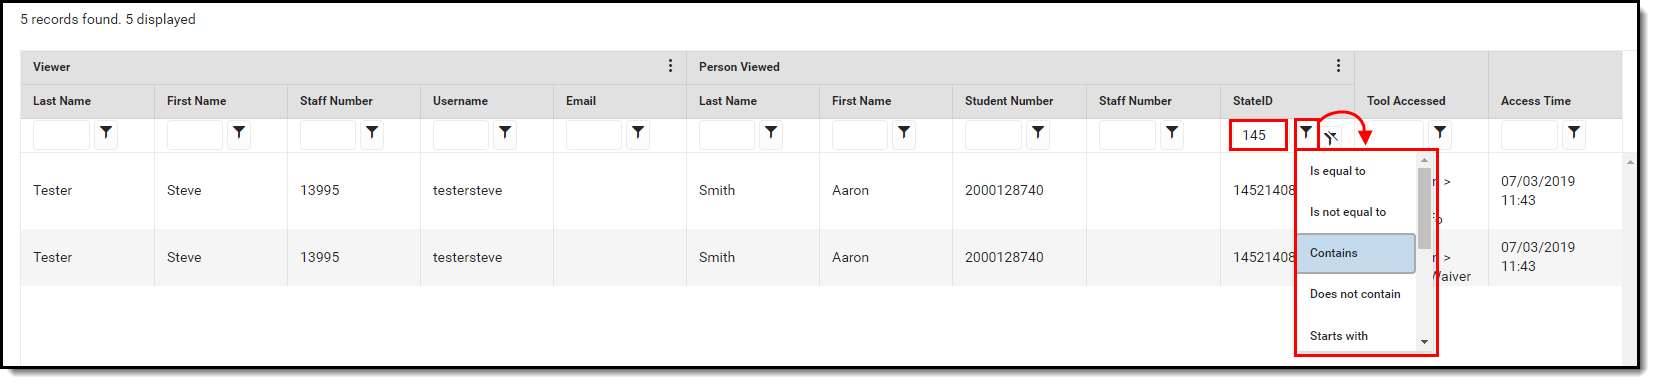
You can filter columns based on operators by entering a value in the text field found under the column name and selecting the ![]() icon. For example in the image below, the State ID column is being filtered by the Contains operator with a value of 145. What this means is that only records with a State ID which contains '145' are displayed.
icon. For example in the image below, the State ID column is being filtered by the Contains operator with a value of 145. What this means is that only records with a State ID which contains '145' are displayed.
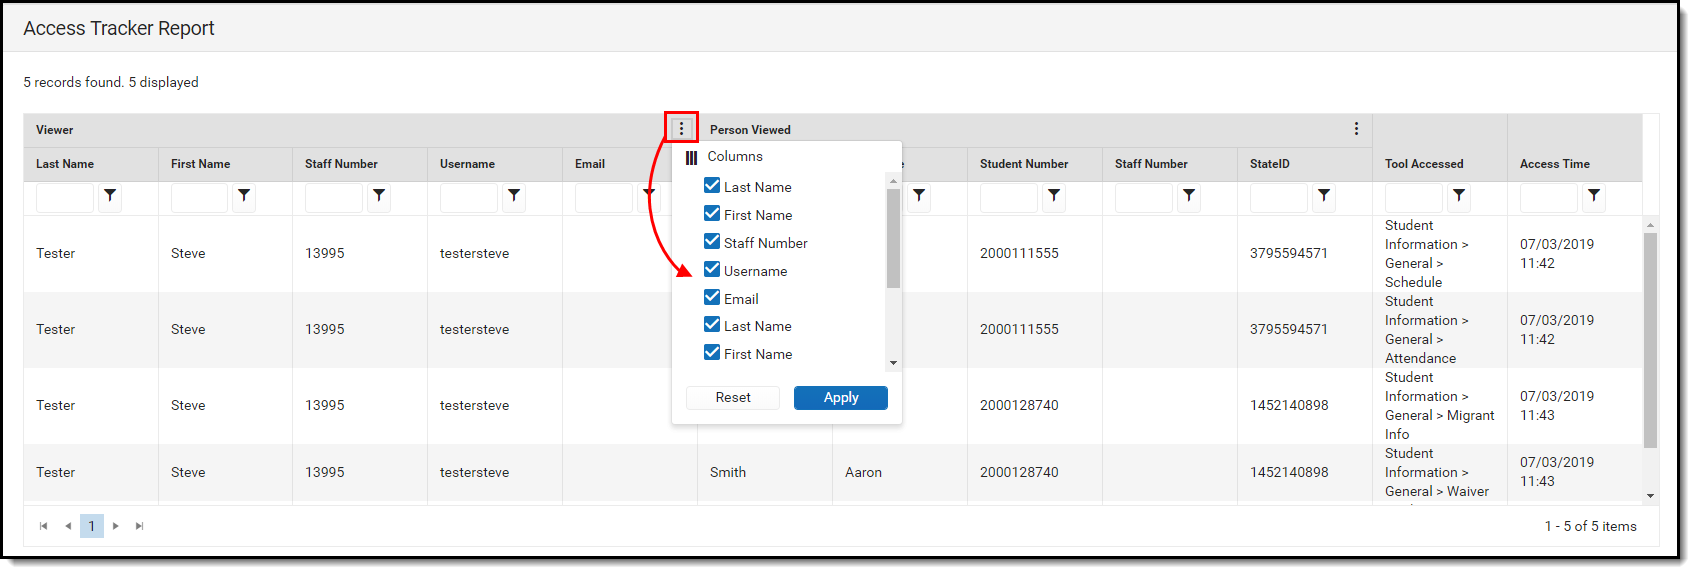
You can also remove columns from the table by clicking the ![]() button, unchecking the columns you wish to remove, and clicking Apply.
button, unchecking the columns you wish to remove, and clicking Apply.
If the report is generated in the CSV format, filtering options are determined based on the third-party program used to open the file (i.e., Microsoft Excel).

