Tool Search: Filter Designer
The Selection Editor provides a list of all students, census/staff and districts (state edition only) who can be selected for the query. Once chosen, the selected filter is saved and can be used in standard reports. An attendance clerk may be given access to this selection and easily record attendance for those chosen students.
Selection editors can only be saved if more than one student or person is selected. If only one individual is necessary in the selection editor, consider searching for that person and viewing their data in Census or in Student Information.
Users need at least Read rights to the Filter Designer tool and at least Add rights for Selection Editor Filters in order to properly use this tool.
For more information about Tool Rights and how they function, see the Tool Rights article.
Create a New Student Filter Using the Selection Editor
Filter and Data Type
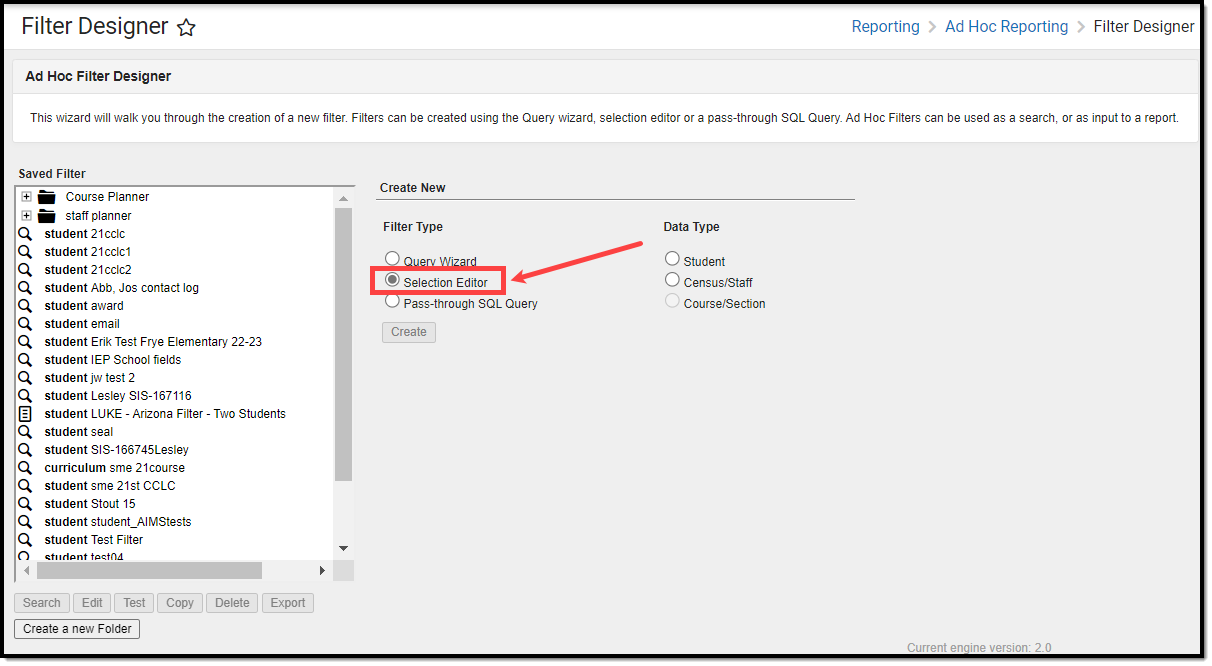
- Select the Filter Type of Selection Editor from the Filter Designer tool in Ad hoc reporting.
- Depending on the desired data set, select the Data Type of Student.
- Click the Create button.
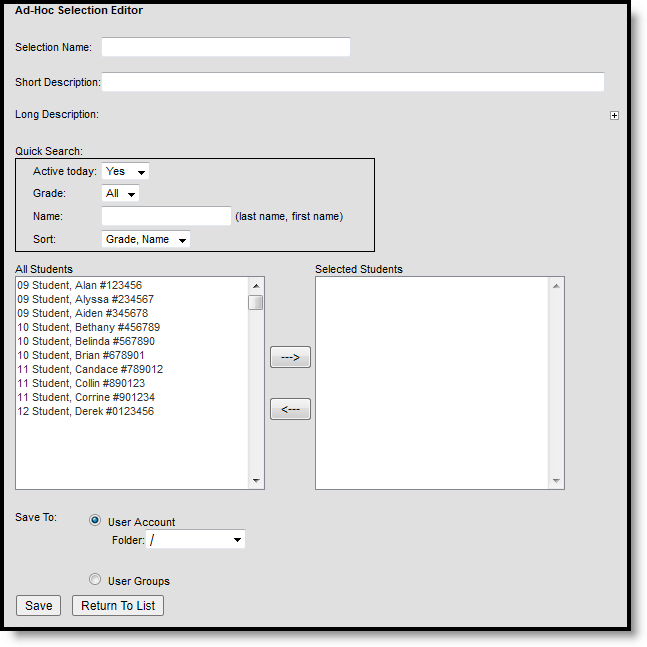
The screen will display a list of items to select in order to create the filter. All students in the selected Calendar are listed by default, first by grade, then last name, then first name. Additionally, students may be sorted by last and first name only by selecting the Name sort option. Students are available whether they are active or inactive.
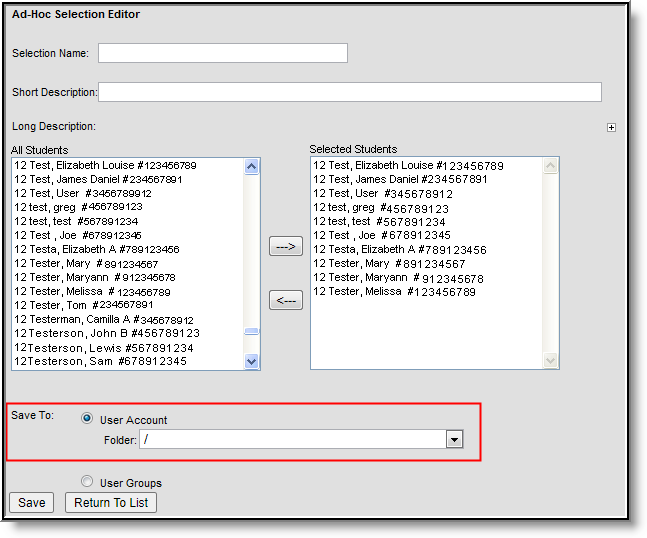
 Ad Hoc Selection Editor
Student Selection
- Enter a Selection Name as well as a Short and/or Long Description about the filter.
- Filter students within the All Students list by using the Quick Search options. Enter one or all of the following:
- Active Today value:
- Yes - Filters students to only those which have an active enrollment record as of the current date.
- No - Filters students to only those which do not have an active enrollment record as of the current date. Inactive students will appear in red.
- Both - Filters students to those which have and do not have active enrollment records as of the current date. Inactive students will appear in red.
- Select the Grade by which to filter students.
- Enter a Name (last name, first name) by which to filter students. Students are actively filtered as characters are entered into the field.
- Select a Sort option to filter students first by grade, then by last and first name (default option), or by last and first name only. If Grade is selected, Sort is disabled.
- Active Today value:
- Select the students to include in the selection filter from the All Student list on the left by highlighting the name and clicking the right-pointing arrow key. This will move the student name to the Selected Students column.
- Remove a student from the selected students list by clicking the left-pointing arrow key.
- Select all students appearing in the list by highlighting the first student and scroll to the very end of the list. Hold down the SHIFT key on the keyboard and select the last student. All student names should now be highlighted. Hold the Ctrl key on the keyboard to select individual students.
Select which group to Save To. Selecting the User Account radio button will provide the option of saving the filter to the current user or saving the filter to a specific folder. Selecting the User Groups radio button allows the filter to be saved to a user group or multiple user groups.If a filter is saved to more than one User Group, a separate copy is stored for each group. Each group can independently edit the filter without affecting another group's copy.
- Click the Save icon when finished. The new filter will be listed in the Saved Filters list on the main page of the Filter Designer.
If a filter is saved to more than one User Group, a separate copy is stored for each group. Each group can independently edit the filter without affecting another group's copy.
Selection editor lists are static. Any changes must be made manually.
Once a selection query is saved, it can be used in the Letter Builder to create detailed letters or used to export data via the Data Export tool.
Create a New Census Staff Filter Using the Selection Editor
Filter and Data Type
- Select the Filter Type of Selection Editor from the Filter Designer tool in Ad hoc reporting.
- Depending on the desired data set, select the Data Type of Census/Staff.
- Click the Create button.
The screen will display a list of items to select in order to create the filter.
 Census/Staff Selection Editor Search Fields
Census/Staff Selection
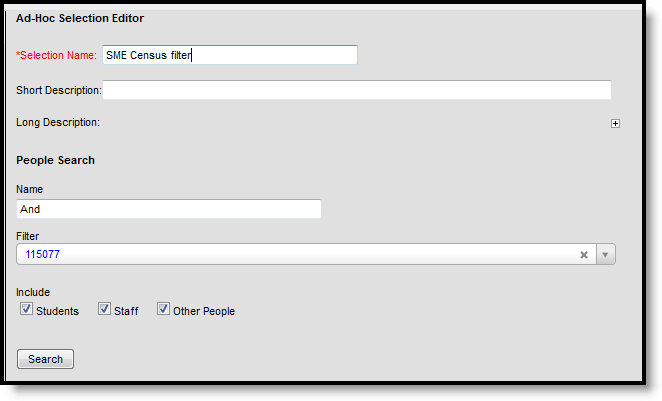
- Enter a Selection Name for this list, along with a Short Description and Long Description.
- In the People Search area, enter the start of a Name for those to include in the filter. At least one letter needs to be entered to return results. Or, select a filter from the Filter dropdown list. Both fields can be populated, resulting in the intersection of the two entries. For example, if a user selects a filter that only contains eighth graders and enters "Anderson" in the Name field, the search will only return eighth graders named Anderson.
- To remove a chosen filter, click the X near the Filter dropdown arrow.
- Determine which type of people to include in the search - Students, Staff or Other People. All three checkboxes can be selected; at least one option needs to be chosen.
- Click the Search button. Results display with the name of the person, some identifying information (i.e., birthdate, student number, gender), and the type of person (Staff, Student or Other).
If a new search is needed, click the Back to Search link.
Search results are limited to the set Search Limit chosen in System Preferences.- Click the Add button to add the desired individuals to the filter. Those names display in the Selected People box. Use the Add All button to add all people in the results to the selection.
- If they should not be included, click the Remove link next to their name. Use the Remove All button to remove all selected people from the selection.
- Click the Save icon when finished. The new filter will be listed in the Saved Filters list on the main page of the Filter Designer.
Selection editor lists are static. Any changes must be made manually.
Once a selection query is saved, it can be used in the Letter Builder to create detailed letters or used to export data via the Data Export tool.
 Census/Staff Selection Editor Search Results
Census/Staff Results and Information Display
- Clicking a person's name from the Search Results displays an option to view a Person Summary Results report, the same report that can be generated from the person's Summary tab.
- Clicking one of the Show links for a person displays secondary search results.
- Relationships displays people with whom a student has a relationship in Census (guardians, household, other family, etc.).
- Teachers displays the sections in which a student is currently enrolled.
- Team Members displays the individuals who are on a student's team (Counseling, Special Ed, etc.).
- Sections displays the course sections assigned to the staff person.
- Caseload displays the students with whom a staff person or other person is currently assigned (Counseling, Special Ed, etc.).
- Clicking Add on a Section result will add all students in that section to the list of selected people.
- Results can be sorted by clicking the column header.
Create a District Selection Editor for State Edition Users
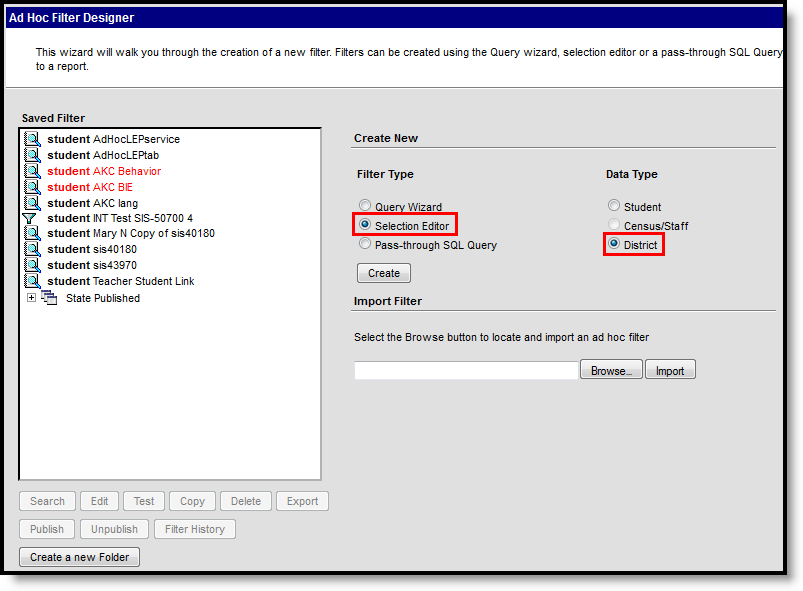
- Select the Filter Type of Selection Editor.
- Select the Data Type of District.
- Click the Create button.
 State Edition - District Selection Editor
District Selection
- Enter a Selection Name for the new filter.
- Enter a Short Description and Long Description of the filter, if desired.
- Select the Districts to include in the filter by selecting the district name from the left hand column and using the arrow keys to move the district to the right hand column.
- Determine the Save To options - a User Account or User Groups.
- Click the Save icon. The new filter will be listed in the Saved Filters list with the data type of District before the name of the filter.
Save Filters to Folders
Ad hoc filters can be saved to specific folders created in the Filter Designer tool. For more information on saving and organizing filters into folders, refer to the Manage Filters section of the Ad Hoc Filter Designer article.
 Saving a Filter to a Folder
