Tool Search: Grade Book Export
The Grade Book Export generates a view of the Grade Book in another format for use in other programs.
Any changes made to the data that has been exported will not be reflected within the Grade Book. A section must have at least one category and one assignment to export the Grade Book.
 Export your grade book in another format.
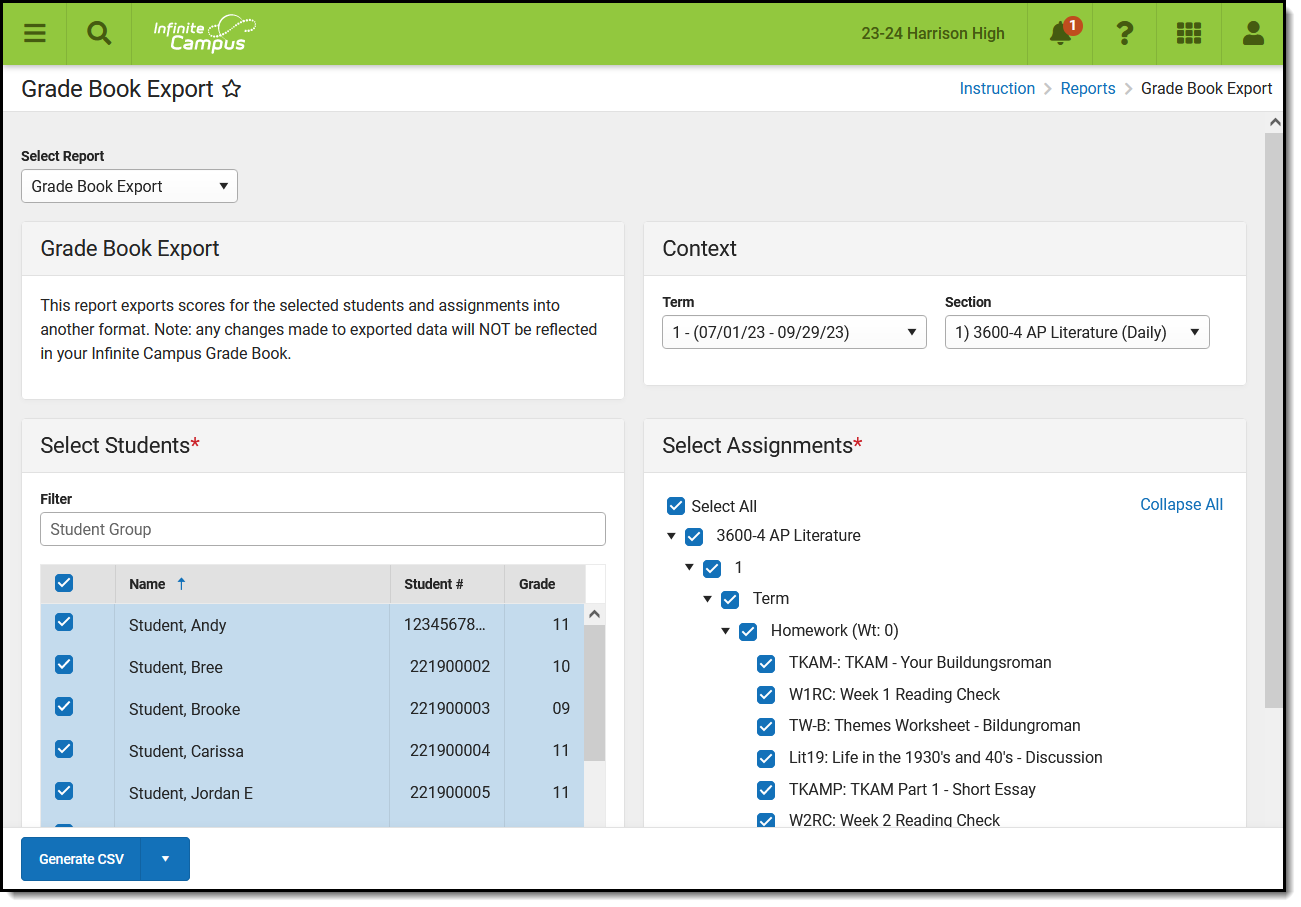
Generating the Grade Book Export
- Select a Term and Section to load the list of students and assignments.
- Indicate the Students to include in the export. Filter the student list by entering a Student Group if desired.
- Indicate which Assignments to include in the export. Expand the assignment list by term and select them individually or by Grading Task/Standard.
Note that Category Weights display in the assignments list if they have been entered for your Categories. Assignments that are not included in grade calculation or in categories that are excluded from calculation are marked as .
. - Click Generate CSV to view the report in PDF format or click the arrow button next to Generate to select a different format.
CSV
 Export in CSV Format
Tab Delimited
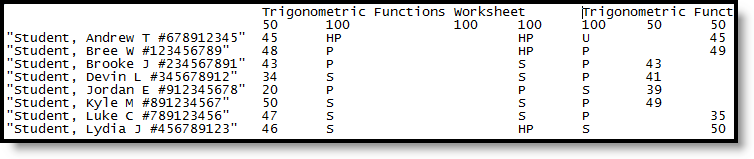 Export in Tab Delimited Format
XML
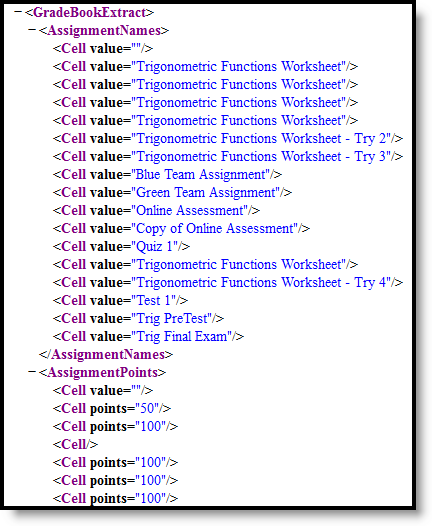 Export in XML Format
HTML
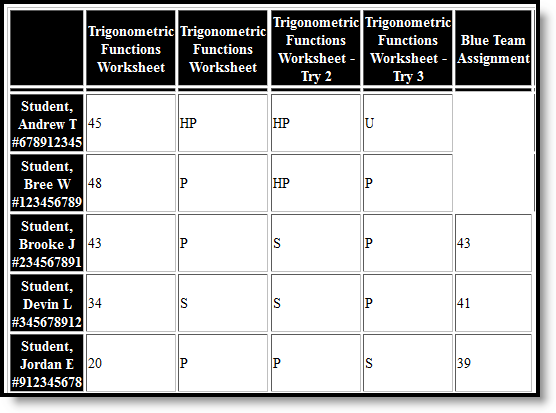 Export in HTML Format
 .
.


Putting Student Names and Numbers in Separate Columns
After generating the extract in Comma Separated format, complete the following steps in Excel to separate student last, first, and middle name, and number into their own columns of the spreadsheet:
- Add three new blank columns to the first of the first column.
- Highlight Column A.
- From the Data tab at the top, click Text to Columns.
- Choose Delimited, click Next.
- Mark Comma and Space as delimiters.
- Click Next and then OK to separate the fields into their own columns. Manually move the student number for any students who do not have middle names.
