Campus Student and Campus Parent put school information at your fingertips with real-time access to announcements, assignments, attendance, grades, schedules, and more.
Welcome to Campus Student and Campus Parent!
Get started with an overview of using the Campus Student and Campus Parent apps.
Getting Started with Campus Student and Campus Parent
Welcome to the new Campus Student and Campus Parent portals!
Campus Student and Campus Parent put school information at your fingertips with real-time access to announcements, assignments, attendance, grades, schedules, and more!
Logging in to the AppThe Campus Student and Campus Parent apps provide the same tools as the browser version, with the benefit of the option to Stay Logged In and receive push notifications.
|
|
Logging in from a Web Browser
Students and parents have different login pages.
- Visit infinitecampus.com and click Login at the top right.
- Search for your District Name and State. Select your district from the list.
- Click Parent/Student
- Click either Campus Parent or Campus Student.
- Enter the Username and Password provided by your school.
- Click Log In!
Have an Activation Key?
Your school may provide you with an Activation Key. Use this key to create your own user account.
- If using the Campus Parent mobile app, open the app and search for your District Name and State. Skip to Step 5.
- If using a web browser, visit infinitecampus.com and click Login at the top right.
- Search for your District Name and State. Select your district from the list.
- Click Parent/Student and then click Campus Parent.
- Click New User?
- Enter your Activation Key in the space provided and then Submit.
- Enter a Username and Password and click Submit.
How do I get Notifications?Notifications are available through the Campus Student and Campus Parent mobile apps, if enabled by your school. You may need to enable notifications on your device as well, in addition to the app settings.
|
|
Need help?
Schools choose whether to enable individual tools in Campus Student and Campus Parent, so if you're having trouble accessing a specific tool, contact your school.
Otherwise, visit infinitecampus.com and scroll down to Parents & Students for troubleshooting tips and more information about the apps.
Supported Devices
To use the Campus Student or Campus Parent apps, mobile devices must be on an Android version of 5.0 or later and iOS devices must be on a version of 13.4 or later.
Language: English | Spanish
Campus Parent and Campus Student put school information at your fingertips with real-time access to announcements, assignments, attendance, grades, schedules, and more. In this video you will learn how to get started with Campus Parent and Campus Student.
General Resources
- Use District Search to locate your district's portal URL.
- The Parents and Students page from infinitecampus.com is an excellent resource for parents and students.
- The Help Center page should be your go-to troubleshooting page with Campus Parent and Campus Student.
Previous Versions
Getting Started with Campus Parent and Campus Student - Video [.2231 - 2423]
Supported Platforms
Review information about the supported platforms, browsers, and apps for accessing Campus Student and Campus Parent.
This page contains information on the platforms generally supported for use with Infinite Campus.
For recommended browser settings, see the following article: Recommend Browser Settings.
Districts may be required to update to the most recent version of Infinite Campus to resolve a specific issue(s).
Upcoming Changes to Supported Platforms
No notable upcoming changes at this time.
Supported Browsers
The following table displays supported combinations of browsers for general use of Infinite Campus.
Being as Infinite Campus is web-based, the supported browsers table below does not list Operating System versions as they are unnecessary. As long as a computer is able to access Infinite Campus using a combination of operating system/browser/versions listed below, it does not matter what version of Windows, MacOS, or ChromeOS the computer is running.
|
Windows
| |
|
Browser
|
Supported Version
|
|
Chrome
|
Infinite Campus supports the current and most recent previous version of Chrome.
|
|
Firefox
|
Infinite Campus supports the current and most recent previous version of Firefox.
|
|
Edge
|
Infinite Campus supports the current and most recent previous version of Edge.
|
|
Mac
| |
|
Browser
|
Supported Version
|
|
Safari
|
Safari 12.x
Infinite Campus supports all versions of Safari currently supported by Apple.
|
|
Chrome
|
Infinite Campus supports the current and most recent previous version of Chrome.
|
|
Firefox
|
Infinite Campus supports the current and most recent previous version of Firefox.
|
|
ChromeOS (Chromebook)
| |
|
Browser
|
Supported Version
|
|
Chrome
|
Infinite Campus supports the current and most recent previous version of Chrome.
To ensure the best performance and compatibility, Infinite Campus recommends running the most up-to-date version of ChromeOS.
HR users will need to allow the use of the Flash plugin. |
|
iOS
| |
|
The Infinite Campus web application (with the exception of Teaching Center and Campus Student/Parent) is currently not supported for use on iOS devices.
| |
|
Android
| |
|
The Infinite Campus web application (with the exception of Teaching Center and Campus Student/Parent) is currently not supported for use on Android devices.
| |
Campus Student and Parent App
Campus Student and Parent Apps apps are designed to provide real-time access to student information such as grades, assignments, attendance, schedules, and announcements.
These apps can be downloaded from the Apple App Store and Google Play. The following devices/OS versions are supported:
|
Device
|
Minimum OS
|
|---|---|
|
Apple iOS Devices (iPod Touch, iPhone, iPad)
|
iOS 13.4+
|
|
Android Devices (Phones and Tablets)
|
Android 5.0+
|
Campus Mobile Payments
The Campus Mobile Payments app, available for Android and iOS devices, allows districts who use the School Store to enter credit/debit card purchases in real-time at school or district events.
These apps can be downloaded from the Apple App Store and Google Play. The following devices/OS versions are supported:
 |
Device
|
Minimum OS
|
|
Apple iOS Devices (iPod Touch, iPhone, iPad)
|
iOS 14.0+
| |
|
Android Devices (Phones and Tablets)
|
Android 12.0+
|
Accessing Infinite Campus on Mobile/Tablet Devices
With each release, Infinite Campus continues to work on and improve the user experience of accessing the Infinite Campus web application on mobile and tablet devices. The product's responsive design allows tools to resize based on a device's screen size and resolution, and navigation throughout the product allows for touchscreen interaction.
Some tools in the Campus Application will not be fully functional when accessed on a tablet or mobile device.
Please note that some Infinite Campus features use Java or Flash, which aren't supported on today's mobile operating systems.
Point of Sale Terminal Minimums
The following table indicates the recommended minimum operating requirements for use of Campus Food Service on Point of Sale terminals:
Infinite Campus does not support Campus Food Service running on Macintosh-based terminals at this time. All terminals must be PC based.
We recommend purchasing your POS terminals from Infinite Campus to ensure compatibility with our POS software.
For non-Campus terminals, we STRONGLY recommend touchscreen monitors.
|
|
Supported Minimums
| ||||||||||||
|
Infinite Campus recommends users operate at the levels listed below.
| |||||||||||||
|
Operating Systems
|
Supported: Windows 8.0, Windows 10 Recommended: Windows 11
Districts are responsible for managing Windows updates on Point of Sale (POS) terminals.
Microsoft has announced the end of support for Windows 10. Consequently, all customers using Campus Food Service POS and/or Campus Workflow Suite will eventually need to acquire new terminal models compatible with Windows 11.
If you are using Windows 11 and a POS-X Cash Drawer, the following adapter must be used:
Download and install this driver to finalize the adapter installation process: https://px-download.s3.us-east-1.amazonaws.com/Apex_USB_Cash_Drawer_VCOM_Driver.exe Deadline for New Terminals
The deadline depends on the version of Windows 10 installed on your terminals. A user or admin can find your version information by opening Windows Properties in the terminal. Below are the most common versions.
| ||||||||||||
|
Processor
|
Intel Celeron E1500 64-bit @ 2.2 GHz (Dual-Core)
| ||||||||||||
|
Memory
|
4GB DDR2
| ||||||||||||
|
Hard Drive
|
160GB 7200RPM SATA-300
| ||||||||||||
|
Network Connection
|
10/100 full duplex wired
| ||||||||||||
|
Internet Browsers
|
Please refer to the Supported Browser section.
| ||||||||||||
Frequently Asked Questions (FAQ)
Expand the link below to view a list of frequently asked questions about Infinite Campus-supported platforms:
What is a supported platform?
A supported platform is one that:
- Infinite Campus regularly tests during the development cycle.
- Is available within Infinite Campus for support and developers to reproduce problems.
- Authorized support contacts at the district and the Campus Support team can work with.
- Bugs raised against it will be given priority.
Can I get assistance with running Infinite Campus on a platform that is not supported?
If you are running Infinite Campus on an unsupported platform, we cannot guarantee that we will provide any support for it.
How can I get Infinite Campus to be supported on a new or unsupported platform?
Supporting a new platform requires a significant investment of time by Infinite Campus. This investment includes the up-front costs of setting up new testing environments, resources applied to fixing new issues, and ongoing maintenance costs in the future. Therefore, we only support new platforms when there is significant demand for them.
My organization has a standardized operation environment that Infinite Campus does not support. What can I do?
In this situation, you have the following two options:
- Run Campus in the unsupported environment, with the caveats mentioned above.
- Make an exception to your standardized operating environment and set up Campus based on its supported platforms.
Campus Student
The Campus Student Portal includes useful features for students and is optimized for use on mobile devices and tablets.
Campus Student Portal
The Campus Student Portal includes useful features for students and is optimized for use on mobile devices and tablets.
In Campus Student, navigate between tools in the menu on the left. On mobile devices, this menu shrinks to a "hamburger" or "three bars" icon to save space.
Click the Person icon in the top right to log out or view Notification Settings.
Home
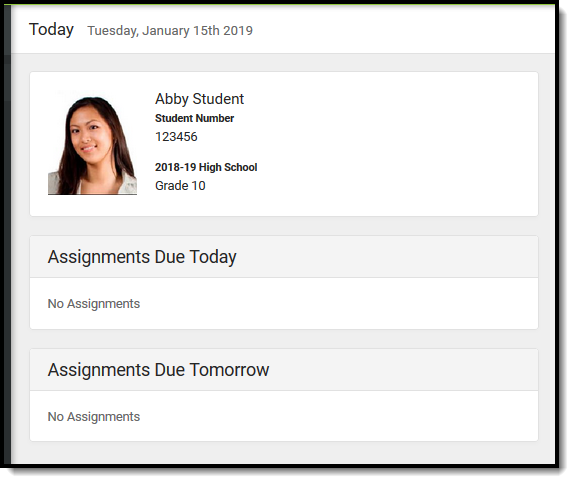
The student Home page provides important information at a glance. Many features described below are controlled by preferences set by the school or district. 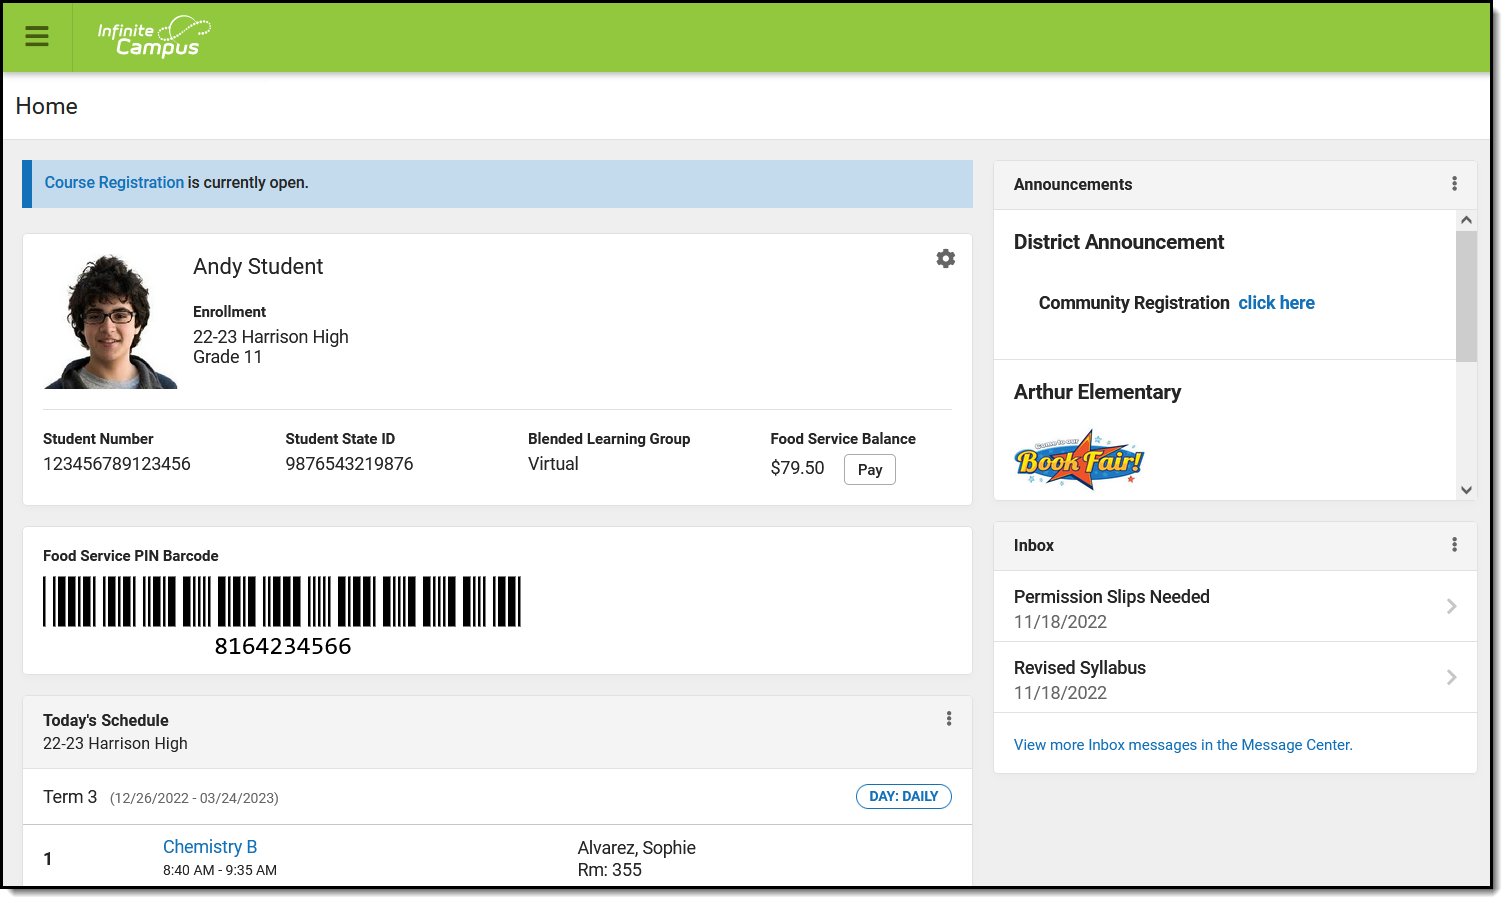 The Home page collects important and relevant information for the student.
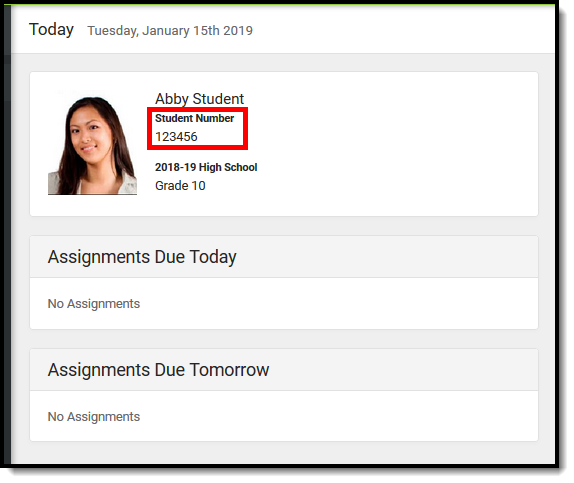
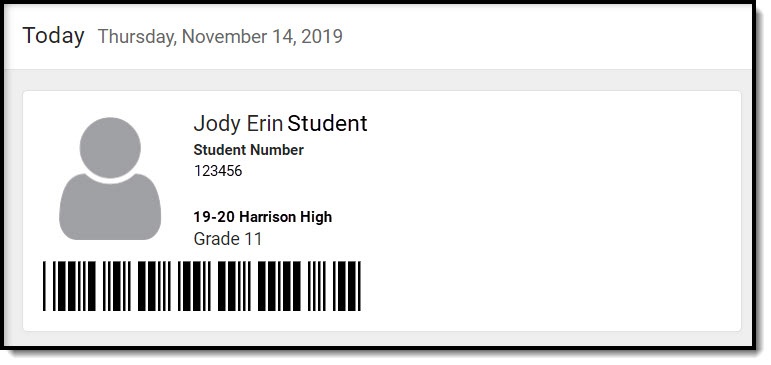
If enabled and applicable, links to course registration and/or surveys display at the top of the screen. Next, the student's name and basic information display, followed by the Food Service barcode if applicable.
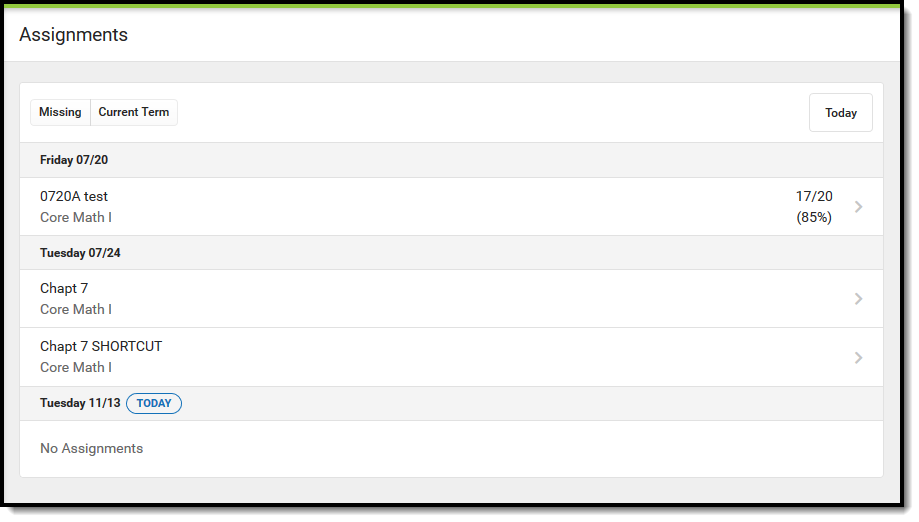
Below that, the following sections display. Click on the items listed, such as assignments or attendance events, to see more information:
- Today's Schedule
- Documents Need Attention
- Assignments Due Today
- Assignments Due Tomorrow
- Recent Assignment Scores
- Recent Grade Updates
- Recent Attendance Updates
- Recent Behavior Events
Along the right, sections for Announcements and Inbox messages display, as well as the School Store, if applicable.
Links in Campus Student
In various areas of Campus Student, clicking links opens details for items such as assignments and courses.
To enlarge Example Images, right click and select View Image. Click BACK to return to the article.
| Available Link | Description | Example Image |
|---|---|---|
| Assignment | Click on an assignment to view details, such as dates, scoring information, and the description. Files attached by teachers and submission options also display on this screen, as applicable.
At the top of an assignment, the bread crumbs show the course and any folders used by the teacher to organize curriculum. Click a link in the bread crumbs to view all assignments in the course/folder. |
|
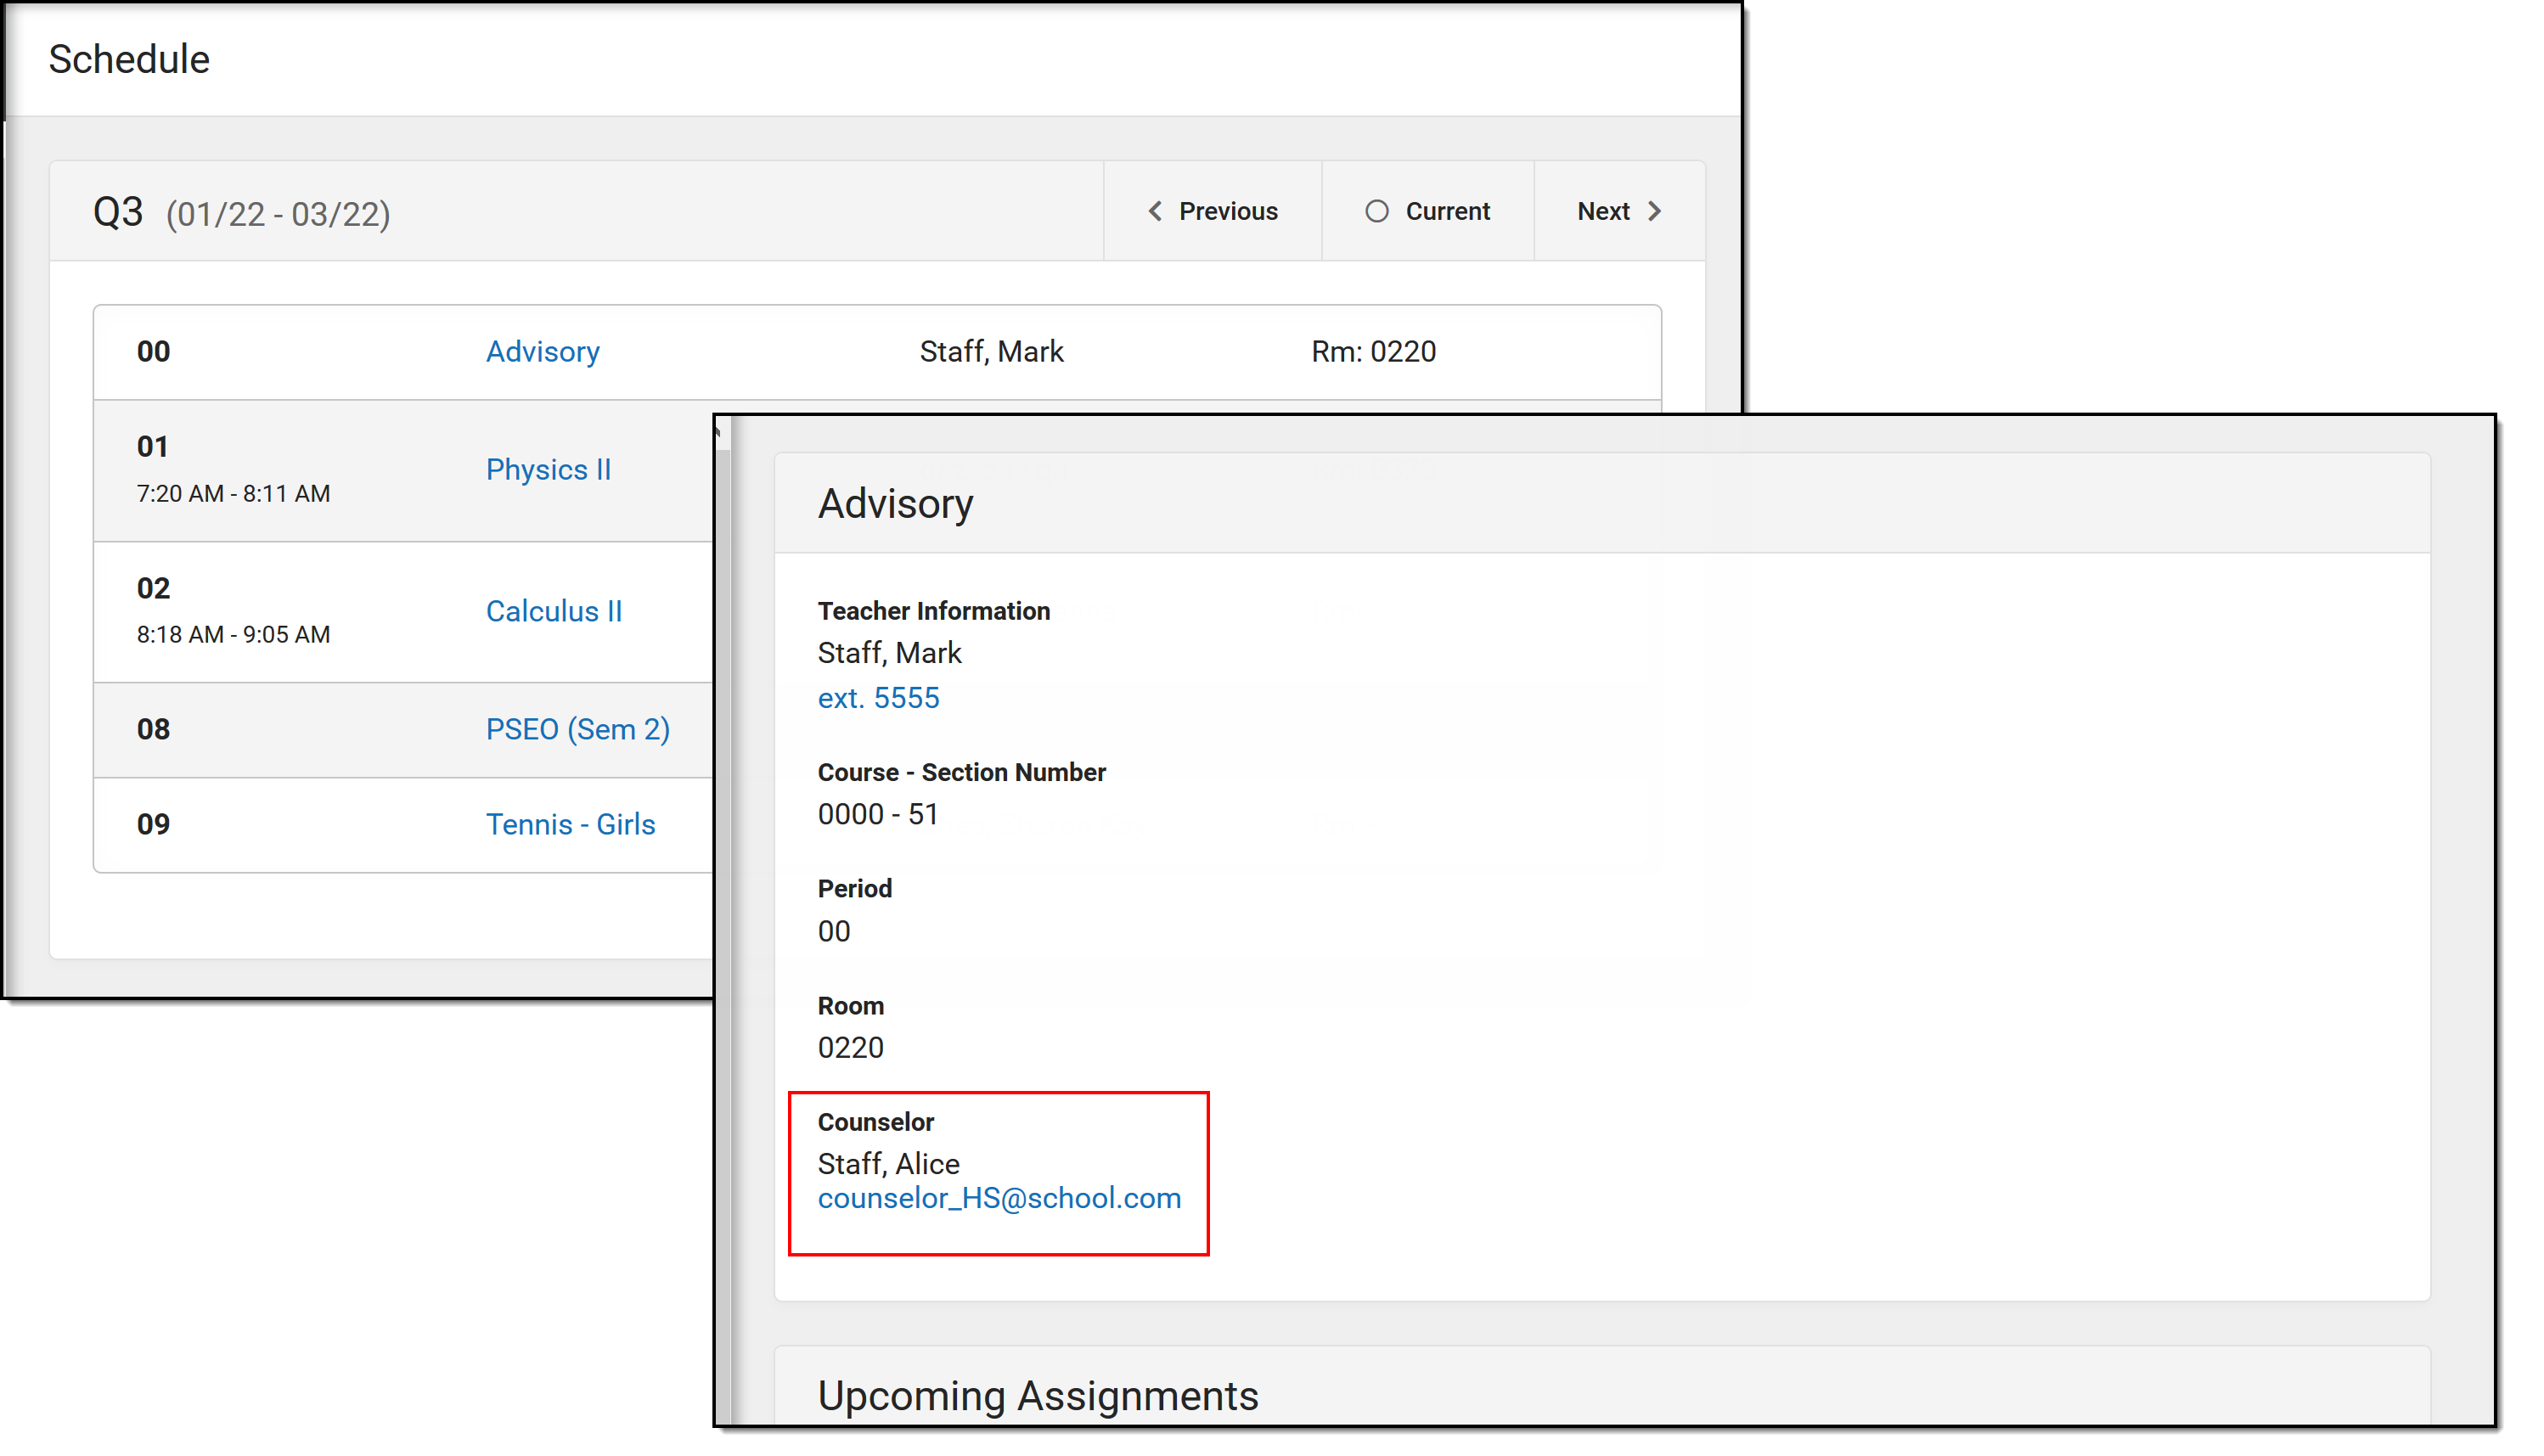
| Course Name | Click on a course name to view the Course/Section number, Period, Room, section Website. From the Course detail, a list of all Curriculum in the course, a Grades screen and a list of Upcoming Assignments are also available. |
|
| Counselor Email | From the Course detail, click the counselor's email to discuss schedule changes (a pre-formatted email form displays), or discuss other topics with your counselor. |
|
Student Questions
|
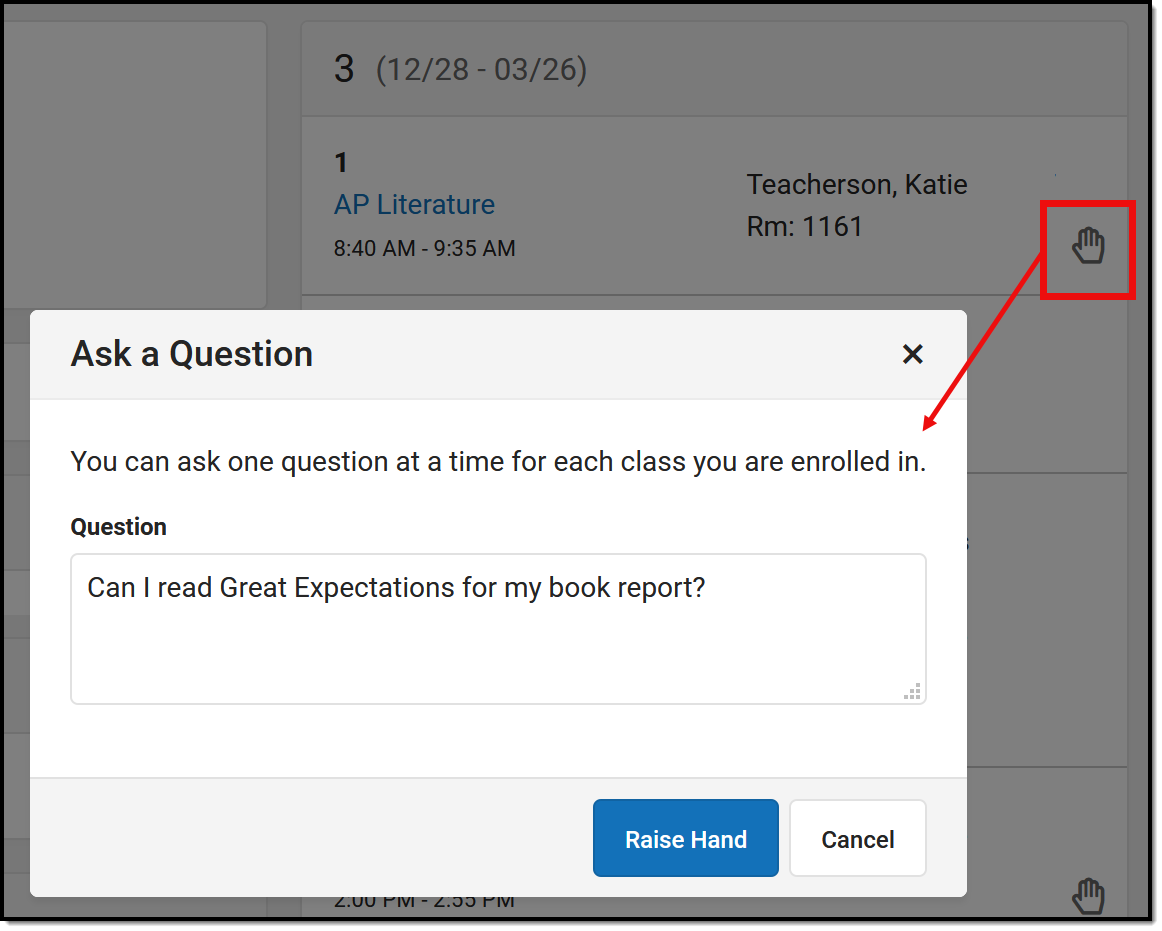
The Student Questions tool allows students to ask teachers simple questions and receive an answer in Campus Student.
This tool must be enabled by the district and by the teacher for each section. Once enabled, a hand icon displays for students in various places around Campus Student, such as in the schedule on the Today screen. Students click the hand icon to enter a question and click Raise Hand to submit it. They can also click Raise Hand without asking a question, such as to get the teacher's attention in a classroom setting. Students can modify their question or remove it at any time.
Once a student submits raises their hand, the hand icon displays as red. Once a teacher responds, the icon changes to a green speech bubble. Resolve the question to clear it, or ask a new one. |
 |
Notification Settings
Notification settings allow users to opt out of receiving specific kinds of notifications and establish thresholds for those they want to receive. Set thresholds to only receive notifications when a grade or score falls below the selected percentage or a lunch balance falls below the selected dollar amount. From the User Menu, select Settings, then Notification Settings. Click the arrows to change the threshold or click and drag the dot.
Notifications are not sent for any tools that have been disabled by the district. Only districts using Campus Food Service receive low balance notifications.
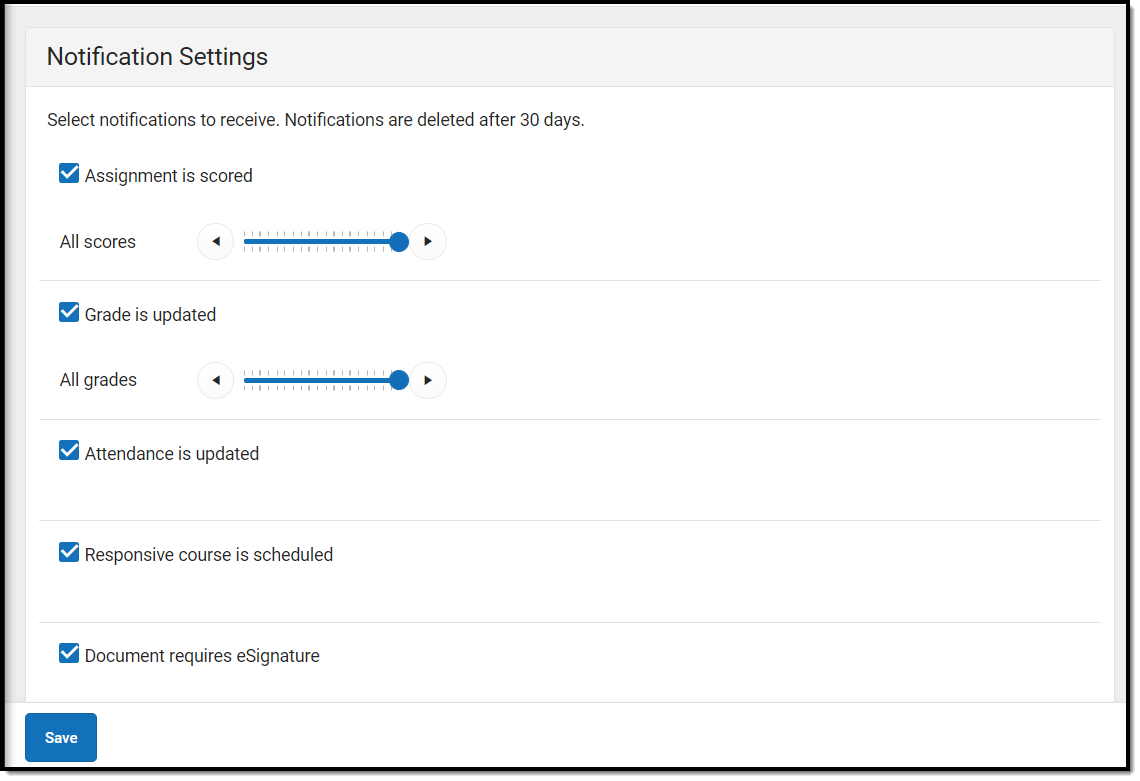 Enable notifications and set thresholds to determine when notifications are sent.
Blended Learning
Some schools are using blended learning for the 20-21 school year, with some students attending school physically and some attending virtually.
Am I Virtual Today?
Check the Today screen to see if you are physical or virtual today. A  tag displays at the top of the schedule on days you're attending virtually.
To check another day, go to the Calendar screen, click Schedule and click a day in the calendar to see if you are attending in-school or virtually that day.
Attendance Check-Ins
Depending on how your school is using virtual attendance, you may be required to respond to an attendance Check-In to show that you're participating in school while virtual. These Check-Ins may display for each virtual section or one per day; some students are required to respond during the period the section would normally meet and other have all day to respond. Contact your school if you have questions about how they're doing virtual attendance.
To respond to a Check-In, click the Check-In on the Today screen and then click Yes, I'm Here.
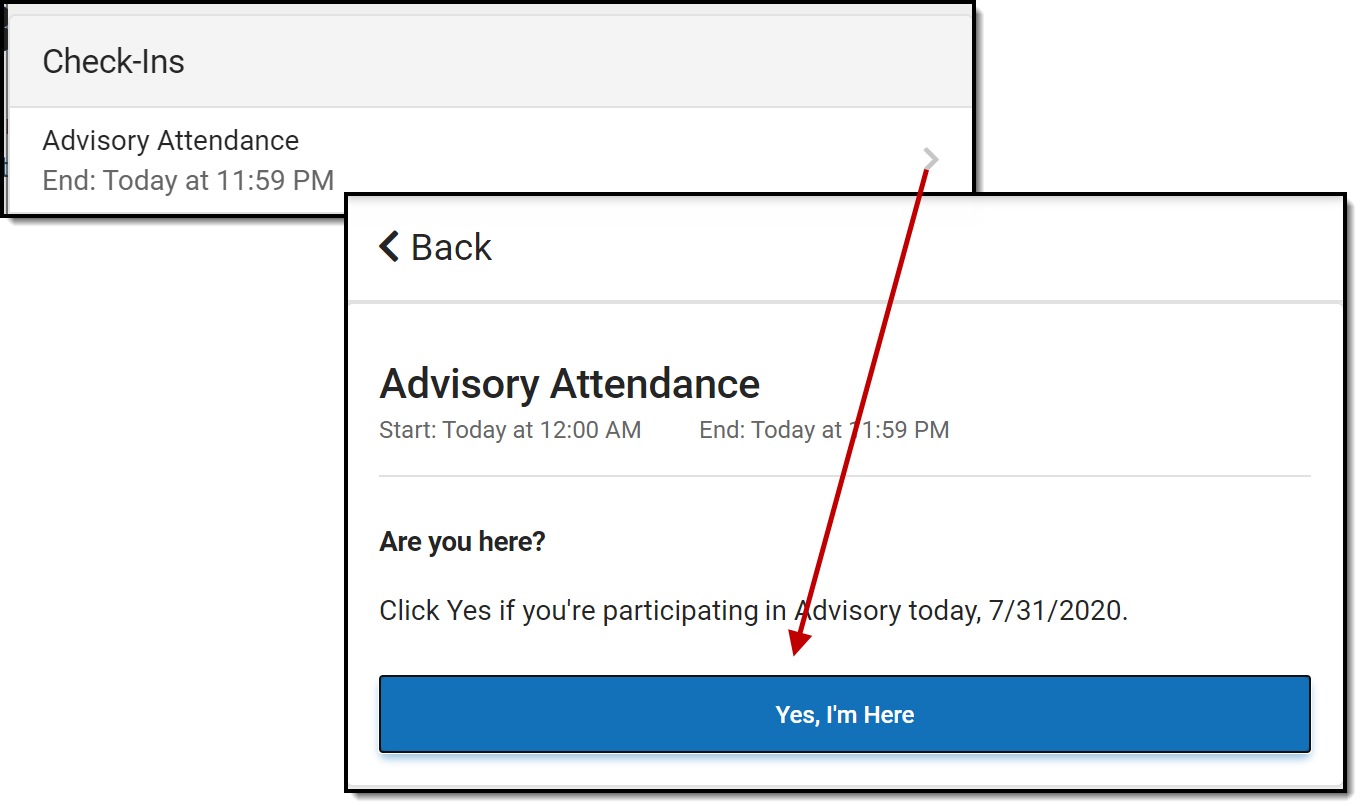 Respond to a Check-In to show that you're participating in school virtually.
Account Settings
Account settings allow users to update their security email on record or to change their Password and E-Signature PIN. From the User Menu, select Settings, then Account Settings.
- The Account Security Email is the email used if a user forgets their username or password.
- Passwords can only be modified if the district has enabled Password Reset. Strong passwords are enforced, meaning that passwords should have a mix of letters, number, and characters to make them more secure.
- E-Signature PINs are used to electronically verify and sign Meal Benefit Applications. This field is only available if enabled by the district.
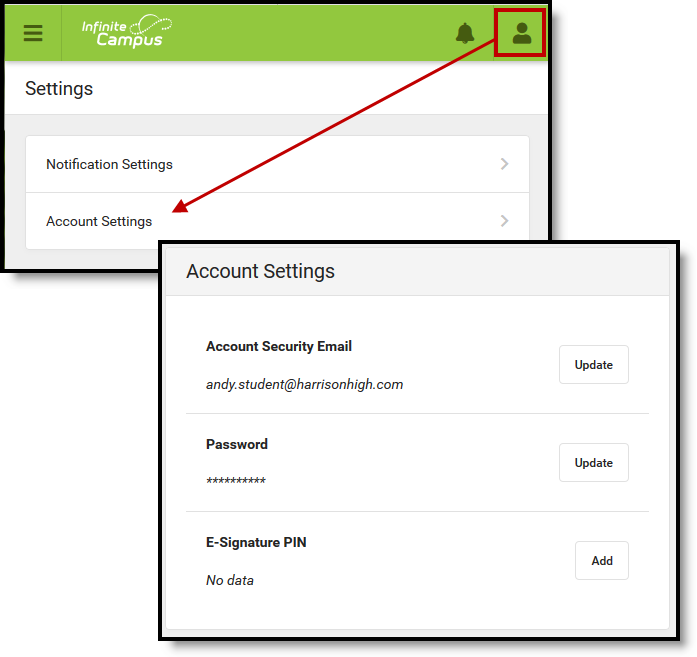 Access Account Settings to update basic account information.
Language
From the user menu, click Language to change the language that Campus Student displays in. Campus provides translations into Spanish and Chinese; districts may provide additional translations.
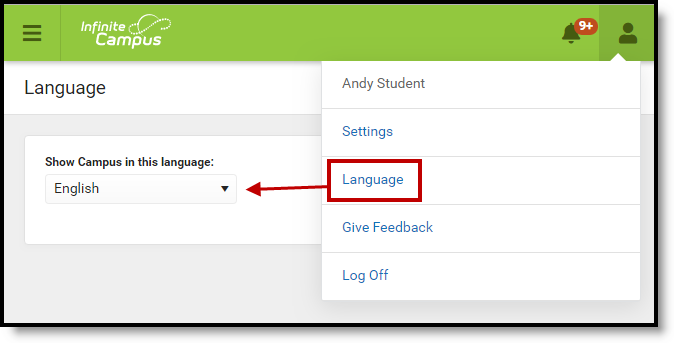 Select a Language to translate Campus Student. Spanish and Chinese translations are provided by Campus.
Contact Preferences
Manage your contact preference by selecting the desired language and when you receive message, and how you receive that message (phone call, email, or text message). If your school has turned on certain options, you may be able to modify your phone numbers and email addresses.
From the User Menu, select Settings, then select Contact Preference. Review existing contact information (phone numbers and email addresses), enter any updates, and mark your desired Messenger Preferences. When phone and email changes are made, an email notification acknowledging the change is sent to the individual, alerting them to changes they may not have made.
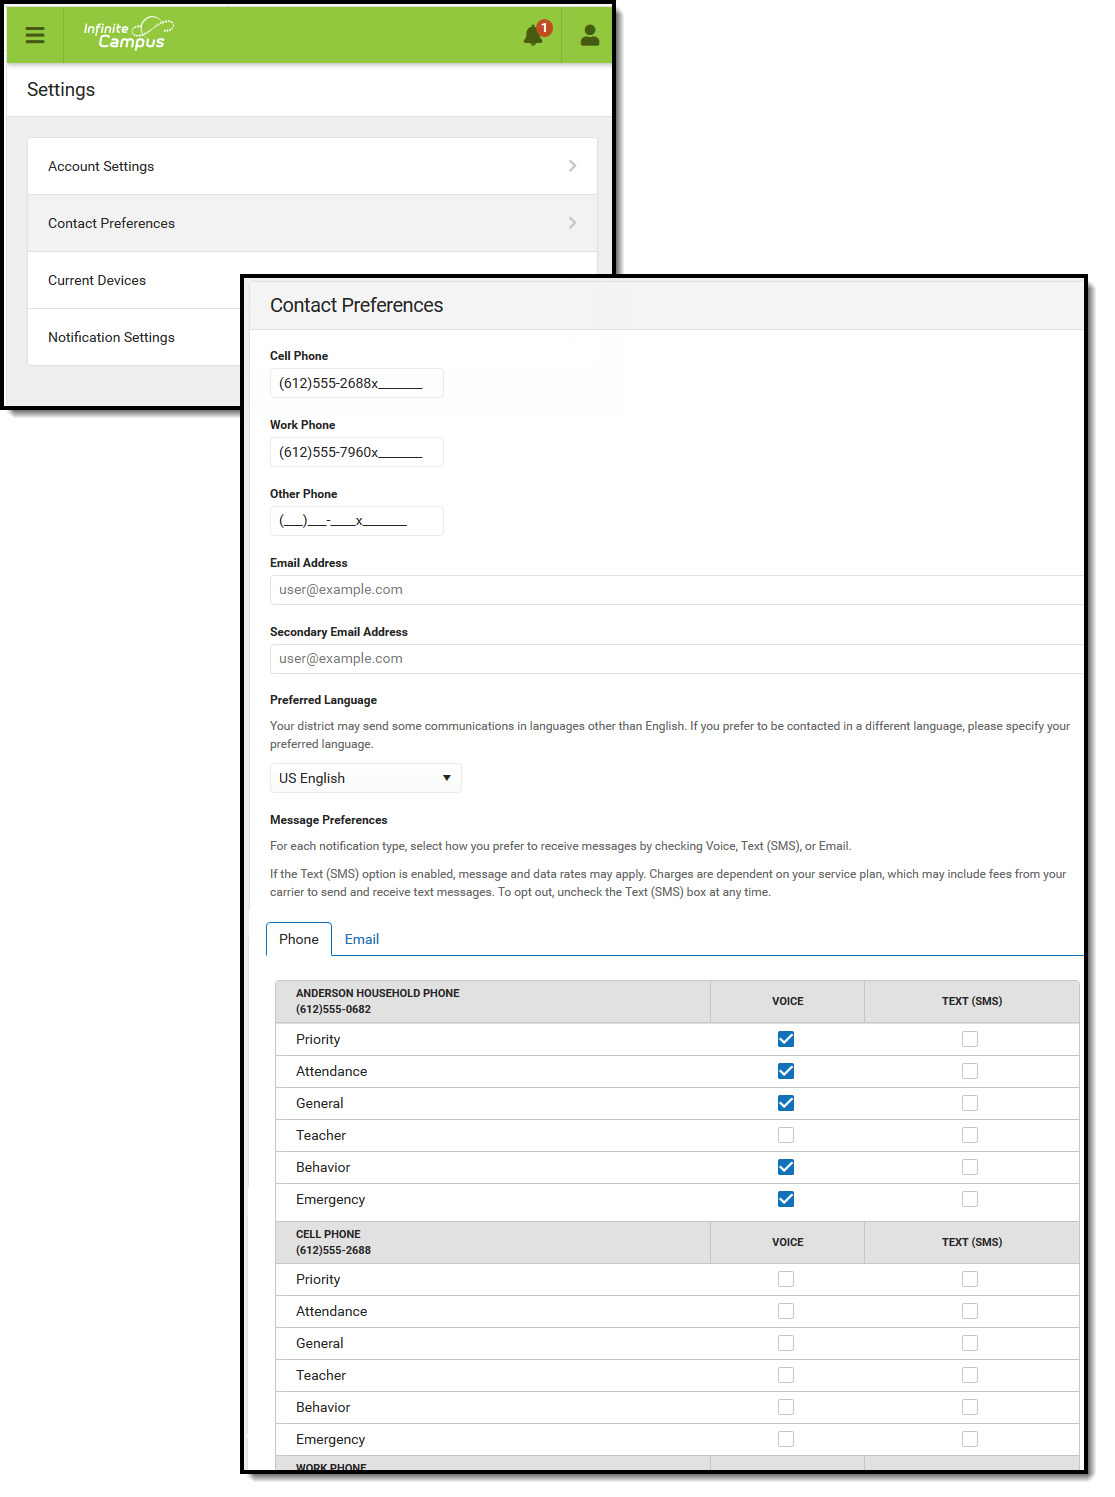 Contact Preferences
Access Log
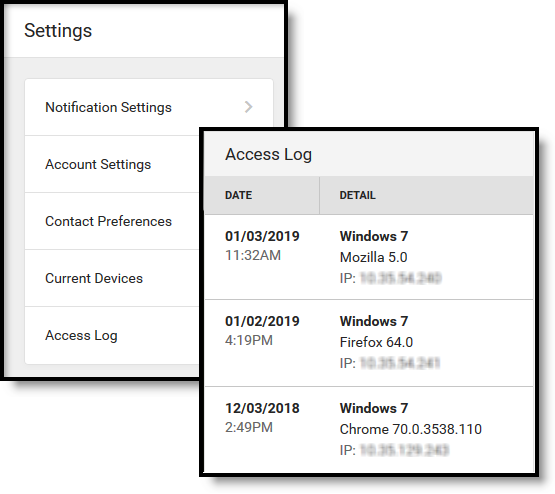
The Access Log lists the date, time, operating system, browser, and IP address of each time this account has been accessed. Failed attempts are indicated.
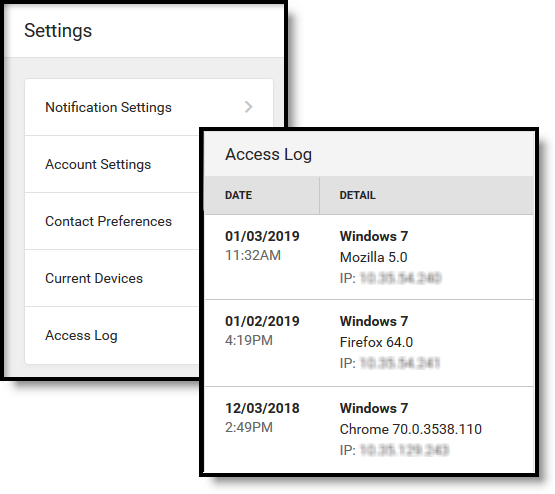 Use the Access Log to see information for each login.
Previous Versions
Campus Student Portal [.2303 - .2331]
Campus Student Portal [.2211 - .2251]
Course Registration (Campus Student)
Using the Course Registration tool, students enrolled in any future calendar can select which courses they would like to take. This is just a course request process and does not guarantee placement into a course.
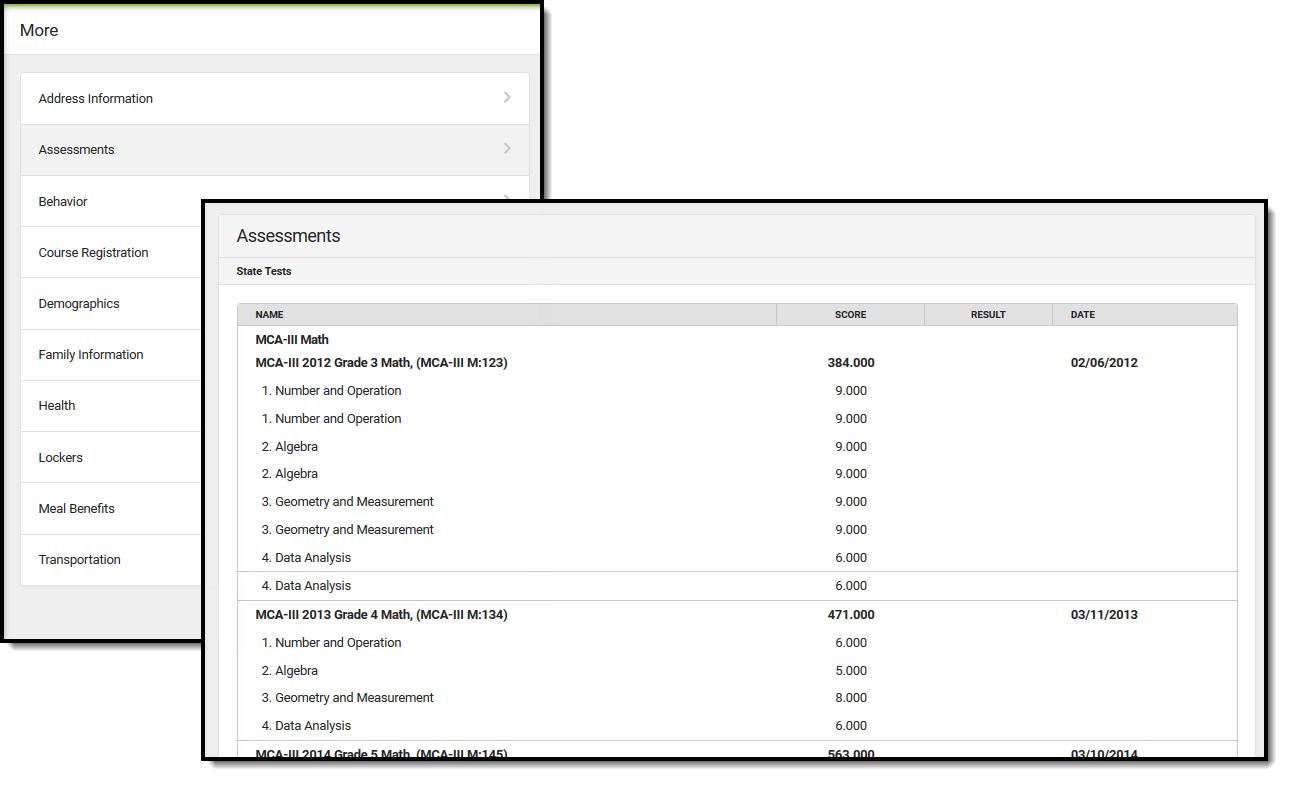
Location: Campus Student > More > Course Registration
Course Registration allows students enrolled in next year's calendar (or any future calendar) to select which courses they would like to take. This is just a course request process; it does not guarantee placement into a course. Parents can also request courses for students using this same process.
- If you do not see the Course Registration after selecting More from the Index, contact your school (Counselor, etc.). They may need to review correct setup has been done and verify you have an enrollment record for a future school year.
- If you do not have access to Campus Student or Campus Parent, contact your school.
- If you do not know where to access Campus Student or Campus Parent, contact your school.
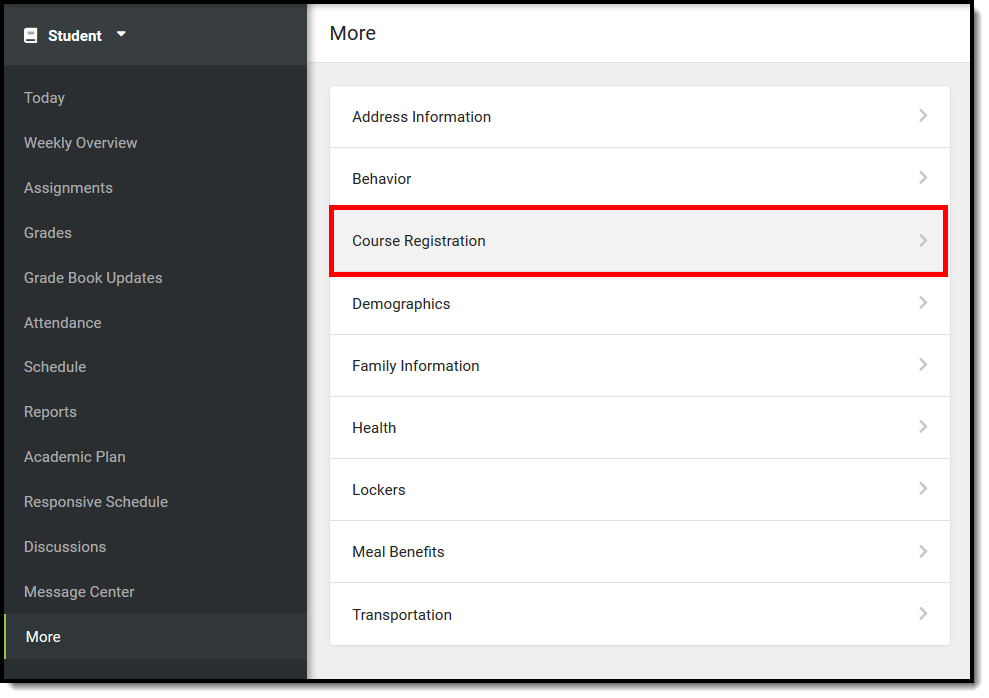 Campus Student Course Registration
School and District users: To find instructions and prerequisites for using this tool, see the Portal Display Options article.
Select Enrollment
- After logging in to Campus Student/Campus Parent, select More from the Index. Then select Course Registration. A list of Course Registration Enrollments displays.
- Select the desired enrollment. This is usually the next school year's enrollment (if the current school year is 2024-25 High School and you are currently in Grade 10, the next school year's enrollment is 2025-26 High School, where you will be requesting courses for Grade 11).
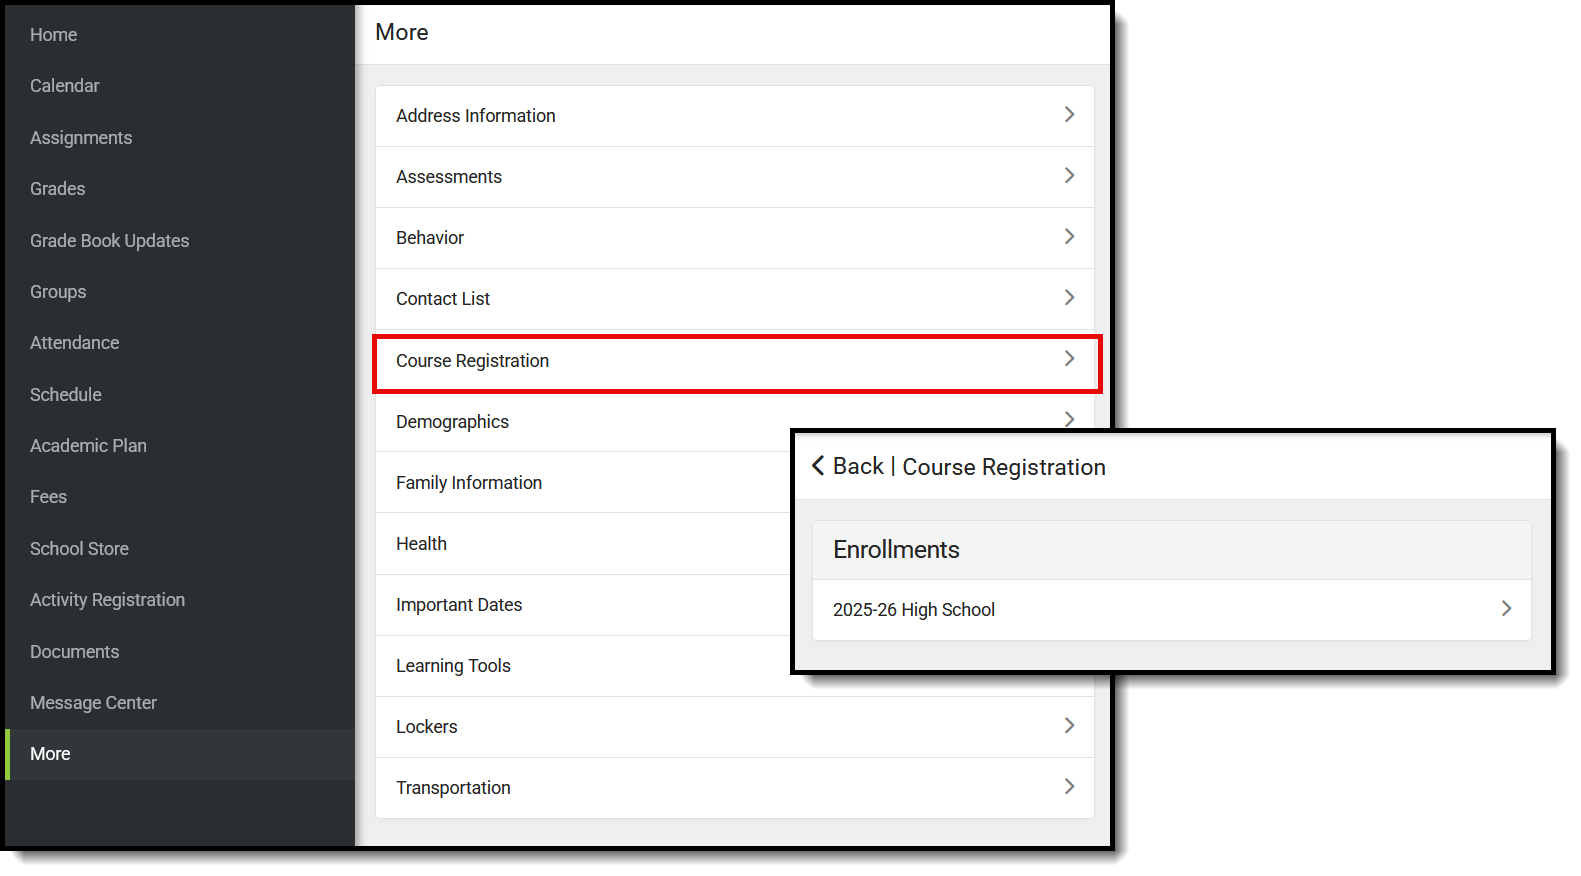 Course Registration Enrollment Selection
Note that multiple enrollments may be listed. Perhaps you have an enrollment in one high school in your district, and also take a course at another high school in the district. In this instance, two enrollment options for the same school year are listed.
You are now ready to enter Course Requests. When there are currently no course requests, a screen like the image on the left below displays. If some course requests have been entered, a screen like the image on the right displays.
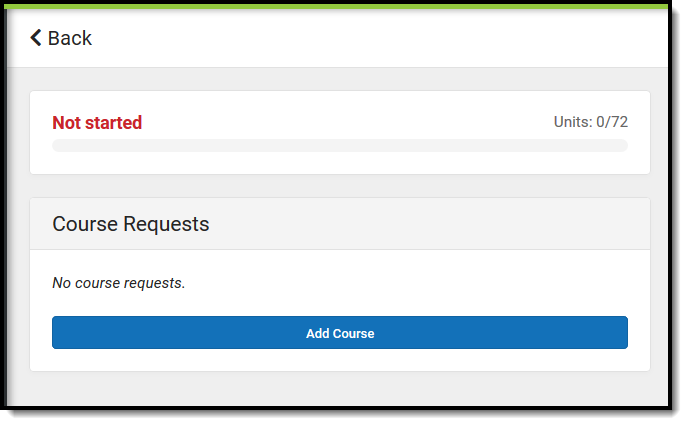 No Existing Course Requests
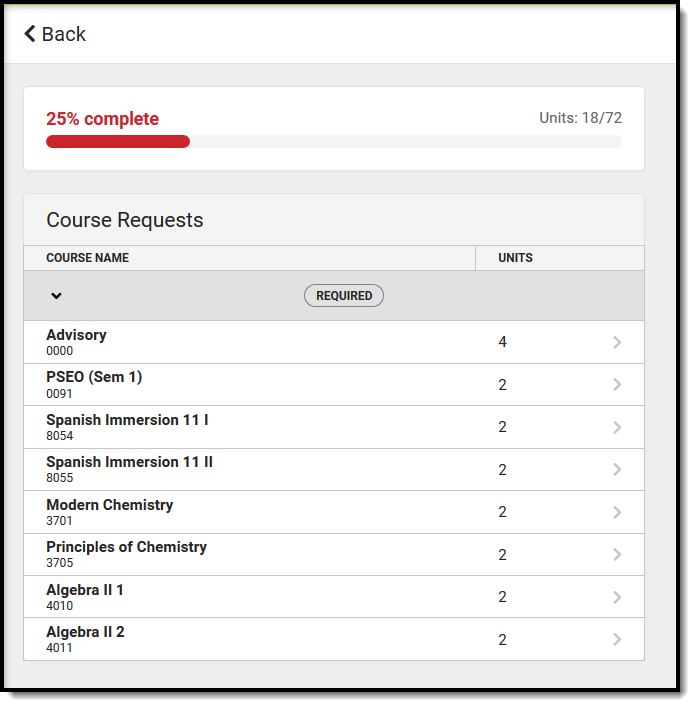 Existing Course Requests
Required, Requested, and Alternate Courses
- Courses that your counselor added display as Required. You cannot change these requests (but you can discuss these choices with your counselor).
- Courses you request display as Requests. These requests can be modified (changed to alternates, removed, etc.)
- Courses you request as alternates display as Alternates. These requests can be modified (changed to requests, removed, etc.)
- Change a course request to an alternate by selecting it from your list of courses and clicking the Convert to Alternate button,
- Delete a request by clicking the red X from the Search Results or by selecting the course and clicking Delete Request.
When your counselor begins adding courses to student schedules, requested courses and required courses are given a higher priority for placement on your schedule. Alternate course requests are placed when the requested or required courses cannot be placed.
Course Units
The Course Units total indicates how complete your schedule is. In this example, the student has a full schedule when they have requested 72 units.
- The first number (in this example, 18) indicates how many units the students have requested.
- The second number (in this example, 72) indicates how many total units are needed.
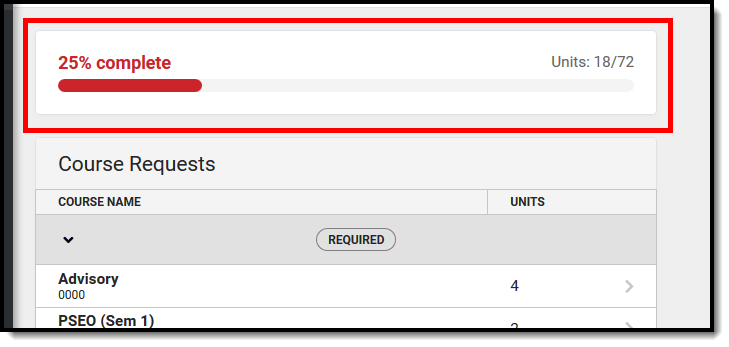 Course Units, Completion Value
This number is based on how the school calendar is set up. The progress bar's color changes depending on the number of units requested, as does the circle's total completion.
- A complete schedule (100%, top number is the same as bottom number) is green.
- A schedule that is between 67% and 99% completed is yellow.
- A schedule that is between 34% and 66% completed is orange.
- A schedule that is between 0% and 33% completed is red.
Request as many courses as instructed by your counselor. If you cannot request that many courses, work with your counselor to complete the process. If you have a course plan, refer to that when requesting courses.
When you locate and select a course that you have already taken in previous school years, the Course Detail displays Course History details of the year and grade level you took the course, the term you took that course in, and the score you received.
Request Courses
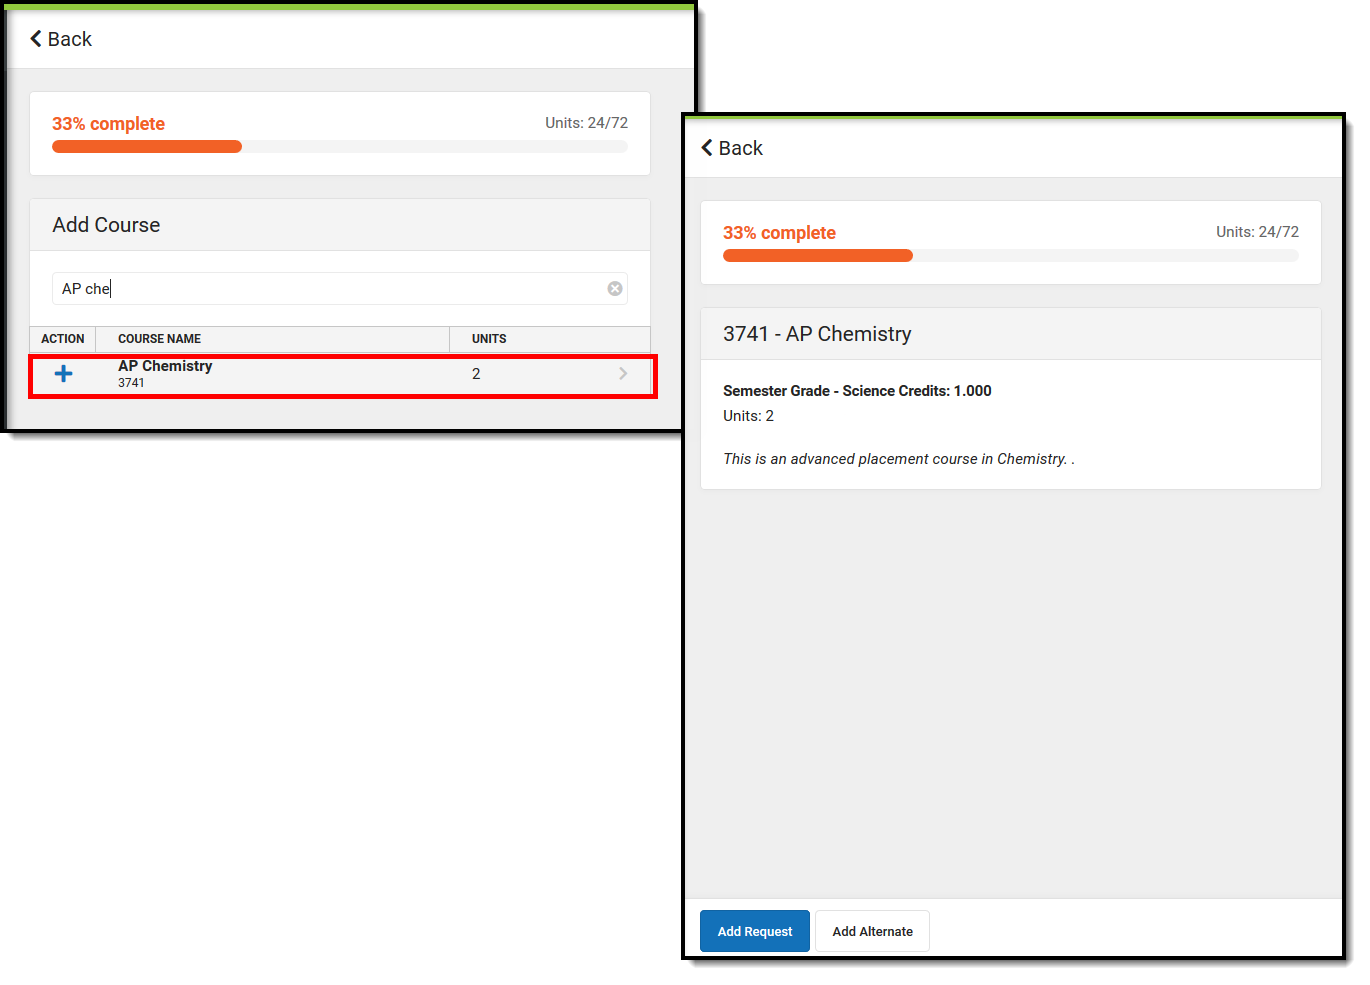
- Click the Add Course button. A list of courses available for selection displays.
- Begin typing the name of the course in the Search field. Matching results display below the search field.
- Select the desired Course. Information about that course (how many units and a description of the course) displays.
- Add the course by clicking Add Request or clicking the Add Alternate button. This adds the course as an alternate course in case you cannot be scheduled into other courses.
- Return to the Add Course screen by clicking Back.
Repeat these steps until you have a complete or near-complete schedule.
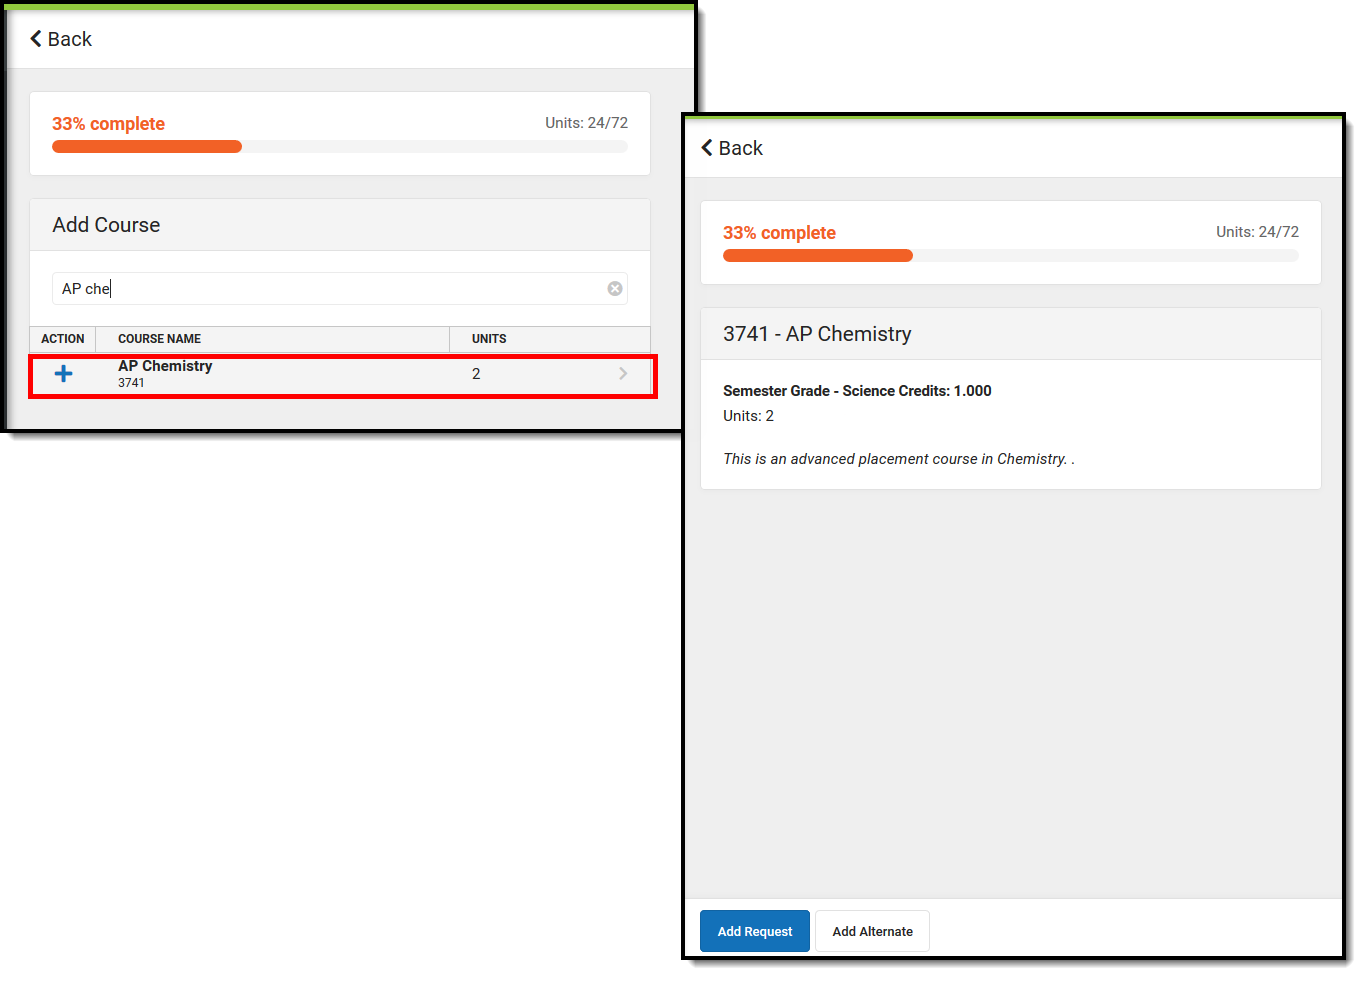 Add Course Requests
For a faster way to request courses:
- Search for the course.
- Click the blue plus sign on the left.
- In the popup message that displays, select Request, Alternate or Cancel.
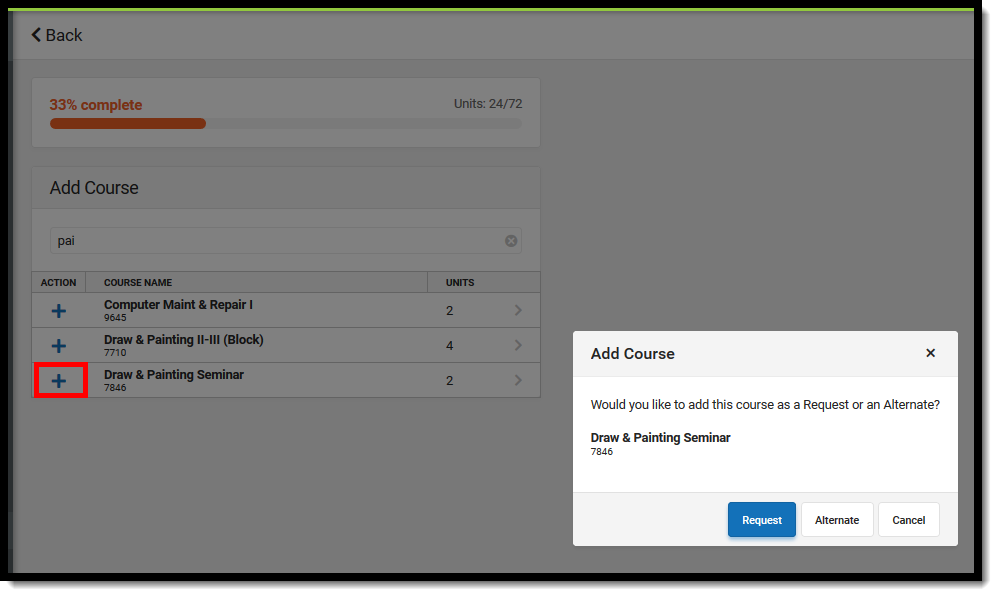 Add Course
Review Course Requests
When finished requesting courses, review the requests you have made and make adjustments as needed.
If you are satisfied with your requests, click the Print button. This generates a PDF of your required and requested courses.
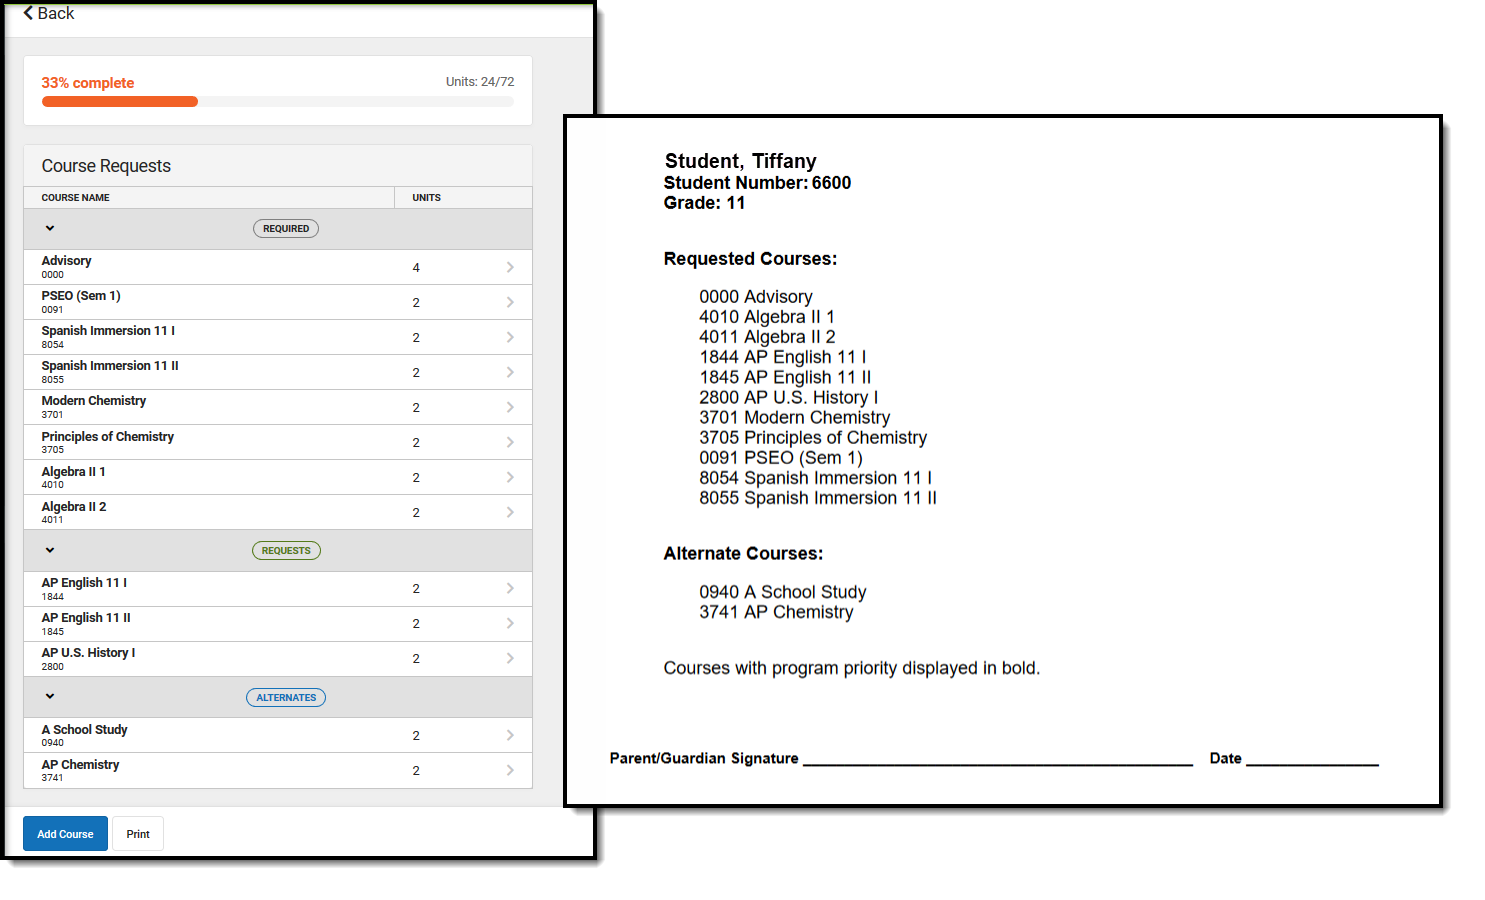 Completed Course Requests, Printed View
Academic Plan (Campus Student)
Students can view their assigned Academic Program and the courses they have planned to take in each school year using the Academic Plan tool.
The Academic Planner displays the student's assigned Academic Program and the courses the student has planned to take in each school year (represented by grade level). Counselors have a similar view to this that allows them to see your chosen courses and make modifications, if necessary. Based on the assigned Academic Program, students must meet credit requirements, course requirements, test requirements and GPA requirements. The goal is to meet each requirement for each grade level.
Options available in the Academic Plan require preferences to be turned on by your school administrator.
 Academic Plan
Select an Academic Program
When first accessing the Academic Planner, select and/or verify an Academic Plan from the dropdown list. Also select the desired Post Grad Location (where you are going to attend college) and your Post Grad Plans. Click the Next button when finished.
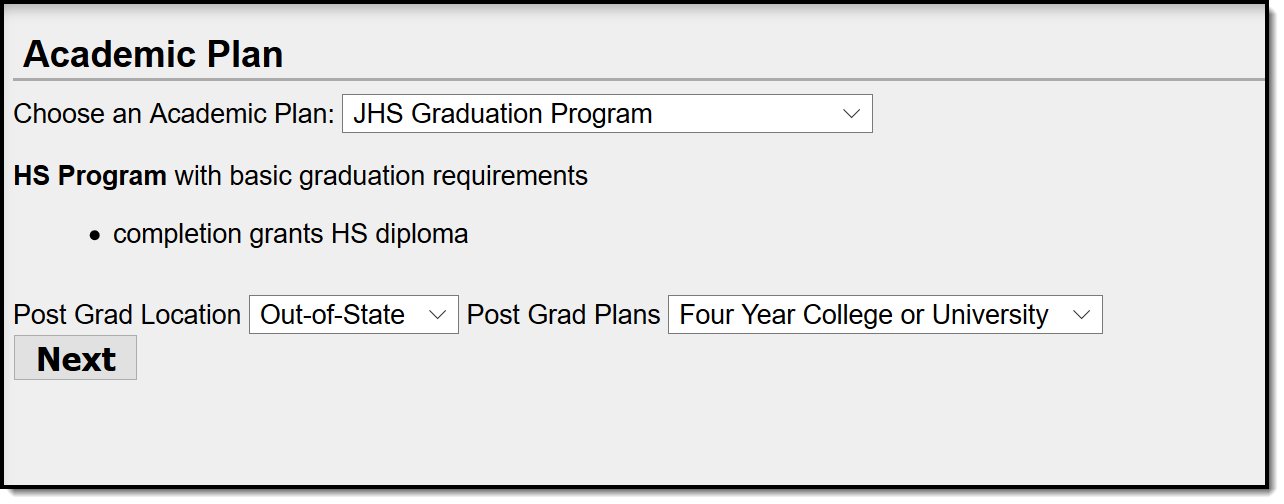 Academic Plan Selection
You can search for and add courses using the Course Catalog option, or if you know the course name or course number, you can add the courses directly to your plan.
If the program you selected does not have credit requirements, you won't be able to add information or see your progress. Contact your counselor for assistance.
Things to Know About the Academic Plan
Academic Plan Alerts and Warnings
Each time a change is made to the Academic Plan, all rules and requirements are reevaluated and updated alerts and messages display. The plan does not need to be saved to show these alerts. When the alerts have been satisfied, they will be removed.
Warnings
- Warnings display in black font when there is a failure to meet a Credit Requirement or a Course or Compound Requirement. A compound requirement includes both a course and a test requirement.
- Plans can still be saved when warnings exist.
Alerts and Errors
- Students who have an Academic Plan that has an error cannot save changes they've made to their course plan from the Portal.
- Alerts display when:
- A grade does not have enough credits planned.
- A credit type does not have enough credits planned.
Depending on your school's selection of Portal options, an academic plan can only be saved if the selected courses meet all requirements and planning rules. It may be possible to save the selected courses without meeting all requirements, but all planning rules must still be met.
Warning messages from failed requirements and failed planning rules display, explaining the issues that need to be corrected.
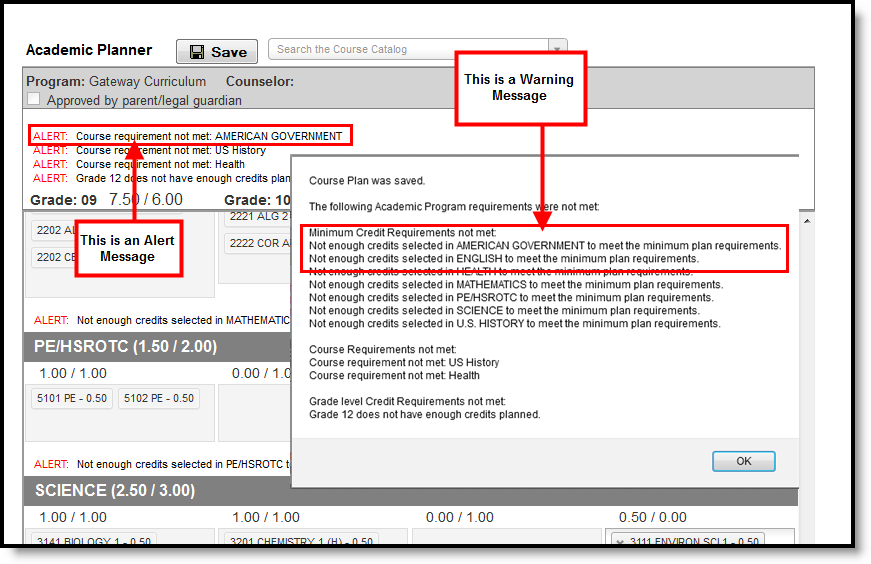 Warnings and Alerts
Course Display
A course is available for selection when the course is marked as active. Courses that appear in the dropdown lists are pulled from the student's most future enrollment calendar, based on the primary enrollment (partial or special education enrollments are not used).
- Courses that are set to be recommended from a course requirement display in bold text.
- Courses that have been completed (have been posted to the transcript) and in-progress courses (student is currently scheduled into) display as such when hovering over the course.
- Courses that can be taken multiple times display for each grade level. Students can select these courses in any grade level.
- Courses that have planning rules associated with them that have not been satisfied display in gray text when choosing courses in the dropdown list when choosing courses.
- Courses that have a planning rule of Parent of/Child of display both the parent course and the child courses.
- The correct credit value for each course (parent and child) displays.
- The correct total value per credit type for each course (parent and child) displays.
- The correct total value per grade level displays for each course (parent and child).
- When a parent course is removed from the course plan, the child courses are also removed.
- A child course with a different credit type displays in the correct credit type frame and displays the correct credit amount. All child courses display as locked.
- When selecting a course with a Parent of rule, and the child course has a different credit type, the credit type displays after each course to identity which credit type they are associated.
- Planned courses that do not meet planning rules assigned on the course display as a planning rule violation.
- If a student has not taken or planned a required course tied to a course requirement, an alert displays.
 Credits Earned, Credits In-Progress
 Repeating Courses
 Planning Rule Violation
 Course Requirement Violation
Credit Display
Existing credits applied to high school courses (those from middle school or transferred credit) display in the credit type section to which they apply. Any credit assigned to the credit type that is considered overflow displays as well.
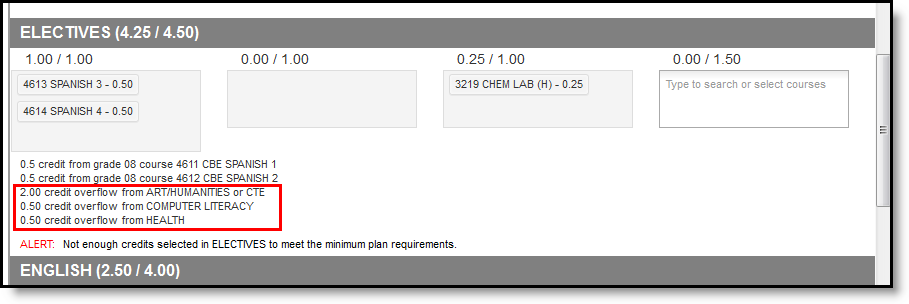 Credit Overflow Assigned
Planning Rules
Principals, counselors and other staff at the school work together to maintain the courses available for students. As part of this setup, they may have added certain rules that determine when students can plan a course for a certain year. These rules are visible when selecting courses from the Course Catalog (see Image 3) and when saving the Academic Planner.
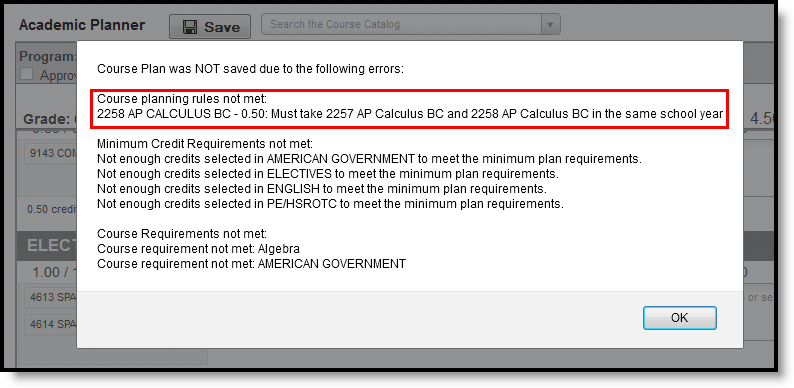 Course Planning Rules Violation
Because of these rules, the courses in the Academic Planner may display differently. The following table provides details on these rules.
| Planning Rule | Course Display | Catalog Search Display | Alerts, Warnings and Errors |
|---|---|---|---|
| Prerequisite | A course displays in red when a student selects a course that has a prerequisite rule but has not previously taken that prerequisite course or has not planned the prerequisite course. | If the prerequisite was met, the course cannot be selected for the same year in which the prerequisite course was taken. But the course can be selected in other years. Both courses remain in the course catalog search results. If the prerequisite was not met, the course cannot be selected and all buttons display in gray (inactive). | If a course is missing its prerequisite(s) on the course plan, the user receive an error when attempting to save. If a student takes the Prerequisite course(s) but does not meet or exceed the credit value to meet the requirement, an alert displays. If a student takes the Prerequisite course(s) but does not meet or exceed the Min GPA Value to meet the requirement, an alert displays. |
| Equivalent | Courses display in red if the user selects more than one course listed as an equivalent. | A student can only take one course in the equivalent rule. If the course and one of its equivalents has already been taken or planned, the course cannot be selected. | N/A |
| Concurrent | Courses display in red if the student hasn't selected a course that meets the concurrent rule. | If a concurrent course is searched but its counterpart has not been requested, the course can be selected. If a concurrent course is searched and its counterpart has been requested, the course can be selected. | If both courses have not been selected in the same year, an alert message displays. If only one of the courses has been selected, an alert message displays. Failure to meet or exceed the credit minimum requirement triggers an Alert message. |
| Prerequisite and Concurrent | A course that is selected on the student's course plan and has a prerequisite or concurrent rule displays in RED on a students course plan screen if they haven't taken or planned to take the course(s) that meet the prerequisite or concurrent rule. | If a prerequisite or concurrent course is not in the course plan, user can search and select the course. If a prerequisite or concurrent course is in the course plan, any remaining prerequisite or concurrent course can be added in any year in the course plan.
| An alert message displays if a course is selected and the user has not selected the other course in a previous year or in the same school year. Failure to meet the minimum credit requirement triggers an alert message. The student must meet or exceed this credit value on their transcript to meet the requirement. Failure to meet or exceed the minimum GPA requirement triggers an alert message. The student must meet or exceed this value to be considered as on-track. |
| Parent Of | Only the Parent Course is available for selection in the Course Plan. The Parent Course credit is a total of all the courses included in the parent/child setup. If there is credit overflow, it displays the total amount of credits as a sum of the parent child courses. | If the parent course is already on the course plan, it displays in gray. | N/A |
| Child Of | Courses marked as Child Of are not available for selection in the Course Plan. | N/A | N/A |
Parent and Guardian Approval
When you are finished building your academic plan, have your parents/guardians review it by having them log into the Portal with their own username and password and mark the Approved by parent/legal guardian checkbox.
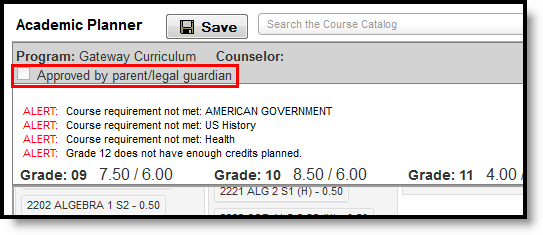 Parent/Guardian Approval
System Display Options and Academic Planner Abilities
Schools have the ability to choose what displays in the portal. These choices affect the functionality of the options that display for parents and students in the Portal. Depending on the options chosen, the student and parent may not be able to do all expected things. See the following table for what happens when these options are selected.
| Selected Portal Display Options | Portal Academic Progress Behavior |
|---|---|
| Student without an Academic Plan | |
|
|
|
|
|
|
| Students with an Academic Plan | |
|
|
|
|
|
|
| Parent of a Student without Academic Plan | |
|
|
|
|
|
|
| Parent of a Student with an Academic Plan | |
|
|
|
|
| Academic Planner |
|
Add Courses from the Course Catalog
Use the Course Catalog to locate courses that would be of interest to you. If you know the name of the course, enter that name in the field, or a partial name. Matching results display. When a course is chosen, a description displays, providing more information about the curriculum of the course, any planning rules set for the course, total number of credits given, course fees (if any), and an option to add that course to the plan.
- Courses can only be added for grade levels that have related credit requirements.
- Courses can only be added if you/your student has not previously taken the course.
- Courses can only be added if it is not currently on the plan.
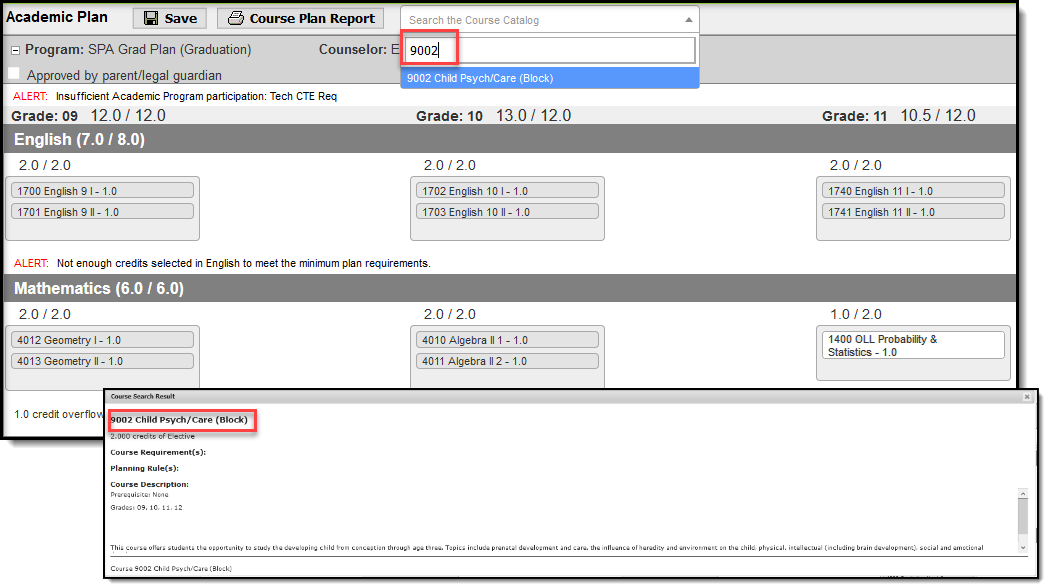 Course Catalog Searching
If this is the course you'd like to take, click the Add to Grade button. Courses can be added to any future grade level. This places the course on your plan in the indicated grade level for that credit type.
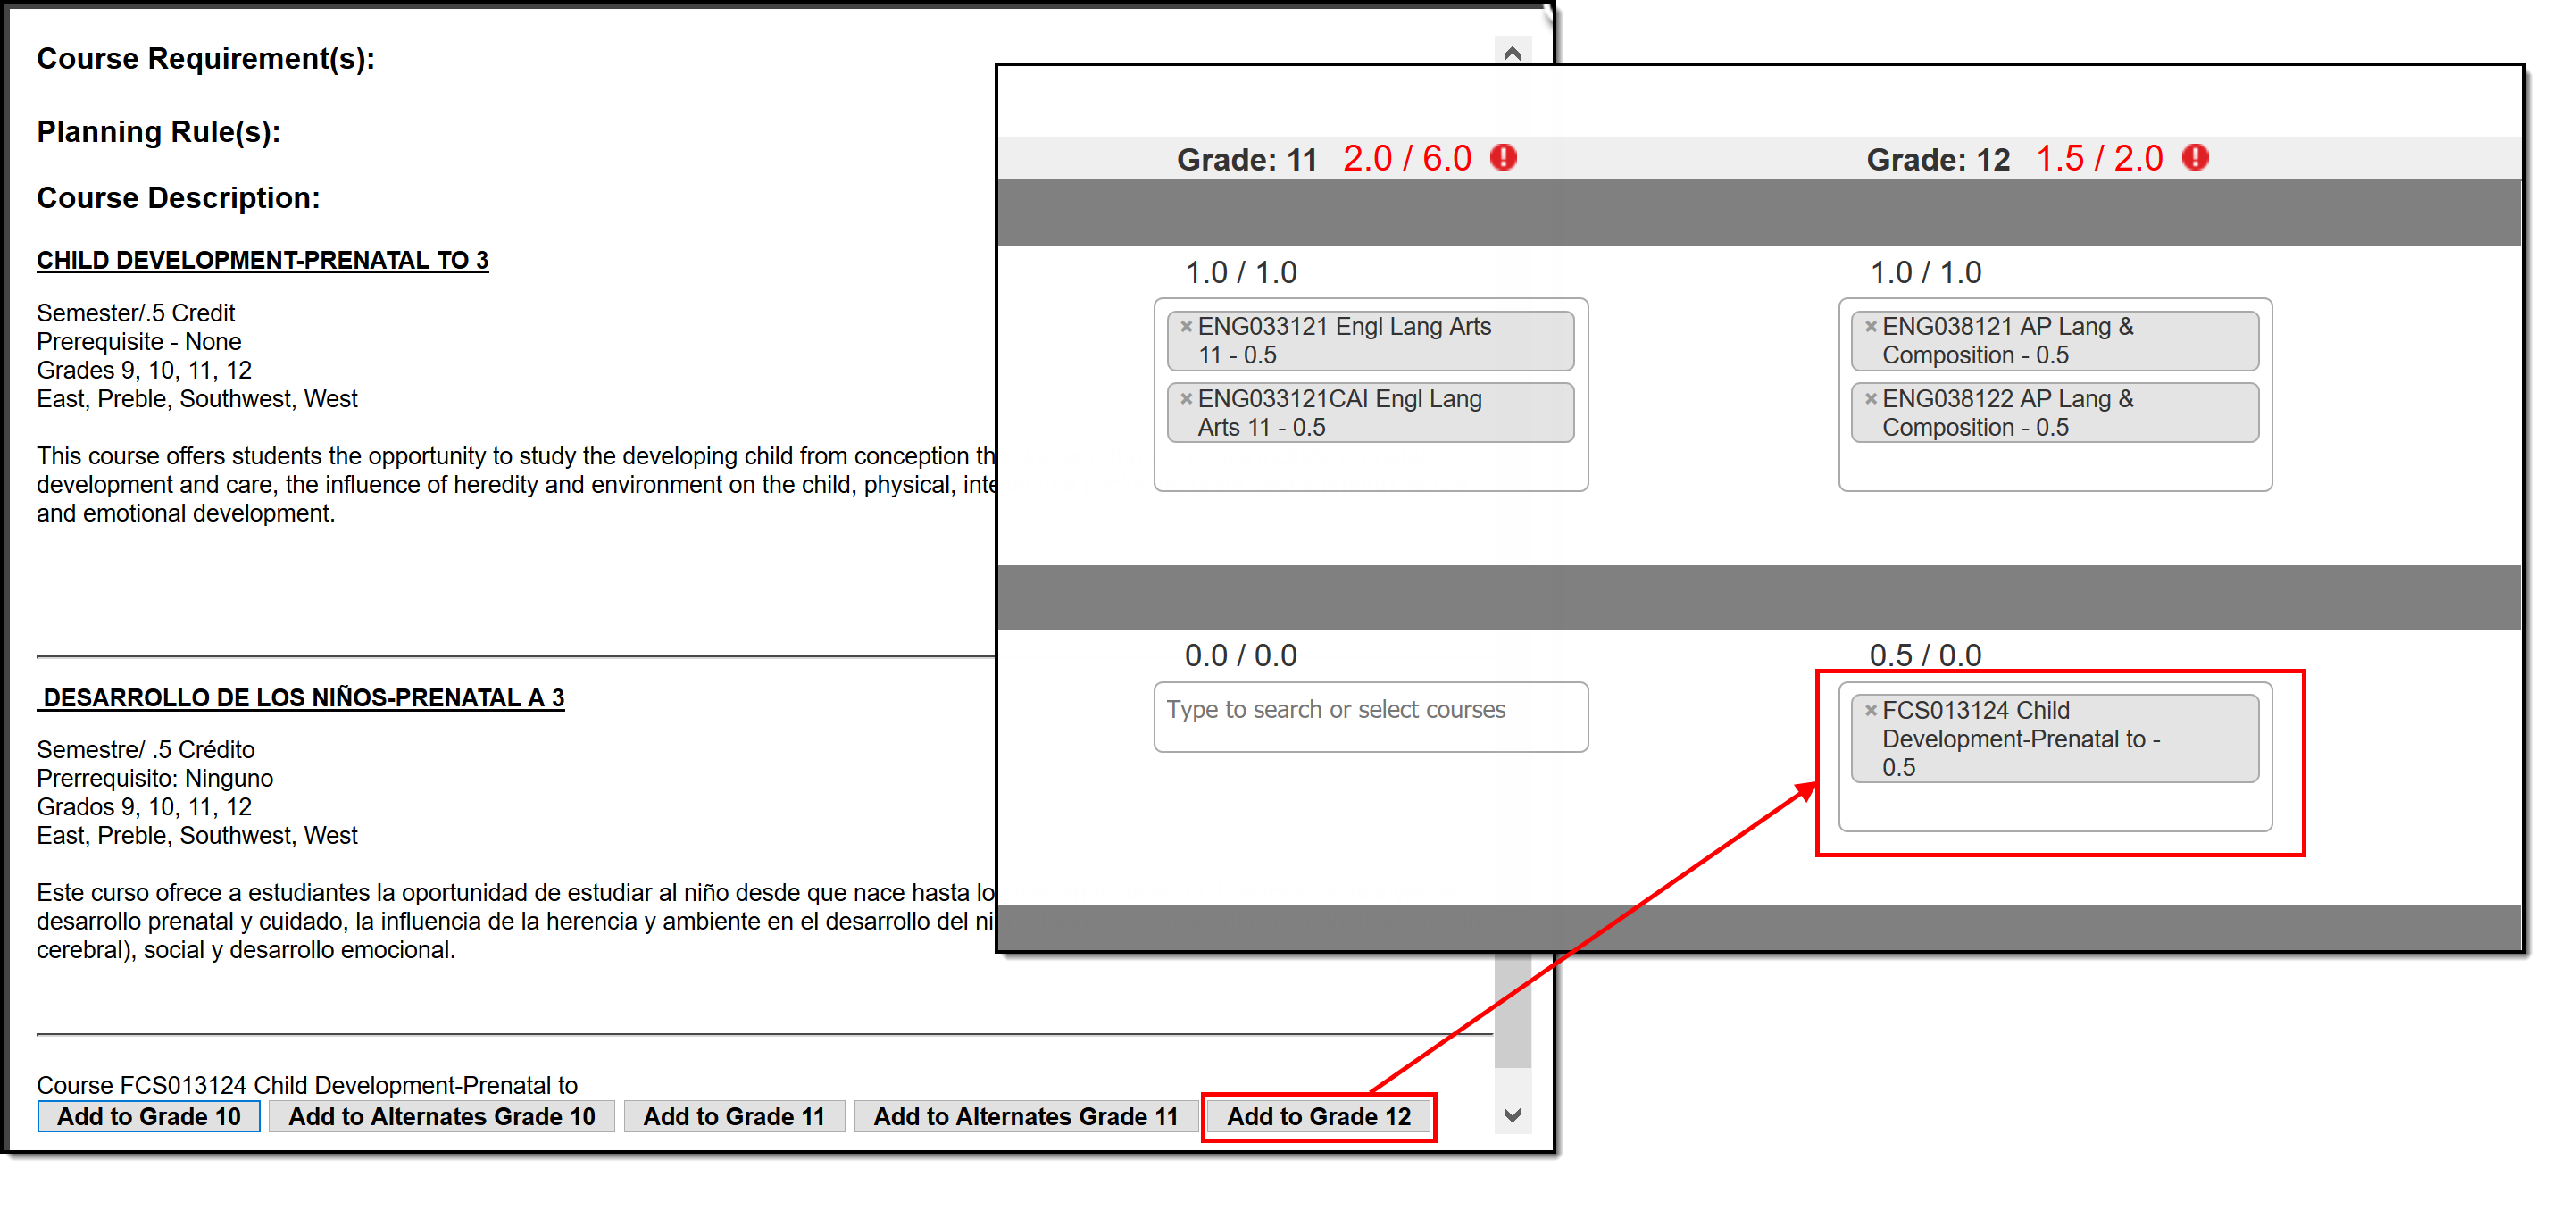 Adding a Course from the Course Catalog Search
Add Courses
- Click in the text box below the number of credits for a certain grade level. Courses meeting that credit type display for selection.
- Choose the desired course(s). When they are added, they display and the number of credits is updated. The credits assigned to a course appear after the course name.
- Add enough credits for future years as needed. When the student has met the number of requirements, the alert that displays for each credit type stating not enough credits are selected disappears.
- Repeat these steps for each credit type. At the end of the process, you should have a clear idea of what courses he will be taking in each grade level.
- Click the Save icon when finished.
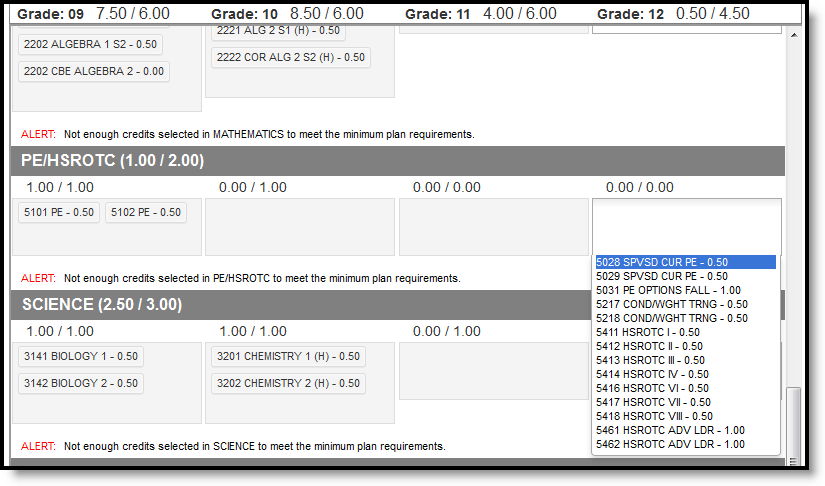 Adding Course
Add Alternate Courses to the Plan
Adding alternate courses is done the same way as entering other courses. Enter alternative courses to take in the event the planned courses cannot be scheduled. Alternate courses are placed on the schedule based on the order assigned to the alternate courses.
Use the arrows to move the courses into the desired order. In the example below, if an alternate course is going to be placed, the Wizard attempts to place the course first in the list (3046 AP Environmental Science) before placing the second course in the list (9008 Sports & Entertainment Market).
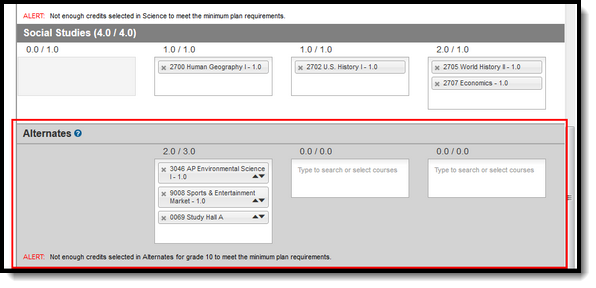 Alternate Course Planning
Note the following:
- Alternate courses can only be planned for future years. A current year freshman student can only plan alternates for the sophomore, junior and senior years.
- If a course is already planned as a desired course, it cannot be planned as an alternate in the same year it is planned. But it can be added as an alternate in a different year. A student could plan to take a World Affairs course in the junior year, but could add it as an alternate in the sophomore year.
- Courses planned as alternates do not satisfy planning rules. If an alternate course is planned and it violates a planning rule, the course is included in the list of alerts.
- Counselors cannot lock or unlock alternate courses.
- Courses that are part of a compound requirement display in bold.
Print Options
Print Course Plan Report
To print a copy of your course plan, click the Course Plan Report button. A PDF view of your course plan displays, including Alternate Course selections.Only saved entries on the course plan are printed. If you added a course but did not save, and clicked print, the new course you added is not included in the print.
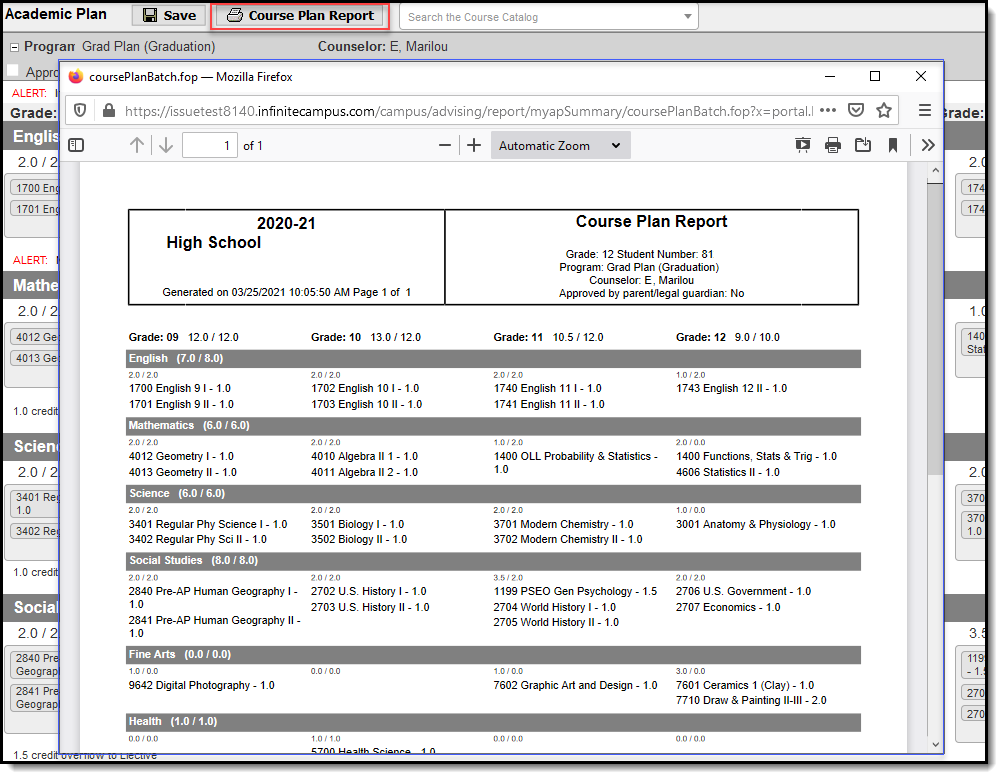 Course Plan Report
Print Progress Report
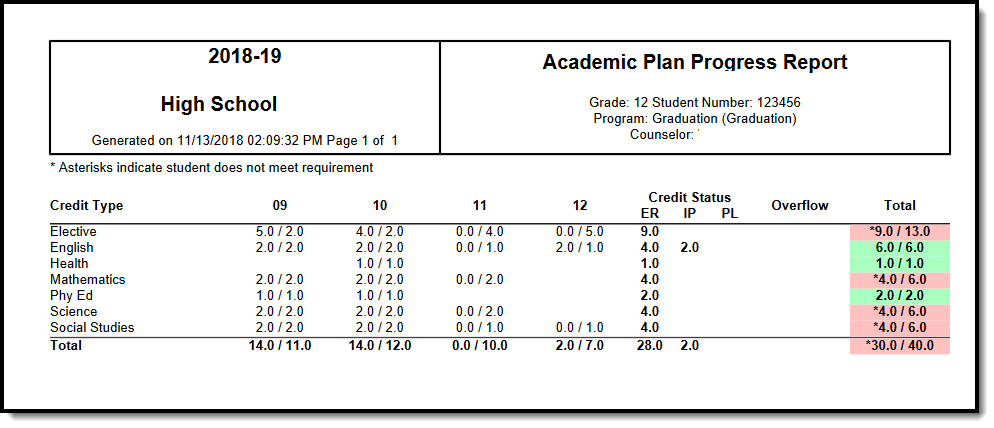
To print a copy of your progress in the selected academic program, click the Academic Plan Progress Report button from Document > Other. Choose which program to print the progress, select to print a summary or a detail of the progress. The Summary Report includes information on the student's assigned graduation program, their on-track status, and the student's progress. The Detail Report includes all of the information in the summary report, plus the information on the specifics of the requirement, and allows the selection of credit type details, course requirement details, test requirement details and compound requirement details.
Depending on the Report Format selected, a PDF or DOCX view of your course plan displays, including Alternate Course selections. Only saved entries on the course plan are printed. If you added a course but did not save, and clicked print, the new course you added is not included in the print.
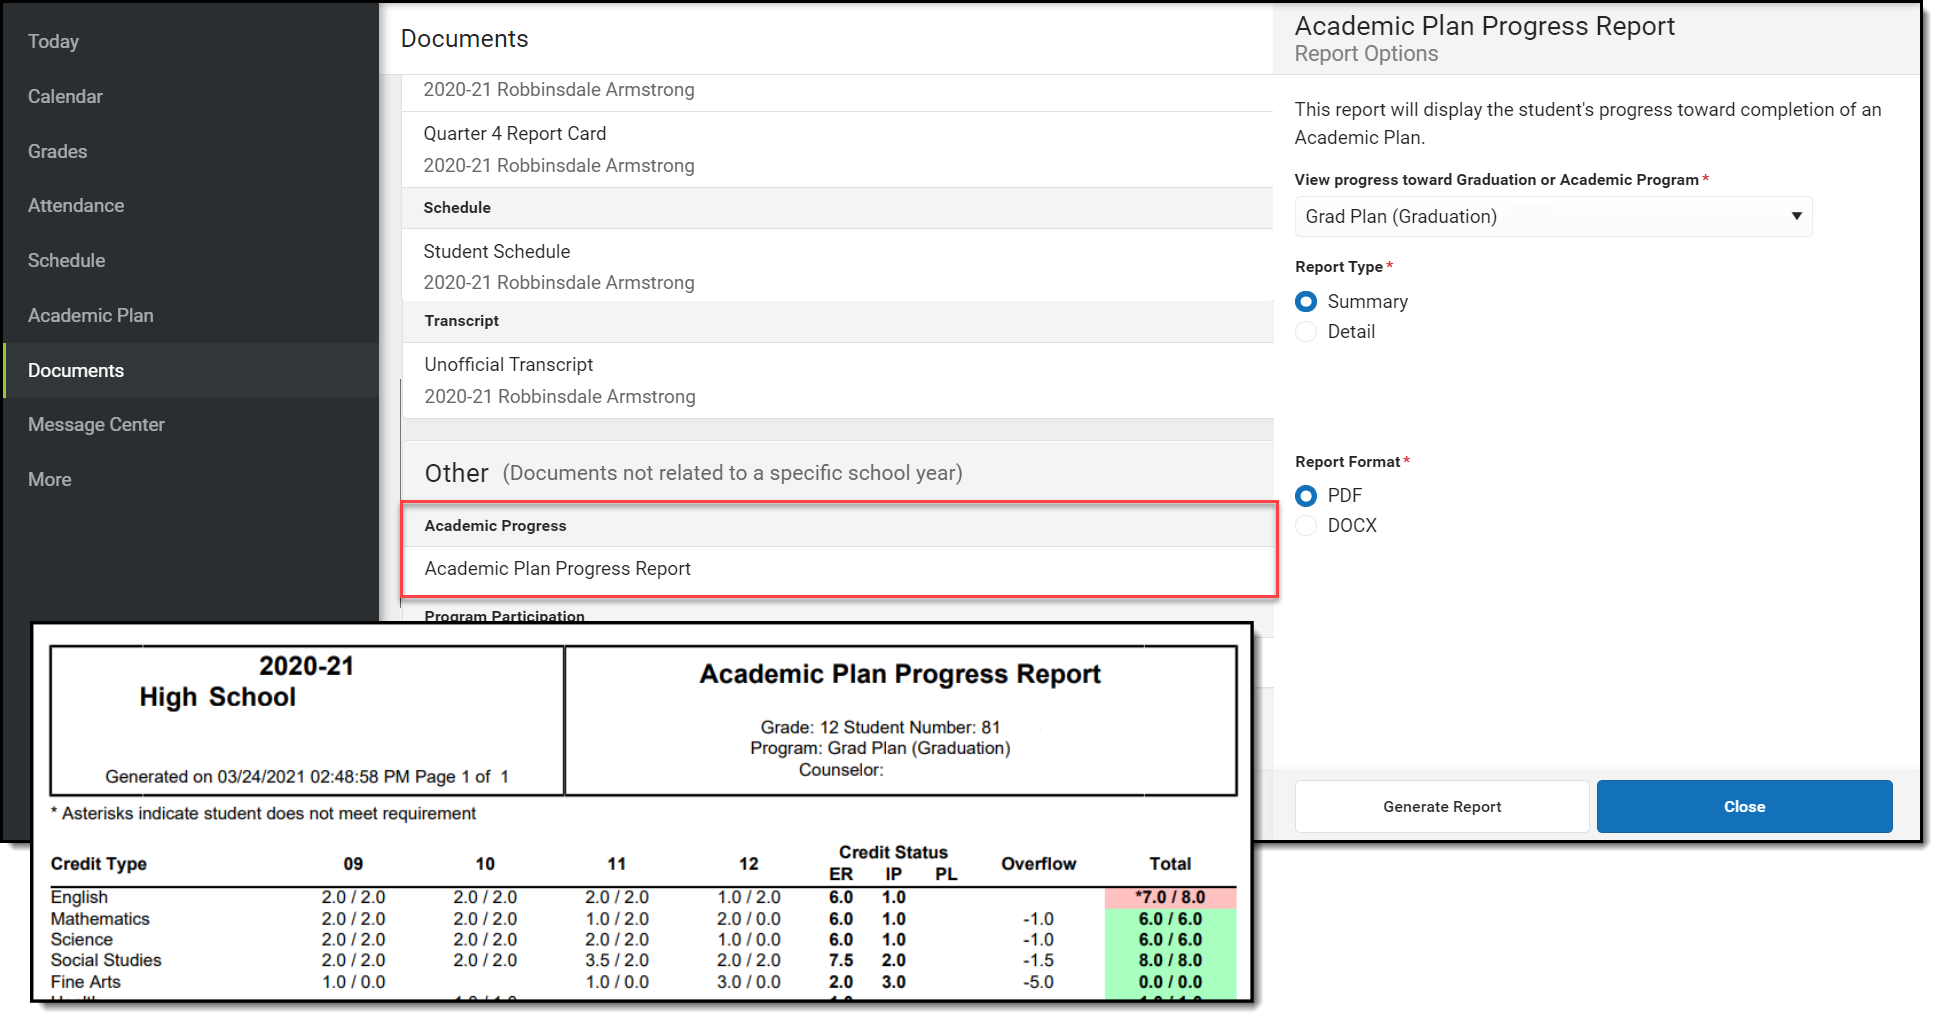 Progress Report
If your school has not turned on the preference for Academic planner, the Progress Report can still be generated from the Student App.
Responsive Scheduling (Campus Student)
Students can use the Responsive Schedule tool to select the sessions they would like to attend for an upcoming responsive day.
Tool Search: Responsive Schedule
Use the Responsive Schedule tool to select the sessions you would like to attend for an upcoming responsive day. Available offerings are listed for each available responsive period. Please note the following:
- You may not be able to select a session for a responsive period. This may be due to one of your teachers choosing your session for you. If this is the case (a message displays indicating a session has been chosen for you), and you want to attend another session, contact that teacher and discuss your options.
- You may not be able to select a session if the request window has closed, in which case, a counselor or principal may choose your session for you.
- If a session is full, it cannot be selected, but it does display, so you can see what is being offering. If you would like to attend a full session, contact the teacher of that session.
- You can request sessions up until the request window has closed. If the window has closed, a message displays indicating such.
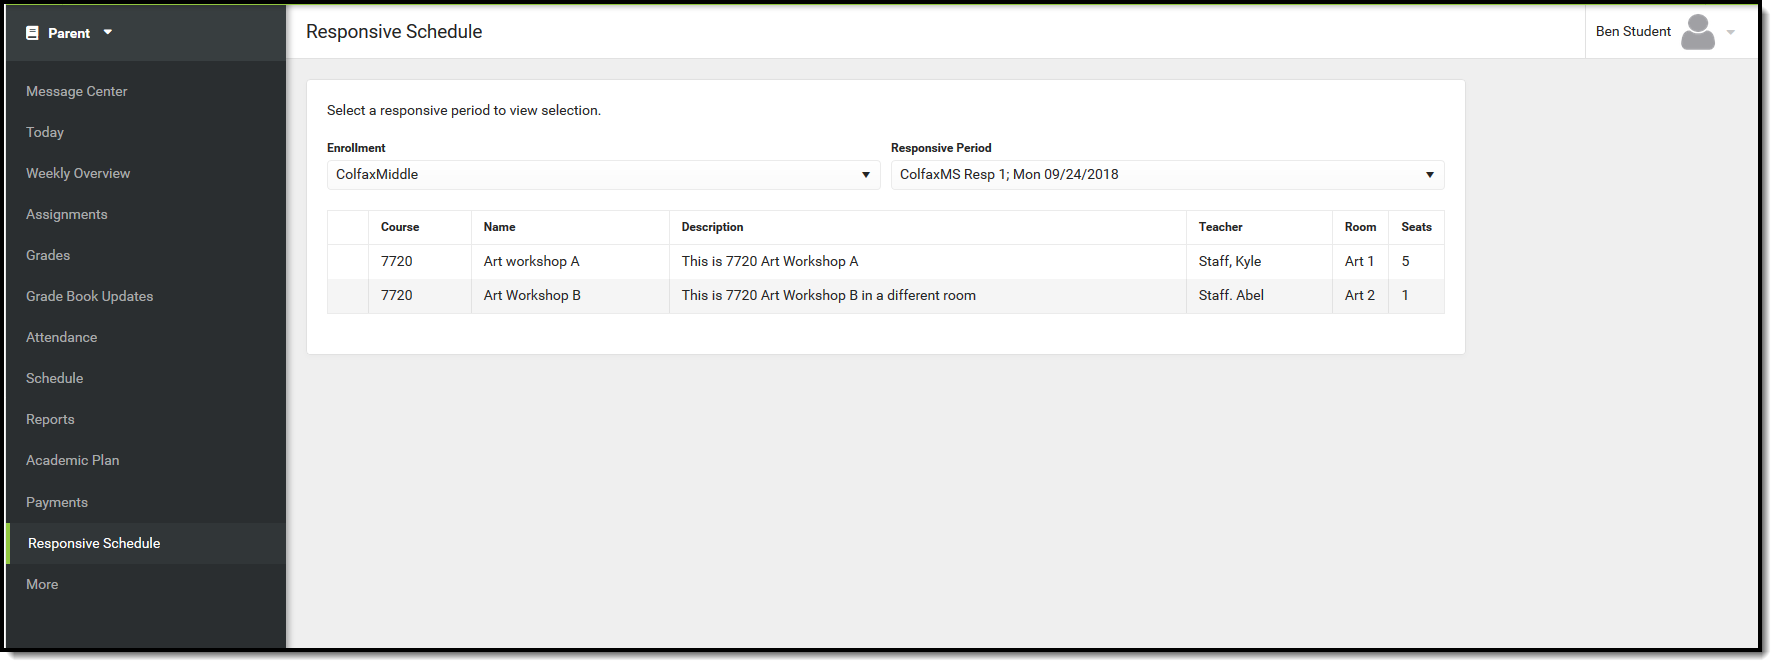 Responsive Schedule - Student Request View
Choose a Responsive Offering
- Select the appropriate Responsive Period.
- Select which sessions you would like to attend by selecting the radio button for that offering. The name and description of the sessions should provide enough information so you can tell what will be offered. The teacher name and room number is also listed, along with the total number of available seats.
- Click the Save icon when finished. Your request has been entered.
You can receive notifications about Responsive Offerings by marking your Notification Preferences accordingly.
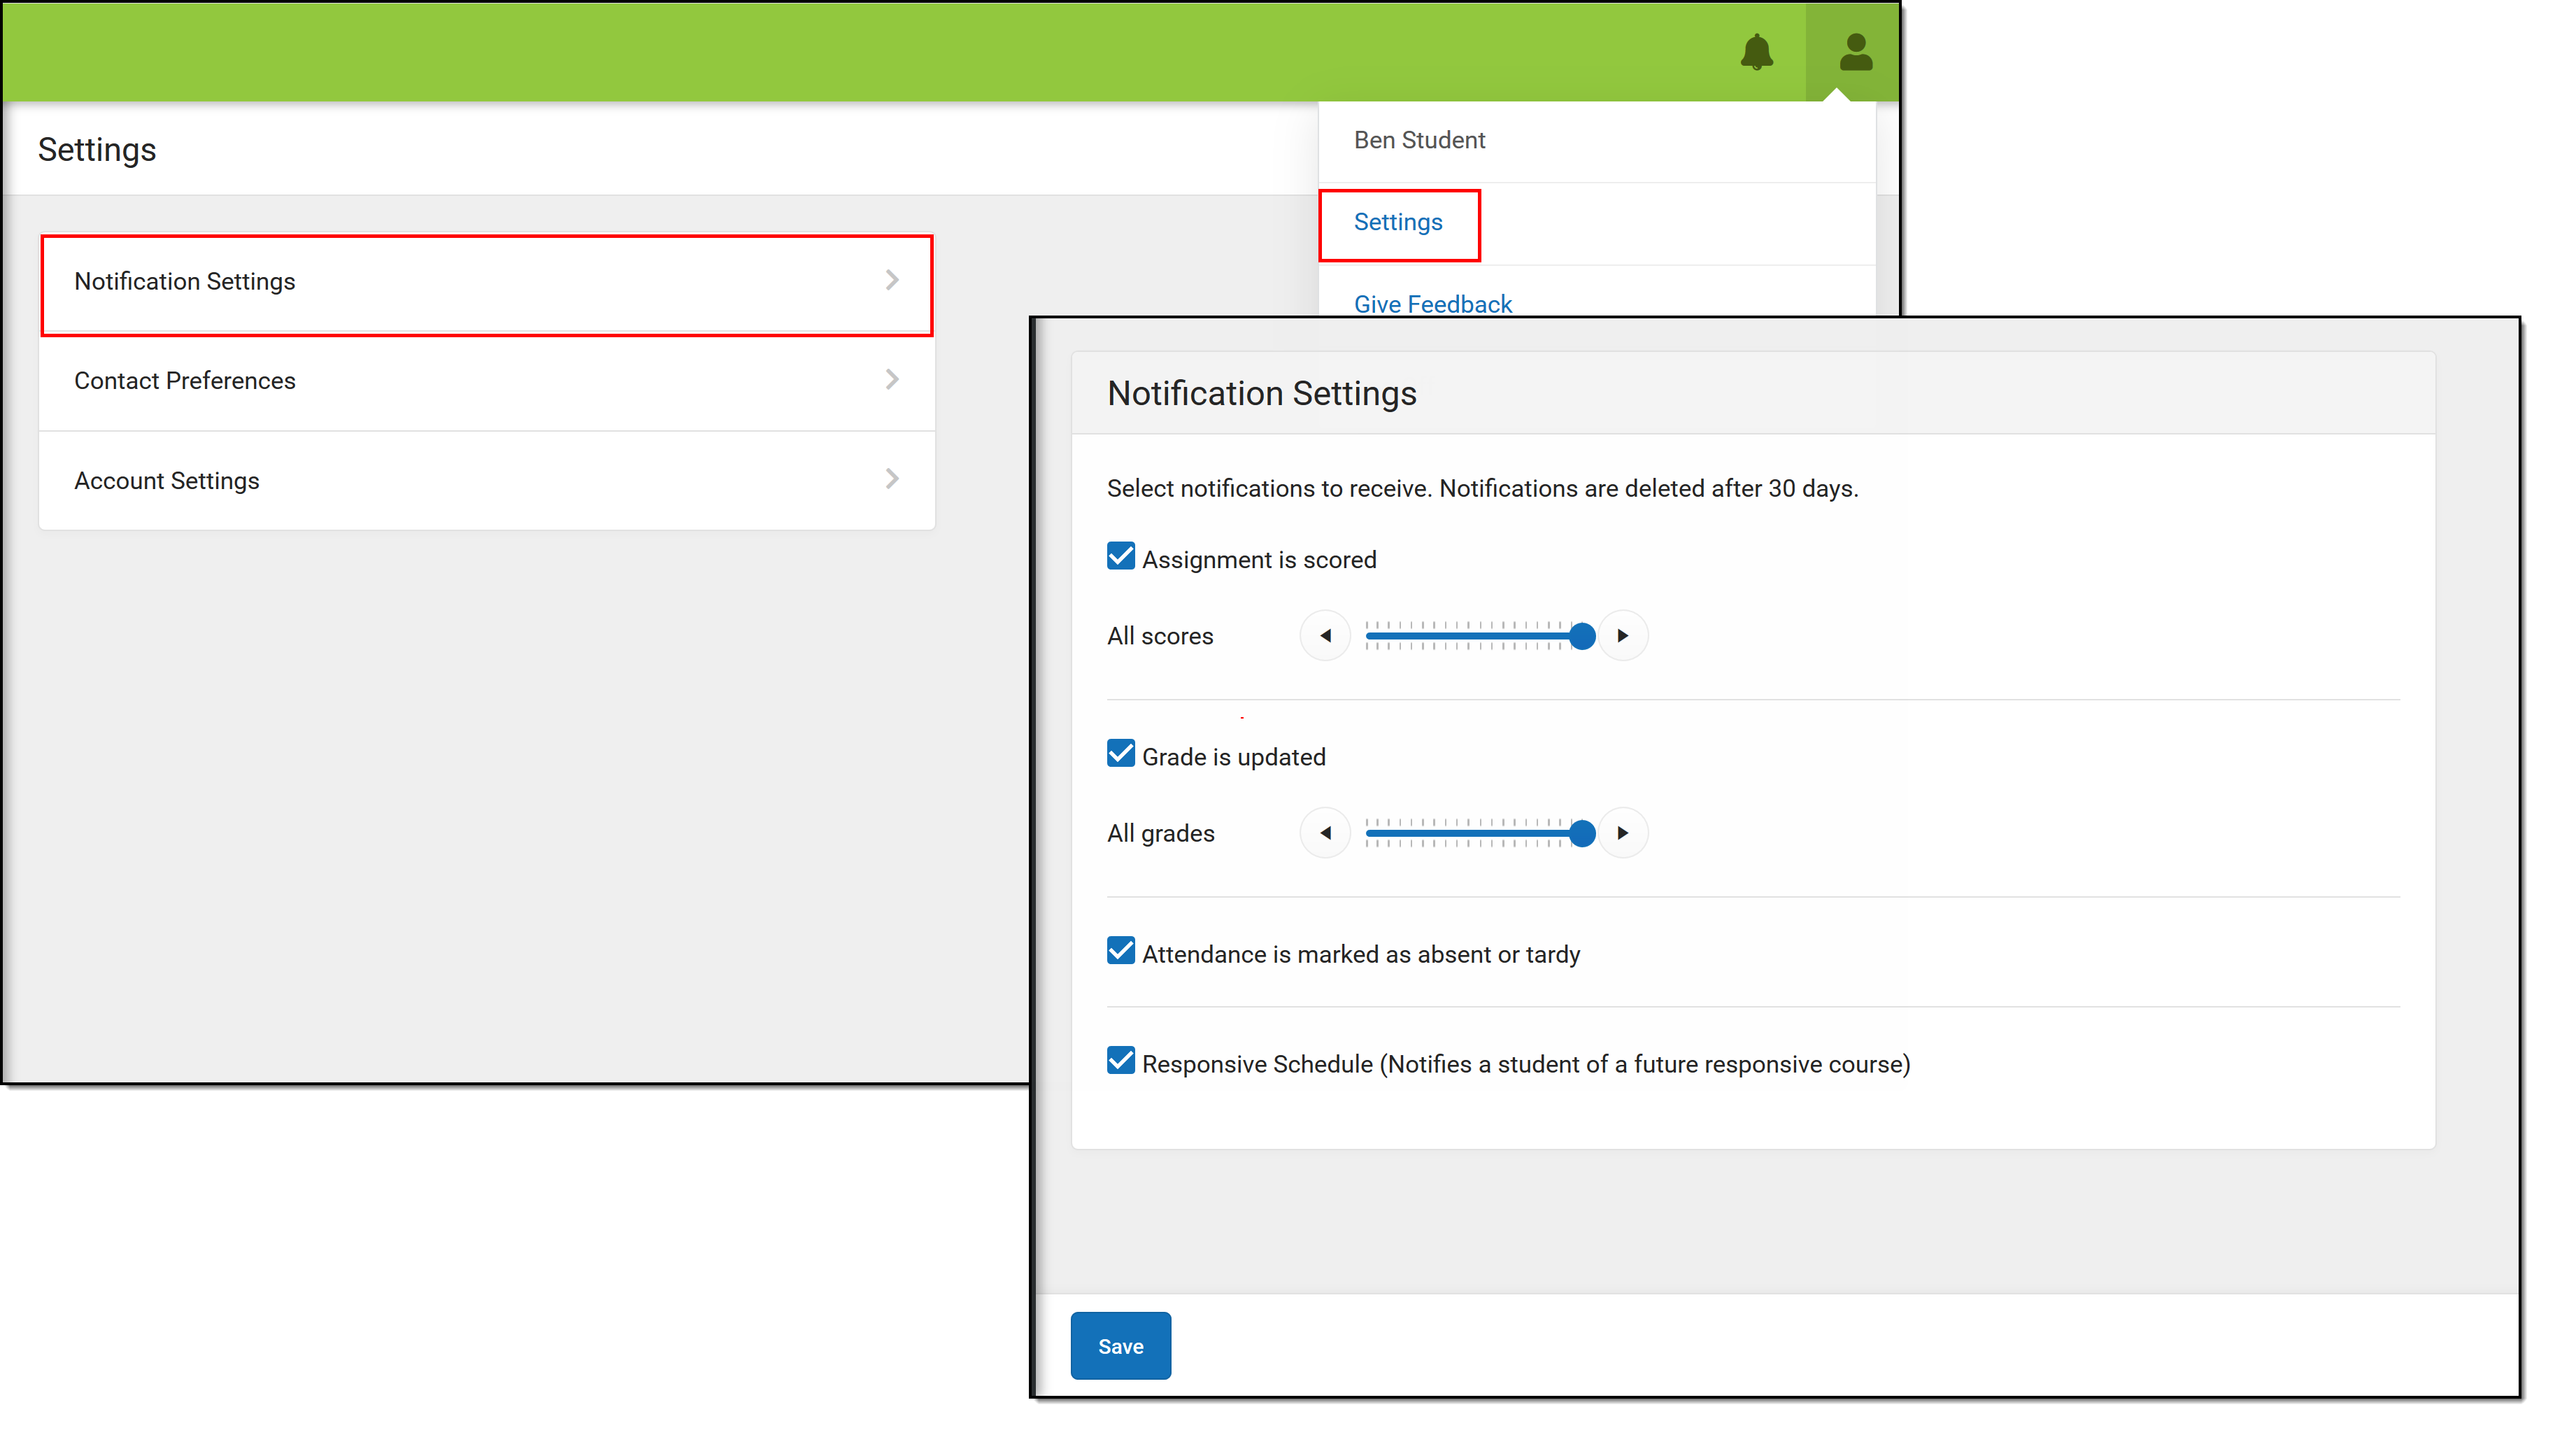 Responsible Schedule Notification
Campus Parent
The Campus Parent Portal is designed specifically for parents and is optimized for use on mobile devices and tablets.
Campus Parent Portal
The Campus Parent Portal is designed specifically for parents and is optimized for use on mobile devices and tablets.
New to Campus Parent? Check out the Getting Started with Campus Parent article or video for more information. Please contact your school if you encounter issues logging in.
In the Campus Parent Portal, navigate between tools in the menu on the left. On mobile devices, this menu shrinks to a "hamburger" or "three bars" icon to save space.
Click the user icon in the top right to view Notification Settings.
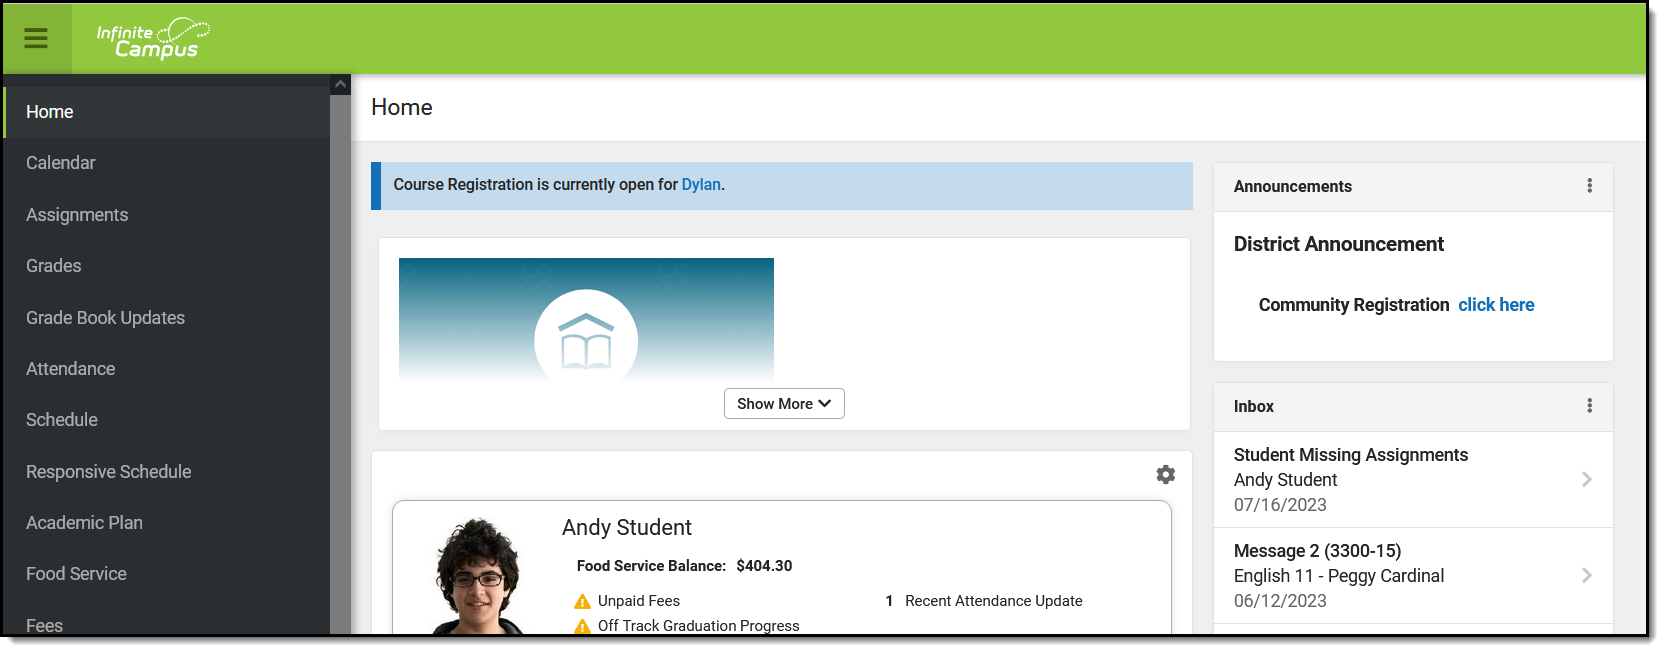 An example of the Campus Parent Portal
Home
The home page of Campus Parent collects the most important items needing parents' and guardians' attention for all of their students and makes helpful information easily accessible.
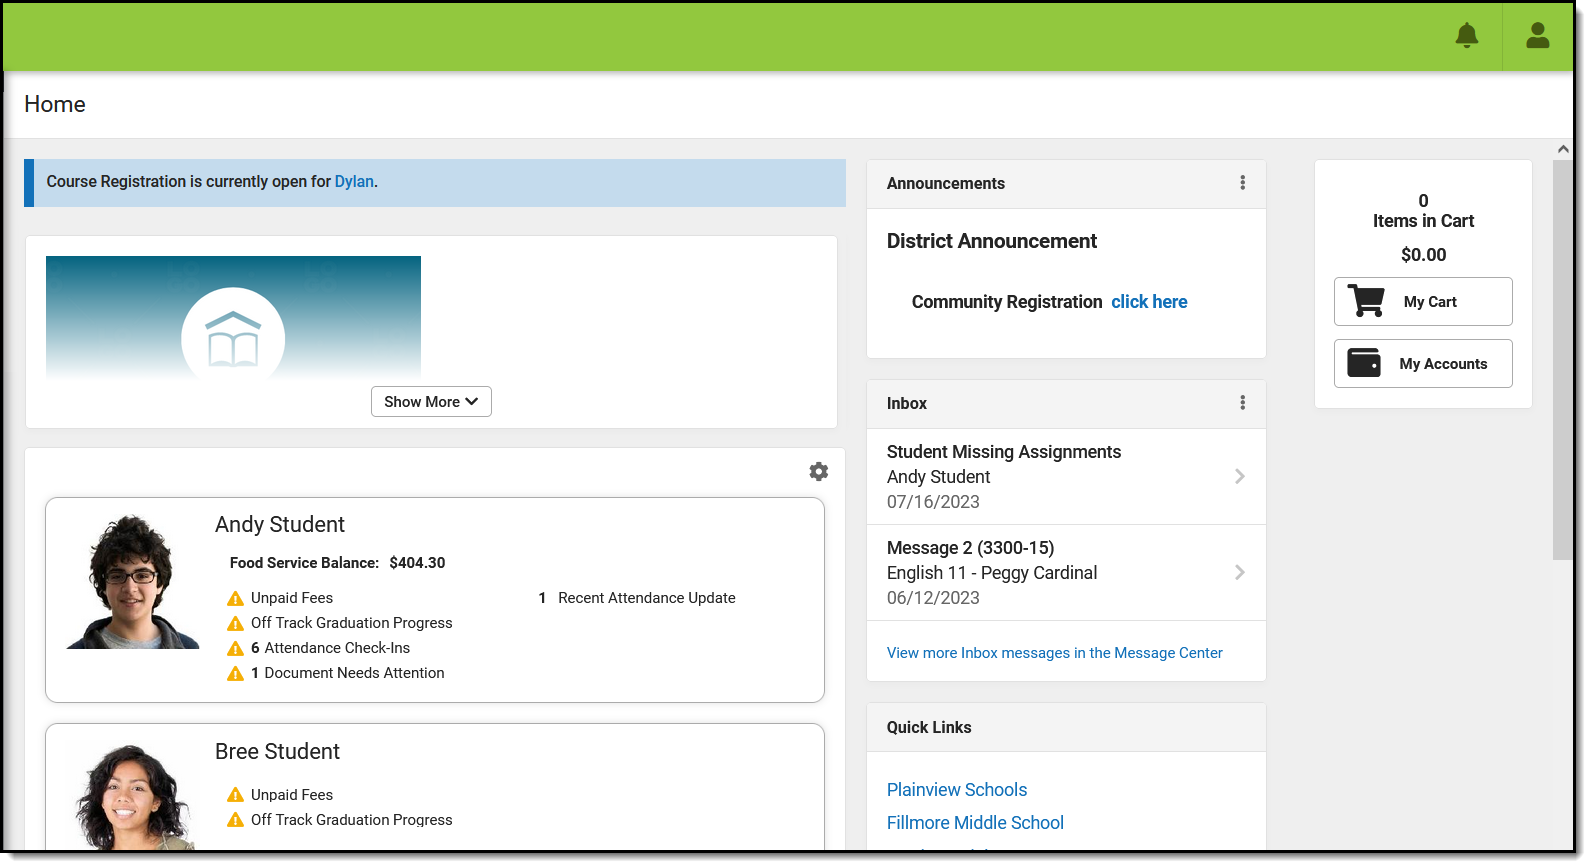 A summary of student information needing attention displays on the Home screen.
If Course Registration is currently enabled, message displays at the top of the screen with links to applicable students. Likewise, if the parent has a Survey assigned, a message with displays with links to the message center where the survey can be found.
Below any blue messages, district-specific information displays, such as a logo or district-wide message.
Each student displays in their own card. Depending on the district's preferences and what is applicable to the student, the following data may display:
- Food Service Balance
- Documents Need Attention - any documents, such as special education documents or other forms requiring a signature.
- Assignments Due Today
- Recent Assignment Scores
- Recent Grade Updates
- Recent Attendance Updates
- Recent Behavior Events
Which updates are considered "recent" is determined by a setting. Click the gear icon (![]() ) above the student cards to indicate the timeframe for which recent data should display. This setting applies to all of the data on a parent's home screen.
) above the student cards to indicate the timeframe for which recent data should display. This setting applies to all of the data on a parent's home screen.
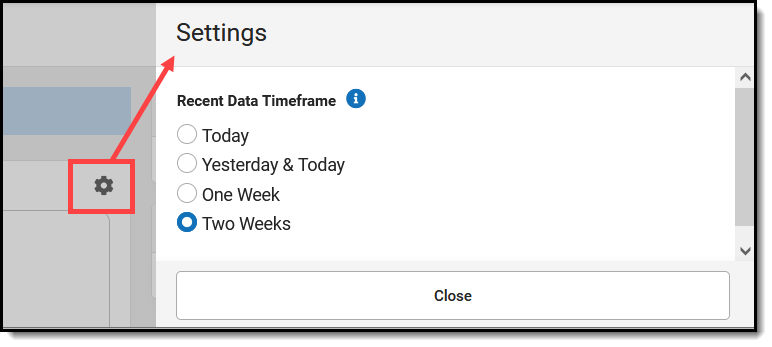 Settings on the Home Screen
Video
Watch the video below to see an overview of Campus Parent.
Student Details
From the Home screen, click on a student to view information for that student. This is the same home page that displays for students when they use Campus Student.
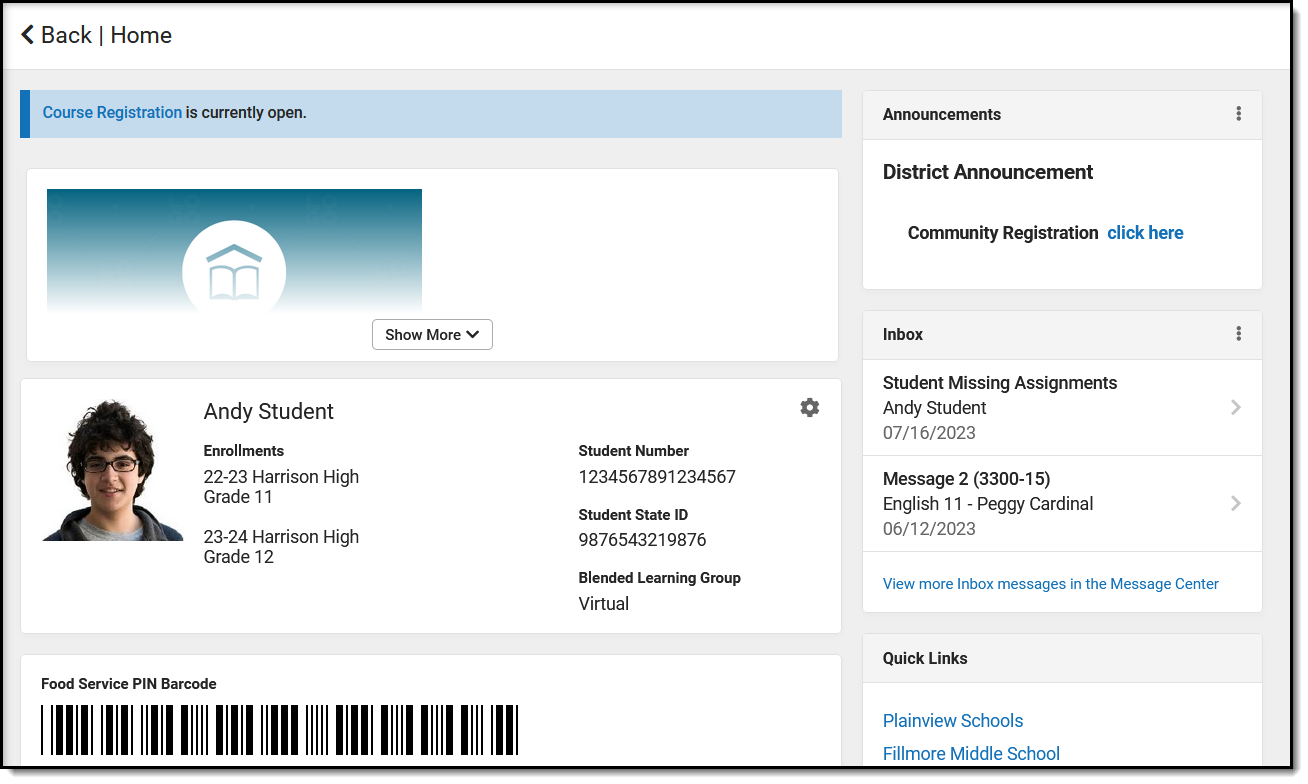 Click on a student in the Home page to view more information about the summaries provided.
The student's name, current enrollment(s) and basic data displays at the top of the screen, depending on what has been enabled by the district. If applicable, the student's Food Service barcode then displays.
Below that, the following sections display. Click on the items listed, such as assignments or attendance events, to see more information:
- Today's Schedule
- Documents Need Attention
- Assignments Due Today
- Assignments Due Tomorrow
- Recent Assignment Scores
- Recent Grade Updates
- Recent Attendance Updates
- Recent Behavior Events
Navigation
If a tool is specific to a single student, such as Grades or Schedule, a student dropdown list displays in the top right corner. This dropdown list does not display for tools that are not student specific like Announcements.
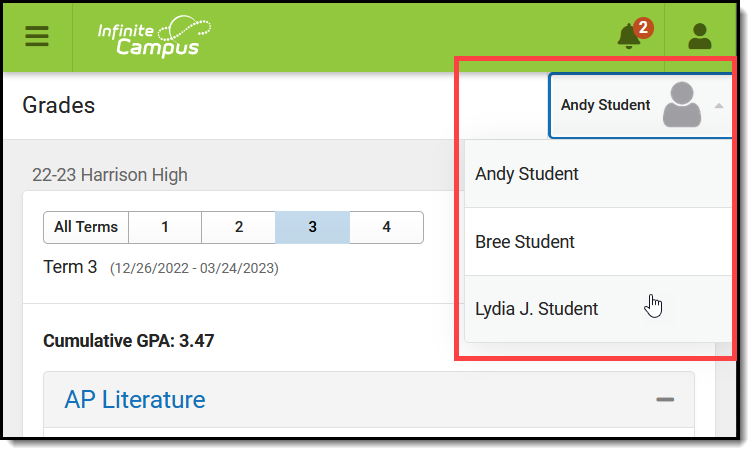
Switch between students using the dropdown list in the corner.
If a student has multiple enrollments, a dropdown list displays at the top of tools like Grades and Schedule listing each enrollment. Other tools, such as Behavior, show multiple enrollments on one screen, with data separated by enrollment.
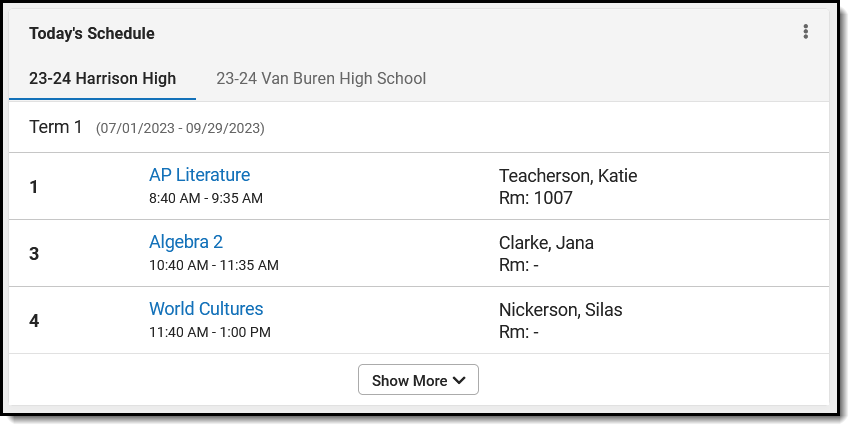 Select which enrollment to view if the student has multiple enrollments.
Links in Campus Parent
In various areas of Campus Parent, clicking links opens details for items such as assignments and courses.
To enlarge Example Images, right click and select View Image. Click BACK to return to the article.
| Available Link | Description | Example Image |
|---|---|---|
| Assignment |
Click on an assignment to view details, such as dates, scoring information, and the description. Files attached by teachers also display on this screen, as applicable. Parents are able to view submissions and Quick Assessments made by their students once the students have turned them in. However, viewing those submissions may be limited by parents' access to third-party programs enabled by the school, such as Google Drive or Naiku. |
|
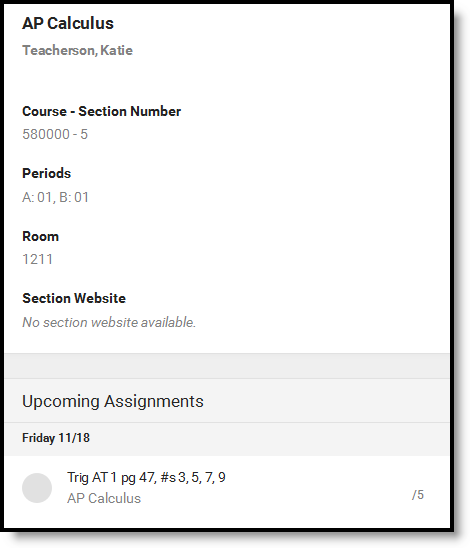
| Course Name | Click on a course name to view the Course/Section number, Period, Room, section Website, and any upcoming assignments. |
 |
| Counselor Email | From the Course detail, click the counselor's email to discuss schedule changes (a preformatted email form displays), or discuss other topics with your student's counselor. |
|
Notification Settings
Notification settings allow users to opt out of receiving specific kinds of notifications and establish thresholds for those they want to receive. Set thresholds to only receive notifications when a grade or score falls below the selected percentage or a lunch balance falls below the selected dollar amount. Click the arrows to change the threshold or click and drag the dot.
Notifications are not sent for any tools that have been disabled by the district. Only districts using Campus Food Service receive low balance notifications.
 Enable notifications and set thresholds to determine when notifications are sent.
Blended Learning
Some schools are using blended learning, with some students attending school physically and some attending virtually.
Is My Student Virtual Today?
Check the Today screen to see if your student is physical or virtual today. A  tag displays at the top of the schedule on days the student attending virtually.
To check another day, go to the Calendar screen, click Schedule and click a day in the calendar to see if your student is attending in-school or virtually that day.
Attendance Check-Ins
Depending on how your student's school is using virtual attendance, students may be required to respond to an attendance Check-In to show that they're participating in school virtually. These Check-Ins may display for each virtual section or one per day; some students are required to respond during the period the section would normally meet and other have all day to respond. Parents may also be able to respond for their students. Contact your school if you have questions about how they're doing virtual attendance.
To see if your student has responded to a Check-In, click on the Check-In on the Today screen. To respond to a Check-In for your student, click the Check-In and then click the blue Yes button.
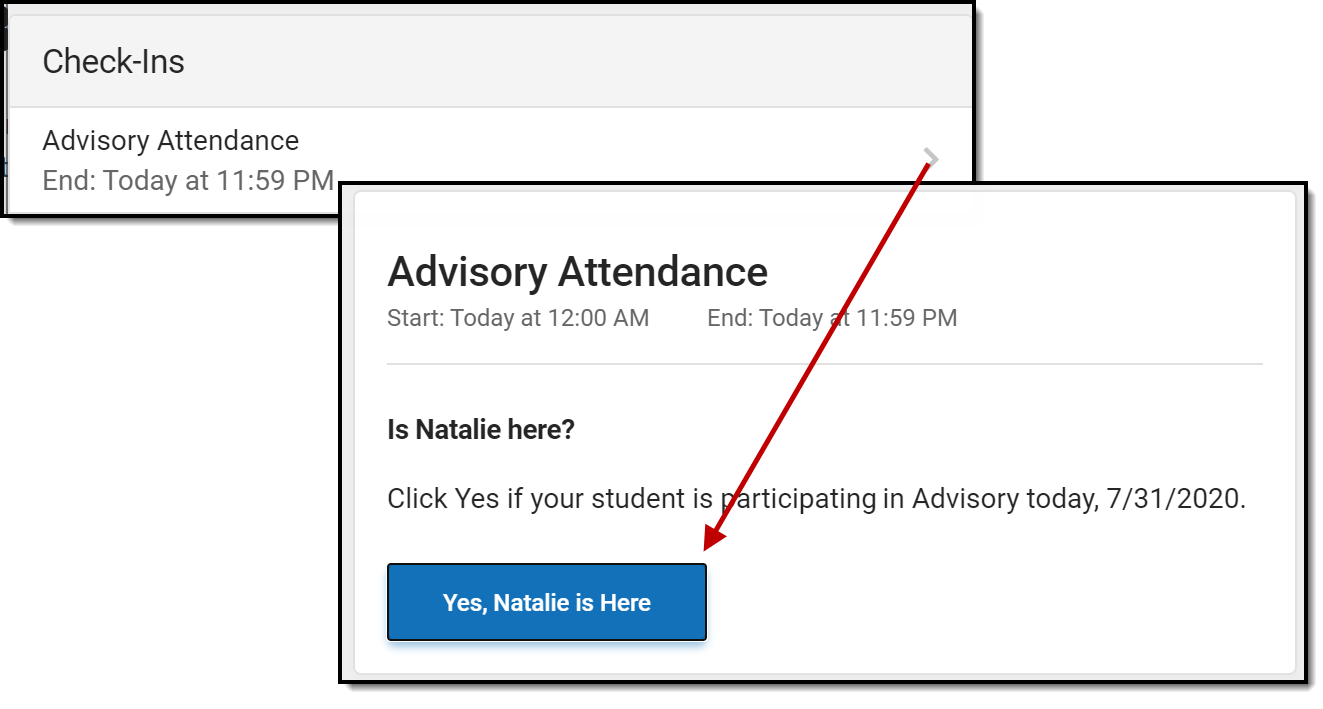 Respond to a Check-In for your student to indicate that they are participating virtually.
Account Settings
Account settings allow users to update their security email on record or to change their Password and E-Signature PIN.
- The Account Security Email is the email used if a user forgets their username or password.
- Passwords can only be modified if the district has enabled Password Reset. Strong passwords are enforced, meaning that passwords should have a mix of letters, number, and characters to make them more secure.
- E-Signature PINs are used to electronically verify and sign Meal Benefit Applications. This field is only available if enabled by the district.
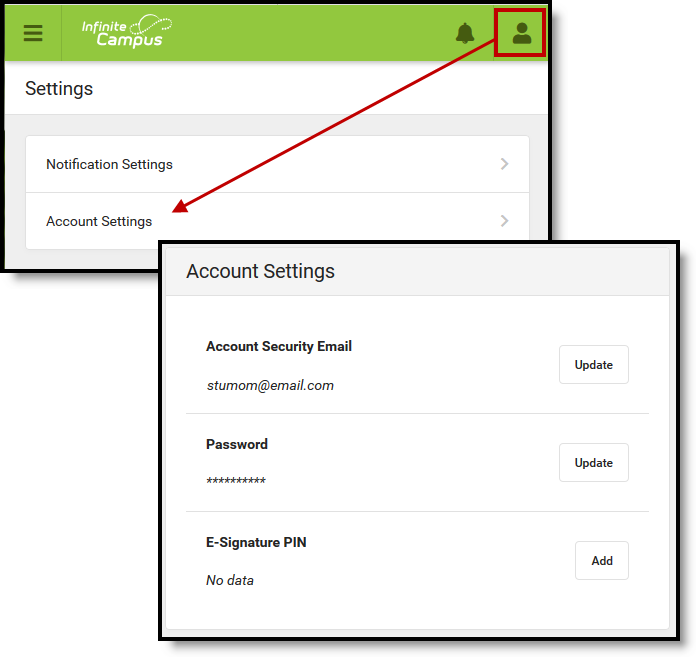 Access Account Settings to update basic account information.
Language
From the user menu, click Language to change the language that Campus Parent displays in. Campus provides translations into Spanish and Chinese; districts may provide additional translations.
 Select a Language to translate Campus Parent. Spanish and Chinese translations are provided by Campus.
Contact Preferences
Manage your contact preference by selecting the desired language and when you receive message, and how you receive that message (phone call, email, or text message). If your school has turned on certain options, you may be able to modify your phone numbers and email addresses.
From the User Menu, select Settings, then select Contact Preference. Review existing contact information (phone numbers and email addresses), enter any updates, and mark your desired Messenger Preferences. When phone and email changes are made, an email notification acknowledging the change is sent to the individual, alerting them to changes they may not have made.
 Contact Preferences
Access Log
The Access Log lists the date, time, operating system, browser, and IP address of each time this account has been accessed. Failed attempts are indicated.
 Use the Access Log to see information for each login.
Save
Save
Save
Save
Save
Save
Previous Versions
Campus Parent Portal [.2303 - .2331]
Campus Parent Portal [.2211 - .2251]
Using Campus Parent, parents and guardians can stay engaged and stay connected with what is happening in the classroom. In this video, you will learn how to use and navigate Campus Parent.
Update Contact and Demographic Information
Parents and guardians can update contact and demographic information using Campus Parent.
From Campus Parent, parents and guardians can review and update contact and demographic information. In this video, parents will learn how they can request changes to contact and demographic information.
Absence Request (Campus Parent)
Parents and guardians can use the Absence Request tool to submit a request that informs the office in advance when their student is not going to be in school.
Portal: Campus Parent > More > Absence Request
Parents and guardians can use the Absence Request tool to submit a request that informs the office in advance when their student is not going to be in school. After the request is processed, Campus creates an attendance record for the student.
| What can I do? |
|---|
 Portal Absence Request Tool Example
Submit a New Absence Request
- Mark the student(s) for whom you are submitting the absence request.
- Select the reason the student will be absent from the Excuse dropdown list.
- Select the Absence Type.
Absence Type Description Full Day Absence This option allows you to submit a request for an entire day. You may request more than one day. Be sure to enter the dates in the First Day and Last Day fields. 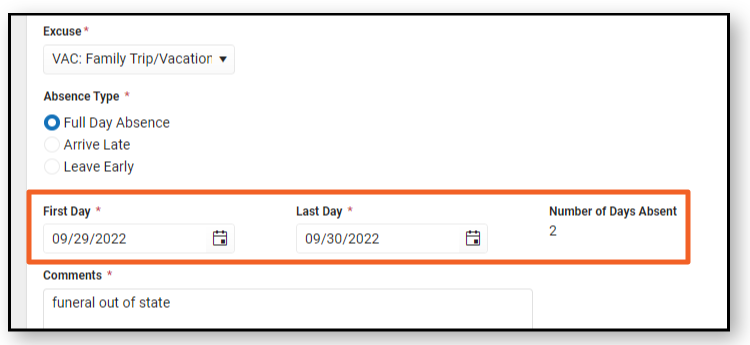
Arrive Late If you select the Arrive Late option, enter the time your student will arrive in the Arrival Time field. Arrival Time must be between the start of the day's first period and end of the day's last period. Parents can enter a time 5 minutes into the past. This allows for instances where a parent drops off a student before entering an absence request.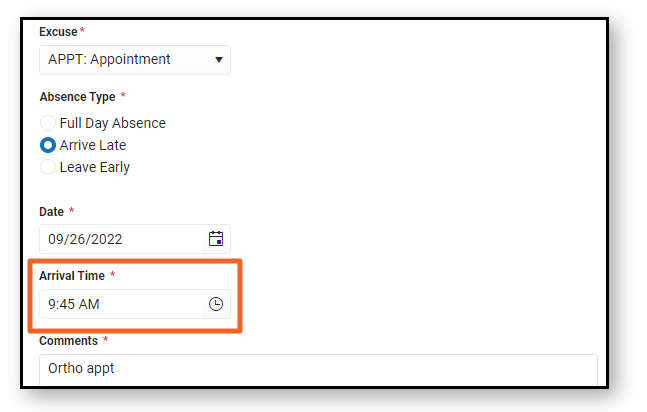
Leave Early If you select the Leave Early option, enter the time your student will leave in the Departure Time field. Departure Time must be between the start of the day's first period and end of the day's last period. Parents can enter a time 5 minutes into the past. This allows for instances where a parent drops off a student before entering an absence request.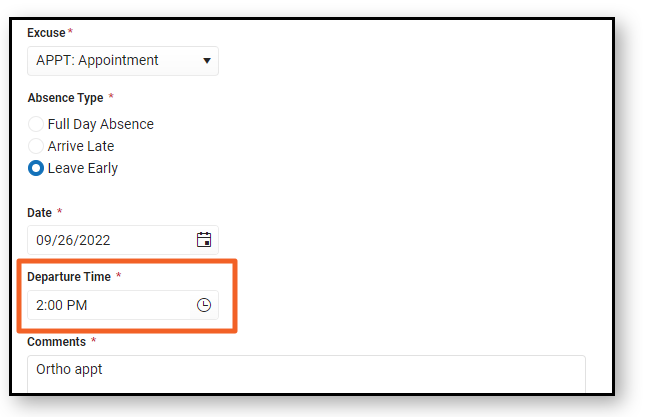
- Enter the date(s) for the absence.
- Upload any optional/required documents. Only one document is allowed per request and it is attached to every student in the request.
- To upload separate documents for each of your students, submit an individual absence request for each student.
- Enter Comments about the absence reason.
Comments are limited to 100 characters.
- Click Submit when finished.
View Requests
Users may view a list of all current Absence Requests and their status.
To view all current absence requests for the student, press View Requests.
 Current Absence Requests
A screen displays listing Current Requests for the student. Users can view request details such as: who submitted the request and their relationship to the student, start/end date of the request, and the status of the request. To view a more thorough version of a request, click on the request for which to view more details. by selecting the appropriate request.
Request Detail View
To view details for a specific request, click on the request. A Request Details screen displays.
 Request Details
From this screen, users can view more specific details about the request and the document uploaded, if applicable, with the request.
When finished viewing request details, press Back to return to the View Current Requests screen.
Upload a Document to an Absence Request
Users can upload documents to Absence Requests if a document was not initially uploaded with the request. If a document has already been uploaded with the request, users may not upload more.
Click on the request for which you want to upload a document. The Request Details screen displays.
 Upload a Document to an Absence Request
Use the Upload Document field to upload the appropriate document. Only one document may be uploaded per request.
When finished, press Save to save the uploaded document to the request and return to the View Current Requests screen.
Delete a Request
To delete an unprocessed absence request, click the request on the Current Requests screen then click the Delete Request button.
 Delete an Absence Request
School Store - Getting Started for Parents
Parents can make purchases using the School Store from Campus Parent. Depending on setup, parents can purchase spirit wear, school supplies, register for school activities, or make donations.
The School Store is a place in Campus Parent where you can make purchases. Depending on what your school has set up, you can purchase spirit wear, school supplies, and make donations. Your school may also use the School Store for Activity Registration or for pre-ordering school meals.
How do I find the School Store?
The School Store is available in the outline on the left. The store has different areas for each school. You will only see the schools in which your student(s) are enrolled.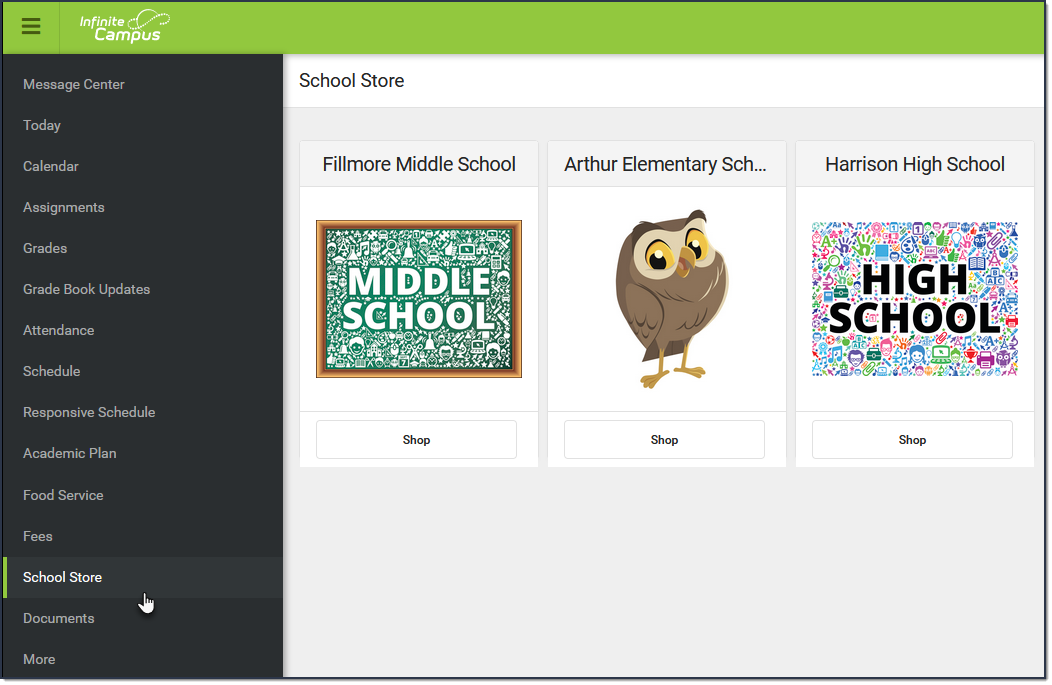
How do I make a purchase?
- Click the Shop button on the school where you want to make a purchase.
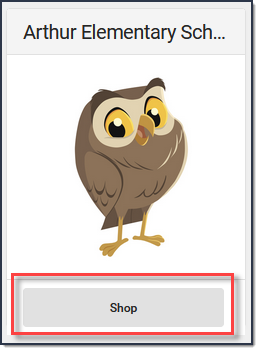
Result
All products available for purchase display or specific Categories of products display depending on your school's setup.
Click the Categories button at the bottom of the screen to filter the items and reduce the number of items that display.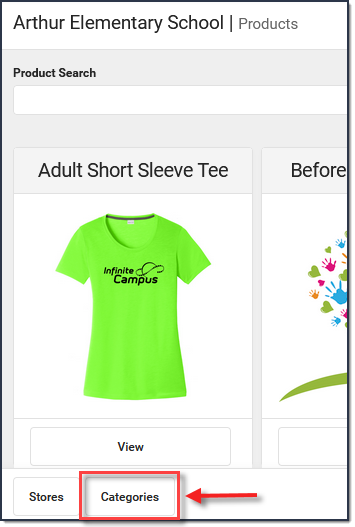
- Click the View button on the item you want to purchase. A panel displays with the item's details.
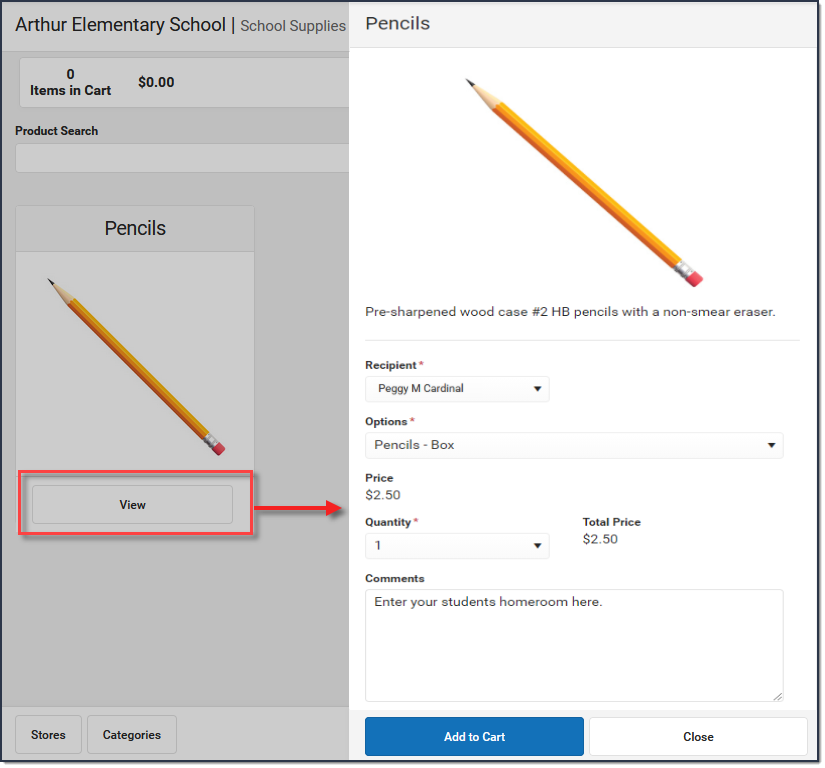
- Select the Options and the Quantity if applicable.
- Select the Recipient.
- Click Add to Cart.
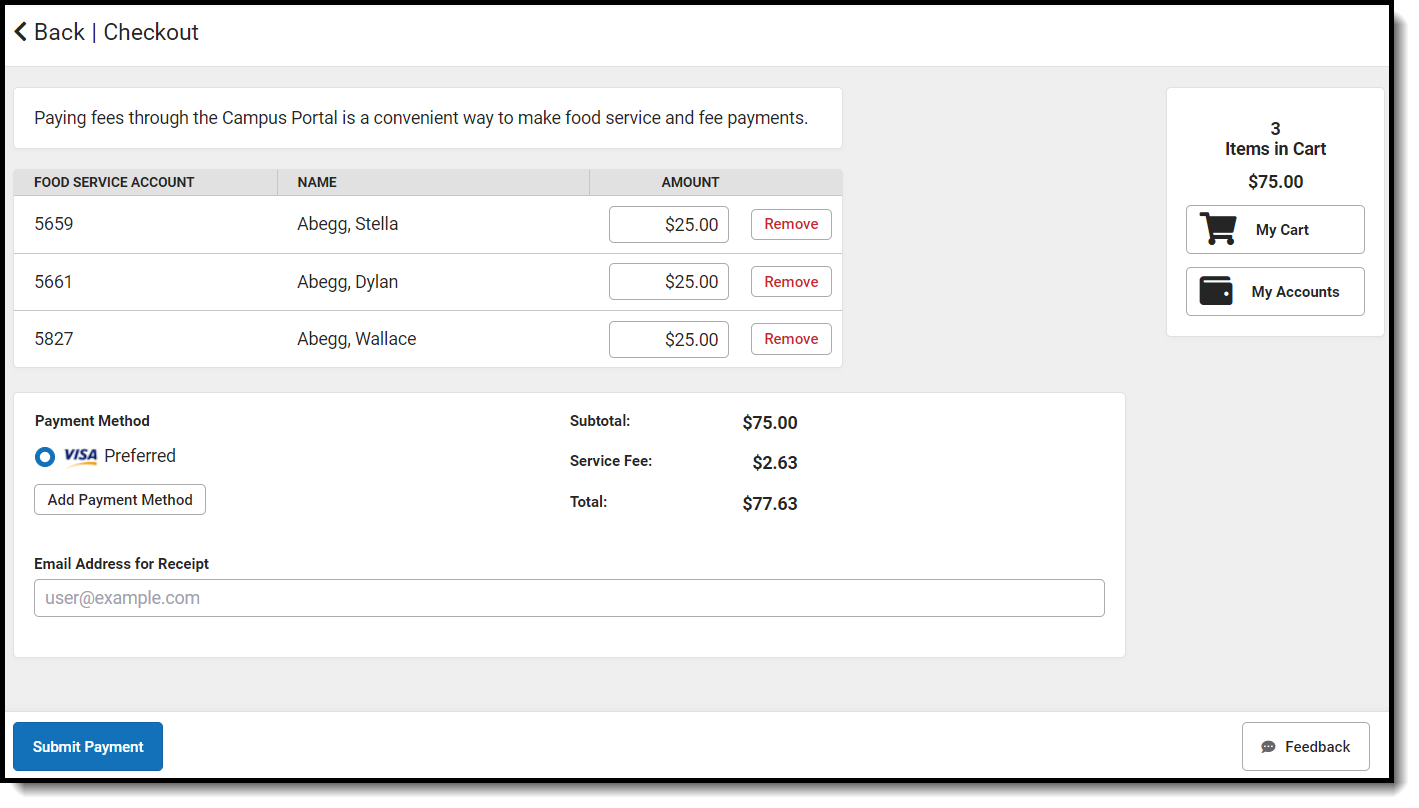
- Select My Cart. The Checkout Screen displays.
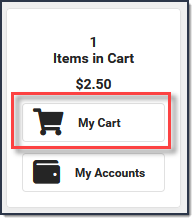 The Checkout Screen displays.
 - Select the Payment Method you want to use and enter an Email Address for Receipt (optional).
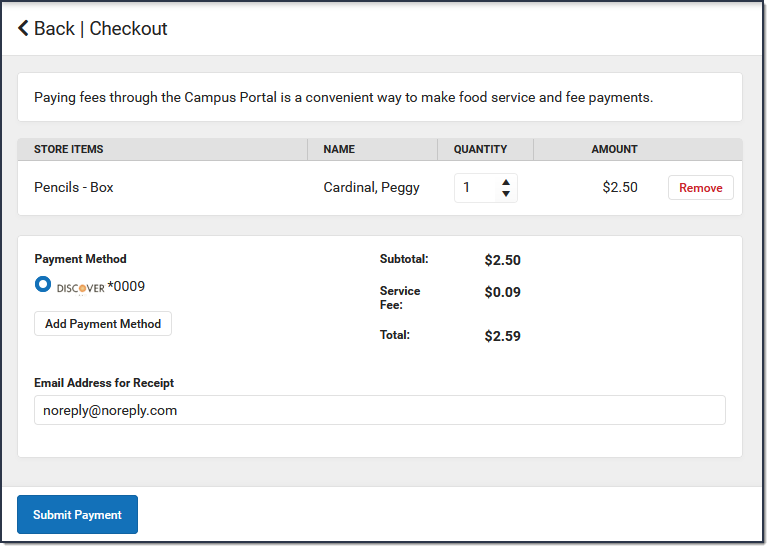
- Select Submit Payment.
The School Store tools in Campus Parent can be used to purchase items and complete registrations for activities, athletics, and field trips.
My Cart (Portal)
My Cart: From My Cart, students and parents can add money to their food service account.
My Cart is where you pay fees and add money to your food service account. You can add items to My Cart from any of the following areas:
Food Service: Review what meals and food items were purchased, as well as add money to your account, using the Food Service tool.
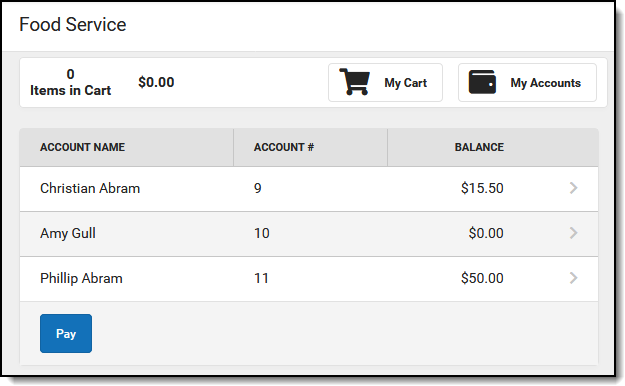
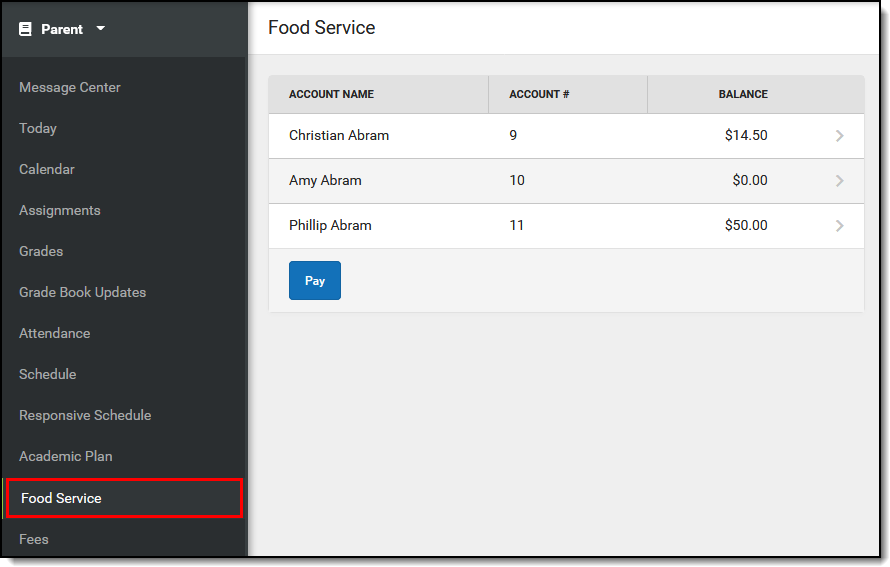
The Food Service tool allows you to see what meals and food items were purchased as well as add money to your Food Service account.
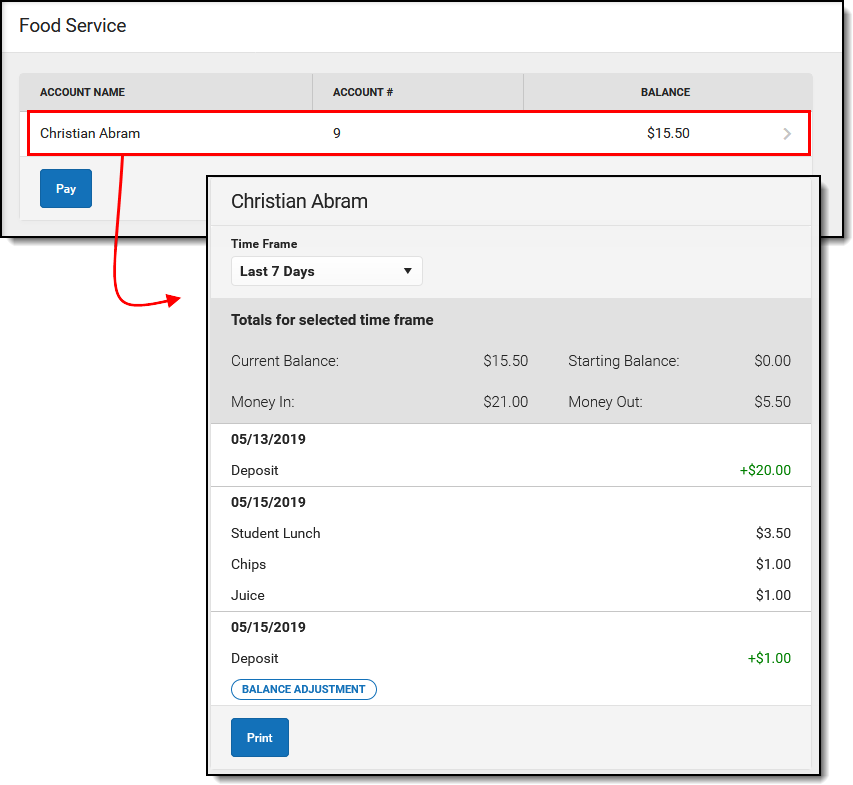
From here you can view also view
- current account balances,
- money in and money out, and
- adjustments made to your account by the school office.
The number of accounts that appear on this screen depend on whether you are a student, a parent, or a parent with access to multiple students.
The link to the Food Service tool does not display for everyone. Specific school operations and settings determine whether this link displays. Similarly, the option to add money to your Food Service account is only available if your school uses this feature.
Where do I go to view and add money to my Food Service Account?
The Food Service tool is available in the outline on the left.
How do I add money to my Food Service account?
- Select Pay.
- Enter the amount you want to add in the Amount field. If a box is not available for you to enter an amount, your account may not be active and you may need to contact your school.
- Select Add to Cart.
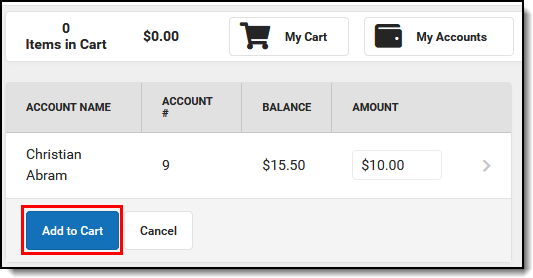
- Select My Cart. The Checkout Screen displays.
- Select the Payment Method you want to use and enter an Email Address for Receipt (optional).
- Select Submit Payment.
How do I automatically add money to my Food Service account?
To automatically add money to your Food Service account on a monthly basis or when it reaches a low balance, use the Recurring Payments tool–this is NOT part of the Food Service tool.
Need more information?
See the Recurring Payments article for more information.How do I view what I have purchased?
To see a list of items that you have purchased, select your account name. A screen displays with all of your account's details, including any deposits or adjustments.
Campus Student & Campus Parent Setup
The Campus Portal provides parents and student access to student information and school communication. Some of the tools and features available in Campus Student and Campus Parent may require additional setup or may allow schools and/or districts to customize preferences.
Portal Setup (Admin)
All Campus districts can utilize Campus Student and Campus Parent Portals. Schools should only use these portals after proper setup and after data in Campus is accurate.
Each district that uses Campus is provided with Campus Student and Campus Parent Portals. Schools should allow the use of these portal only after data in Campus is accurate. Campus settings should have been verified, addresses should be correct, grades entered, etc.
Accessing the Portal
The Portal can be accessed by parents of enrolled students. Parents will see all children in their household, or students that are related through the Guardian checkbox of the Relationships tool. Students can also be given access to the Portal, but they will only be able to access their own information.
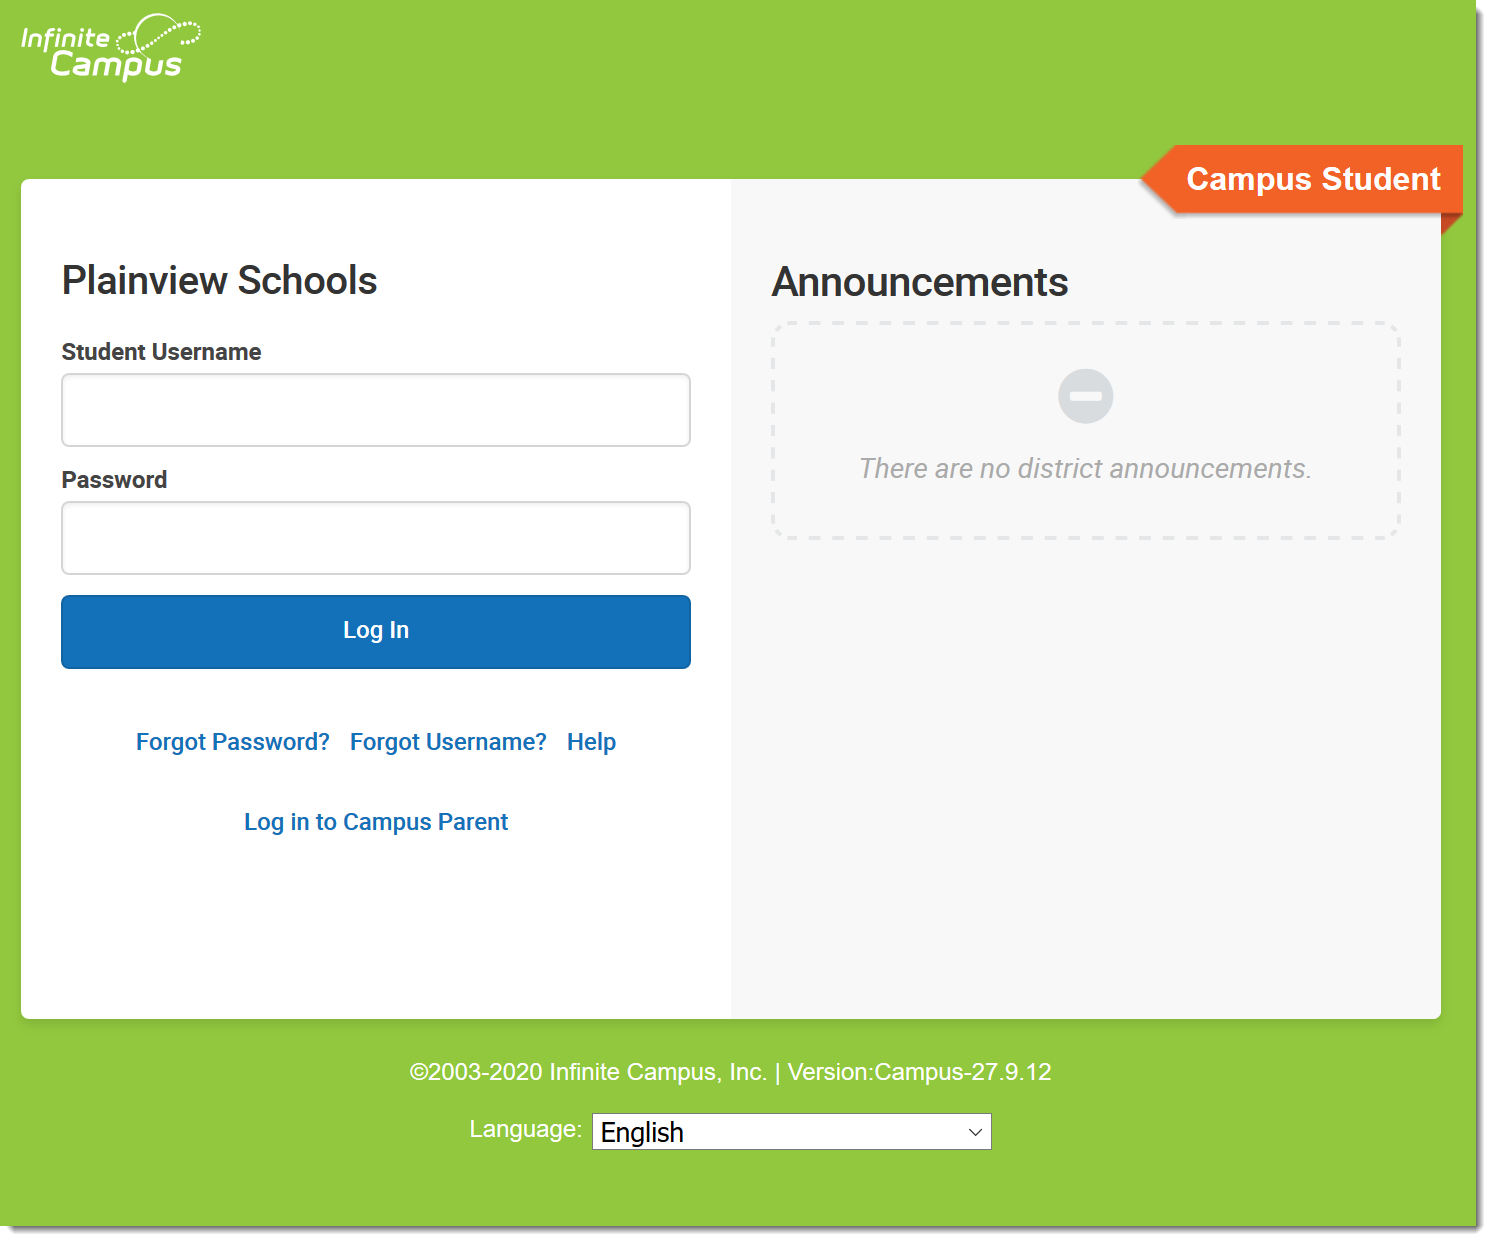 Logging in to Campus Student
Infinite Campus recommends that districts require all Portal users to sign an "Acceptable Use" policy before allowing Portal access. A district may also wish to require that Portal users sign a Web Access Agreement. See the Suggestions for Portal Policies Section at the end of this article for further guidance.
The Portal web address is https://<campus district access>/databasename/portal/<district name>.jsp. Thus, a district with a web application name of ICCampus and a district name of ICCSS would have a portal address of: <https://campus.iccampus.k12.state.us/campus/portal/ICCSS.jsp>.
Assigning Usernames and Passwords Manually
To create a username/password, search for the user and complete the following steps.
Step 1: Search for the User
- Open the Search menu by clicking the magnifying glass icon in the Campus Toolbar.
- Select a search Type of User and enter the Last Name, First Name of the user for whom a username and password will be created. Use Advanced search options below the results list to enter more search criteria if needed.
- Select the desired user from the Search Results by clicking on the person's name. The User Account tool displays.
Step 2: Create a New User Account
- Click New.
- Indicate the Homepage of the account, such as Campus Parent Portal or Campus Student Portal.
- Enter a Username.
- Enter a Password or click Generate Password. If entering the password manually, enter it again in Verify Password.
- Verify that the entered Password is correct by entering it again.
- If the user should be required to set a new password the first time they log in, mark Force Password Change.
- Click Save.
Share the account information with the user to allow them to log in to Campus Parent or Campus Student.
Allow Users to Create Their Own Accounts
Location: Demographics > scroll to Person Identifiers > Person GUID
Allow Campus Parent and Campus Student users to create their own accounts by giving them their Activation Key. This key is the person's GUID (Global Unique Identifier) which is the ID used to identify them in the Campus database.
This GUID is visible on the Demographics and Summary tools.
To facilitate the distribution of GUIDs, follow the instructions below to create a report in the Ad hoc Filter Designer to pull users' first and last names and their GUIDs. This information can be distributed to users after they have returned the district's Acceptable Use policy.
Step 1: Create an Ad hoc Filter Report for Contact (guardian) GUIDs
Tool Search: Filter Designer
- Select the Filter Type of Query Wizard and the Data Type of Student.
- Click the Create button.
- Enter a name for this report in the Query Name field.
- Select the following fields (more options can be chosen, but only these are necessary):
- Student.firstName (Student > Demographics > firstName)
- Student.lastName (Student > Demographics > lastName)
- Student.grade (optional) (Student > Learner > Active Enrollment > Core Elements > Grade
- Student.stateID (optional) (Student > Demographics > Identity History > State ID History > stateID
- Contacts.lastName (Student > Census > Household Contact Summary > lastName)
- Contacts.firstName (Student > Census > Household Contact Summary > firstName)
- Contacts.contactGUID (Student > Census > Household Contact Summary > contactGUID)
- Contacts.guardian Student > Census > Household Contact Summary > guardian)
- contact.addressLine1 (Sort set to 1) (Student > Census > Household Contact Summary > addressLine1)
- contact.addressLine2 (Sort set to 2) (Student > Census > Household Contact Summary > addressLine2)
- contact.mailing (Student > Census > Household Contact Summary > Mailing)
- Click the Next button. A Filter the Data filter screen displays. Set the following parameters:
- Contacts.guardian = Operator is '= TRUE
- Contact.mailing = Operator is = 1
- Click the Next button. A Format output screen displays. Set the following parameters:
- contact.addressLine1
- Sort is 1
- Direction is Ascend
- contact.addressLine2
- Sort is 2
- Direction is Ascend
- contact.addressLine1
- Click the Next button.
- Click the Save & Test button. This will generate an HTML view of the filter.
- If the information shown is correct, click the Save icon. This will save the report for later selection.
As this query is written, data will be returned for every person in the district. Users may want to filter down to the parent/guardian level to only list parents.
Step 2: Generate an Ad hoc Filter Report for GUIDs
Tool Search: Data Export
- Select the Filter designed in the previous step from the Saved Filters list.
- Select the Pick an Export Format option.
- Click Export. This report can now be used to distribute GUIDs to potential portal users.
Using the GUID/Activation Key to Create Usernames and Passwords
The Activation Key is only needed the first time the user accesses the Portal. Upon logging in, the user will be required to establish a username and password for subsequent logins.
First Time Account Creation
- On the Login page, click New User?
- Enter an Activation Key and click Submit to activate the account. The Activation Key will be verified, and when approved, a screen will prompt the user to create a username and password.
Username and Password Creation
- Enter a Username. Use an alphanumeric (both letters and numbers) username.
-
Enter a Password. Use an alphanumeric password. Passwords should be at least 6 characters and considered a strong password.
Complex, tricky passwords are not always strong passwords and can be difficult to remember. For example, TheBr0wnC@t is a stronger password than !@#$%&() because TheBr0wnC@t uses a combination of character types and is long, whereas !@#$%&() uses only symbols and is short. A computer program can crack !@#$%^&() easier than it can crack TheBr0wnC@t.
When creating a password, consider the following:
- Content - Use a short two or three word sentence as your password.
- Length - Make your passwords long (8-10 characters is usually sufficient).
- Combination - Include letters, punctuation, symbols and numbers.
- Uniqueness - Do not use your username or words found in the dictionary.
- Re-enter the password in the Verify Password field.
- Click the Create Account button.
This action will create the username and password. The username and password will be verified, and upon approval, the portal account will be created. Use Click Here link on the account creation page to enter the username and password to access the Portal information. The new account is given a home page of Campus Parent, unless the user has a current or future enrollment, in which case the home page is Campus Student.
Importing User Accounts and Sending Portal Account Messages/Letters
For detailed information on importing user accounts and sending user account messages and letters, see the Batch and Import Wizards article.
Portal Considerations
Before completing the necessary steps to give parents access to records contained in Infinite Campus, there are some key discussions that need to occur with faculty and staff to outline the internal school policies and procedures.
Attendance
Parents can see absences and tardies the moment the teacher or attendance clerk saves an attendance entry. Therefore, an attendance timeframe should be set, such as the first ten minutes of class. Teachers should feel comfortable taking attendance in that time. This attendance timeframe and other related attendance policies should be communicated to parents in the initial Portal letter or by some other means.
Because parents can see attendance information immediately, teachers and attendance staff should develop a level of proficiency in taking and managing attendance information before allowing attendance to appear in the Portal.
Grading
As with attendance information, parents can see available Grade Book information, such as scores and comments, as soon as they are saved. Parents can see assignments as they are created, including blank scores for assignments that have not yet been graded. This can cause concern about missing work and pressure on the teachers to enter scores quickly. School should establish a grading deadline (turnaround time) for assignments to be graded and entered in Campus. Some schools give a two week deadline to teachers to grade and record scores. This policy should also be communicated to parents.
Teachers have the option to hide assignments and scores from the Portal, but hidden assignments are still included as part of grade calculations. Teachers should be reminded of the impact of hiding assignments and how to use this option properly, such as hiding assignments that have been created in Campus but not yet assigned or collected.
Report
Parents can pull unofficial transcripts from Campus. Some instruction should be provided to them so they can correctly interpret these documents.
A school will need to take certain data security and integrity measures to differentiate an official transcript from an unofficial one.
User Support
Schools will need to decide what qualifications need to be met for individuals to receive registration keys and access to student information, such as guardian status and identity. Another issue is the availability of staff members to provide registration keys and direction. Many schools implementing the Portal choose to operate tables of booths at school events as a medium for distributing information to parents. Events such as back to school nights, open houses and parent/teacher conferences present convenient opportunities to interact with many parents.
Schools also need to establish policies and procedures for handling user support and data-related questions. Staff may need to address forgotten passwords and locked accounts and serve as a liaison between parents and the system administrator.
The Campus Student Portal and Campus Parent Portal articles provide additional information about the tools available.
Suggestions for Portal Policies
Districts may wish to specify the following in parent/student Portal policies:
- Qualifications for parental rights concerning who is allowed access to students' information, which usually includes guardians.
- That districts agree to provide free and accurate (to the best of their ability) information meeting the agreed-upon standards based on parents' compliance with security requirements.
- Information accuracy as a shared responsibility among schools, parents/guardians and students.
- That districts maintain the right to add, modify or delete information and *Portal functions at any time, as well as the right to deny parents access with suitable cause.
- Timeframes concerning when attendance and grade information will be made available.
- Qualifications that must be met by usernames and passwords, such as character length and password strength. It is often a good idea to specifically prohibit users from setting their computer to automatically sign in. Some districts choose to set a lower number of unsuccessful logins necessary to disable the user account. Districts usually require that parents have their own individual accounts rather than household accounts.
- System requirements as well as a way for users to receive technical support, including how to unlock accounts.
- That use of the Portal is subject to electronic monitoring by the district, as well as other specific rights the district maintains.
Save
Save
Save
Portal Overview
Location: System Settings > Portal Preferences
The Campus Portal provides parents/guardians and students access to student information and school communications. This is an optional feature free-of-charge to the school district. Students and parents/guardians must have received a Portal URL to access the Campus Portal and the School District should establish Terms of Use and review the Portal Setup information prior to allowing access.
The Portal folder in System Administration provides schools with configuring features available to parents and students on the Portal. In addition, Self Service preferences, the Portal Usage Report and the Portal Request Summary Report are located in this folder.
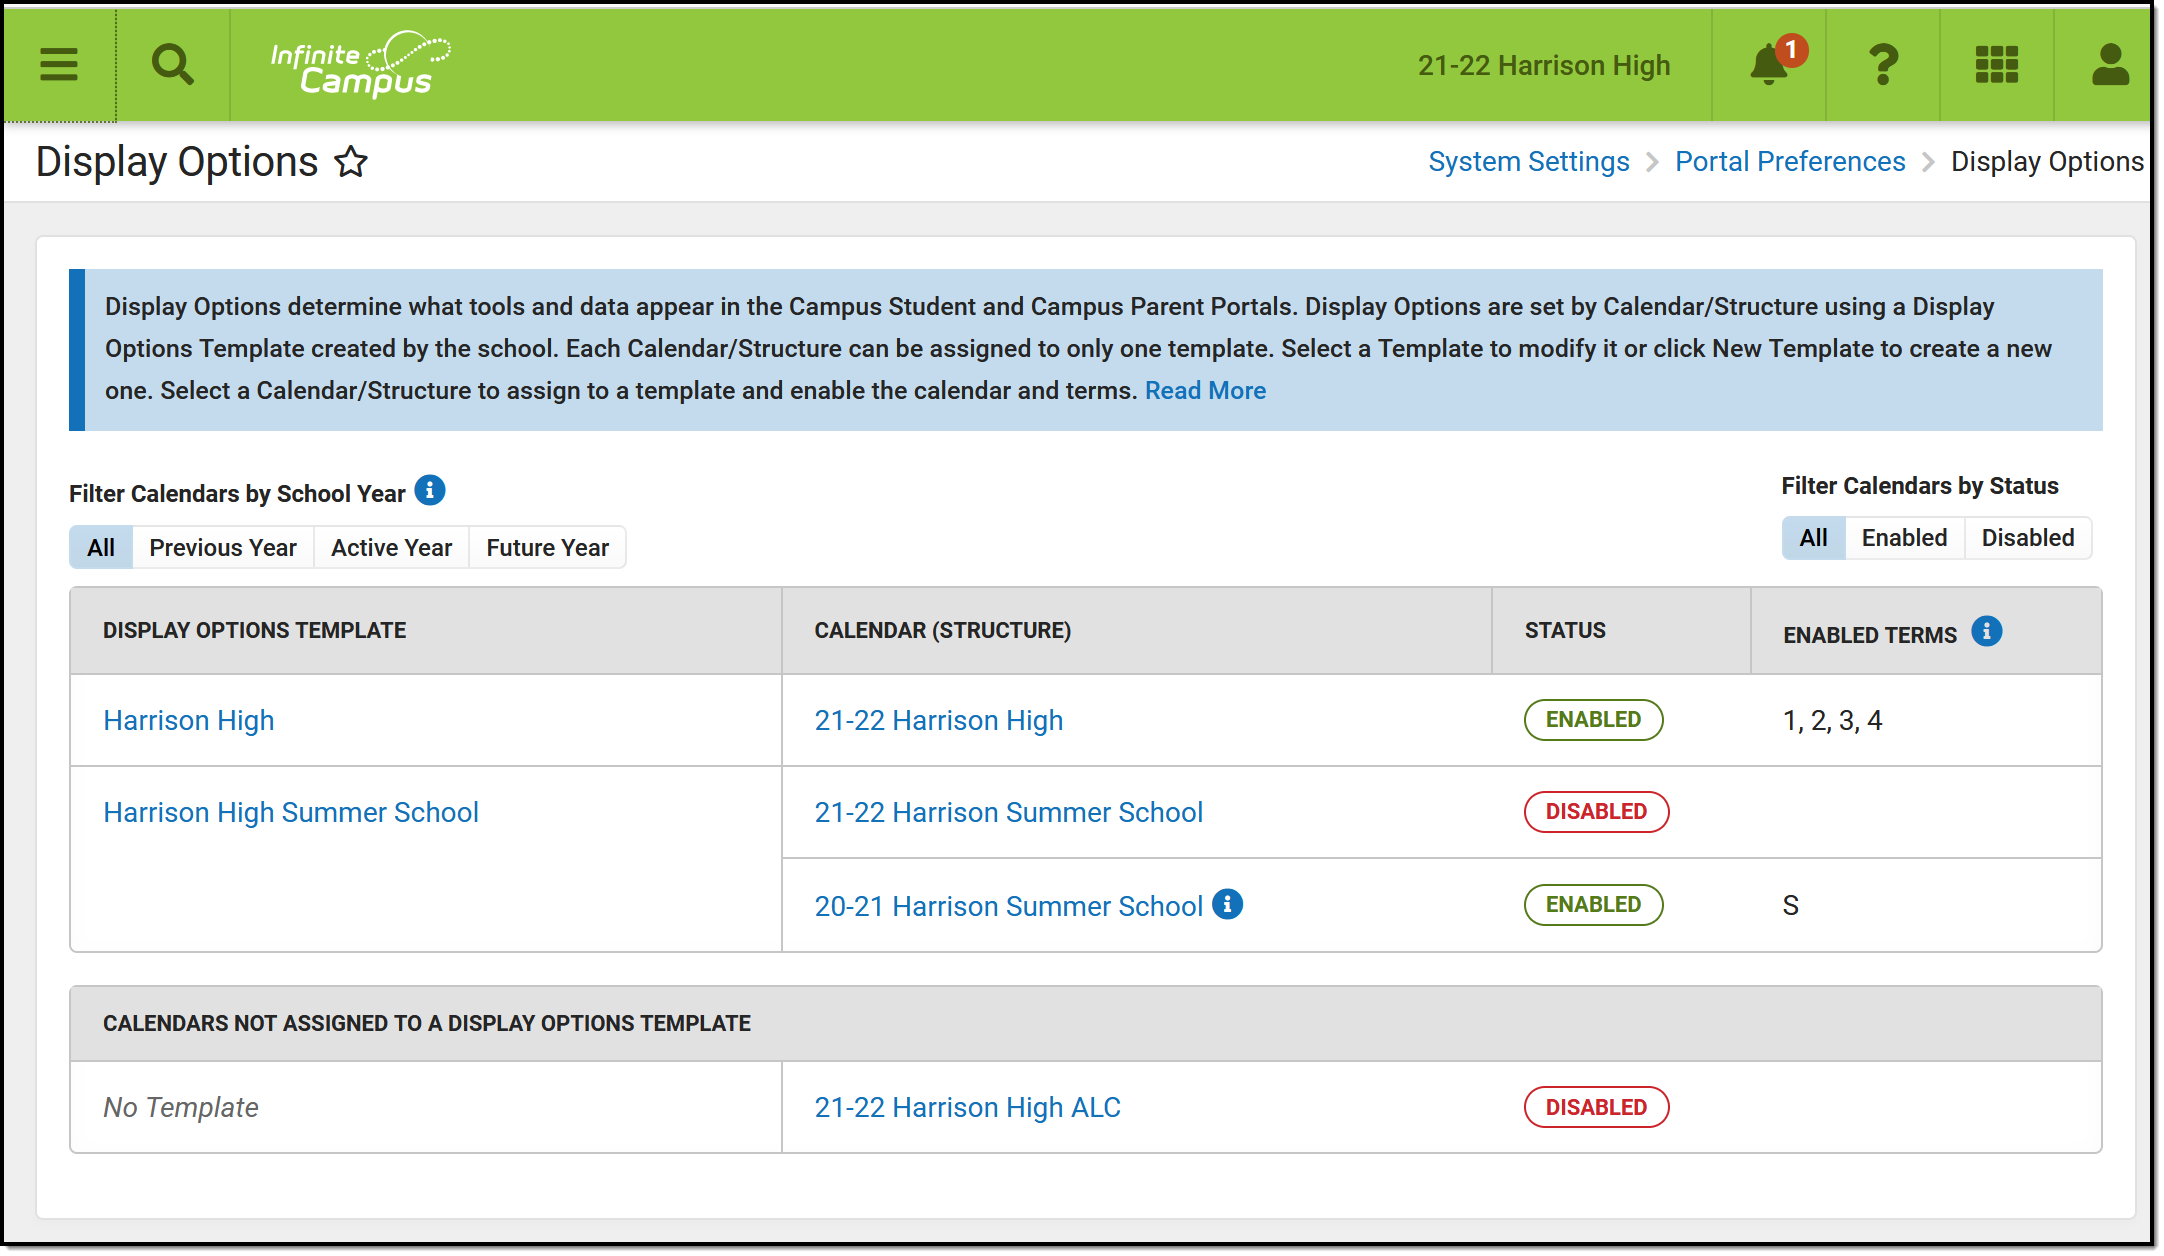 Display Options for Campus Parent and Campus Student
See the Portal Tool Rights for a description of applicable tool rights for this area.
Managing Portal Preferences
Topic | Tool |
|---|---|
Select data elements to be viewed by students and guardians | |
Enable self service portal options | |
Enable push notifications for Mobile Portal apps |
Generating Portal Reports
Topic | Tool |
|---|---|
Generate a report of portal activity | |
Generate a report for changes requested to data via Portal Self Service |
For Parents and Students
The Campus Student Portal and Campus Parent Portal articles describe the tools available for students and parents.
Save
Save
Save
Display Options
The Display Options tool allows schools to create Display Options Templates that are used to determine which features and tools appear in Campus Student and Parent Portals.
Tool Search: Display Options
The Portal Display Options allow schools to determine which tools and data are available in the Campus Student and Campus Parent Portals. This tool is scoped to the school selected in the Campus toolbar.
Options are managed by creating templates and assigning calendars (and schedule structures) to that template. This tool also contains Batch Edit options to simplify updating multiple templates or schools.
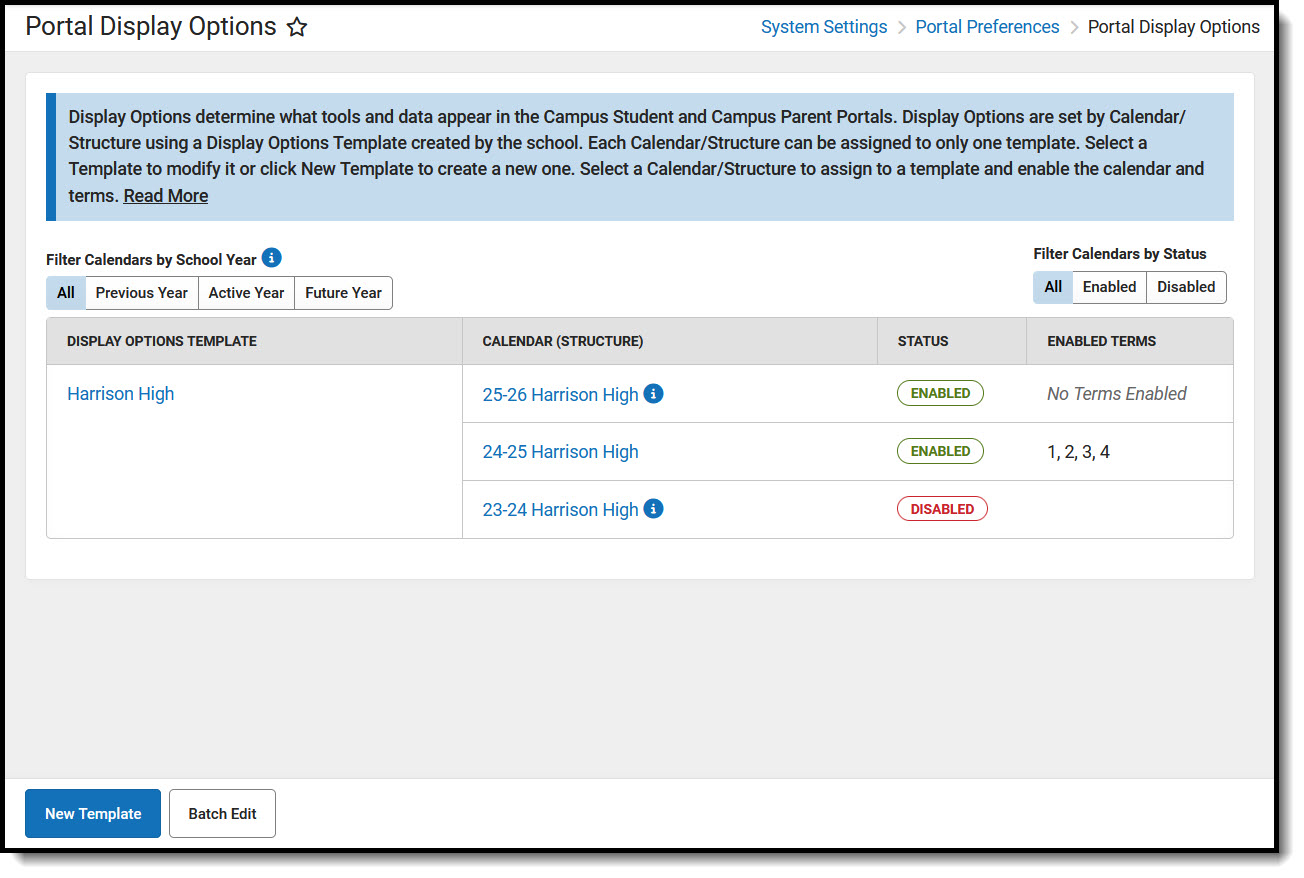 Portal Display Options
See the Portal Display Options Tool Rights article for suggested tool rights.
Understand the Portal Display Options Tool
The primary view of the Portal Display Options tool lists the Templates created for the school and the Calendar(s) assigned to each template. Click the name of the template or calendar to view more information.
For each template, a Status and, if applicable, which terms are enabled are displayed. The status indicates whether portal data is enabled for the calendar assigned to the template.
Use the filter options above the table to filter the list by calendars in the Previous, Active, and Future school years or by calendar status.
| The Active year is the School Year currently marked as Active in the School Year Setup tool. |
What does 'Enabled' mean?
If a Calendar (Schedule Structure) is enabled, data is available on the Campus Student and Campus Parent Portals for that calendar. The available data is determined by the display options marked in the template to which the calendar is assigned.
If a Term is enabled, Assignment, Attendance, Grades, and Schedule data for that term are available, depending on which display options are enabled.
Which calendars can be enabled?
Calendars can be enabled if they are for the current, active school year, the prior (previous) school year, or the next (future) school year.
Calendars from the previous school year can be enabled for only 90 days from the Calendar End Date. This is done by extending the enabled status of the calendar. See the Calendar & Term Settings section below for information about enabling previous calendars.
For enabled calendars in the active and previous school years, the data available on the Portals is determined by the Display Options selected. For calendars in the future school year, only the Display Options for Academic Plan, Activity Registration, Course Registration, Documents, and Schedule tools are applicable. All other data is hidden from enabled calendars in future school years.
Questions? Check out the Portal Preferences FAQ article.
Create a Template
To create a new display options template, click the New Template button at the bottom of the tool. Alternately, open an existing template, click the arrow next to the Save button, and then Save & Copy to create a copy of that template as a starting point.
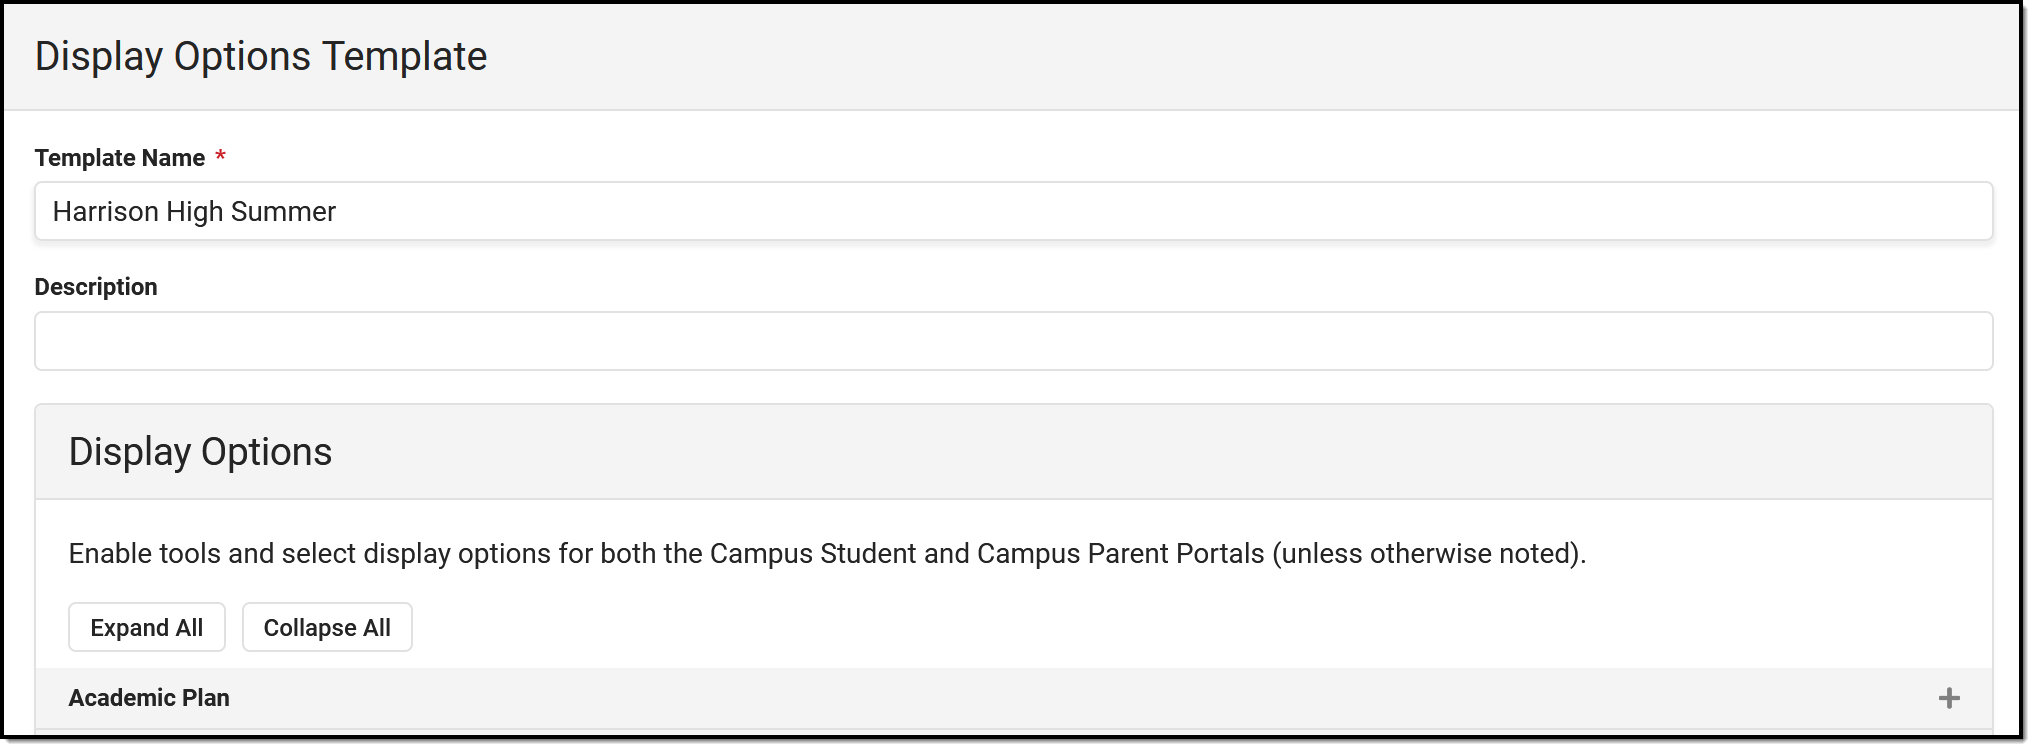 Manage display options by first creating a template.
Enter a unique Template Name. This is the name displayed in the Portal Display Options tool and when assigning calendars. Enter a Description if desired. Currently, this description is only displayed in this tool. It may help provide more information about what data is enabled in the template and how it should be used.
Display Options are grouped in expandable sections by tool. Click Expand All to view all options. When enabled tools are collapsed, an indication in the section heading indicates if the tool is enabled.
For many tools, display options can be set individually for Campus Student and Campus Parent. For some tools, additional options are displayed for specific settings when the tool is enabled. See the Display Options section below for a breakdown of each tool, its related settings, and examples from the apps. |
Once the desired options for this template are marked, click Save to complete the template. The next step is assigning calendars to the template.
Assign Calendars to a Template
To assign calendars to a template, click the Manage Calendars button at the bottom of the template. Click Assign next to the calendar(s) to assign to this template. Calendars can also be assigned by clicking the calendar name from the main display options screen.
Calendars can only be assigned to one template at a time.
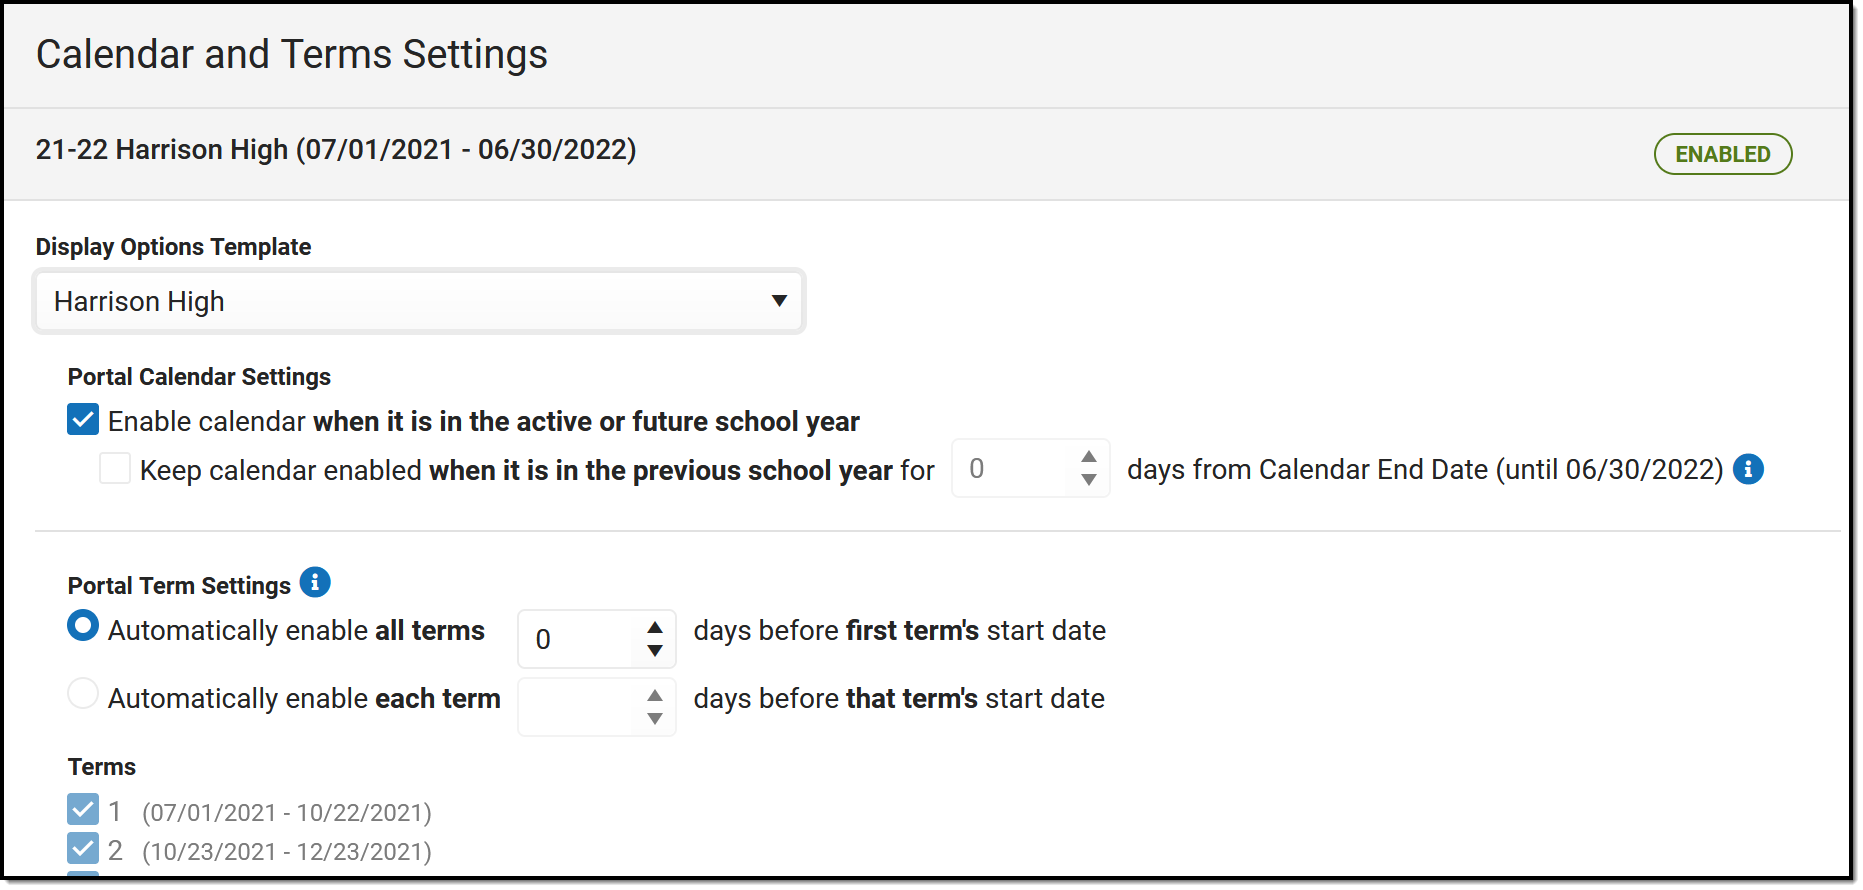 Next, calendars to the template
Calendar and Term Settings
When a calendar is assigned to a template, additional settings display:
Enable calendar when it is in the active or future school year.
When a calendar is enabled, data in that calendar is available in the portals, depending on the options selected. This setting to enable a calendar applies to calendars in the active or future school year. The Active year is the School Year currently marked as Active in the School Year Setup tool. The future school year is the next one.
Keep calendar enabled when it is in the previous school year for X days from Calendar End Date
Keeping a calendar enabled allows parents and students to access a calendar's data past its end date. This option is especially helpful for data such as Grades and Assignment scores.
Access can be extended up to 90 days past the Calendar End Date. After that date, the calendar will no longer be listed in the Portal Display Options tool and cannot be made available.
Portal Term Settings
Term-specific settings control access to Assignments, Attendance, Grades, and Schedule data.
Terms are automatically enabled based on the term's Start Date based on the automatic preferences selected. Automatically enable all terms according to the first term's Start Date, or enable each term according to its own Start Date. Select the number of days before the Start Date for which the terms should be enabled.
Display Options Summary
Below the list of terms is the Display Options Summary, which indicates the template selected for the calendar and which options are enabled.
Display Options
The following describes the available options to display in Campus Student and Campus Parent. An example of the option is provided in the last column.
See the Campus Student and Campus Parent articles for examples of what these apps look like.
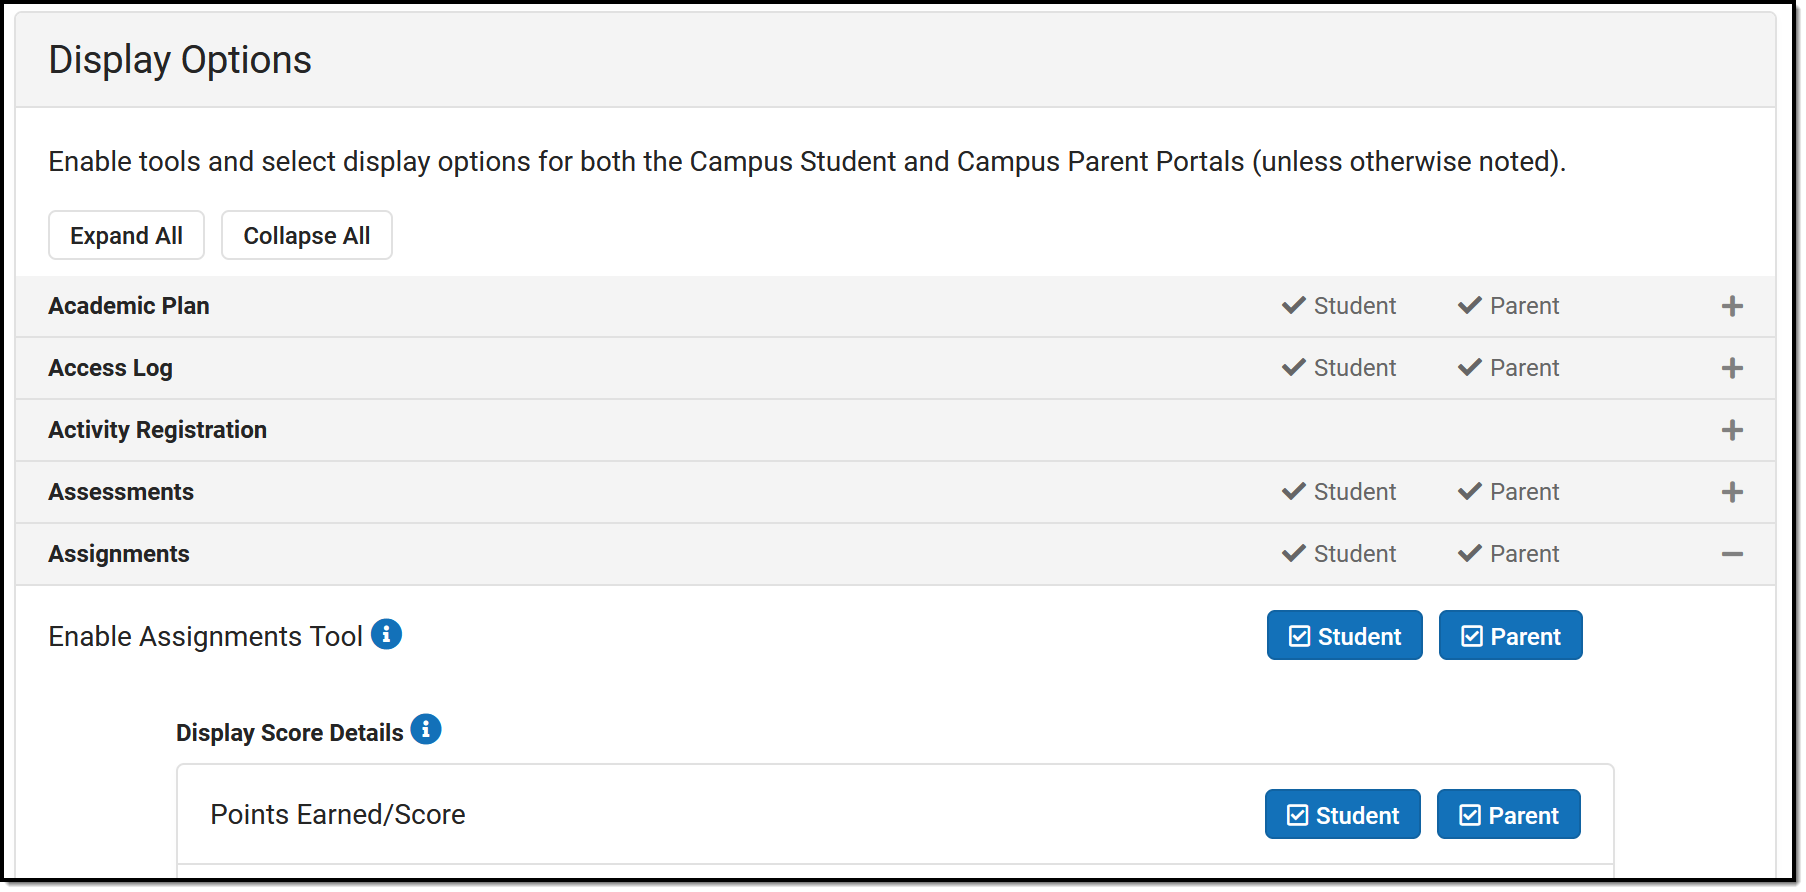 Expand sections of the display options to enable tools and specific data elements to display in the portals.
Attention districts who update their Portal Display Options via custom scripts:
Campus has provided a prism call to refresh the portal cache. This call should be run after a script updates options using the Task Scheduler. The prism call is: x=portal.PortalDisplay-reloadPortalDisplayOptionsCache
Schedule the task as desired in the Scheduler. The Tool Code for this tool is resources.PortalOptions. Select a Task Type of Java (Prism URL call) and enter the text above in the text box.
| Option | Description | Campus Student and Campus Parent |
|---|---|---|
| Academic Plan | ||
| Enable Academic Plan Tool | Displays information related to a student's course plan.
The Academic Planner and Course Registration options can be turned on at the same time, but it is not recommended. It is best to have a window of time when students can add courses to their course plans and a window of time when students can enter course requests. This eliminates the risk of overwriting course requests or planned courses. |
 Click to enlarge |
| Enforce All Rules | When marked, students can only save their academic plan if ALL planning rules and requirements have been fulfilled.
When it is not marked, students can save their plan without meeting all requirements, but all planning rules must still be met. Warning messages from failed requirements and failed planning rules are displayed so users can see the issues but still save the entry. |
|
| Require approval by parent/legal guardian | When marked, parent/legal guardians can mark this box indicating they have reviewed the student's academic plan.
This field displays as marked when the student views the plan when logged into the portal and when the counselor views the student's Course Plan. Parents/guardians can review the student's academic plan and mark this checkbox without being able to change the programs or course plans. This is helpful in situations where a counselor has worked with the student to create a plan and finalize it but still wants parents/guardians to review the selections. |
|
| Display Course Fees | Any fees assigned to a course will be displayed when viewing that course in the Course Catalog search results. | |
| Allow portal users to change program | When marked, parents/guardians and students can select a different academic plan. When not marked, only district staff (counselors, graduation program planners, etc.) can change students' academic plans. | |
| Allow to change course plans | When marked for Campus Student or Campus Parent, students and/or parents can add or remove courses from the course planner. Parents/guardians can approve the student's course plan regardless of whether this checkbox is marked. When not marked, only district staff (counselors, graduation program planners, etc.) can change academic plans for students. | |
| Access Log | ||
| Enable Access Log tool | Displays the date, time, and IP address of successful login attempts. |
|
| Activity Registration | ||
| Enable Activity Registration Viewing tool | Displays Activity Registration information in Campus Parent Portal and Campus Student Portal.
Campus finds the student's current enrollment record and checks that school's preference to determine whether Activity Registration information should display. If there isn't a current enrollment record, Campus will use a previous enrollment record to determine if the Activity Registration data can display. |
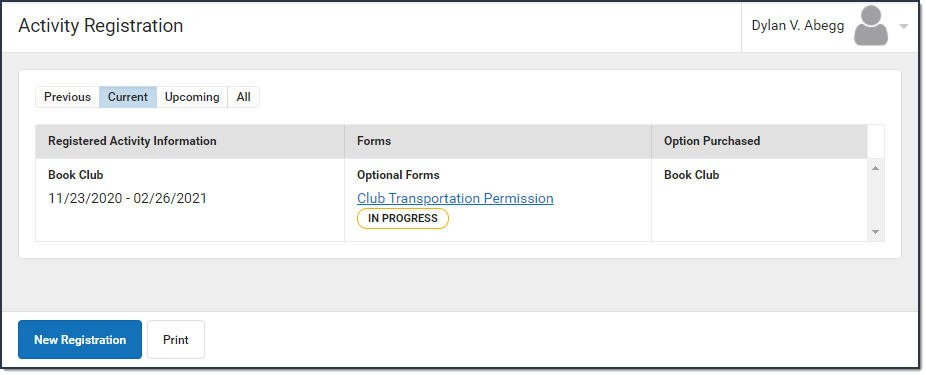 Click to enlarge |
| Assessments | ||
| Enable Assessments tool | Displays a student's district, state, and national test scores. |
|
| Assessment Display Text - Student/Parent | Enter text in these two editors to display that text at the top of the Assessment tool in Campus Student and Campus Parent, respectively. | |
| Assignments | ||
| Enable Assignments tool | Enables the tool that lists a student's assignments for the year. Students can view scores and submit work, as enabled by their teacher. Assignments are also displayed in other areas of Campus Student and Campus Parent, including Grade Book Updates, Today, and the Calendar, as well as the Course detail and Grade detail. |
|
| Display Score Details | Displays the selected details about a student's score. Selecting these options also enables notifications when assignments are scored, based on student and parent settings.
| |
| Display Category Details | Displays category data in the grade detail, by clicking a specific task/standard in the Grades tool. Specific options include:
|
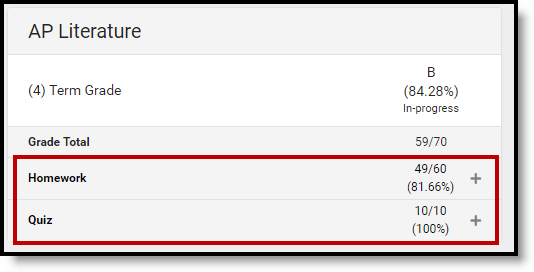 Click to enlarge |
| Attendance | ||
| Enable Attendance Tool | Displays the student's attendance events for the school year in the Attendance tool and the Calendar. | 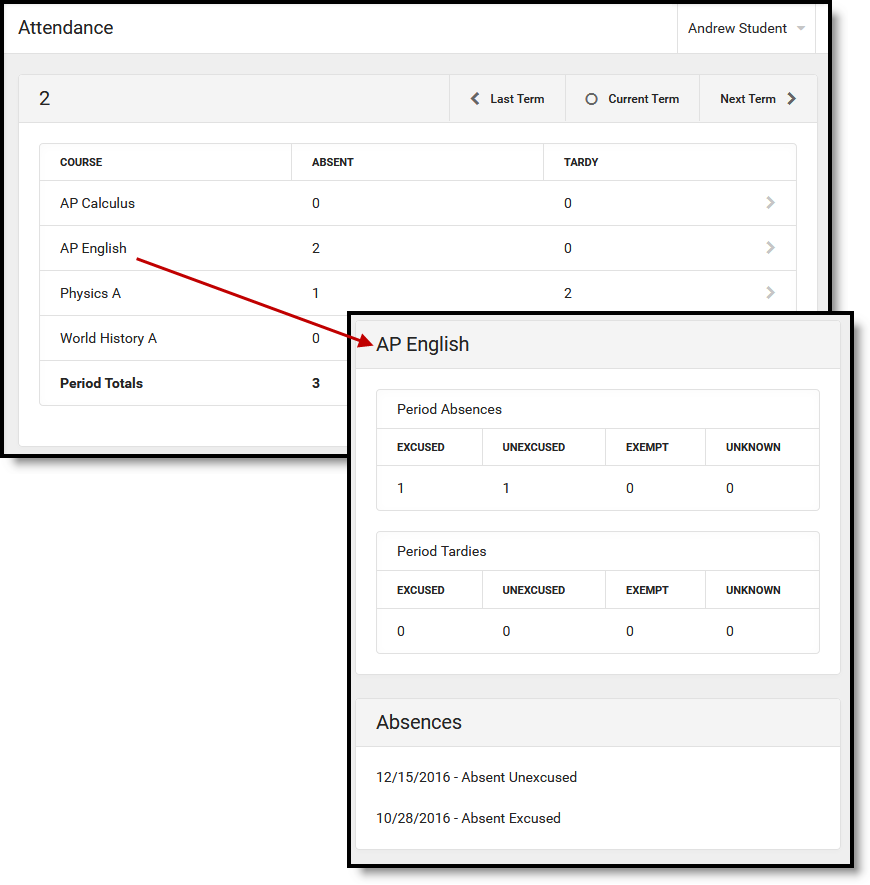 Click to enlarge |
| Display Attendance Comments | Displays the comments attached to attendance events (click second image) (NOT available for Kentucky districts). | |
| Display Positive Attendance Attendance tool only) | Displays attendance for any courses using Positive Attendance functionality (click third image). This option may not display for all states and districts. | |
| Show Unknown Attendance | Enables attendance with a status of Unknown to display within the Portal (ONLY available for Kentucky districts). | |
| Attendance Display Text - Student/Parent | Enter text in these two editors to display that text at the top of the Attendance tool in Campus Student and Campus Parent, respectively. | |
| Behavior | ||
| Enable Behavior Tool | Displays a student's behavior events for the school year. | 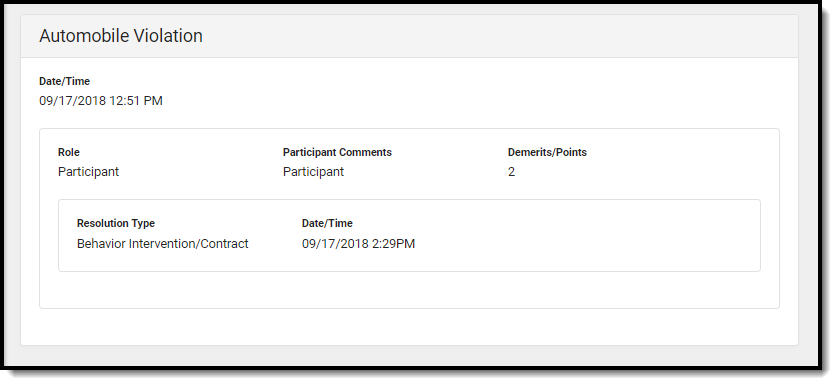 Click to enlarge |
| Behavior Display Text - Student/Parent | Enter text in these two editors to display that text at the top of the Behavior tool in Campus Student and Campus Parent, respectively. | |
| Contact Preferences | ||
| Enable Contact Preferences tool | Displays the parent/guardian's message contact information and gives access to the Change Contact Info tool. | 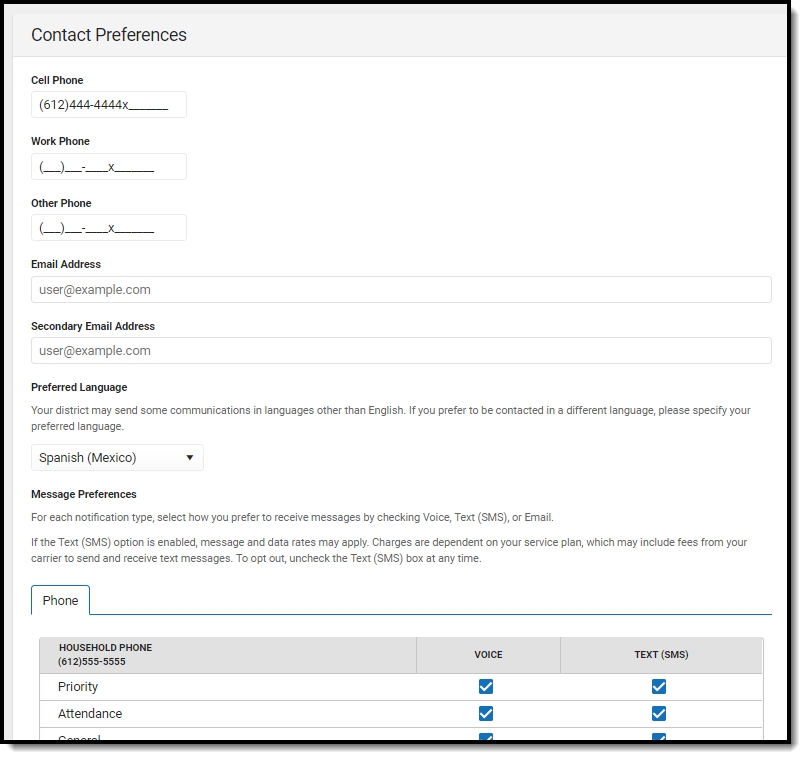 Click to enlarge |
| Allow Update | Students and Parents can update the following contact information from the Contract Preferences tool:
| |
| Course Registration | ||
| Enable Course Registration Tool | Lists the requested courses for the next school year for students. It is recommended that this option be turned on only during registration time.
Both the Academic Planner and Course Registration options can be turned on at the same time, but it is not recommended. It is best to have a window of time when students can add courses to their course plan, and a window of time when students can enter course requests. This eliminates the risk of overwriting course requests or planned courses. In order for students (and parents) to enter course requests, the following must be done:
See the Course Registration article for information on requesting courses. |
|
| Documents | ||
| Enable Documents Tool | Allows users to access report cards, transcripts, custom forms, and other documents.
Note: Report Cards, Transcripts, and configured Schedule reports display in this tool if 'Available in Portal' is selected in the Report Preferences. For report cards, if the Portal - Historical option is marked in the Report Setup, report cards from previous school years will also be available in the Portals. |
Click to enlarge Academic Progress:
Click to enlarge |
| Reports and Plans | The following reports and plans can be enabled:
| |
| Custom Modules | Displays Custom Forms created in corresponding Custom Modules on Portal:
For eSignature Custom Forms to display on the Portal, the following setup must be completed. See each section of the document below for detailed instructions.
|
|
| Food Service | Food service options are only available for districts who are Food Service customers. | |
| Enable Food Service Tool | Displays Food Service Account information. This option only affects Food Service-enabled districts. Marking this option for non-Food Service districts has no effect. |
Click to enlarge |
| Display Food Service Balance on the Today screen | Displays the student's food service balance on the today screen. | |
| Food Service - Barcode | Food service options are only available for districts who are Food Service customers. | |
| Display Food Service PIN Barcode on the Today screen | Displays the student's Food Service PIN as a barcode in Campus Student and Campus Parent. Students and parents can use the barcode to make Food Service purchases.
If the option "Display Barcode of Student Number on Campus Student" is also selected, each barcode displays in its own collapsible area. 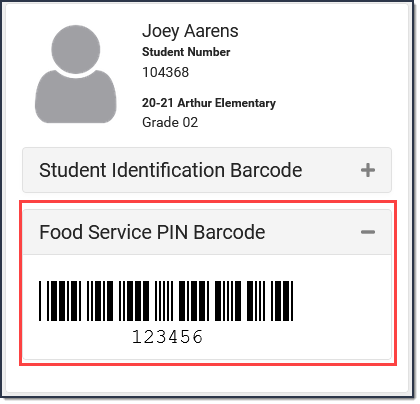 Point of Sale customers who set their student's PINs to be the same as their Student Number do not need this feature if the option "Display Barcode of Student Number on Campus Student" is selected. Point of Sale customers who set their student's PINs to be the same as their Student Number do not need this feature if the option "Display Barcode of Student Number on Campus Student" is selected. |
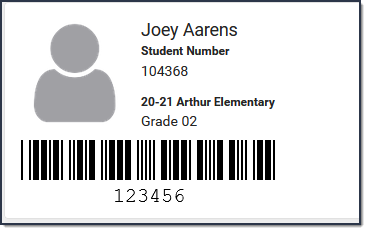 Click to enlarge |
| Grades | ||
| Enable Grades tool | Enables the grades tool, which lists the tasks and standards aligned to the student's courses, as well as in-progress and posted grades (based on the additional options selected). | |
| Display Grade Type | Displays the following types of grades. Selecting these options also enables notifications for grade updates, based on student and parent settings.
| |
| Display Grade Total | Displays the selected Grade Totals:
| |
| Display GPA | Displays the selected grade point average:
| |
| Other |
| |
| Grades Display Text - Student/Parent | Enter text in these two editors to display that text at the top of the Grades tool in Campus Student and Campus Parent, respectively. | |
| Health | ||
| Enable Health Tool | The Health tool lists the student's recorded vaccinations, immunizations and screenings. Separate options display for the following tools:
|
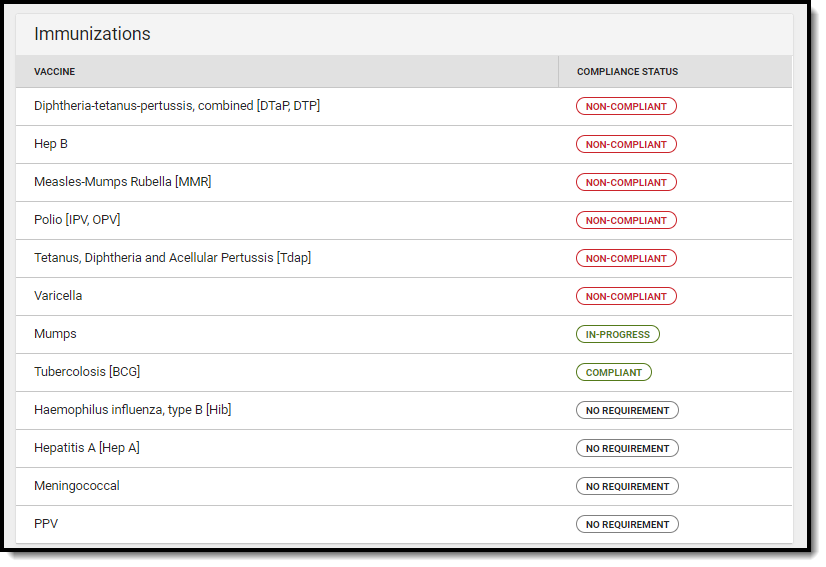 Click to enlarge |
| Learning Tools | ||
| Enable Learning Tools | Displays a list of enabled learning tools, from which students can access learning materials. Learning tools are enabled in the LTI Configuration tool. | |
| Lockers | ||
| Enable Lockers Tool | Displays all Locker assignments for the student. |
Click to enlarge |
| Responsive Schedule | ||
| Enable Responsive Schedule Tool | Displays Responsive Scheduling offerings in Campus Student and Campus Parent.
NOTE: Additional setup for responsive scheduling courses is required. See the the Responsive Scheduling article for more information. |
Click to enlarge |
| Schedule | ||
| Enable Schedule Tool | Displays the student's schedule, both in the Schedule tool, and in the Today and Calendar views.
Schedules display for enabled terms only. Disable future terms to hide schedules until they are finalized. |
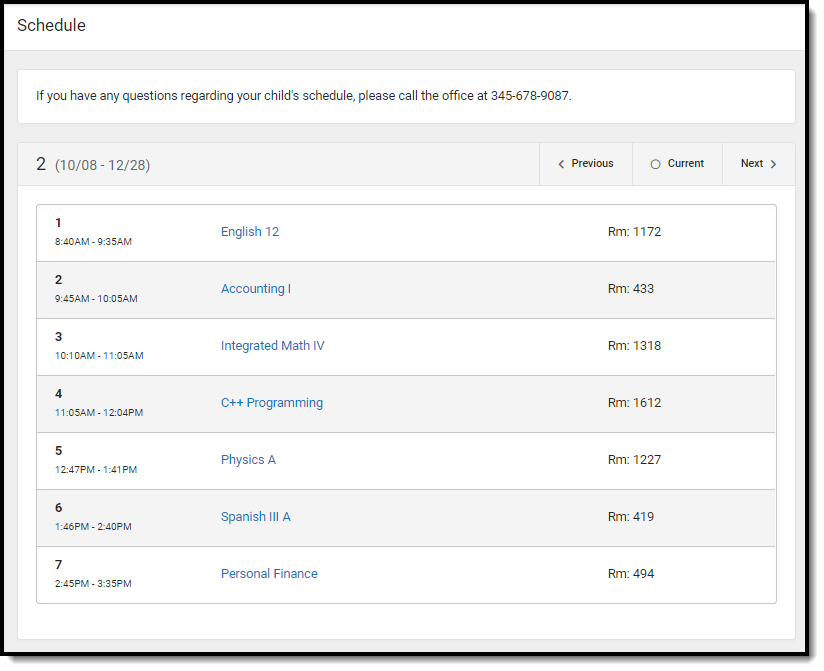 Click to enlarge |
| Display Period Times | Displays Period Times in the student's schedule. | |
| Schedule Display Text - Student/Parent | Enter text in these two editors to display that text at the top of the Schedule tool in Campus Student and Campus Parent, respectively. |
|
| School Choice | ||
| Enable School Choice Tool | Displays data related to school choice and allows parents to accept enrollment when the school has completed processing school choice applications. |
Click to enlarge |
| Section Feed | ||
| Enable Section Feeds | Enables the Section Feed tool for students and parents. |  Click to enlarge Click to enlarge |
| Display Other Students' Comments | Displays comments for other students in a section. (Campus Parent only) | |
| Display Other Students' Names | Displays the names of other students in a section with their comments. (Campus Parent only) | |
| Student Questions | ||
| Enable Student Questions | Allows students to ask questions of their teachers from the Today screen, which is displayed in the Control Center. | |
| Transportation | ||
| Enable Transportation Tool | Displays the bus(es) a student rides to and from school. |
Click to enlarge |
| Transportation Tool Display Text - Student/Parent | Enter text in these two editors to display that text at the top of the Transportation tool in Campus Student and Campus Parent, respectively. | |
| Tuition | ||
| Enable Tuition Tool | Displays the Tuition tool that enables parents to submit school tuition payments. | |
| Tuition Options | Displays a student's tuition balance on the Home Screen. | |
| Other Display Options | ||
| Display Student Picture | Displays the student's current picture for parent and student users. |
|
| Display Student Number | Displays the student's district-assigned student number. |
Click to enlarge |
| Display Student State ID | Displays the student's State ID number on the Home page. | 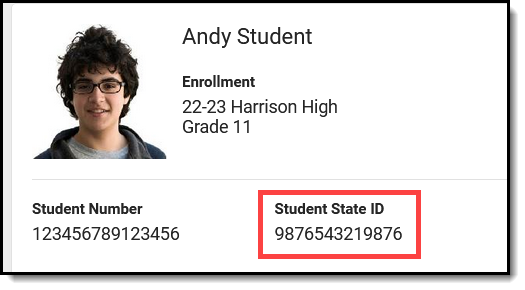 Click to enlarge Click to enlarge |
| Display Counselor Email on the Course screen | Displays the email address for the student's assigned guidance/academic counselor. When marked, students or parents can email the counselor to request schedule changes.
The counselor's email is displayed on the Course detail of the Schedule.
|
Click to enlarge |
| Display Blended Learning Group Name | Displays the blended learning group that is active for the student for that day on the Today screen. | 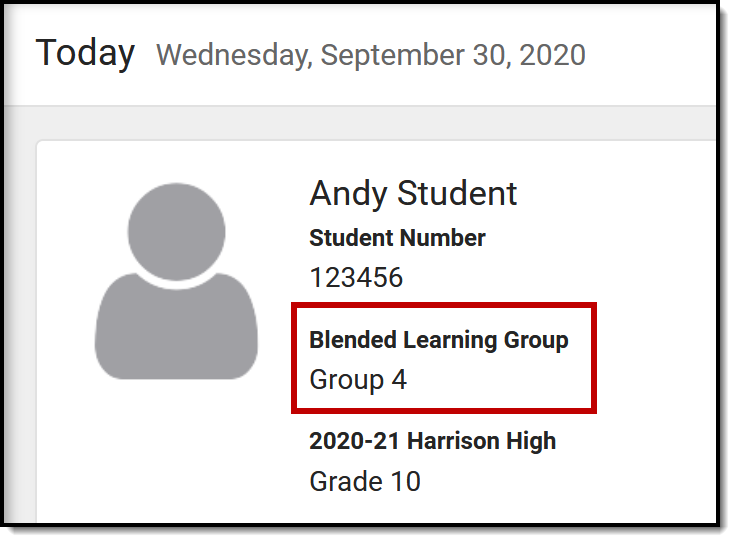 |
Display Barcode of Student Number on Campus Student
|
Displays a barcode of the student number after the student logs in. The barcode can be used for attendance scanning as part of the Campus Workflow Suite. This option is only available for districts who have purchased the Workflow suite.
Point of Sale customers who set their student's PINs to be the same as their Student Number can use this feature. If student PINs are the same as their student number, a terminal with a 2D scanner can read the student's barcode from their mobile device and process the transaction. This feature eliminates the need to distribute a paper barcode and allows contactless payment. |
Click to enlarge |
Previous Version
The Portal Display Options tool allows schools to create Display Options Templates that are used to determine which features and tools appear in Campus Student and Parent Portals. In this video you will learn to create and use Display Options to determine which tools are available to parents and students.
Batch Edit Display Options
From Display Options, users can make mass updates to Display Options templates and calendar and term settings using Batch Edit options.
Location: Display Options > click Batch Edit
The Batch Edits options in the Display Options tool enable making mass updates to Display Options templates, and calendar and term settings. There are three types of batch tools available:
| Copy Template | Edit Templates | Edit Calendar and Term Settings |
| Click the Copy Template option to copy the source template's display options, either to a new template at the destination school, or by overwriting the options in existing template(s). | Click the Edit Templates option to make edits to the Display Options for multiple templates en masse. | Click the Edit Calendar and Term Settings option to update those settings for multiple schools en masse, which include the template assigned, whether access to a calendar has been enabled or extended, and when terms are enabled. |
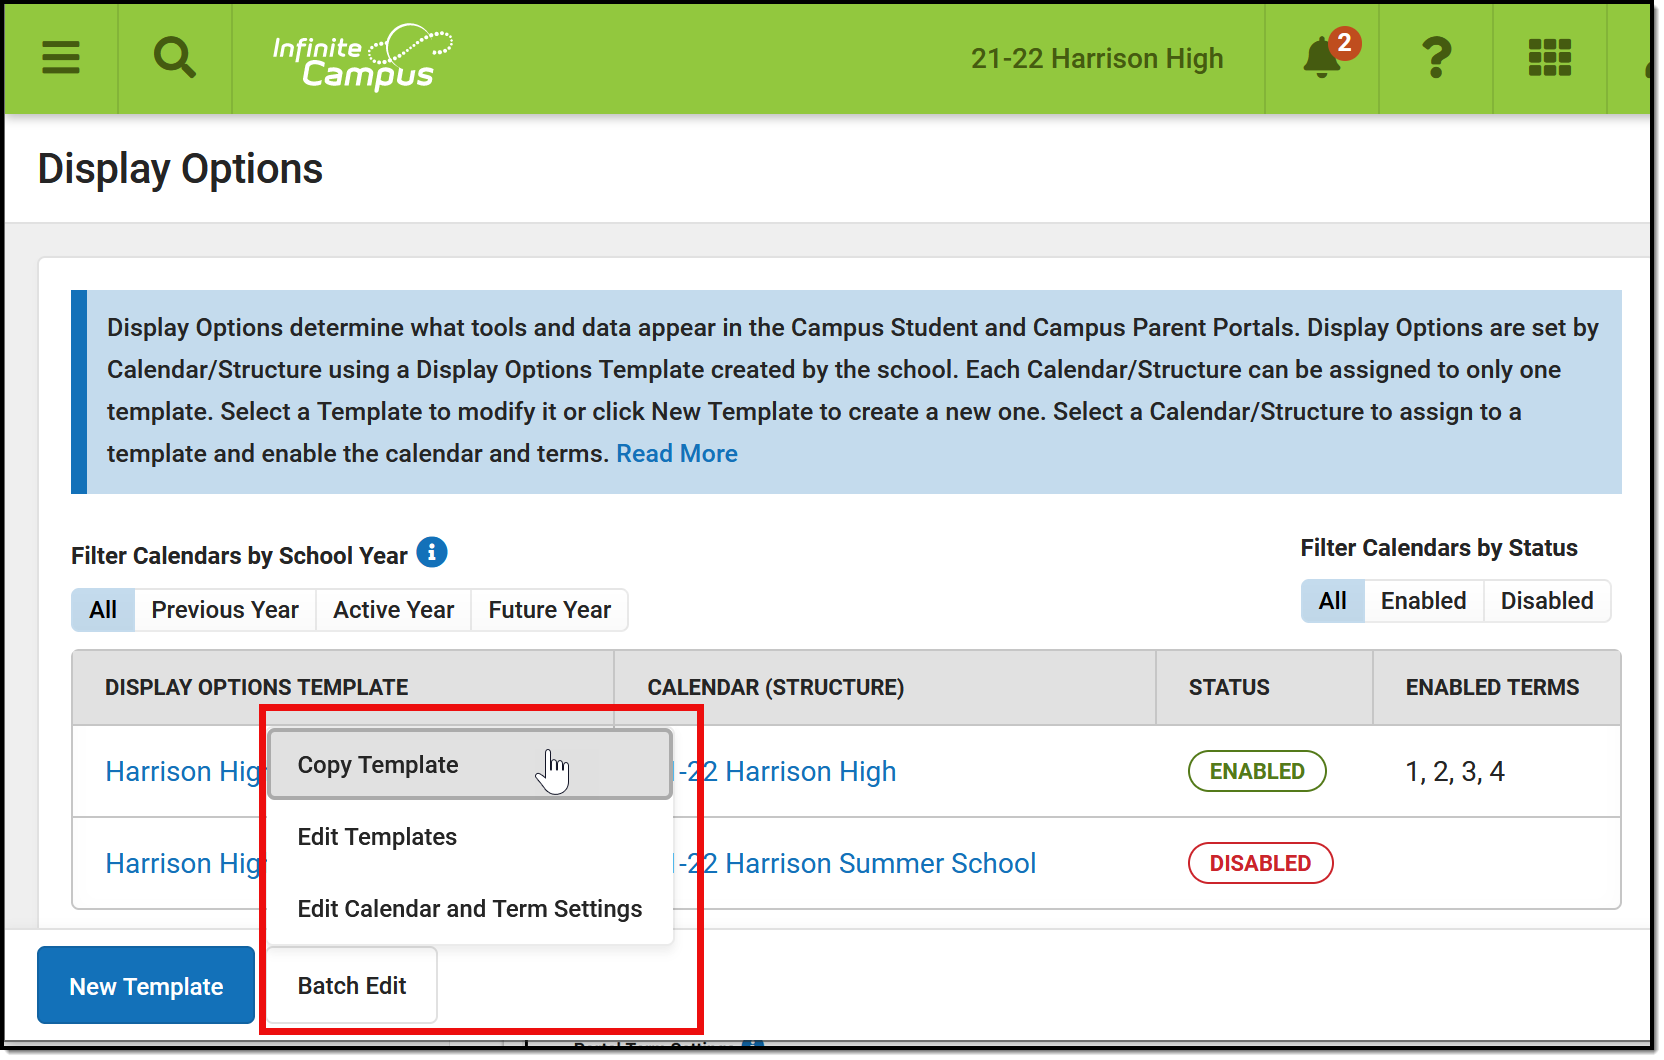 Select a Batch Edit option to copy a template or update templates or settings en masse.
Questions? Check out the Portal Preferences FAQ article.
Copy Template
Use the Copy Template option to copy a template in the source school to the destination school(s). The copied template can be added to the destination school(s) either as a new template, or replacing an existing template.
In the example portrayed below, I'm copying a template I've made in one elementary school to all elementary schools in the district, to save time setting up each school's template.
| Click to enlarge | ||
Step 1 | First, select the Source School and Source Template that will be copied. Click View to see the display options and settings of the selected template. | 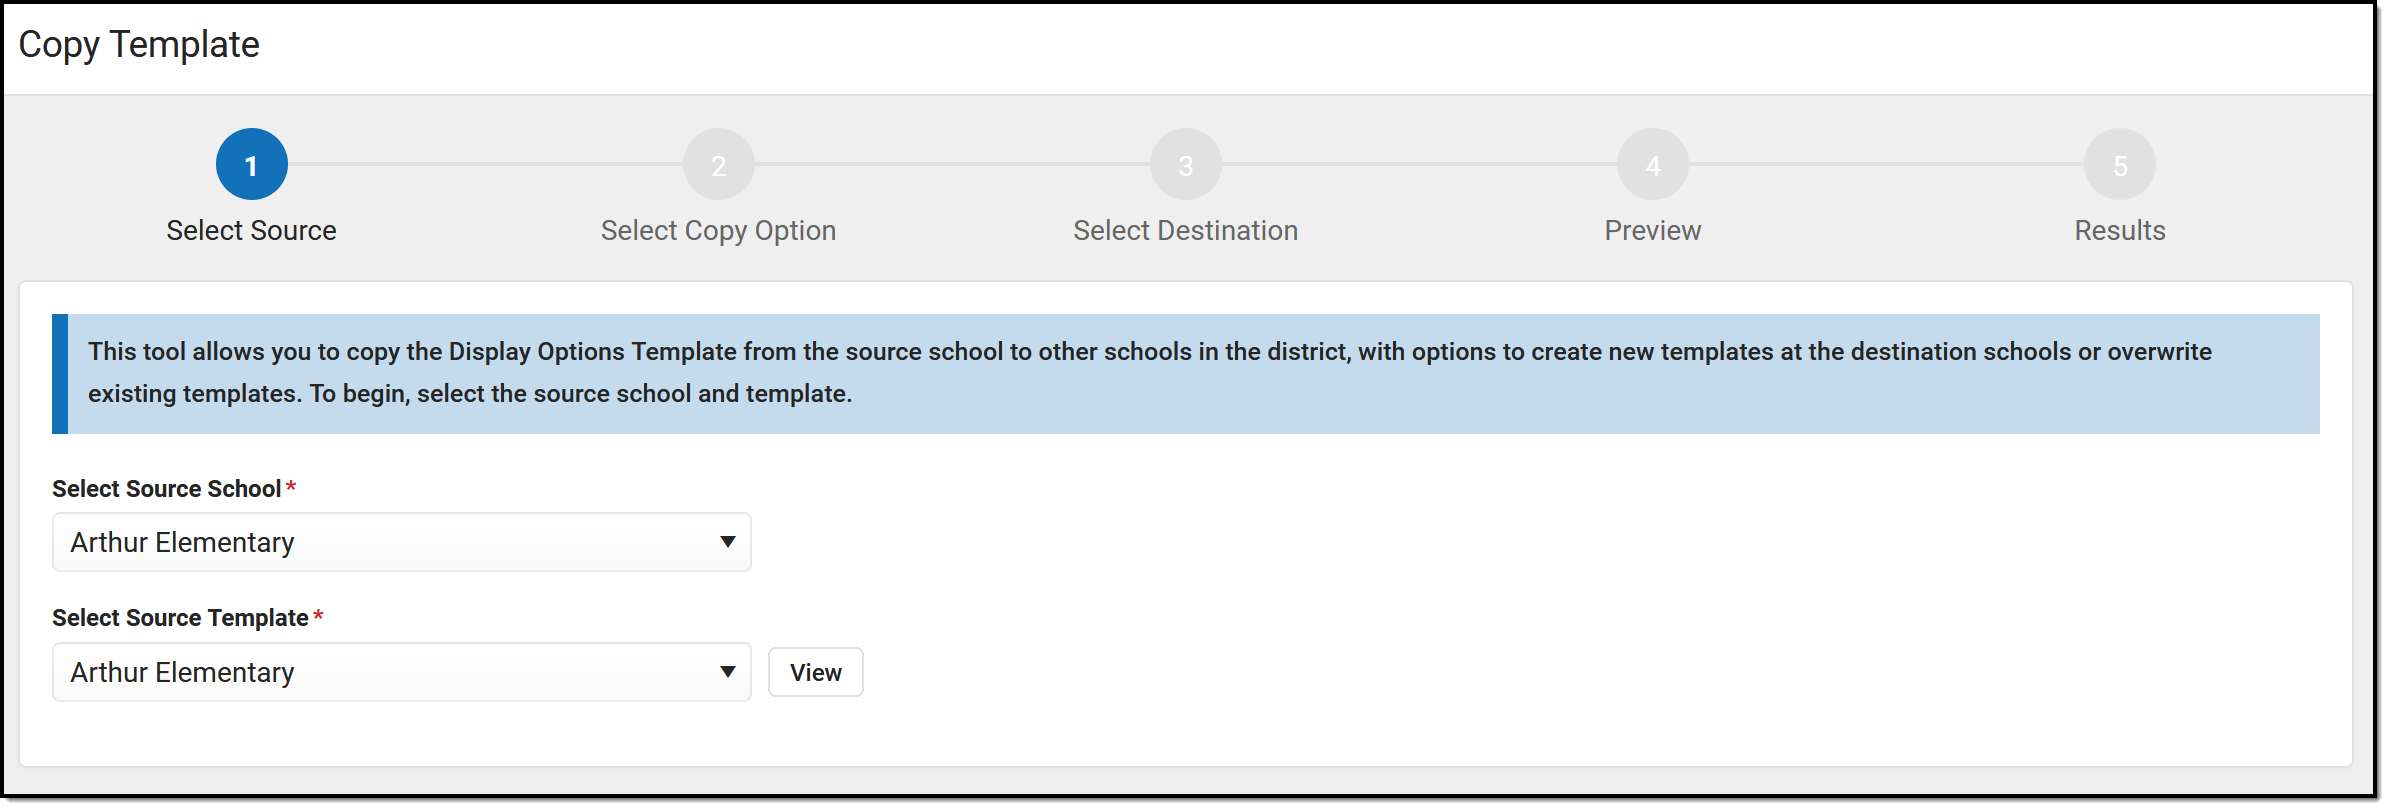 |
Step 2 | Next, indicate if the copied template should be added as a New template in the destination school(s) or if it should Update an existing template. Note: Updating an existing template overwrites the current options selected, except the name and description. | 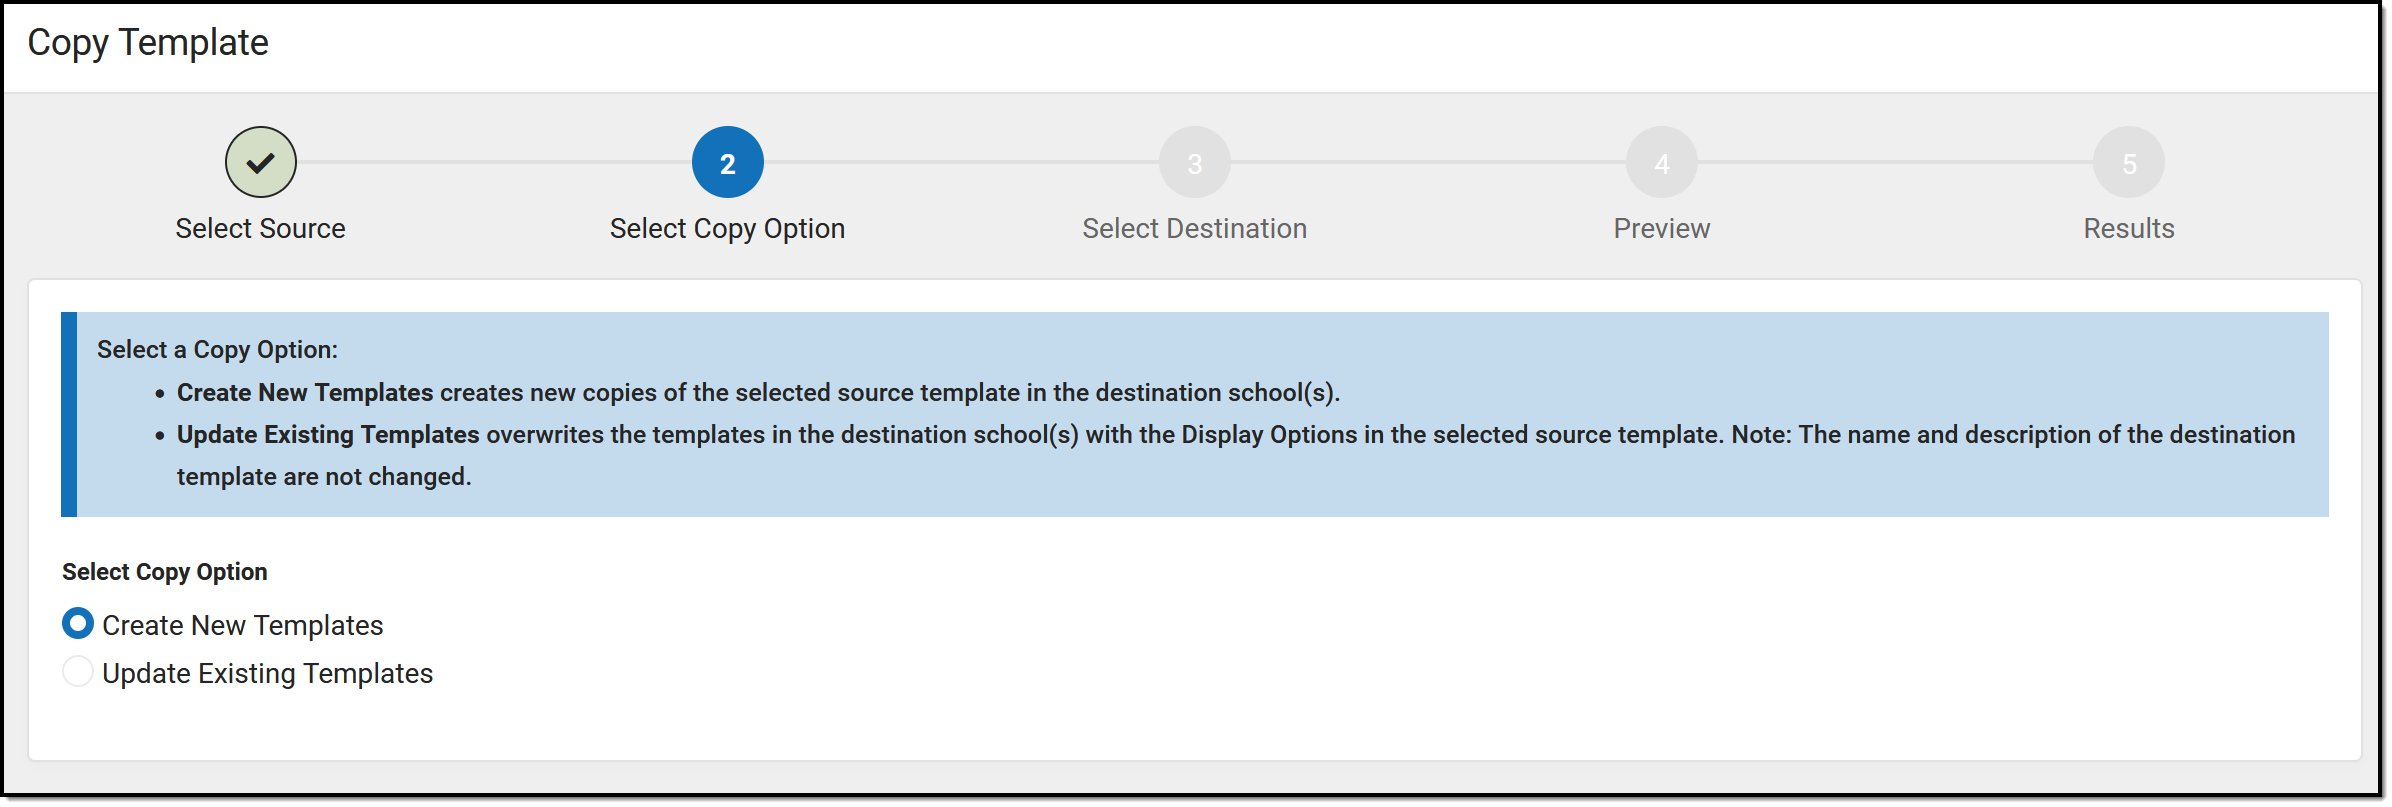 |
Step 3 | In the third screen, select the Destination school(s) that will receive the copied template. Filter the list of schools using the text field at the top, if desired. Enter a Name for each template, and a Description if desired. Or, use the fill options for Name and/or Description. The Fill dropdown includes options to append or prepend the template with the school name. In this example, I am copying the calendar from Arthur Elementary to all my other elementary schools, so I filter the list by only elementary schools, select all of them using the checkbox in the header, and then unmark Arthur, since that school is the source of the template I'm copying. I then filled the Template Name fields with the name Summer School and prepend with each school's name. | 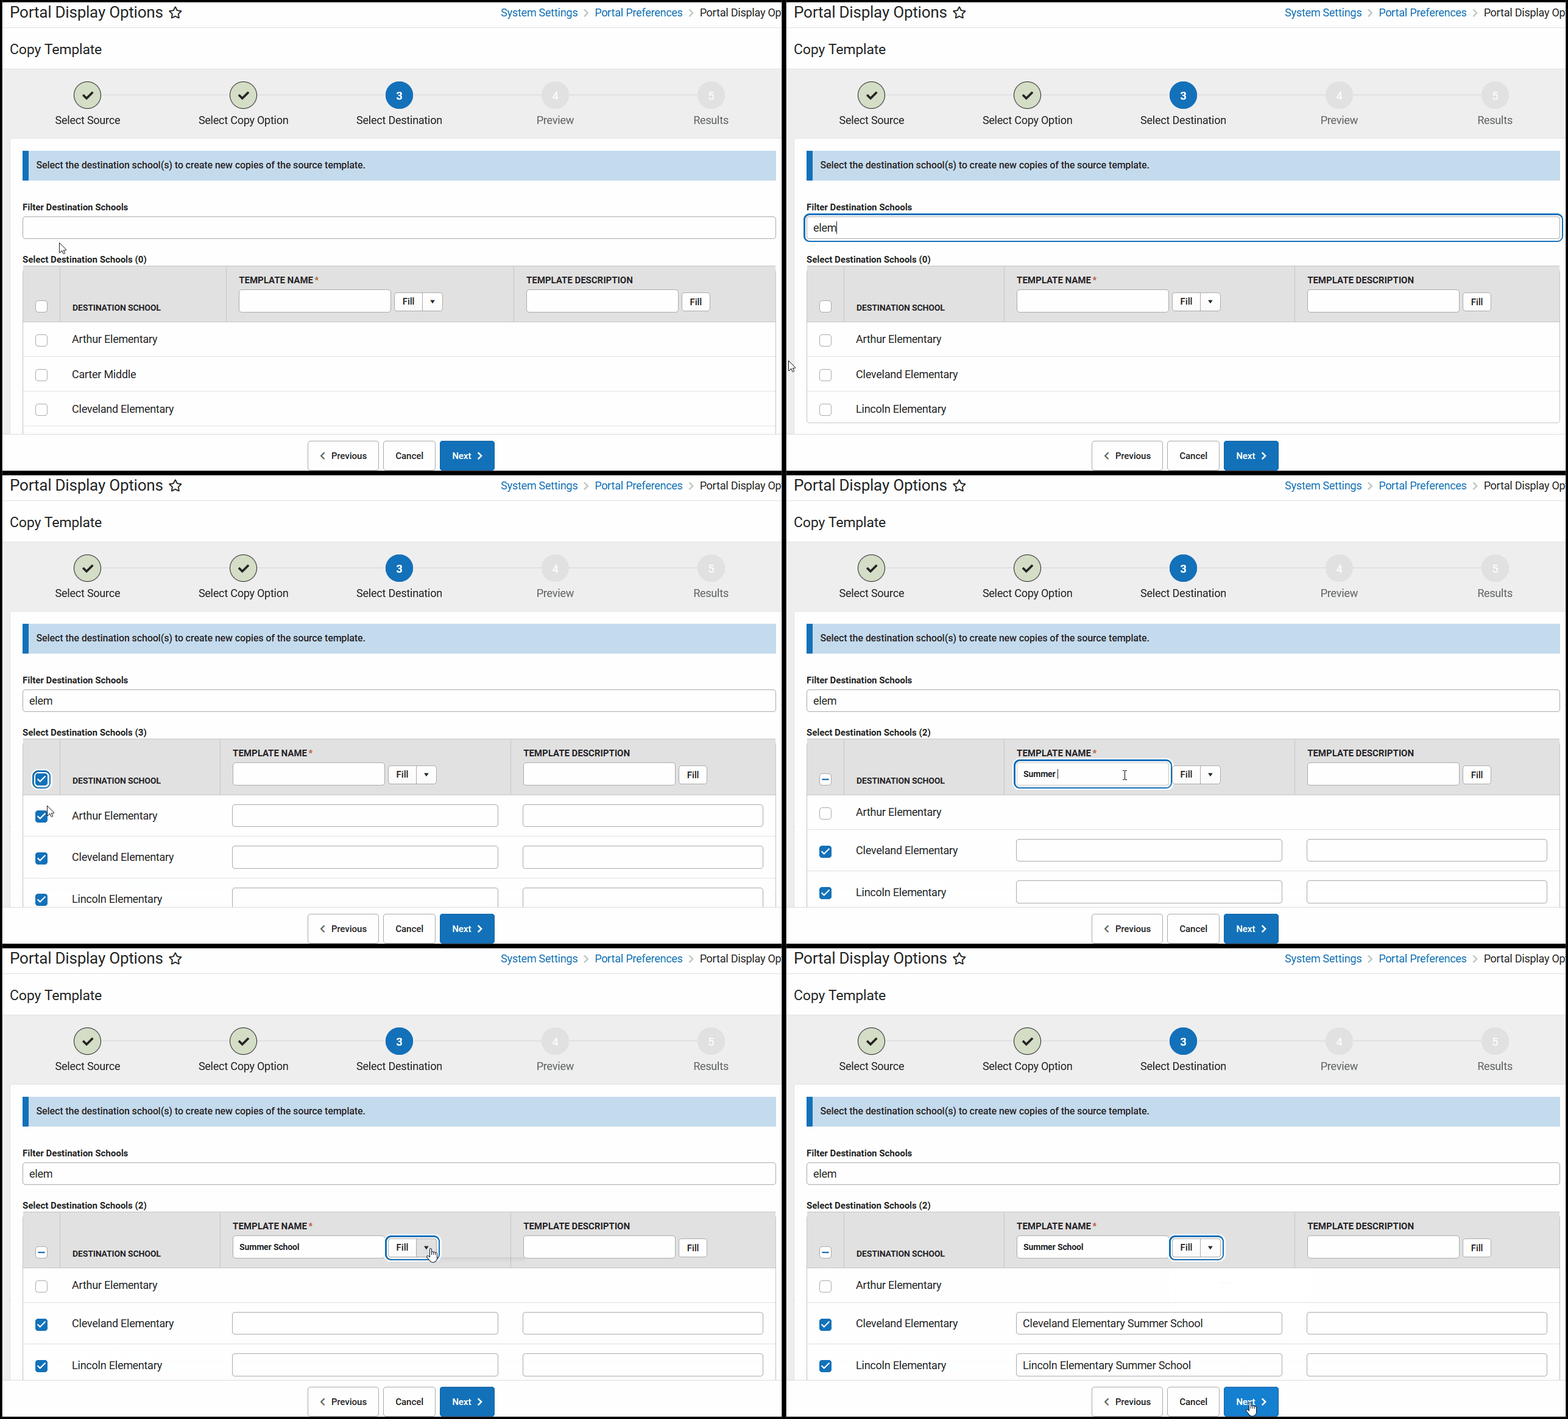 |
Step 4 | Prior to copying the templates, review your changes. Click Create if creating new templates, or Update if updating existing ones. Remember, updating a template overwrites it's options with those selected in the source template. | 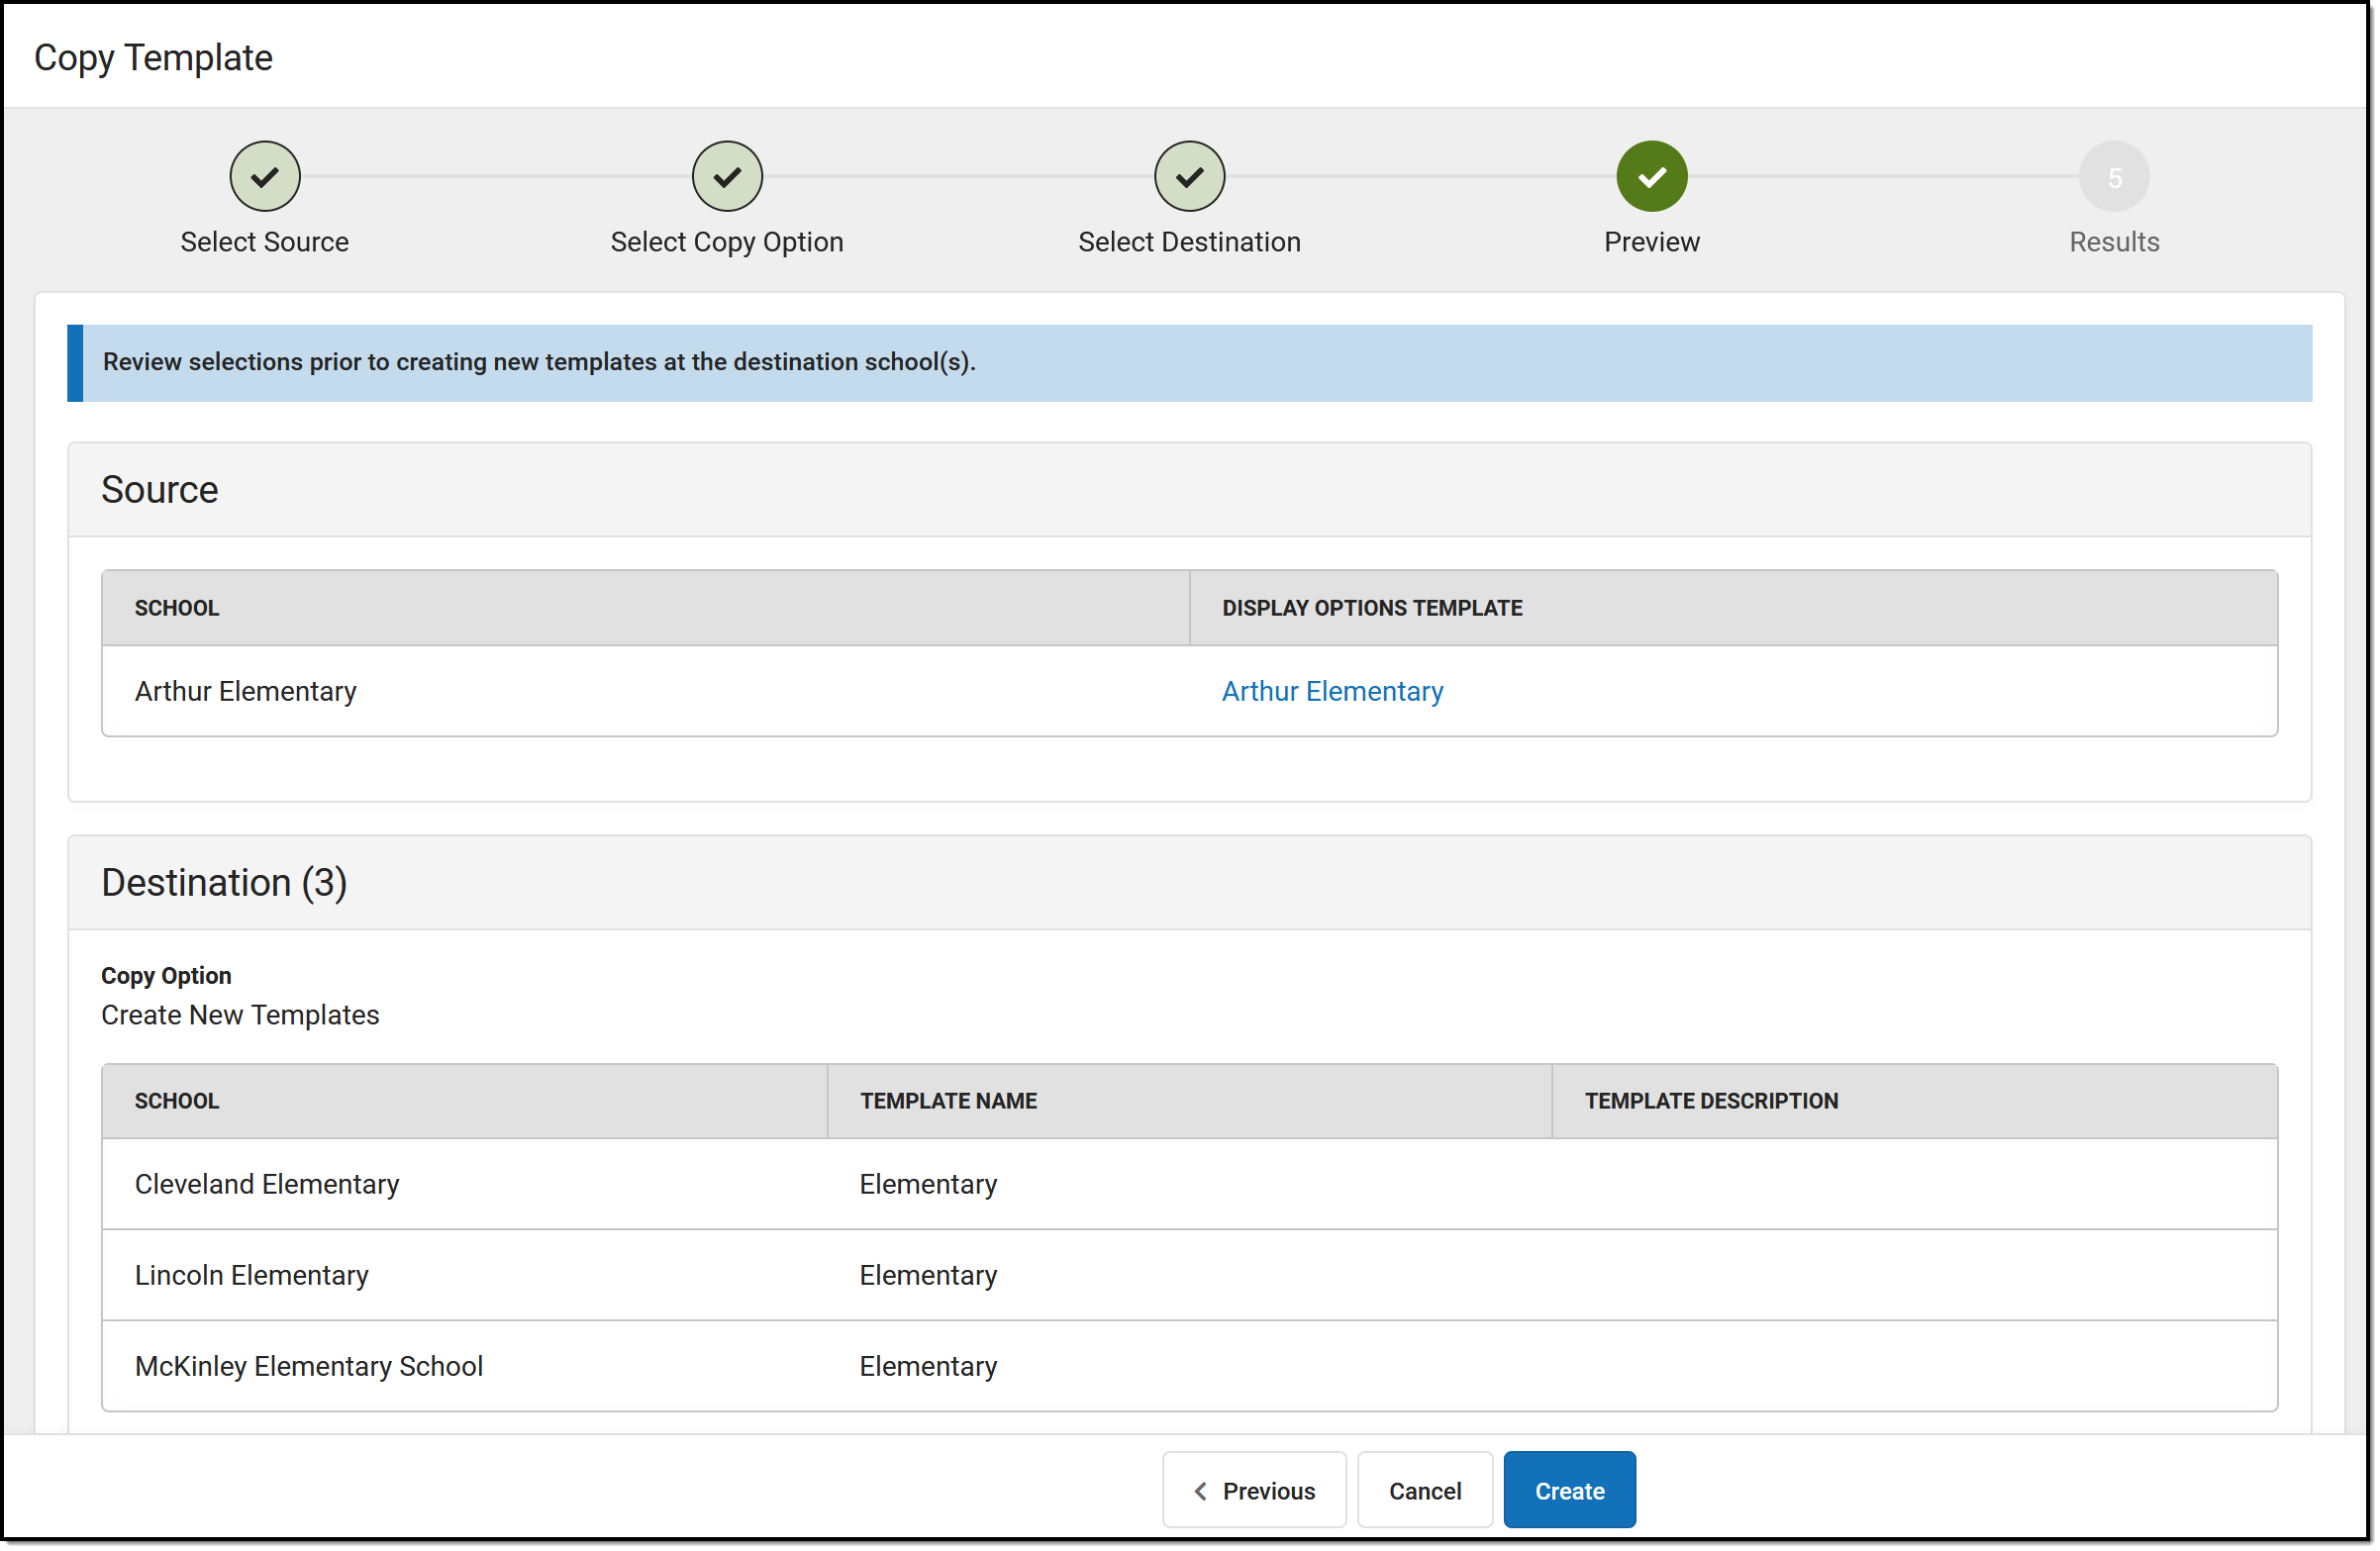 |
Step 5 | Once templates have been created or updated, the results screen displays, summarizing the templates created or updated. Click Repeat to return to the beginning of the Edit process. | 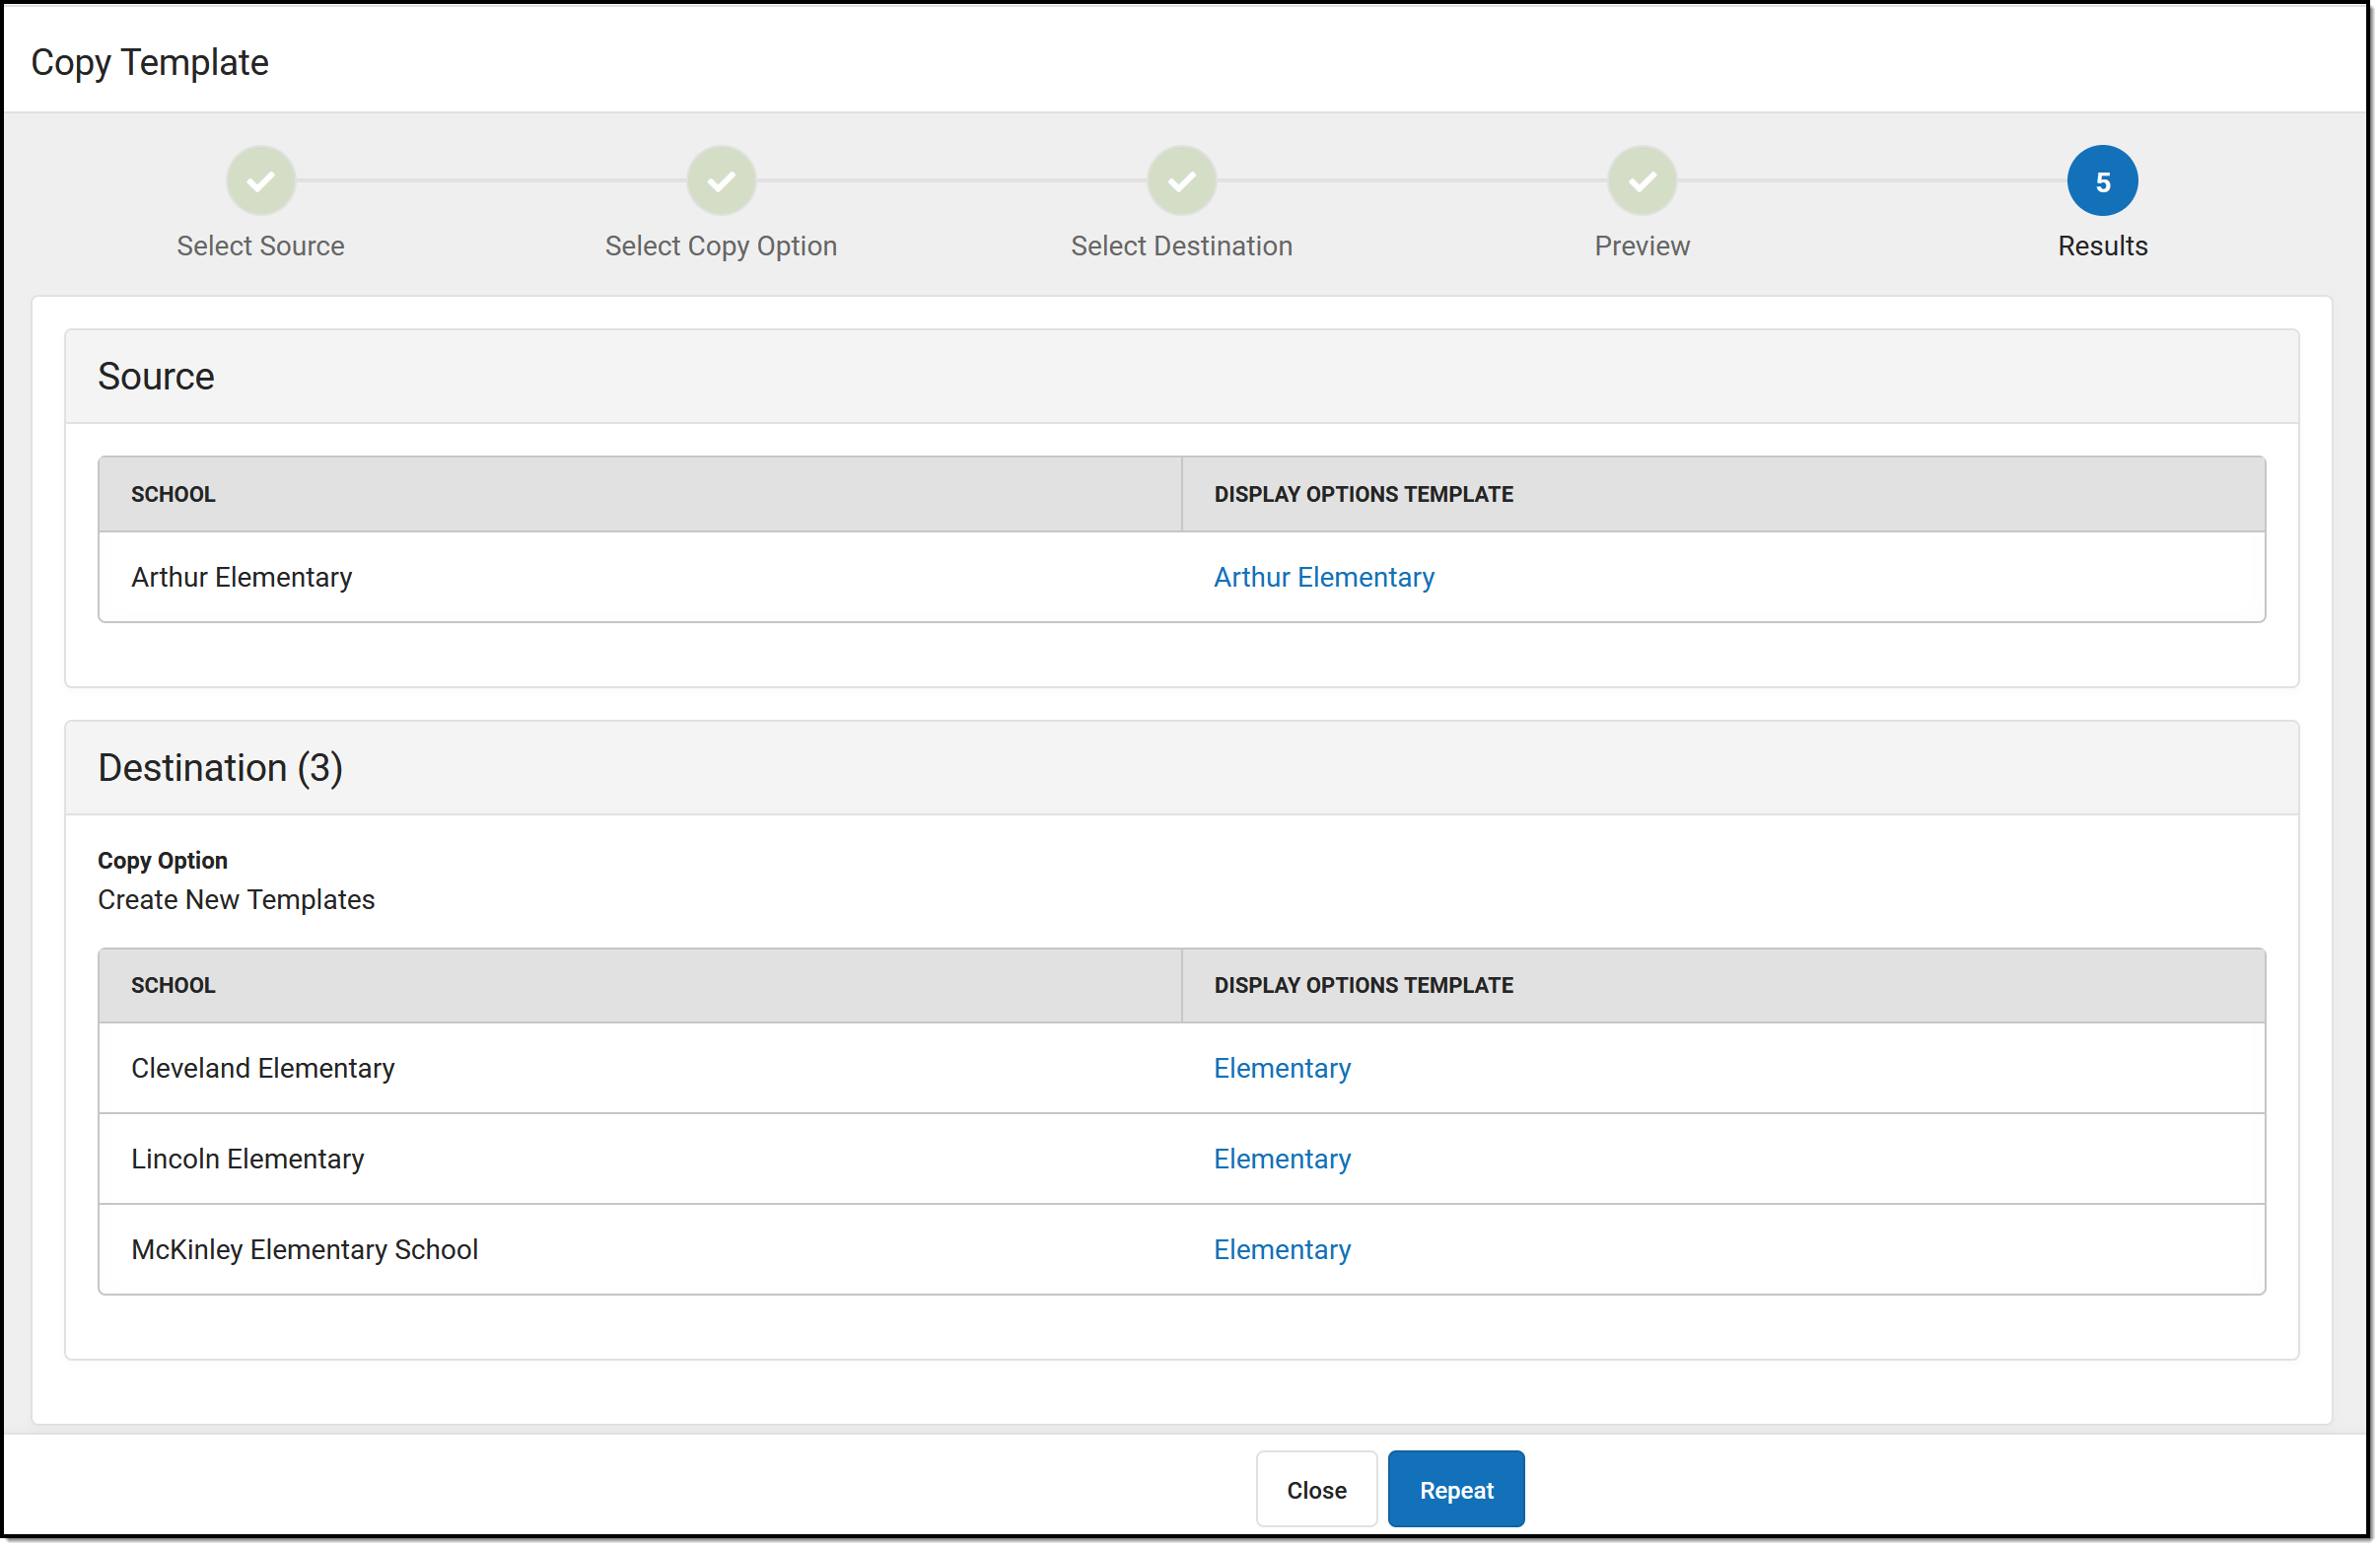 |
Edit Templates
Use the Edit Templates option to update the Display Options selected for multiple templates at once.
In the example portrayed below, I'm enabling Posted Grades and Term GPA for high schools in my district, now that the Grading Window has been closed at the end of the term.
| Click to enlarge | ||
Step 1 | In the first step, select which templates to update, which are grouped by school. Filter templates by school name or template name using the search bars at the top. Click Next to continue. | 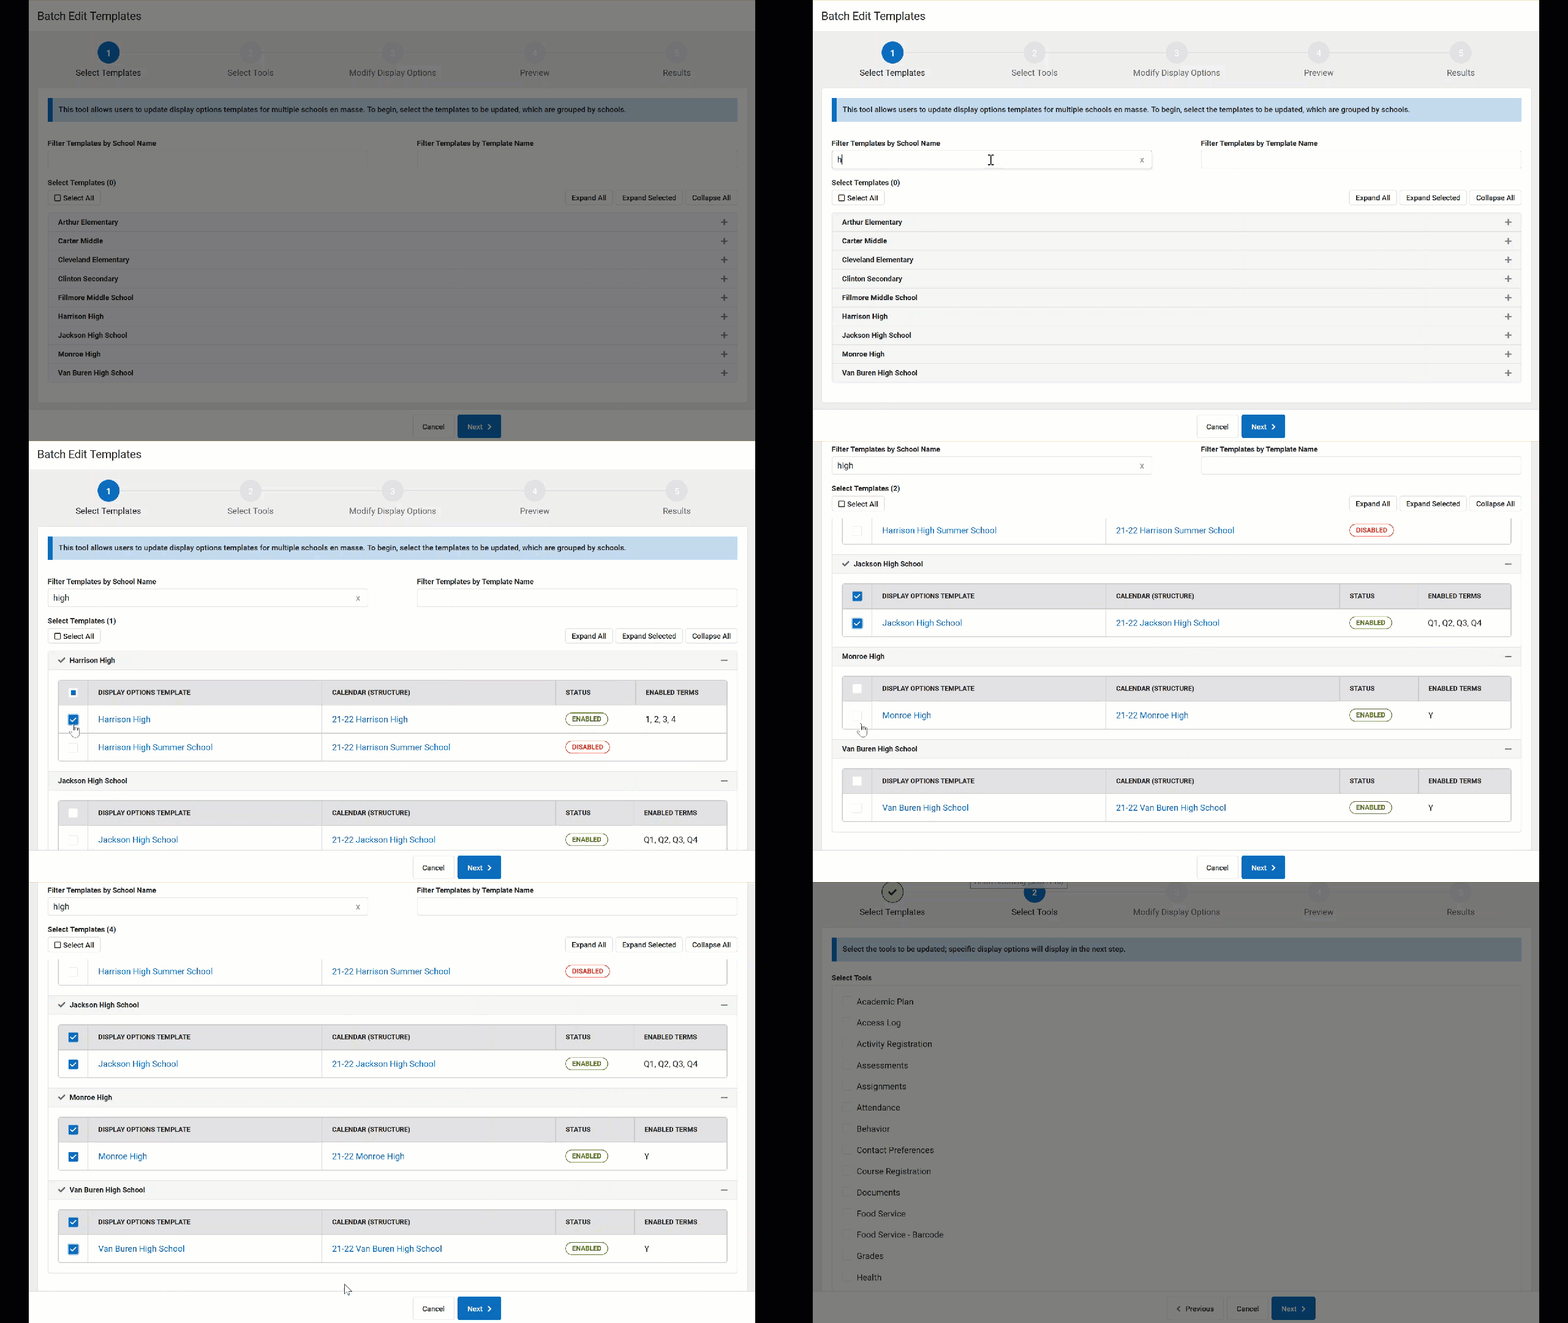 |
Step 2 | Next, select which tools should be updated. Specific display options for the selected tools display in the next step. | 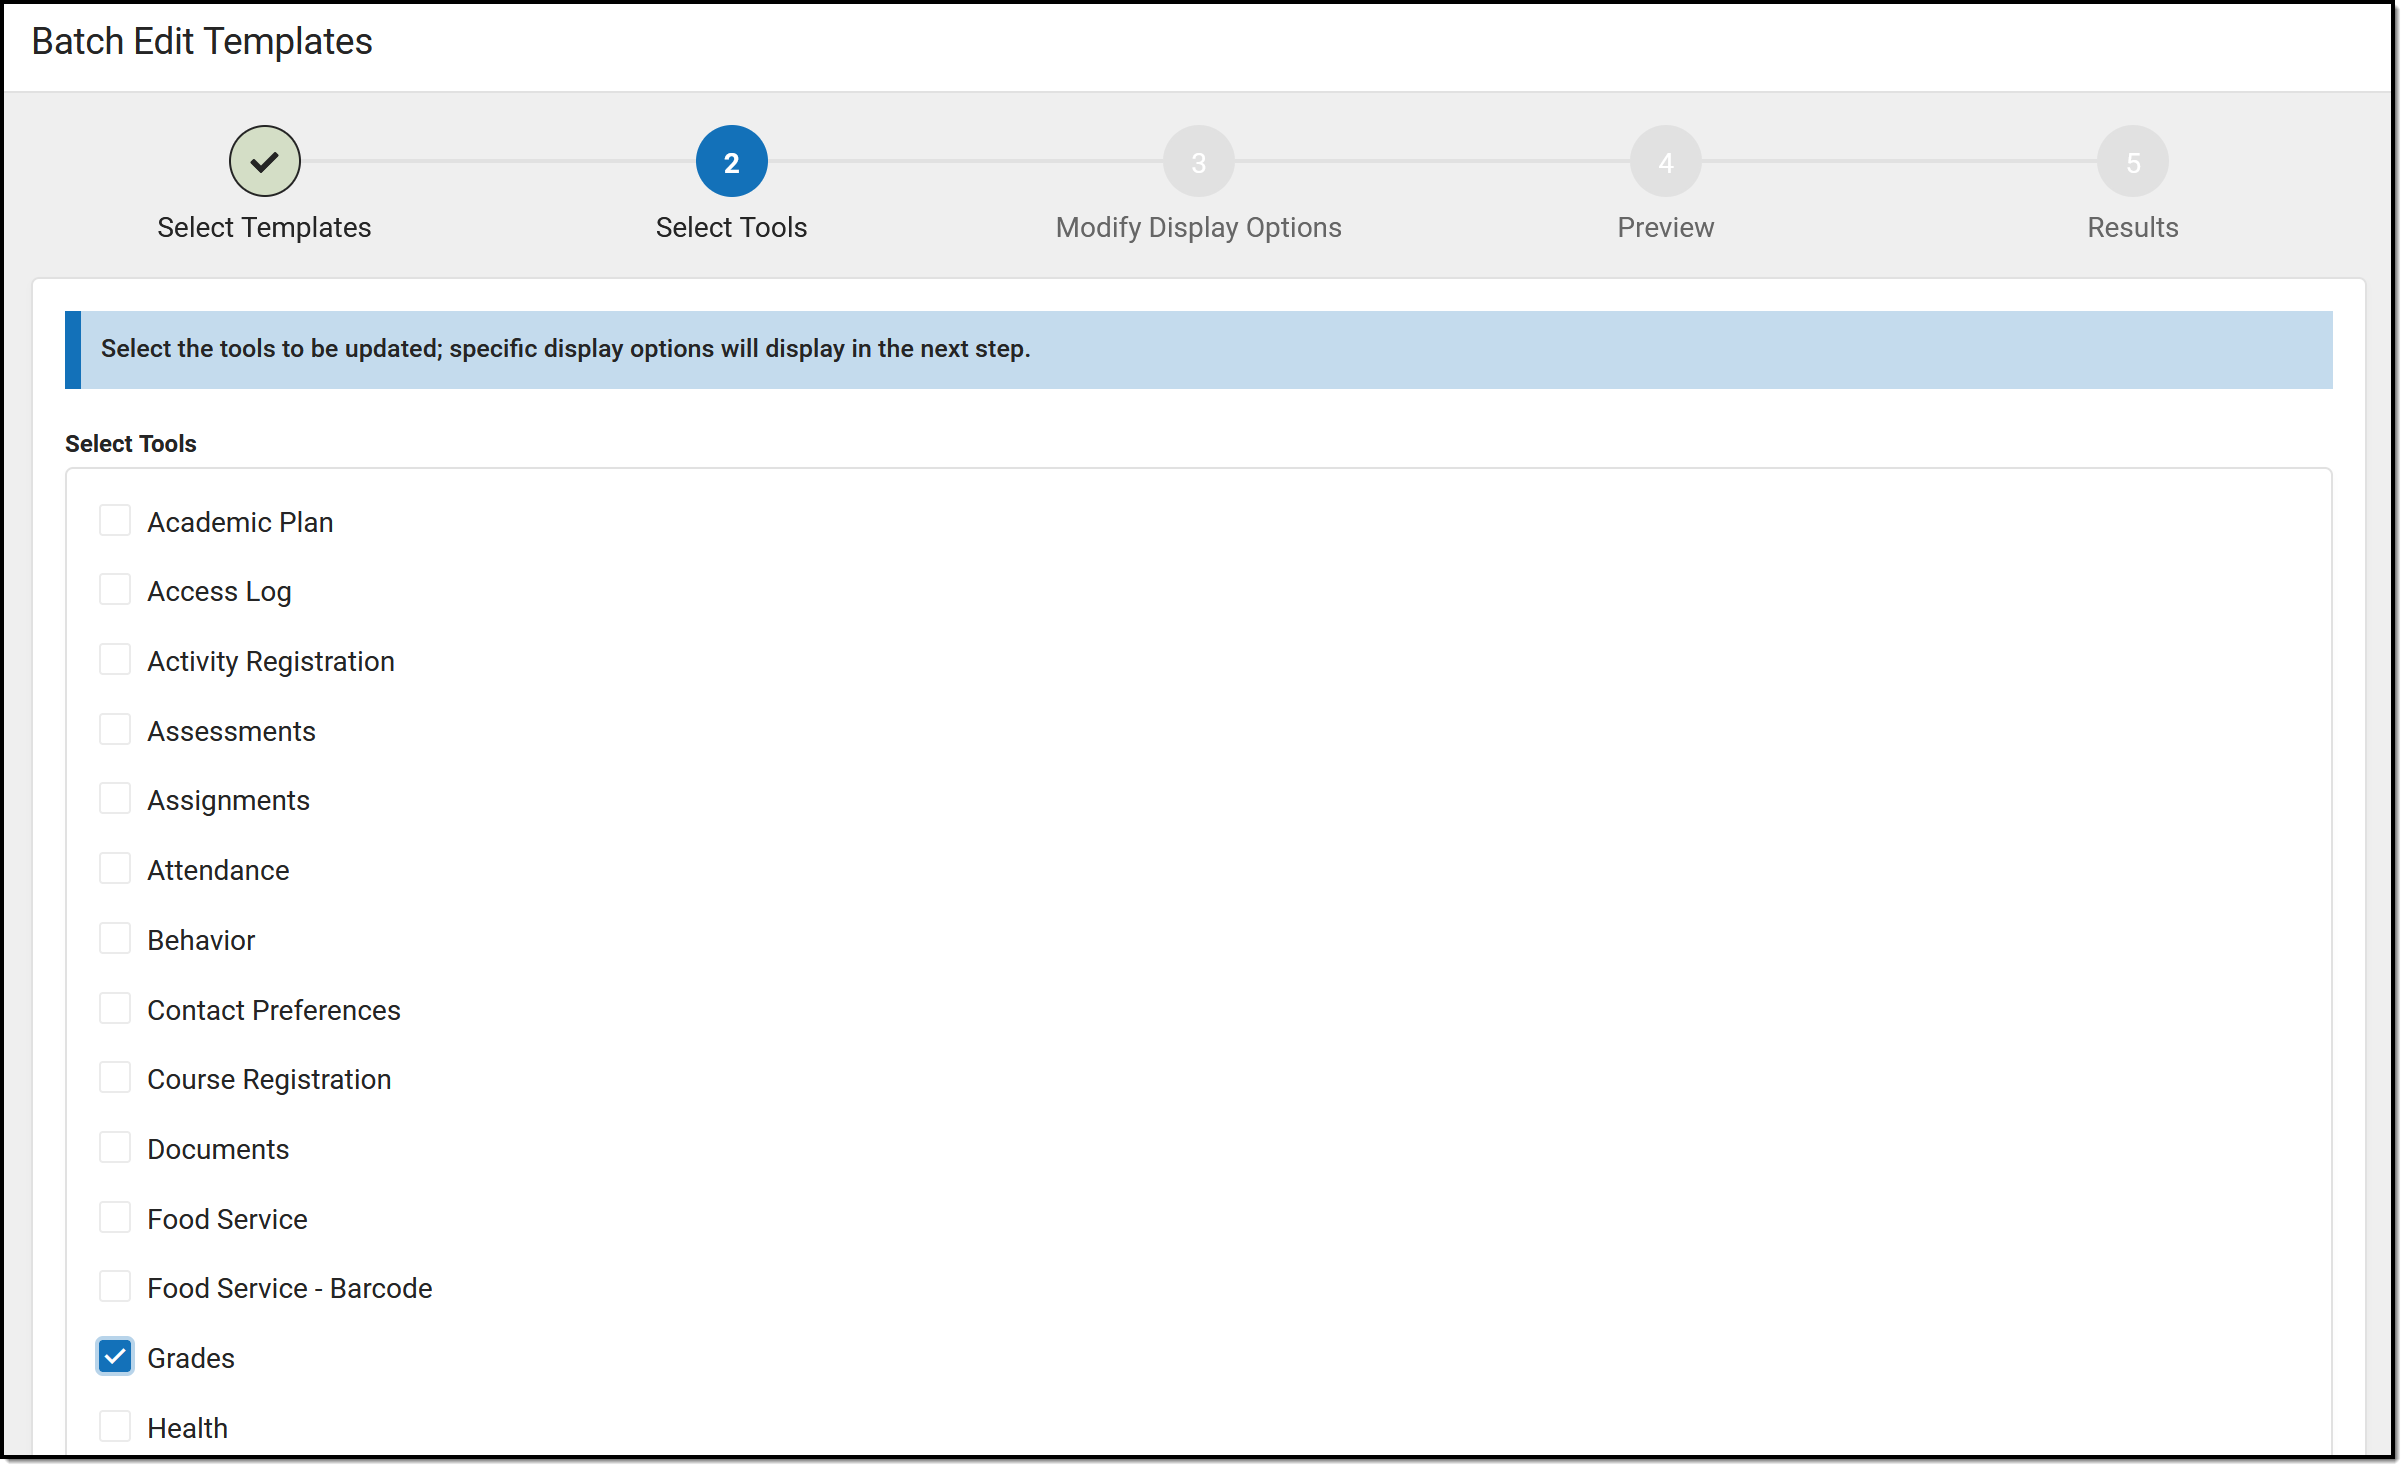 |
Step 3 | In step 3, update specific display options using the Student and Parent dropdown lists for each option. Tip: When disabling a tool, only the main tool needs to be set to Disabled, the sub-options can remain unchanged. Their status will be remembered the next time the tool is enabled. In this example, the Grades tool is already enabled, so I leave the tool setting unchanged and update the Posted Grades and Term GPA options to be Enabled. | 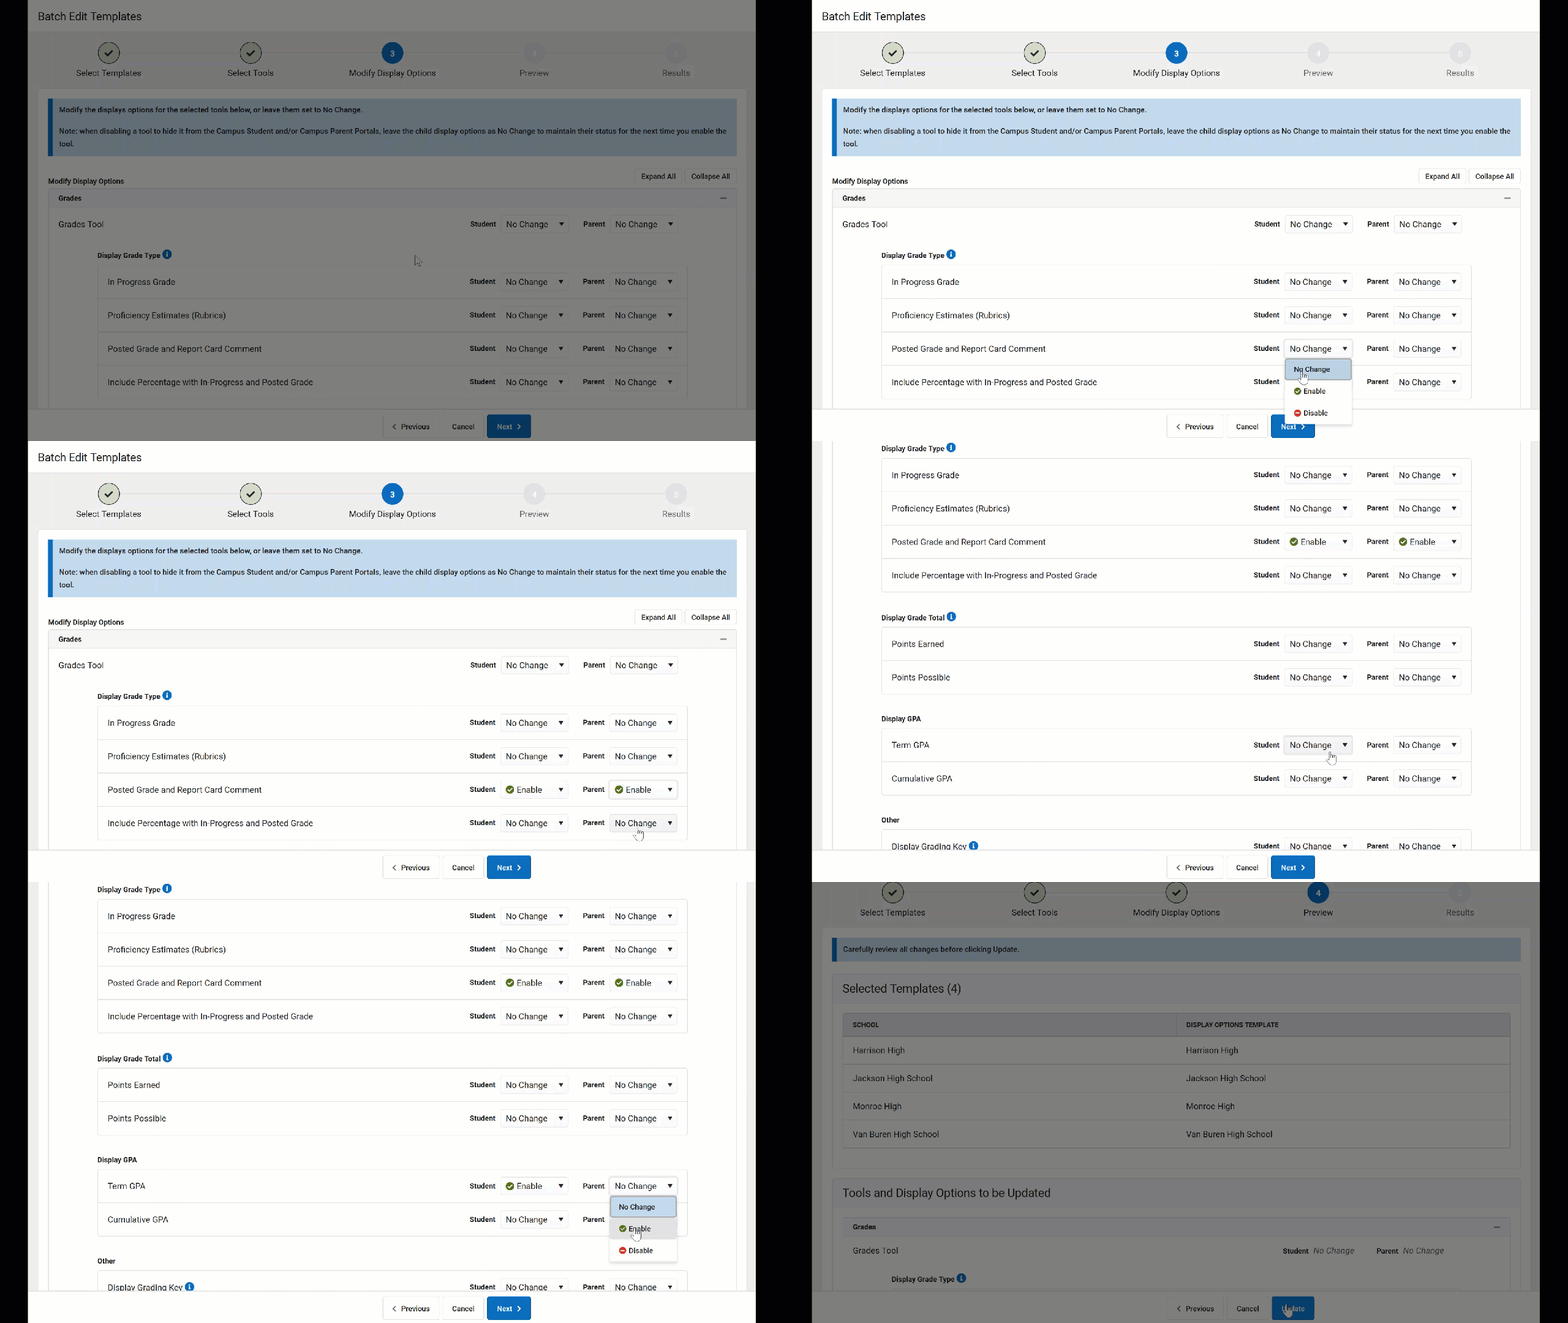 |
Step 4 | Before updating templates, carefully review your changes in step 4. The templates that will be updated are listed at the top, followed by the individual changes. | 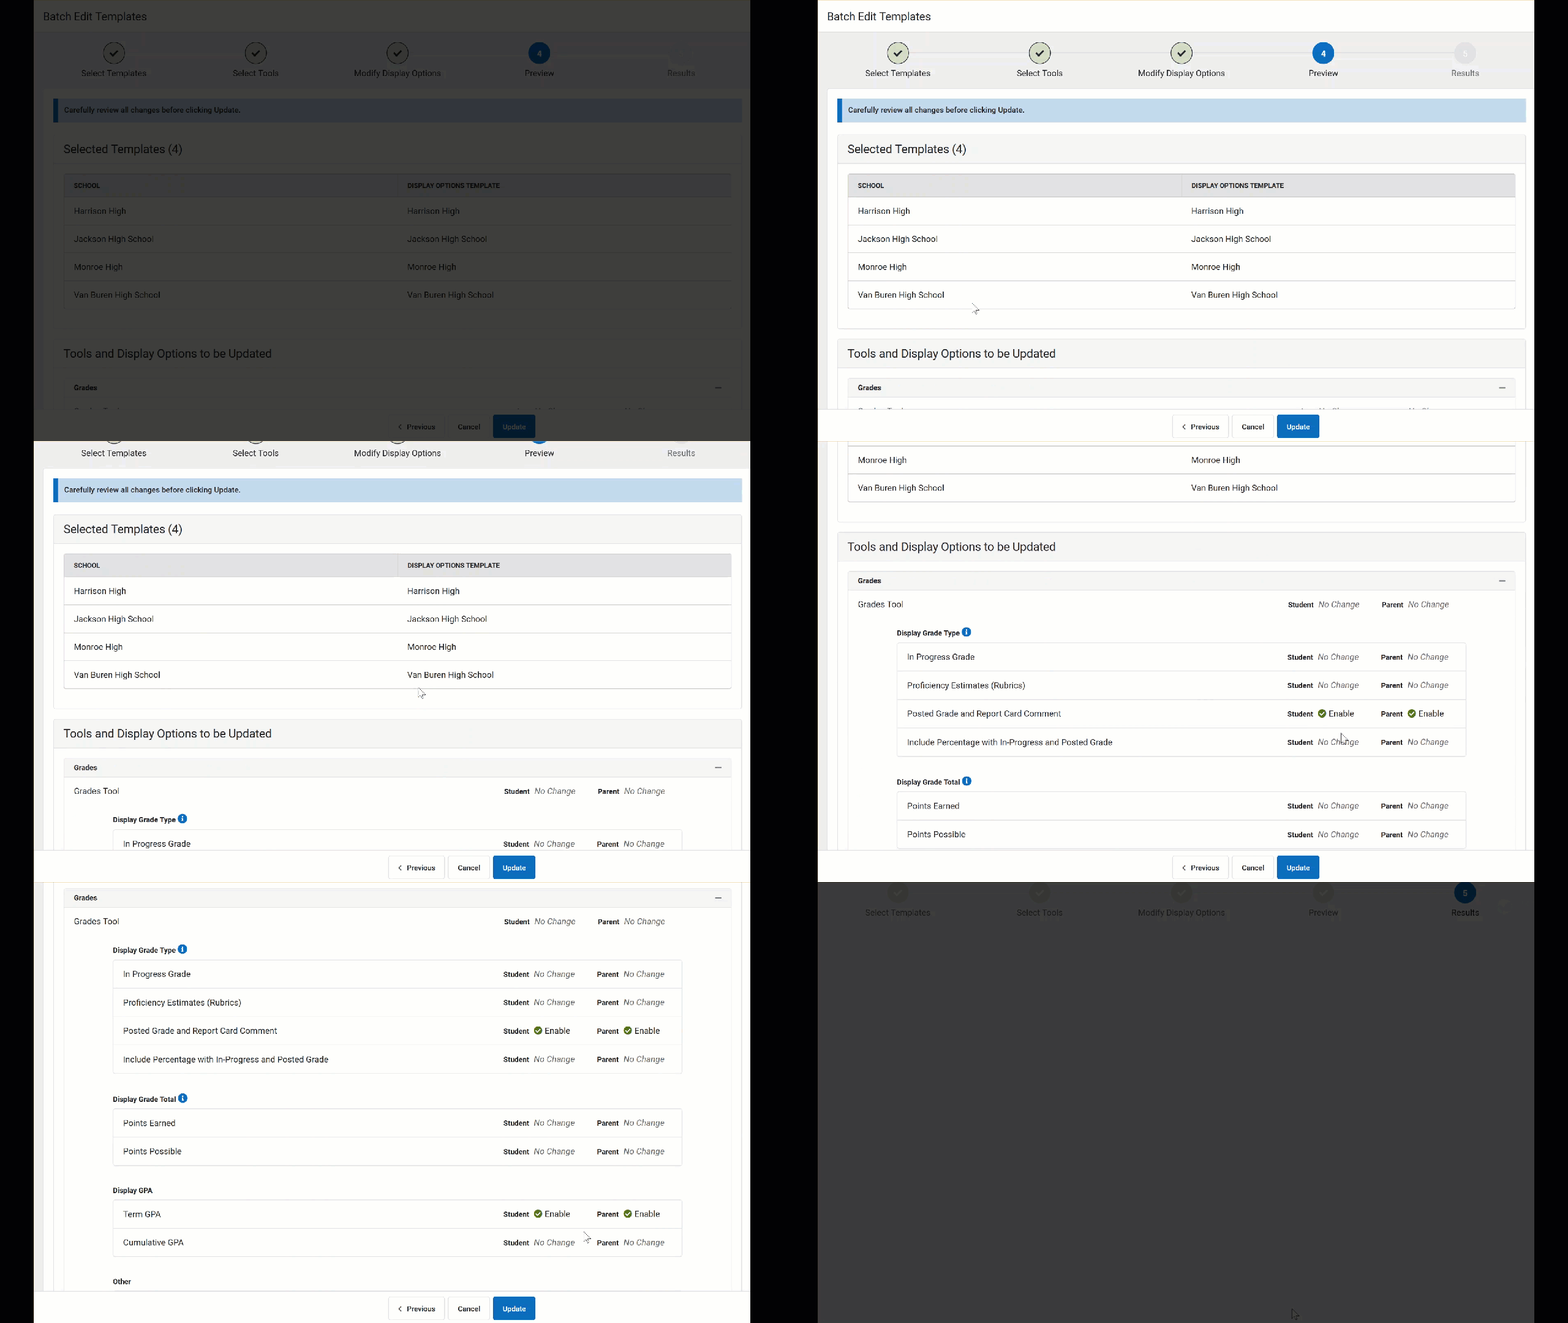 |
Step 5 | Once the update is complete, a results screen displays which summarizes all of the changes. Click Repeat to return to the beginning of the Edit process. | 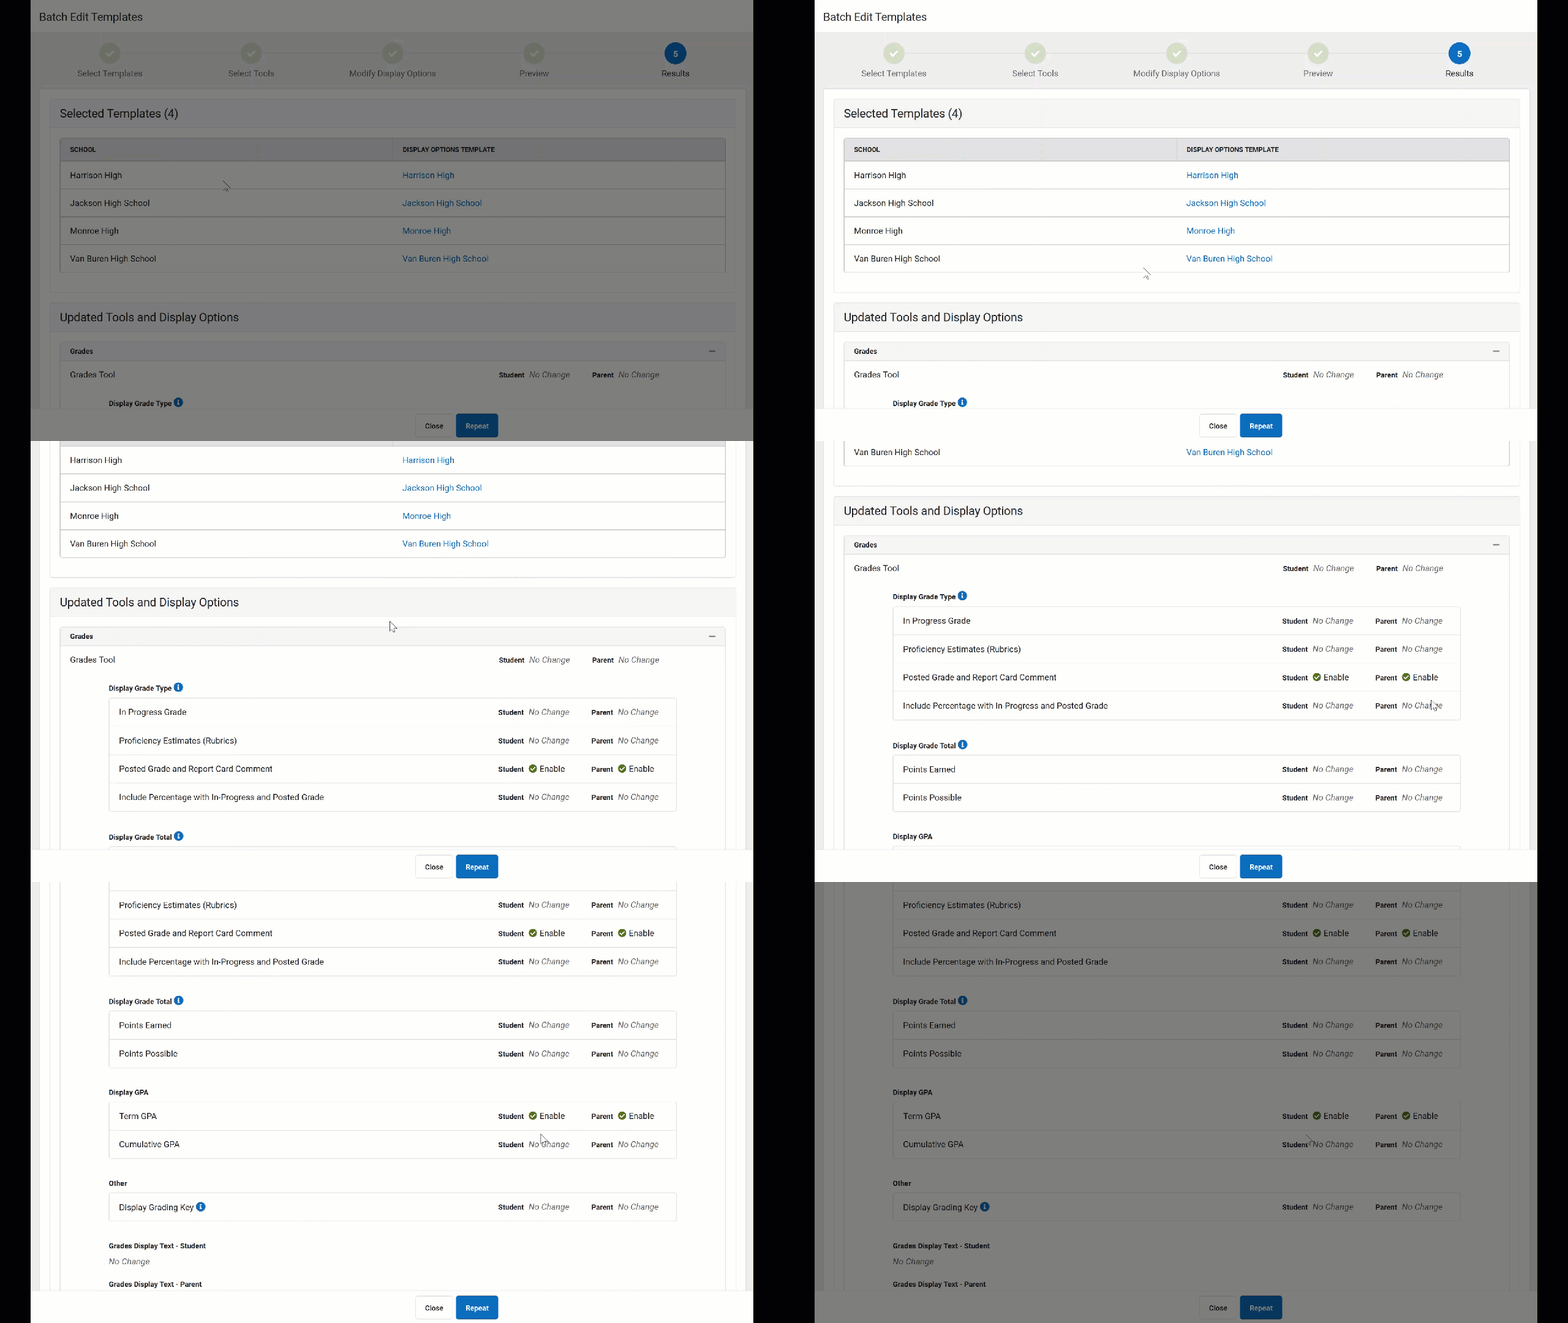 |
Edit Calendar and Term Settings
Use the Edit Calendar and Term Settings option to modify the calendar and term settings in the Display Options tool for multiple schools en masse. This could include:
- Modifying the Template selected for a calendar.
- Enabling a calendar or extending access to a calendar's data
- Modify when terms are enabled.
In the example portrayed below, I'm extending access to data in the regular school year calendar beyond the end date of those calendars for high schools in my district. This action allows data from the previous school year to remain available in Campus Student and Campus Parent into the summer school calendar of the new school year.
| Click to enlarge | ||
Step 1 | On the first screen, select which calendar to update. Calendars are grouped by school; filter the list of calendar by school name or by the calendar's template using the filter fields at the top. Calendars can also be filtered by whether the school year is the active, previous, or future year or by whether the calendar is currently enabled. | 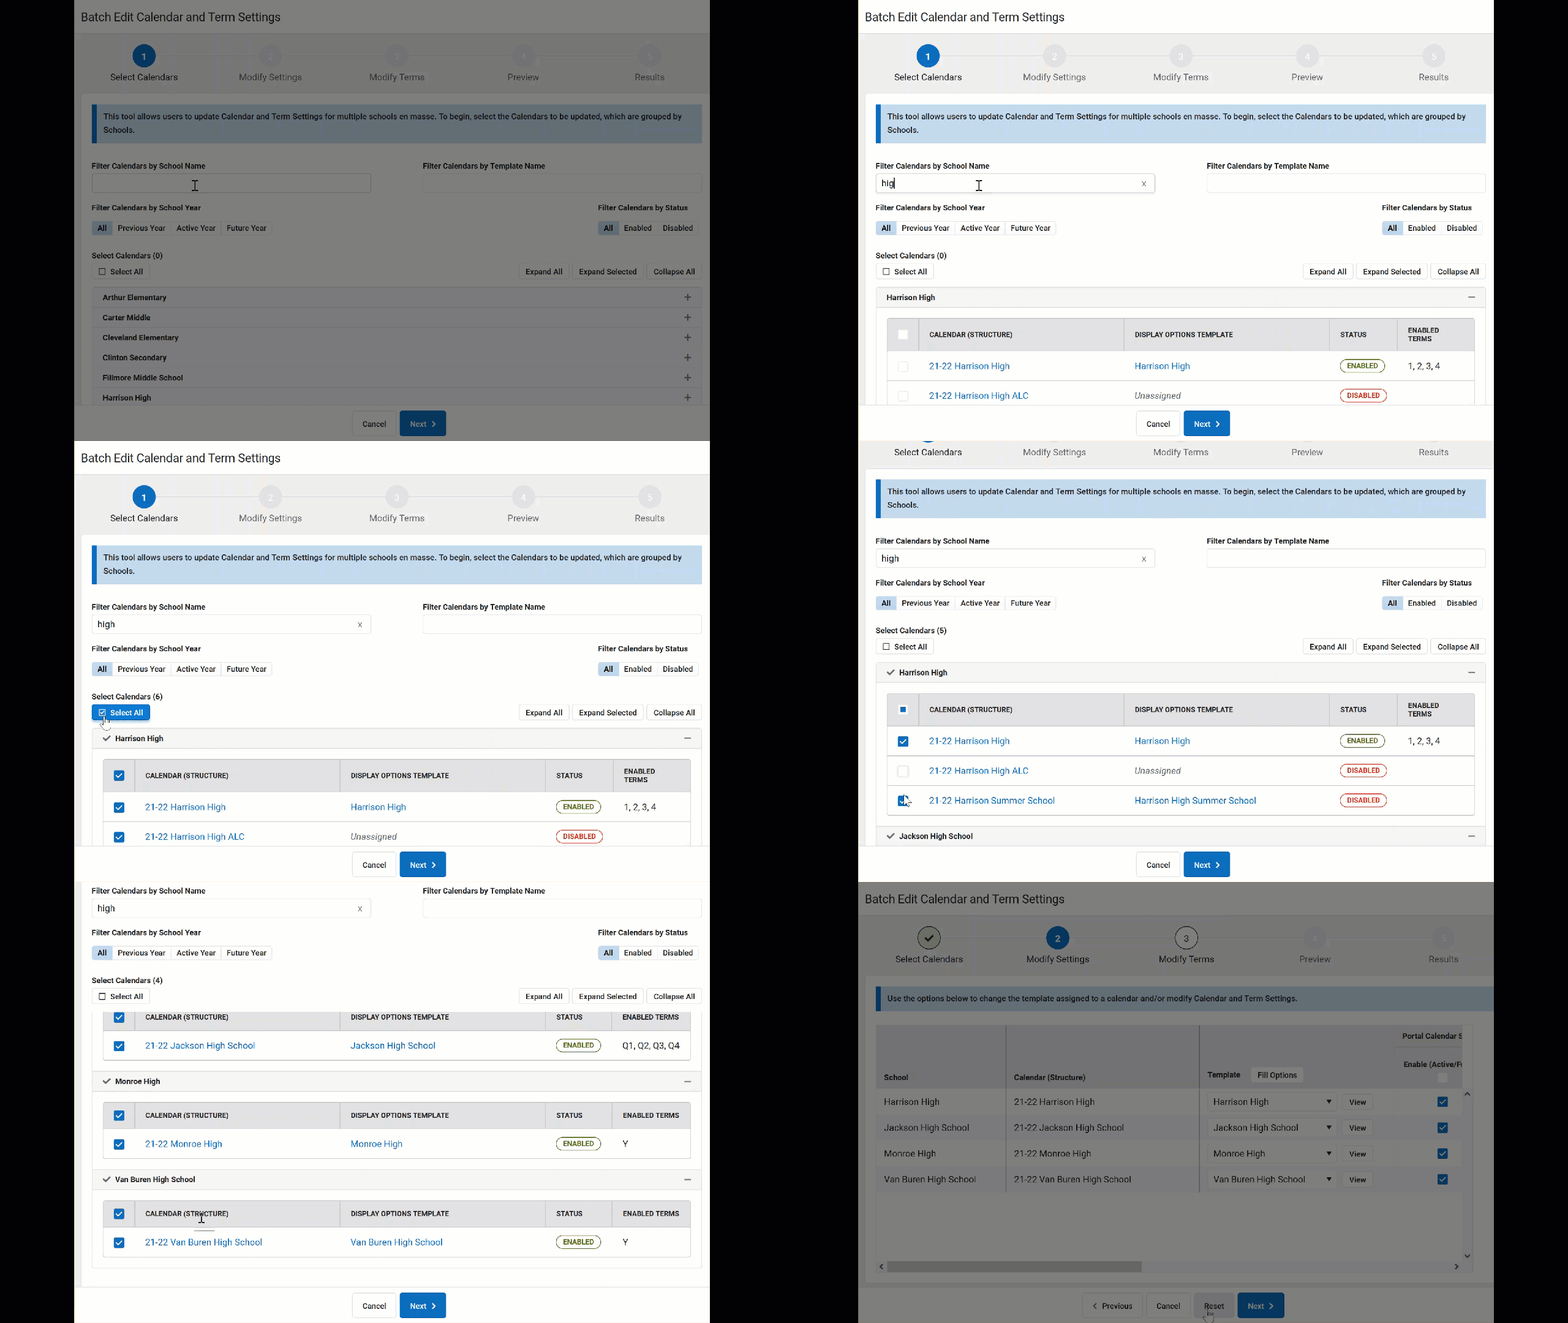 |
Step 2 | Next, modify any calendar settings for each selected calendar. See the Calendar Settings section of the Display Options article for more information about these settings. Options include:
In this example, I'm extending access to calendar data 30 days into the next calendar. | 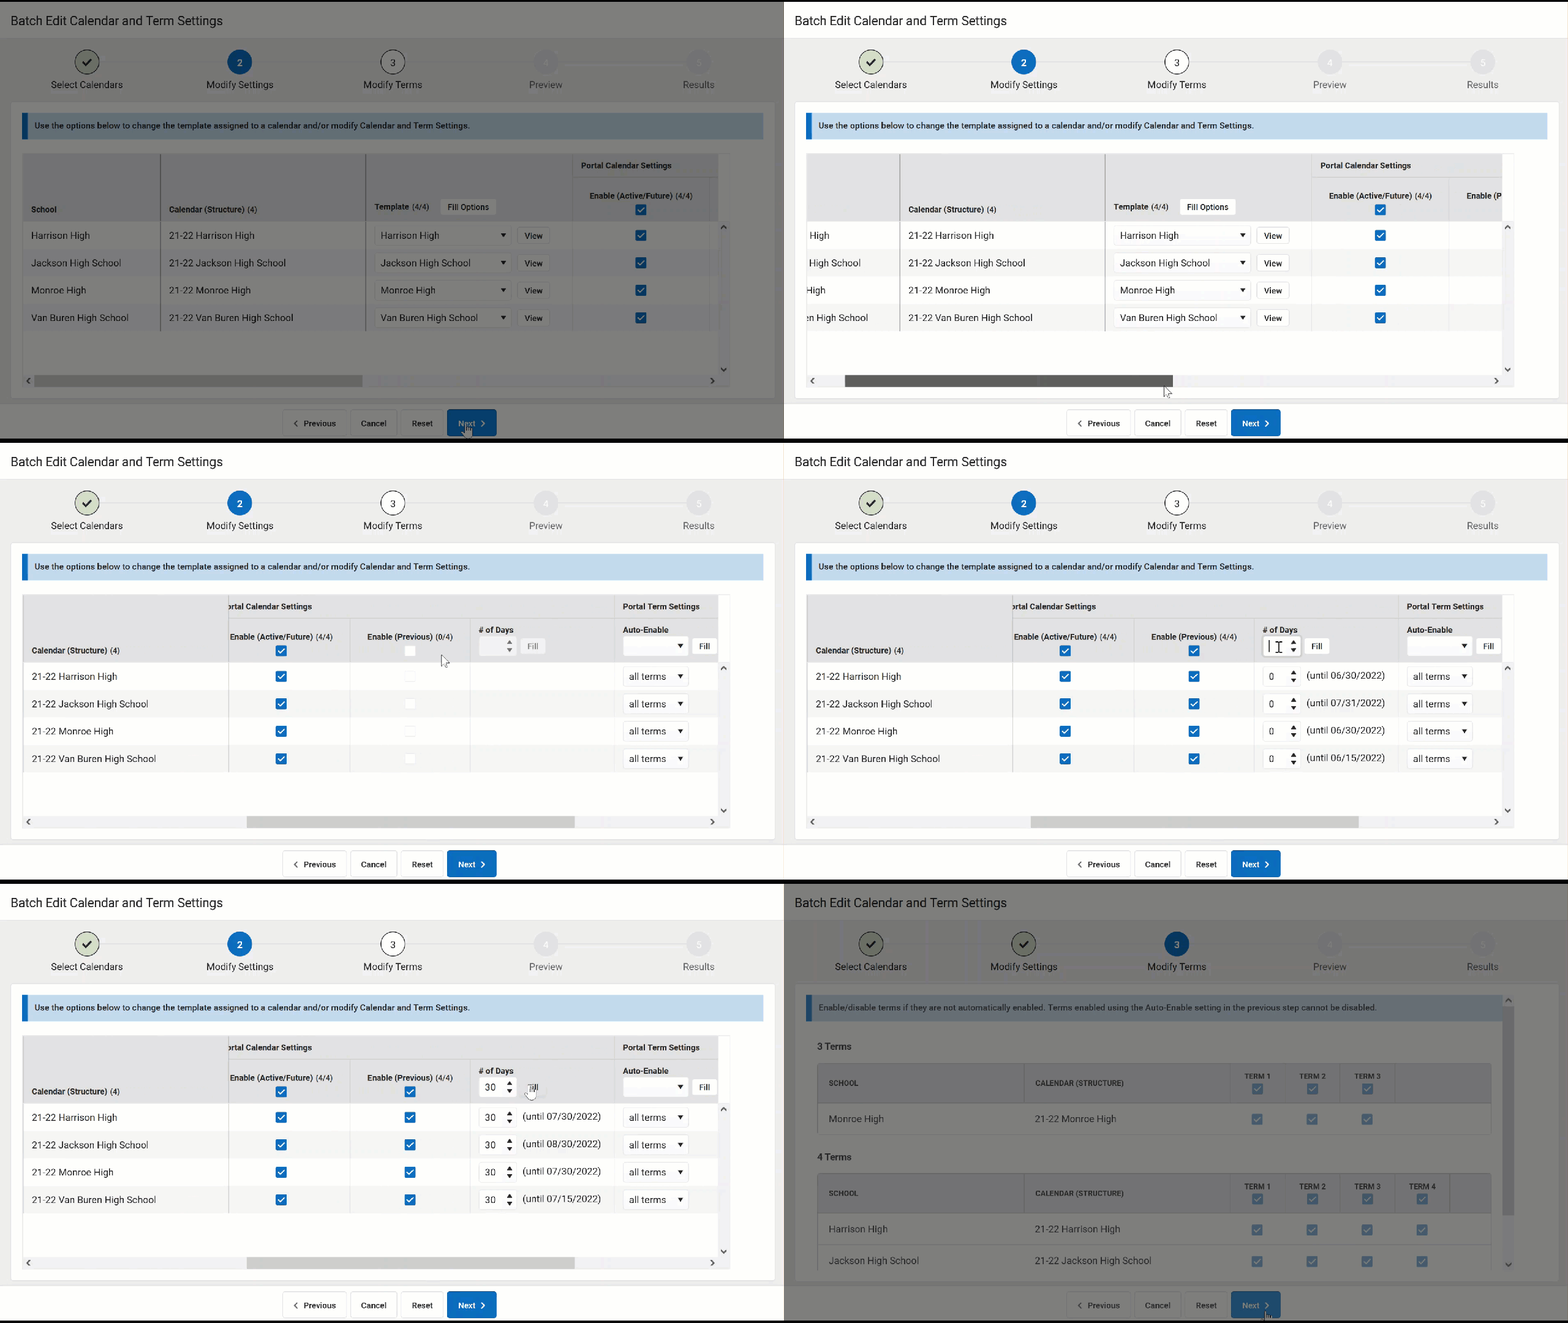 |
Step 3 | In step 3, enable or disable terms that are not already automatically enabled based on the Terms Settings. Note: If a term is enabled automatically, it cannot be disabled. | 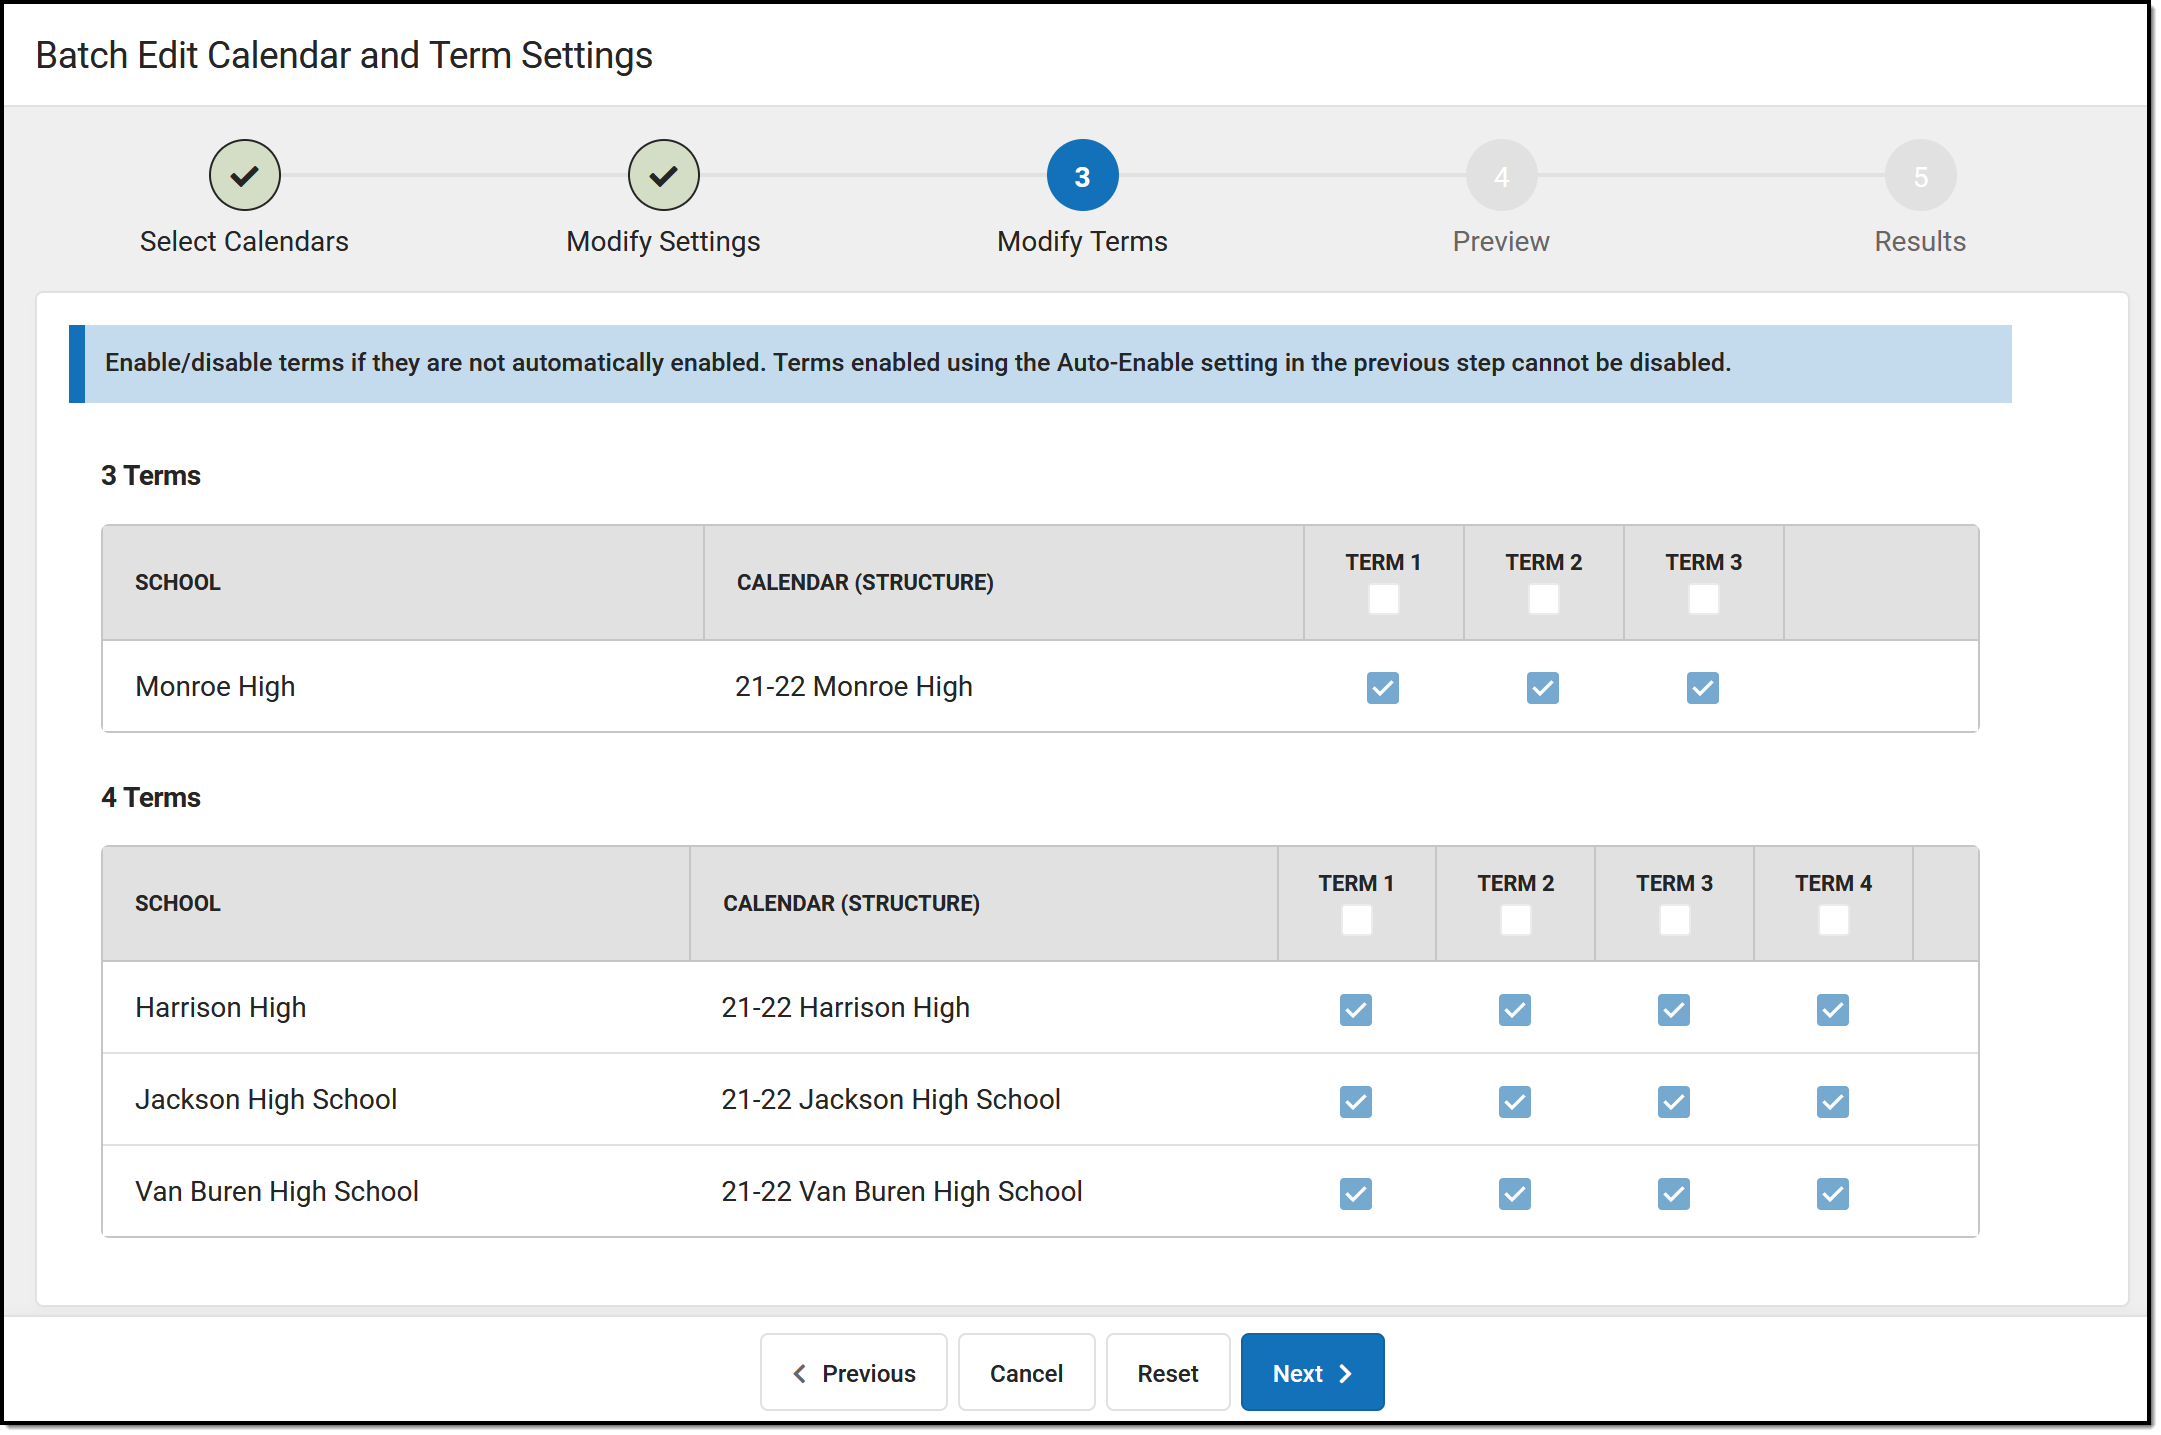 |
Step 4 | Finally, preview changes before updating settings. Changes display in bold text, as shown in this example. Click Update to apply changes. | 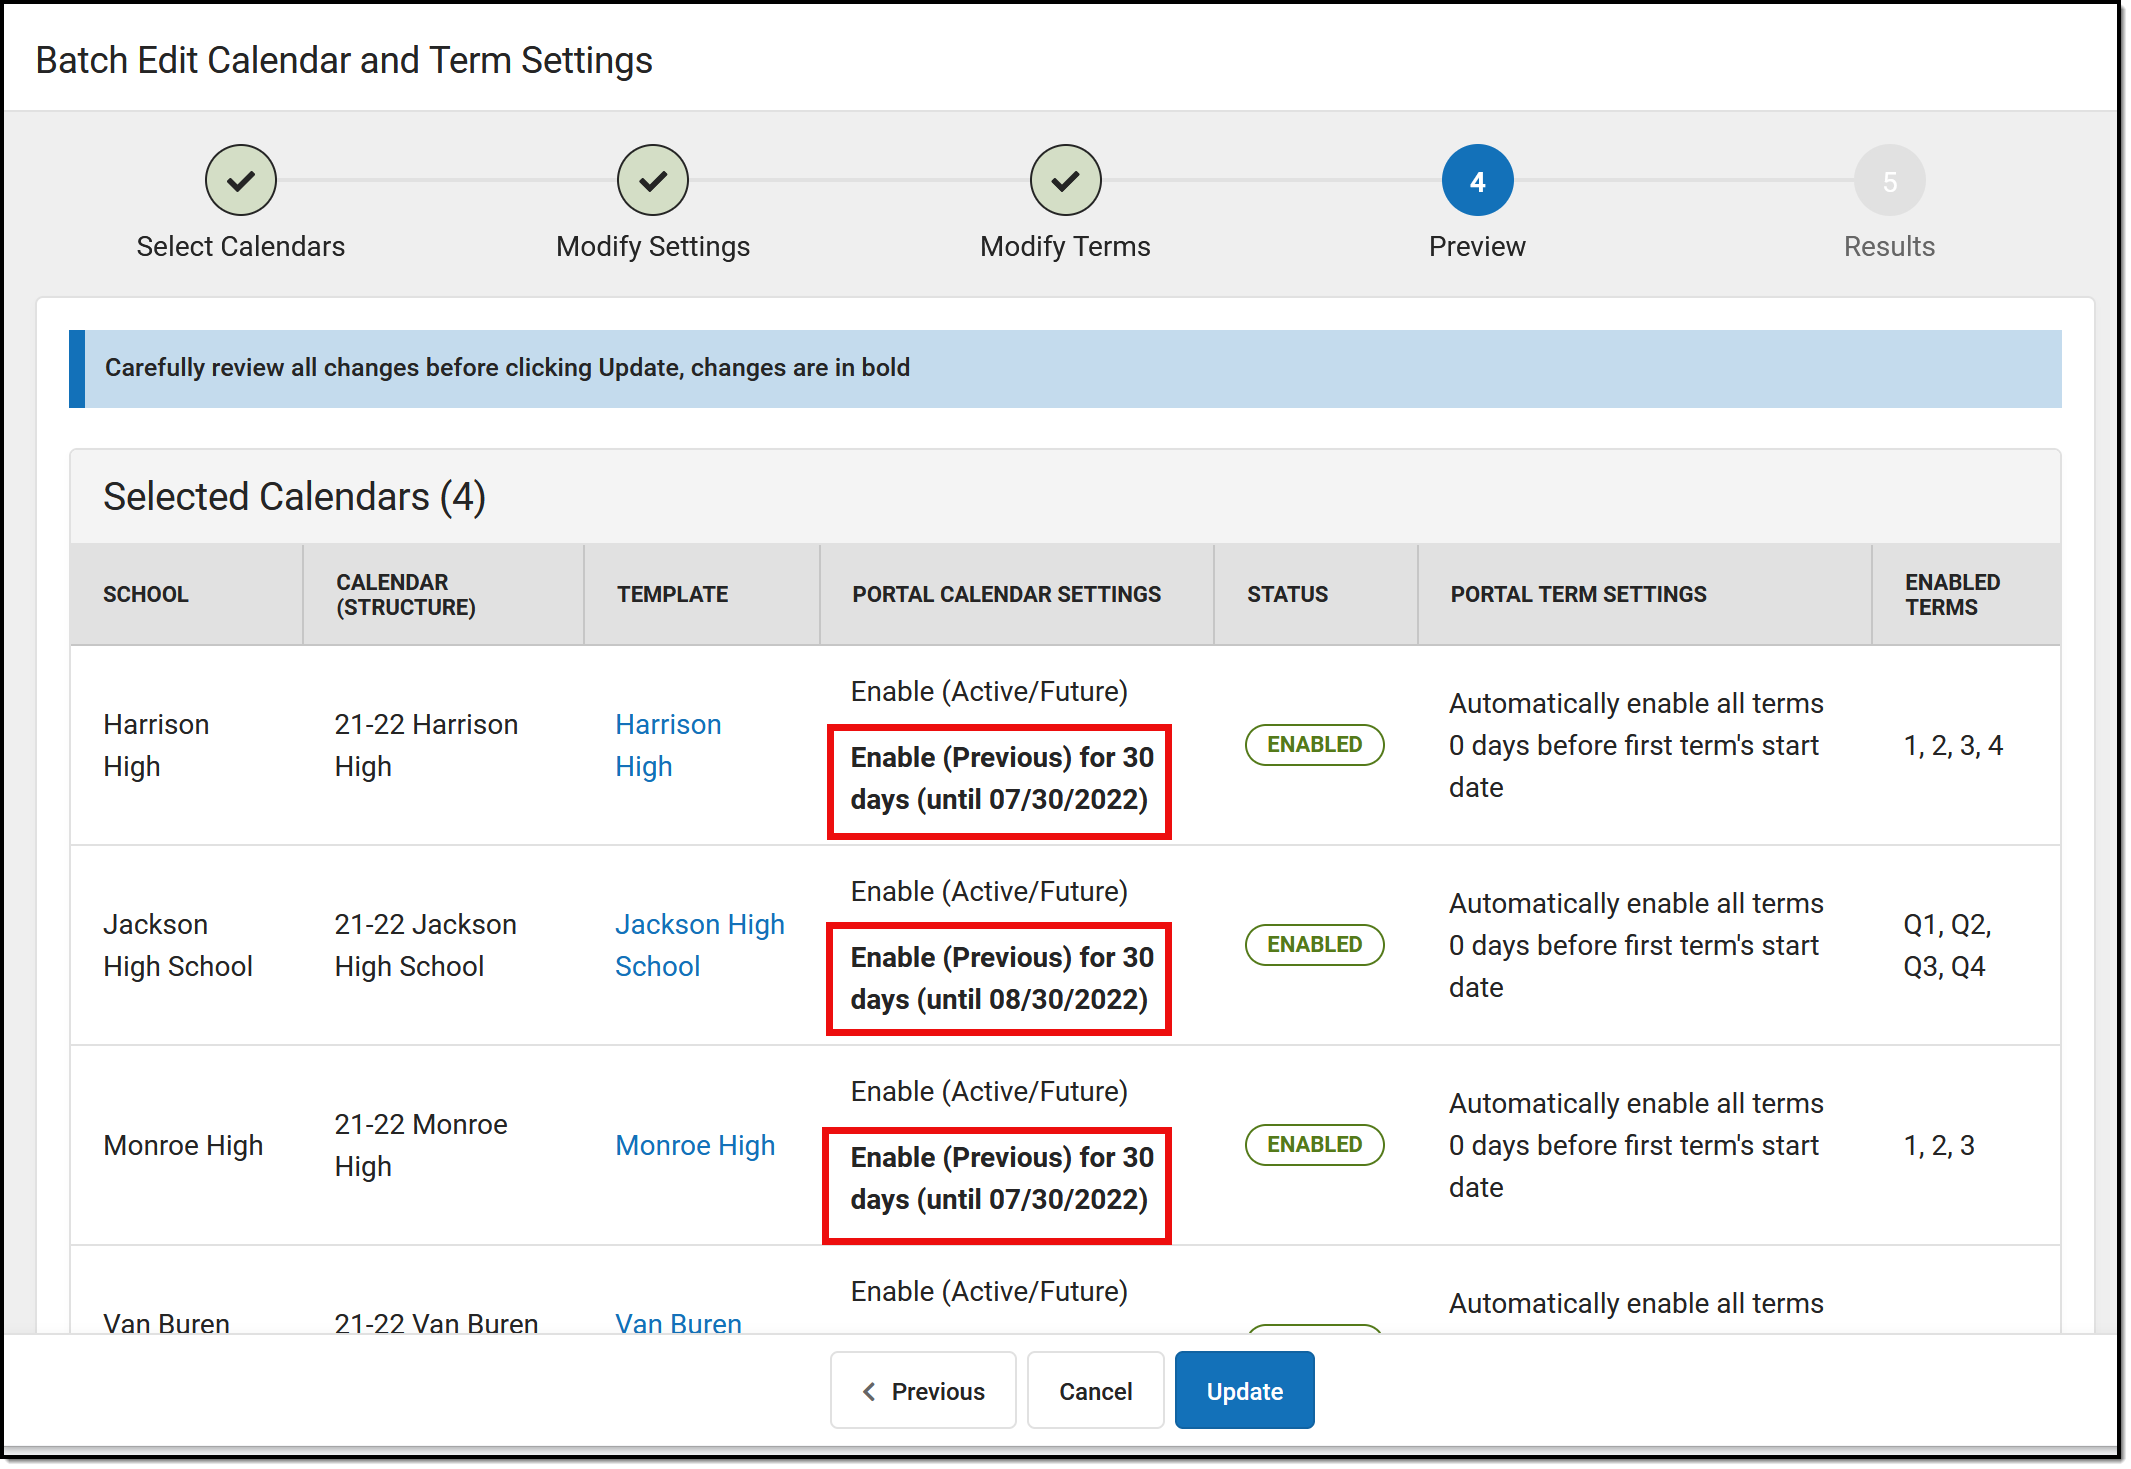 |
Step 5 | Once the update is complete, a results screen displays which summarizes all of the changes. Click Repeat to return to the beginning of the Edit process. | 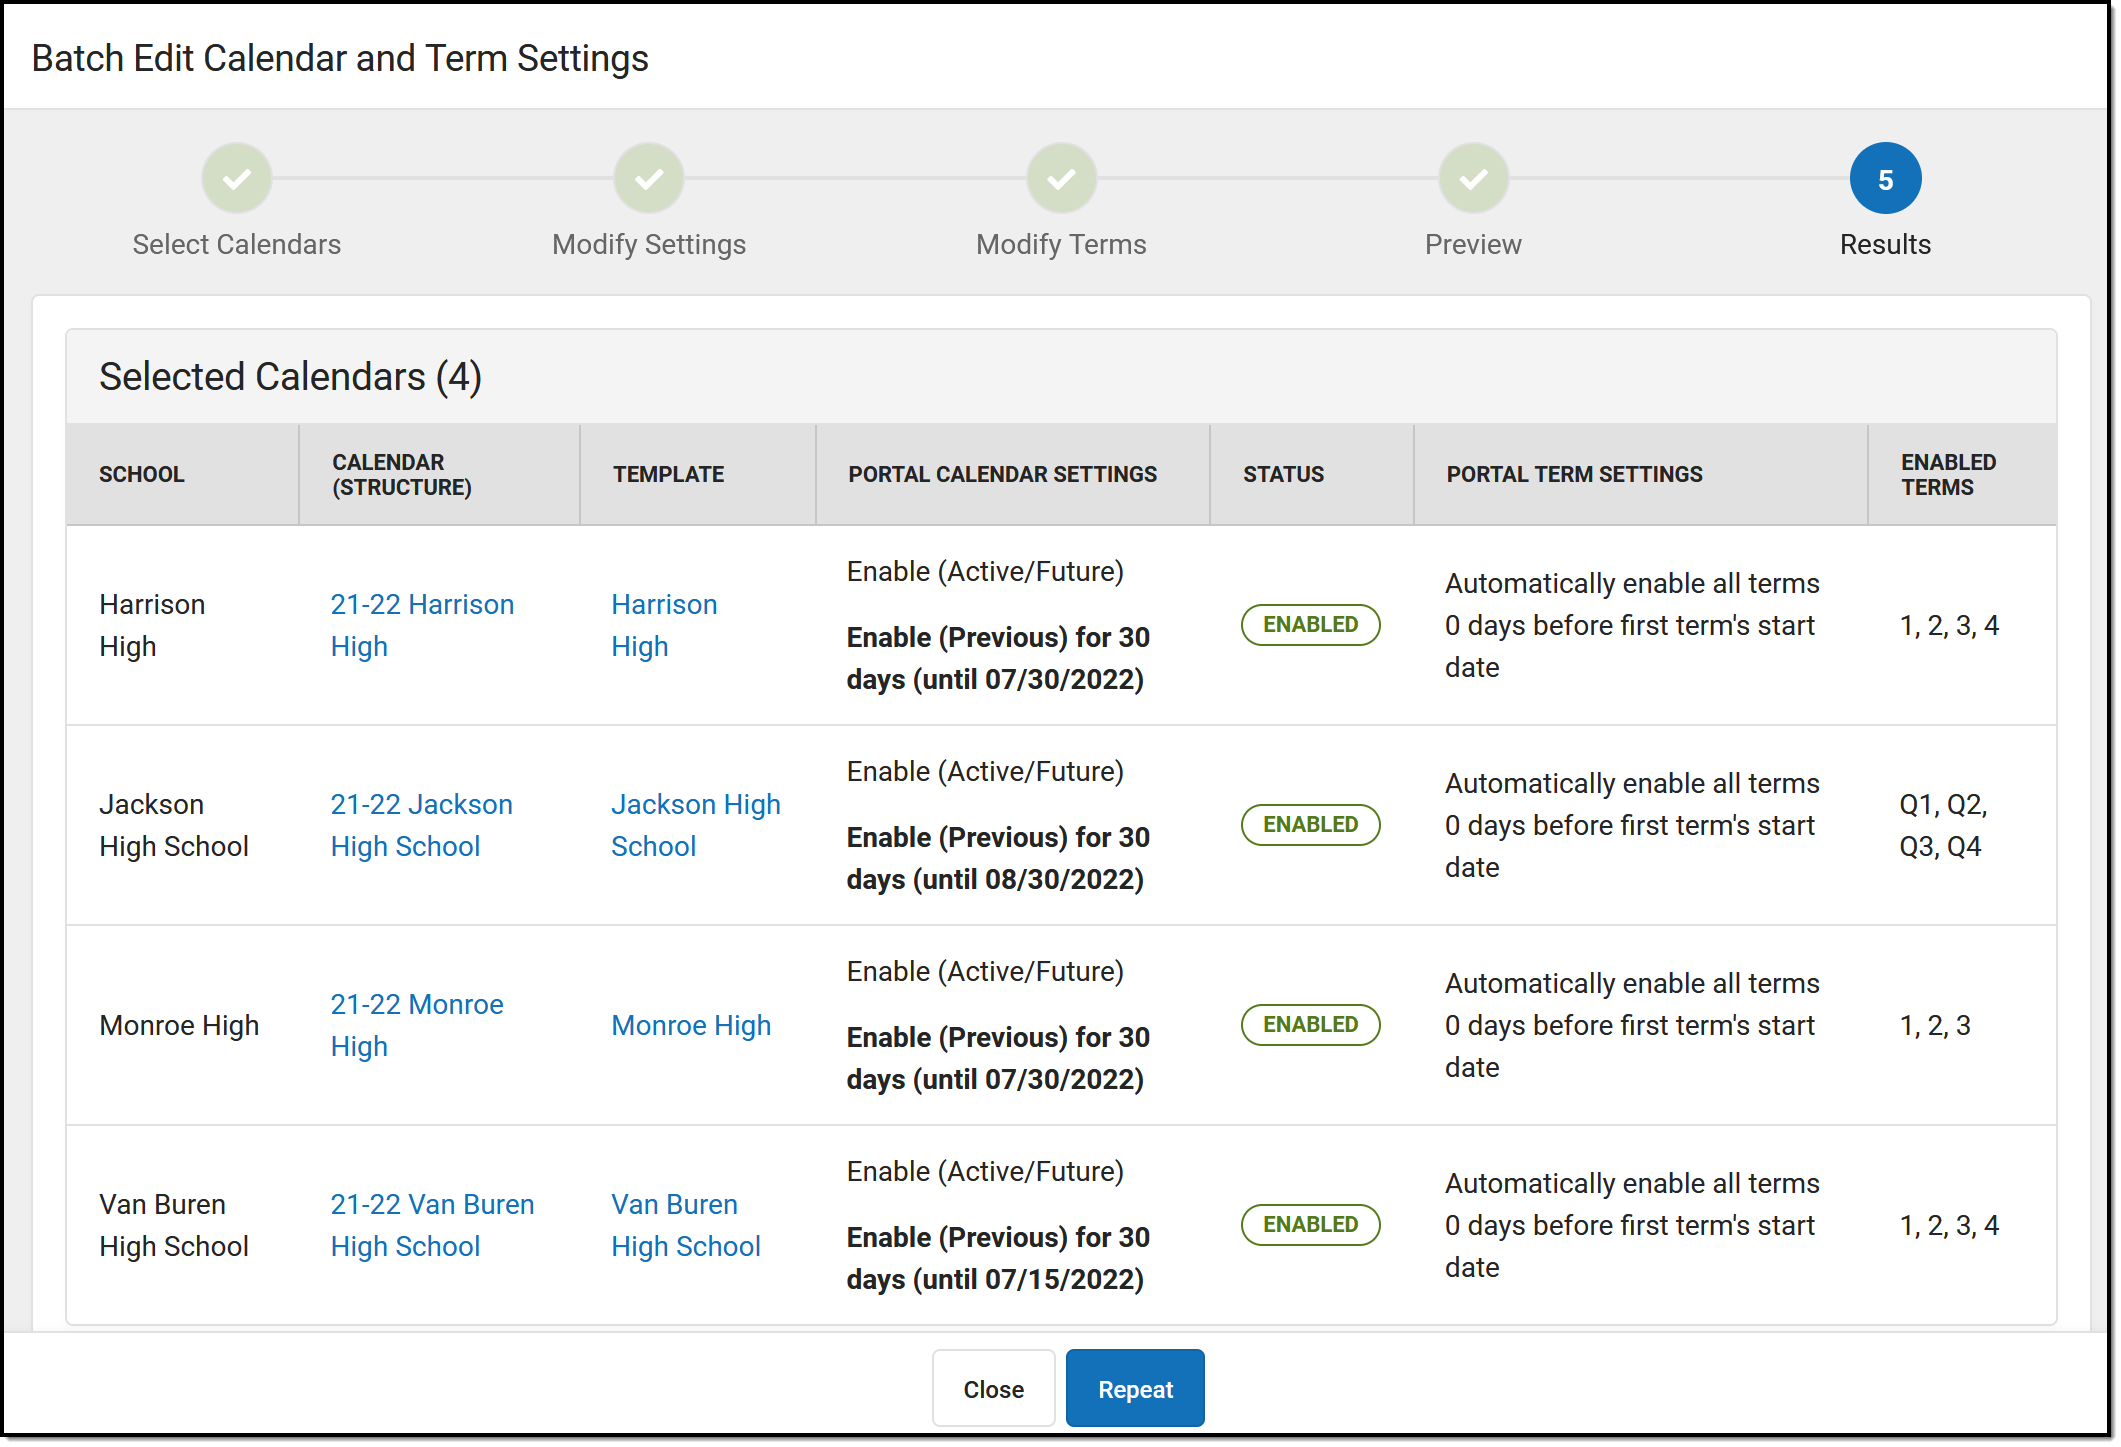 |
Template Fill Options
The Fill Options button in the Template column opens a side panel with advanced fill options
These fill options are most effective when a district using a consistent naming convention for their templates.
To use this advanced fill option, select a parameter for the fill in the Fill Templates with Name dropdown list: Contains, Starts With, Ends With, or Equals. Then enter the template name or part of the name as the Value. Indicate in the Fill dropdown list if the fill template logic should apply to all calendars or just those that do not currently have a template assigned.
| Summer School Fill Scenario: First, I create a summer school template at one school. Then, I use the Copy Templates option to copy that template to all of my schools that have a summer school calendar, giving the templates names that match their schools, such as Harrison Summer School, Monroe Summer School, etc. Once the template is copied, I can update each of the copies based on that school's needs. Next, I use the the Edit Calendar and Term Settings option. In Step 1, I select all of the summer school calendars in my district. In Step 2, I click this Fill Options button, select Contains and enter a value of Summer School. When I click Fill, each calendar is filled with it's corresponding Summer School template. |
| Grading Window Fill Scenario: First, I create a template based on what I want available to parents and students while the grading window is open, and then copy that template to all of my high schools, leaving the name as Grading Window for all. Then use Edit and Calendar Term Settings and click Fill Options in Step 2. Then, I select Equals and enter a Value of Grading Window. When I click Fill, all of the templates populate with this Grading Window template. |
Copy Display Options Template: Administrators can copy a Display Options Template from a source school to other schools in the district using the Copy Template tool.
The Copy Template tool allows administrators to copy a Display Options Template from a source school to other schools in the district. In this video, you will learn how to copy Display Options Templates.
Batch Edit Display Options Templates: Multiple schools can be updated en masse using the Batch Edit Template tool.
The Batch Edit Template tool allows administrators to update Display Options Templates for multiple schools en masse. In this video, you will learn how to update Display Options Templates en masse.
Batch Edit Calendar and Term Settings for Display Options: From Display Options, users can make mass updates to Display Options templates and calendar and term settings using Batch Edit options.
The Batch Edit Calendar and Term Settings tool allows administrators to update Display Options Calendar and Term Settings for multiple schools en masse. In this video, you will learn how to update calendar and term settings for Display Option templates en masse.
Enable Push Notifications
When Push Notifications are enabled, Campus Student and Campus Parent users who have subscribed to notifications will receive push notifications informing them of changes to student data available in the mobile portal.
Tool Search: Push Notifications
The Push Notifications at the district level is used with the Campus Student Portal and Campus Parent Portal. When enabled, users receive notifications about the following student data updates:
- Assignments
- Grades
- Attendance records
- Lunch Balance (for FS enabled districts)
- Responsive Schedule
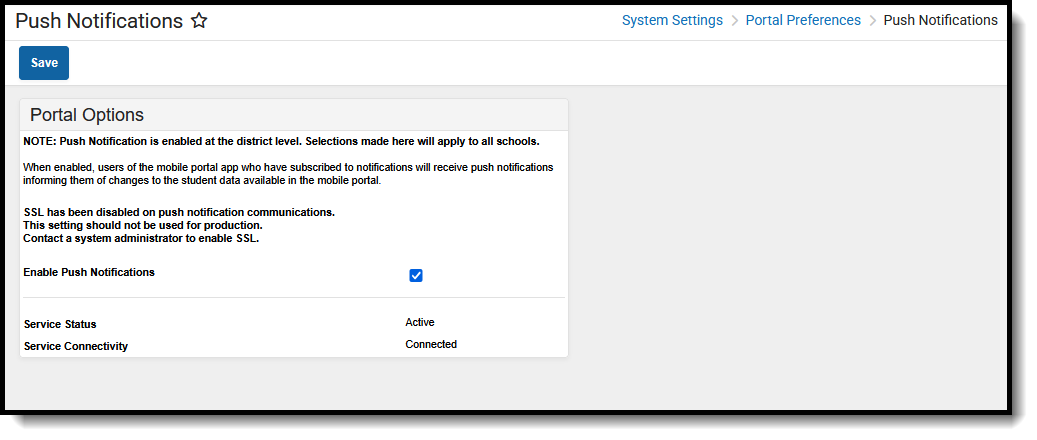 Push Notifications
See the Push Notifications Tool Rights for information on available tool rights.
Enabling Push Notification
- Mark the Enable Push Notifications checkbox.
- Click the Save icon.
Notification Logic
Notifications are triggered by Campus user actions, such as recording attendance or scoring an assignment. Students and parents enable specific types of notifications and can set thresholds, such as only sending a food service notification when the student's balance falls below a certain dollar amount. Users of the Campus Student and Campus Parent apps must also select Stay Logged In when logging in to receive notifications.
Notifications are only delivered for Active Year calendars. The tools associated must also be enabled in the Display Options; for example, the Attendance tool must be enabled for students and parents to receive notifications.
Notification functionality is not guaranteed by Apple or Google.
Districts may need to allow access to cmq.infinitecampus.com on Port 5671 on their firewall to let notification messages out from their district.
Mobile Portal Supported Platforms
See the Supported Platforms article for up-to-date information about which supported mobile operating systems.
Self Service Options
The Portal Self Service Options allow districts to display and allow updates to Census data for users of Campus Parent and Campus Student.
Tool Search: Self Service Options
The Portal Self Service options allow districts to display and allow updates to Census data for users of Campus Parent and Campus Student. Information can be selected at a granular level allowing districts to choose what information can be viewed and what information can be updated. Districts are able to review all update requests submitted prior to updating the database.
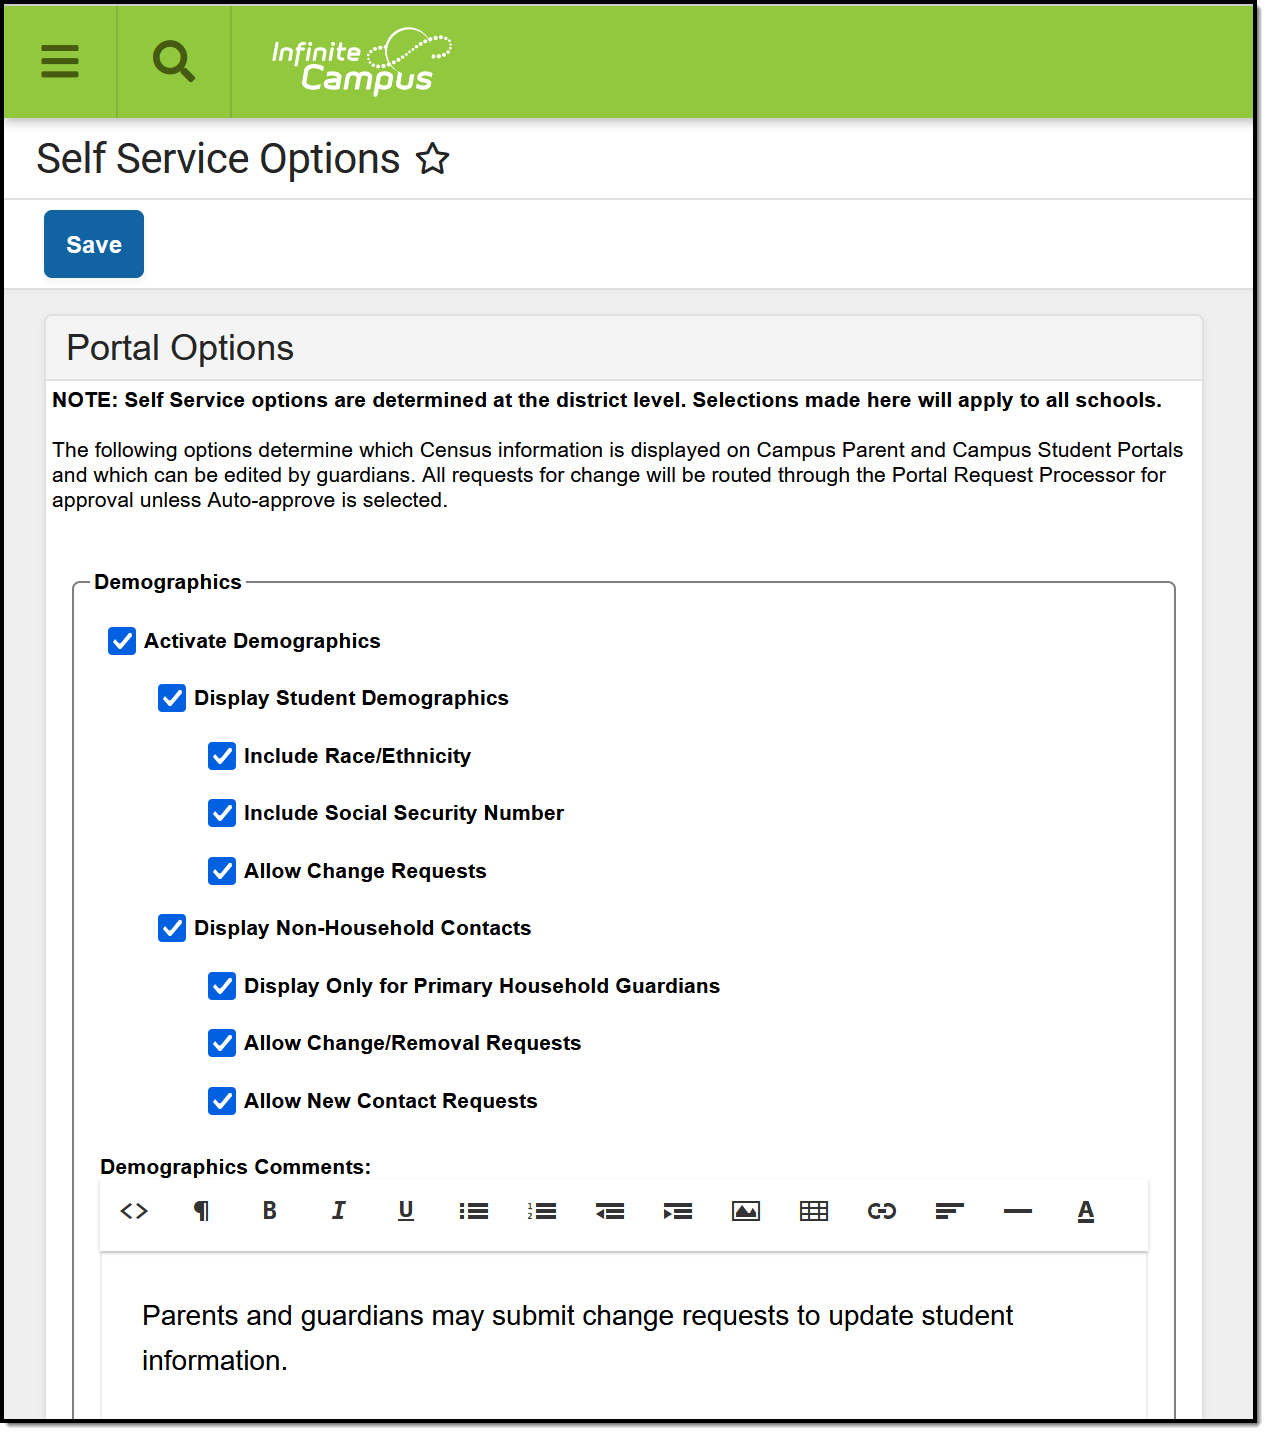 Portal Self Service
See the Portal Self Service Options Tool Rights article for information on available tool rights.
Campus Student users (usually enrolled students) are not able to request changes to their data unless they are emancipated and their own guardian.
Student Demographic information, Household Contact information, Phone and Addresses can be viewed and modified for individuals marked as the student's guardian. The guardian does not need to reside in the student's primary or secondary household.
Staff who have students in the district are allowed to view and edit information, as defined in the above table. Staff who do not have students in the district should use My Data to request changes to demographic, household and contact information.
Note the following:
- Self Service options are District-wide.
- Users have to determine which items to display and which items to allow for change requests.
Districts can choose to allow parents/guardians to request updates to Census information via Campus Student and Campus Parent. Submitted update requests are then reviewed by an authorized staff person using the Portal Request Processor, and each request can be approved or denied individually.
Like Portal Display Options, selected Self Service options determine what data can be requested for modification. Options can be turned on for student data, household data and family data.
Set Self Service Options
- Select the desired settings for each of the areas available for update options within Campus Student/Parent.
- Click the Save icon when finished. Self Service options are saved, and Campus Parent users can update information as needed.
Review the following information for explanation of the available options.
Student Data
The Student Data options include both student demographic data (race/ethnicity, Social Security number, etc.) and Non-Household Contact Information (i.e., emergency contacts outside of the household).
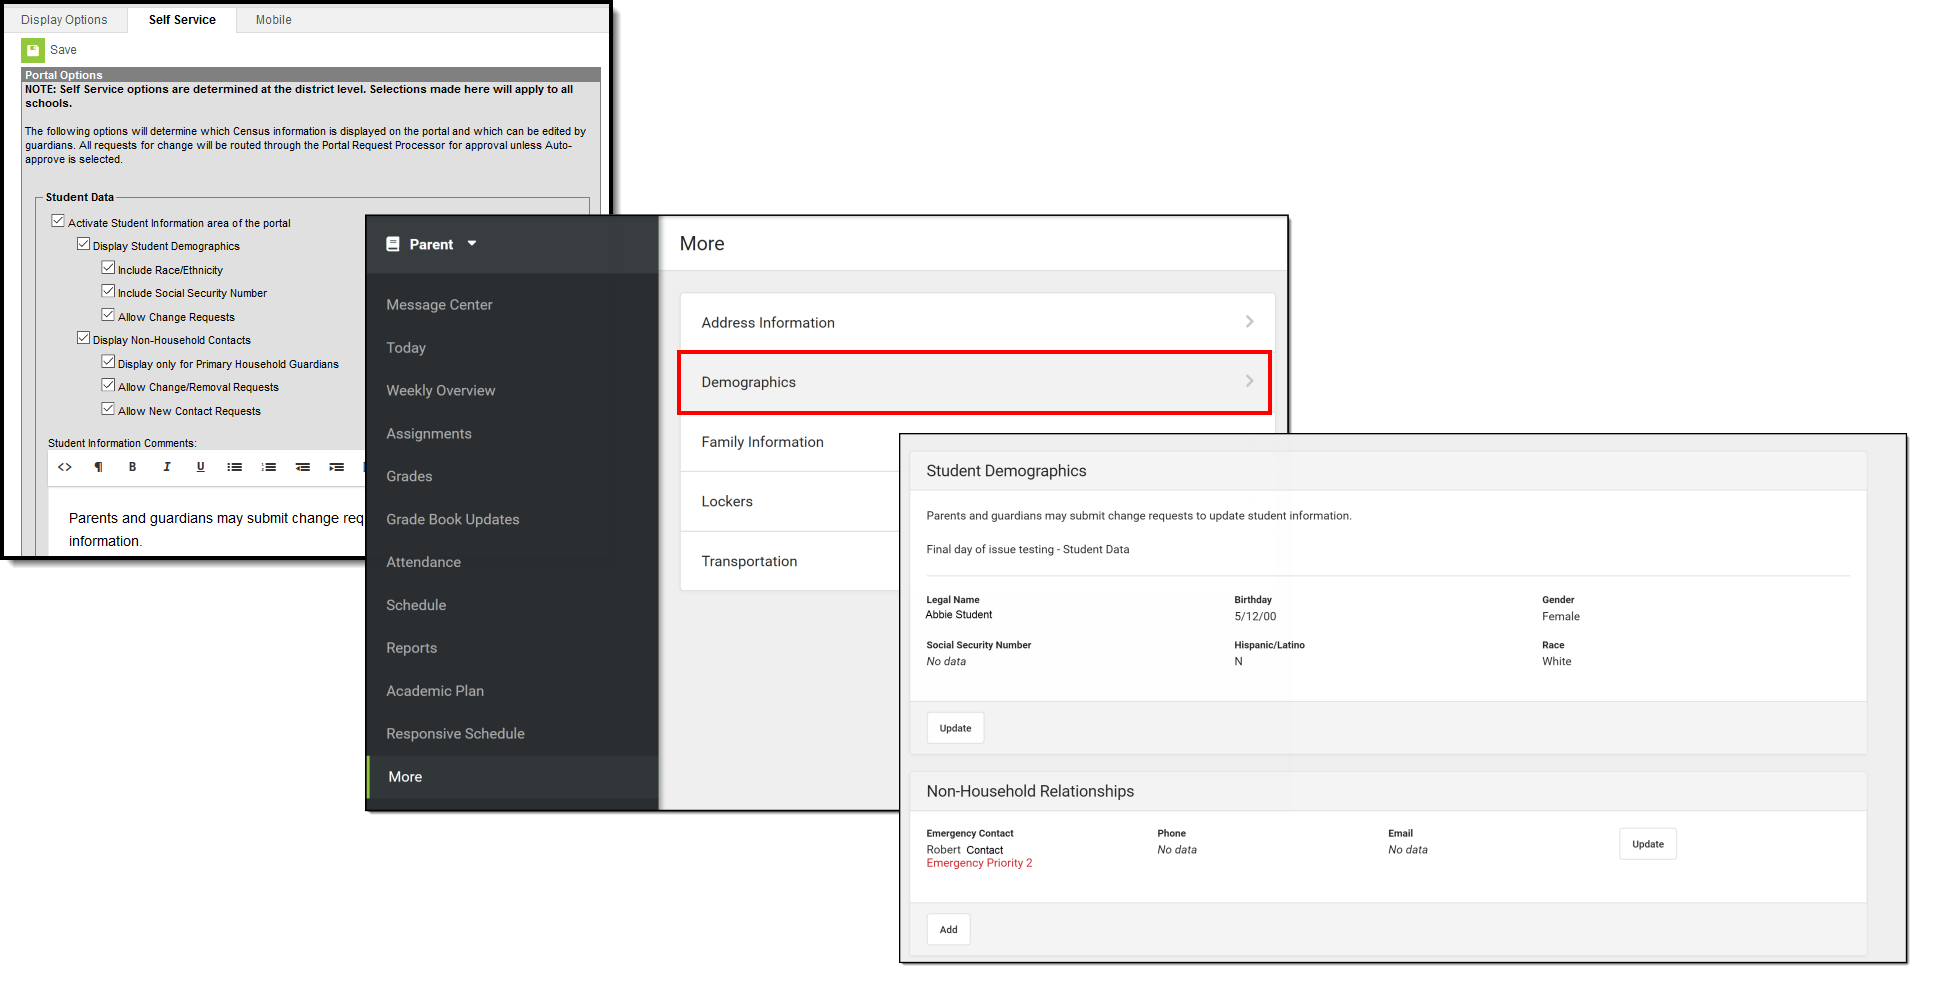 Student Data Self Service Options
The following defines the available Student Data Self Service Options.
Options | Definition |
|---|---|
Activate Student Information area of the Portal | Student Information area is visible when a parent/guardian or student selects a student name. |
Display Student Demographics | Displays student name, birth date and gender. |
Include Race/Ethnicity | Displays student's race/ethnicity information. |
Include Social Security Number | Displays student's Social Security number. |
Allow Change Requests | Allows the parent/guardian to request changes to displayed demographic information. |
Display Non-Household Contacts | Displays contact information for those individuals who do not reside in the same household as the student. |
Display only for Primary | Displays contact information for those individuals who reside in the primary household. Only those who have the guardian and portal flags for a student who live in the student's primary household can view and/or update the contact information. Guardians in secondary households and non-household guardians do not see this information. |
Allow Change/Removal Requests | Allows the parent/guardian to request changes to existing household contact information or to remove existing non-household contacts. |
Allow New Contact Requests | Allows the parent/guardian to request new additions to non-household contacts. |
Student Information Comments | HTML field (WYSIWYG editor) for district to provide information about student information. Entered text displays for all users. |
Any modifications requested by parents/guardians go through an approval process. Designated staff use the Portal Request Processor to approve or deny requests from parents/guardians.
Household Data
The Household Data options include household phone number and household addresses.
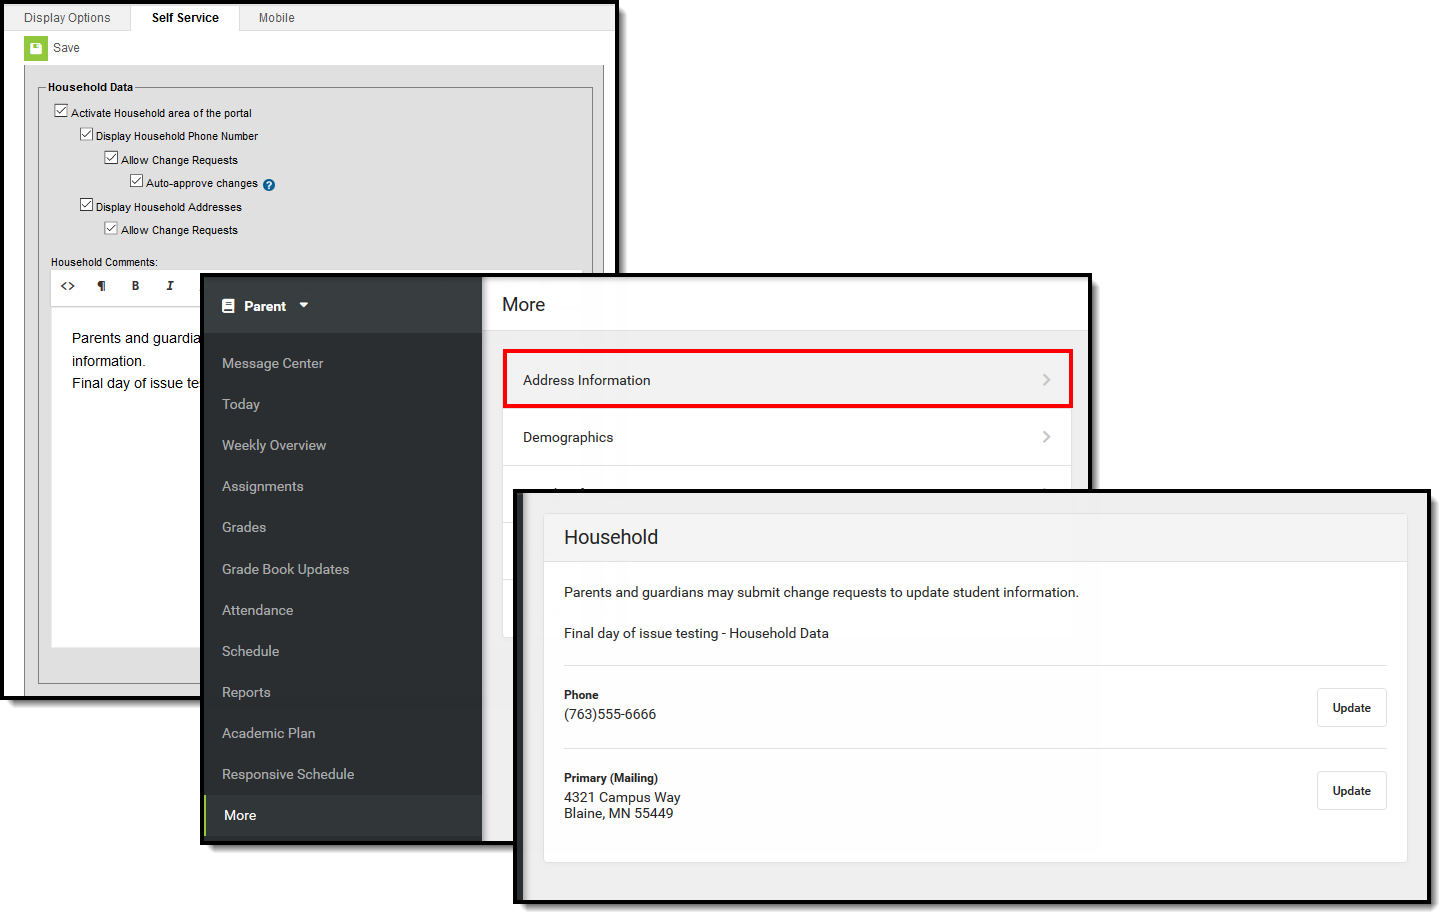 Household Self Service Options
The following defines the available Household Data Self Service Options.
Options | Descriptions |
|---|---|
Activate Household area of the Portal | Household information displays in the Address Information area of Campus Student/Parent. |
Display Household Phone Number | Displays the household phone number. The household phone can be viewed or edited (based on portal options) for all primary and secondary households in which the person is a member on the date of the login. If the person does not belong to a household, he/she will not see anything for household phone. |
Allow Change Requests | Allows the parent/guardian to submit change requests to the household phone number. |
Auto-approve Changes | When selected, requests to change the household phone number are automatically approved and updated, meaning district staff do not have to process changes to household phone numbers or receive a message that a request has been submitted. ONLY Household phone numbers are auto-approved. |
Display Household Address | Displays the household address as part of the household information. Household addresses (primary and secondary) can be viewed or edited (based on portal options) for all primary and secondary households in which the person is a member on the date of the login. |
Allow Change Requests | Allows the parent/guardian to submit change requests to the household address. |
Household Comments | HTML field (WYSIWYG editor) for district to provide information about household information. Entered text displays for all users. |
Family Data
Family data options include updating contact information and relationship data for all family members. If a person is not a guardian to anyone in the household, they can only update his/her contact information.
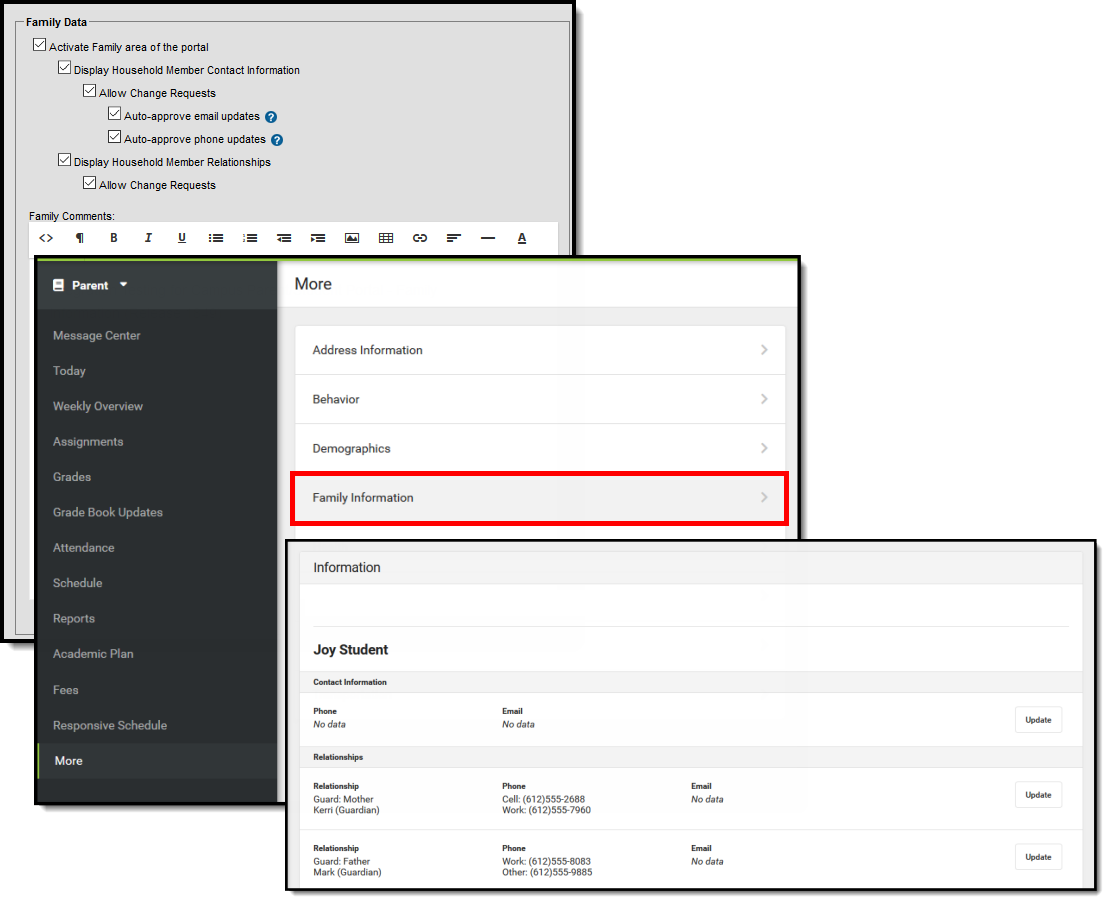 Family Self Service Options
The following defines the available Family Data Self Service Options.
Options | Description |
|---|---|
Activate Family area of the Portal | Family information displays in the Family Information area of Campus Student/Parent. |
Display Household Member | Displays household member contact information.
|
Allow Change Requests | Allows the parent/guardian to submit change requests for household member contacts. |
Auto-approve Email Updates Auto-approve Phone Updates | When selected, requests to change the phone number and email associated with the family member are automatically approved and updated, meaning district staff do not have to process changes to phone numbers or emails, or receive a message that a request has been submitted. |
Display Household Member | Displays relationships of members in the household.
|
Allow Change Requests | Allows the parent/guardian to submit change requests for family relationships. |
Family Comments | HTML field (WYSIWYG editor) for district to provide information about this area in Campus Student/Parent. Entered text displays for all Campus Student/Parent users. |
When selecting these options, be aware that selecting the checkbox to display the area does not give the ability to submit a change request. The Allow Change Requests option would also need to be selected. A district could choose to display the household phone number, but not allow parents/guardians the ability to request a change to that phone number.
Languages and Translations Setup
Districts can manage the language and translations available in the Campus Student and Campus Parent portals using the Languages and Translations tools.
Languages: Administrators can add new languages for Campus Parent and Campus Student using the Languages tool.
Tool Search: Translation Language Setup
The Languages editor allows users to add languages and assign a language code to them. Once a language is added here, translations can be assigned for fields that display in Campus Parent and Campus Student.
The four languages into which the Campus Portal is currently translated are available: English, Spanish, Traditional Chinese and Simplified Chinese. Any language can be added, modified or removed, except English. When the English language is selected, it is in gray text, indicating modifications to it cannot be made.
After you add a language, you can associate Translations with the language.
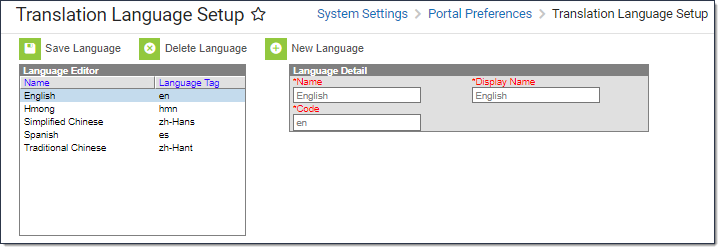
See the Portal Translation Language Setup Tool Rights article for information on available tool rights.
Add a Language
- Click the New Language button. A Language Detail editor displays.
- Enter the name of the language in the Name field.
- Enter the name of the language in that language in the Display Name field. For example, if the language is French, the Display Name is Francais. Or, if the language is Spanish, the Display Name is Espanol.
- Select the language Code from the dropdown list. Search through the list of languages, or begin typing to have matching languages display.
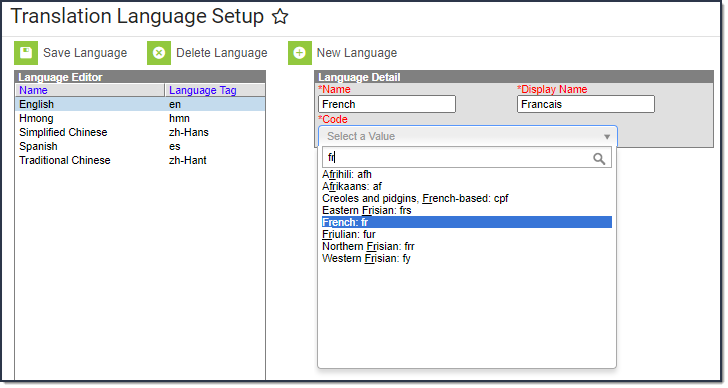
- Click the Save Language button when finished. The new language displays in the Language Editor.
Delete a Language
Any language listed here can be deleted, except English. Click the Delete Language button to delete a language. A warning message displays asking you to verify this is the intended action. Click OK to continue, or Cancel to leave the language and not delete it.
If translations exist for the language, the language cannot be deleted and a security error displays. Remove the translations that exist for that language on the Translations tool, and then delete the language.
The Language tool allows administrators to add new languages that will be translated in Campus Parent and Campus Student. This video demonstrates how to add new translation languages.
Translations: The Translations tool allows administrators to enter a language translation for individual fields within a specific tool or application.
Tool Search: Translation Setup
The Translations tool allows you to enter a language translation for individual fields within a specific tool (module) or application. Once a language is created, translations are entered for field names, and the language is activated, users can select this language from a dropdown list at the bottom of the Campus login page. Once the language is selected, fields are translated from English to the selected language.
At this time, translations can only be entered for Campus Parent/Student.
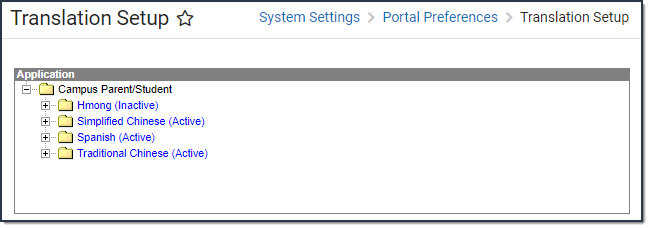 Translation Setup
See the Portal Translation Setup Tool Rights article for information on available tool rights.
Translations are organized by tool/application, then the language, then all of the available pages within that tool/application, and then the fields on that page.
In the image below, the Assessment page is selected in the Application list for the Spanish translation. All of the fields displayed on the Assessment page appear within the Key column and the English Text column indicates how they are displayed in English on the page. Next to each field is a Translation box where you can enter the language translation of the English Text next to it. Once translations are entered and saved for these fields, the English fields will translate to the values entered when the user selects the language on the Campus login screen or within the app.
In the image below, Spanish translations are entered for each field within the Assessments tool (Evaluación). The Campus Portal user selected to translate the app into Spanish and the screen was updated to display these fields in that language.
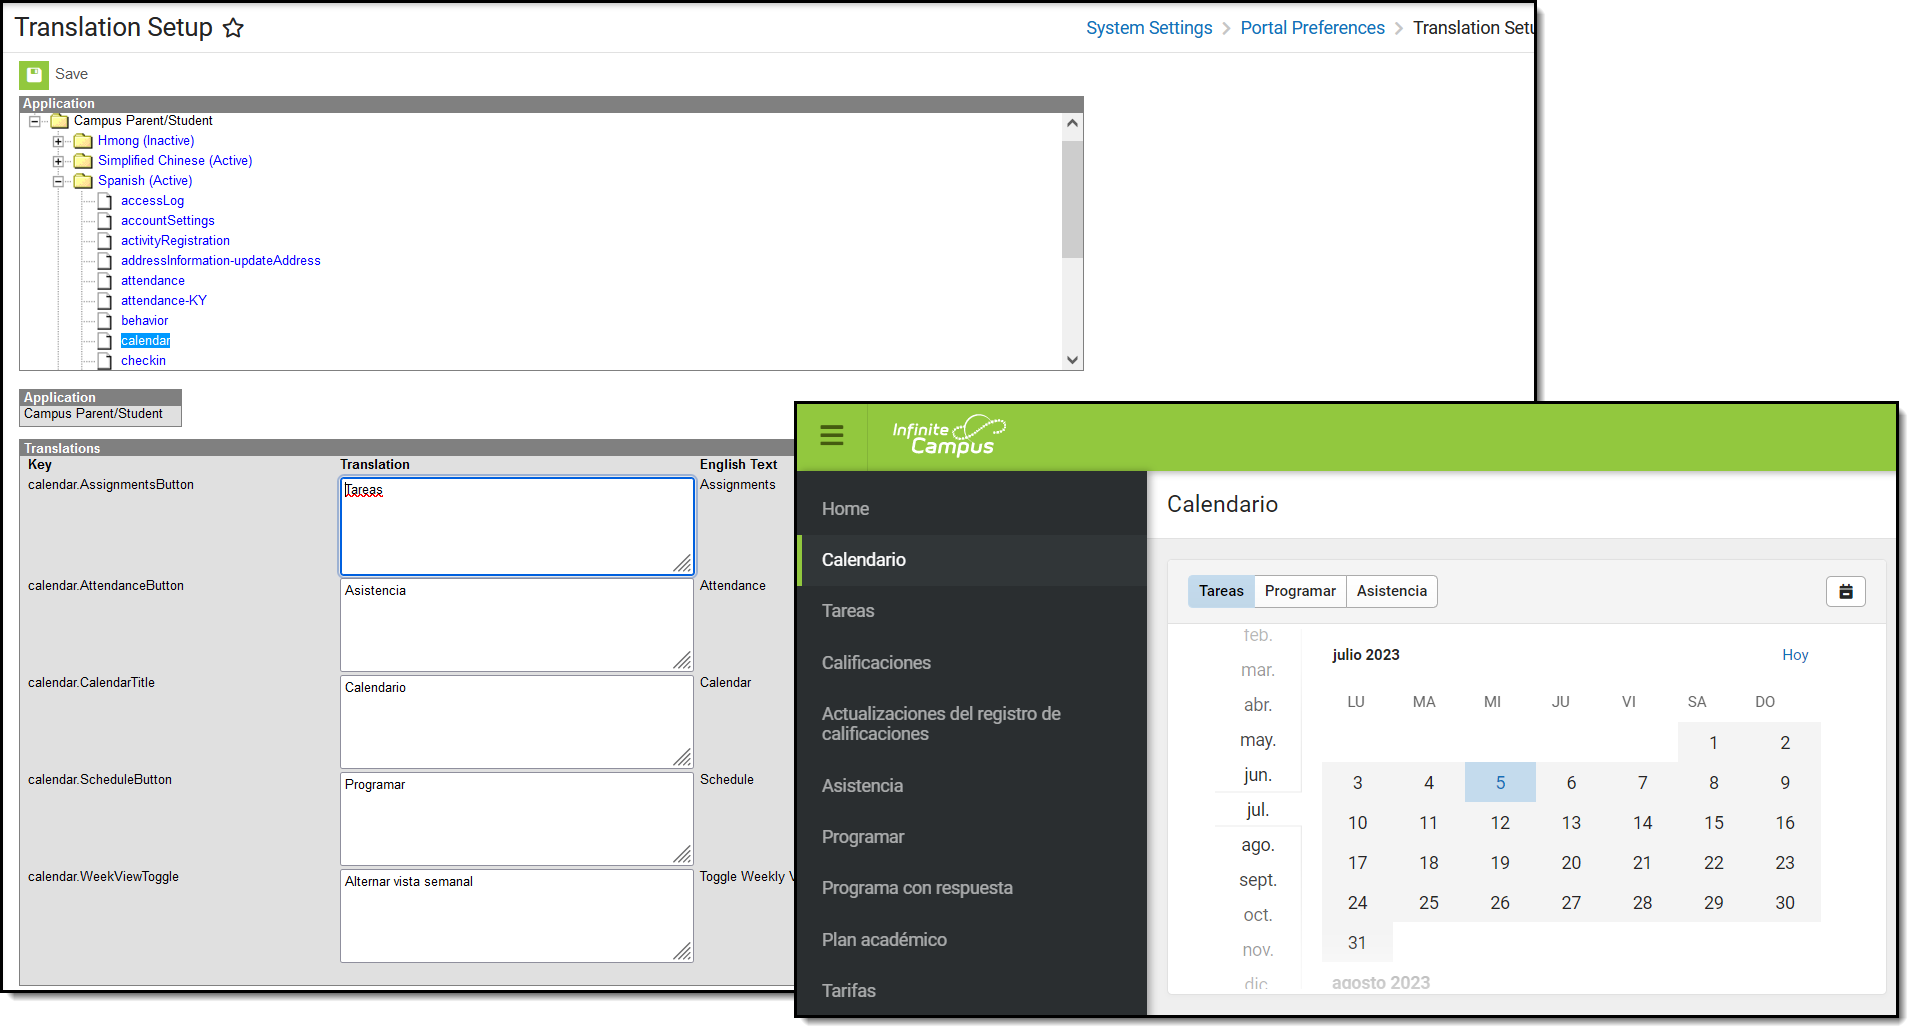 An example of the Calendar in Translation Setup and Campus Student
Considerations for Translations
- OS Limitations. Certain operating systems are not set up to handle certain character sets. For example, Windows 7 does not display Burmese (Myanmar) characters.
- Context. An English word or phrase may be translated many different ways depending on how it is used.
- Length limitations. There are occasions where very long words (for example, native German or native Hawaiian words) extend beyond the boundaries of the left navigation pane on the Portal. To correct this, manually add a space-hyphen break in the word so auto-wrapping is in effect in the menus.
- File Encodings. Encode CSV files to use UTF-8. Other encodings do not work properly.
- Excel files. Excel cannot be used to save CSV files. Excel recognizes some UTF-8 files, but it cannot be used to save files with UTF-8 encoding. CSV files saved in Excel may not load properly. Instead, consider using Google Sheets, or any other editor that does not change the encoding of a file.
Enter Translations
- Select the page of the module/application for which to enter translations.
A Translations editor displays. On the left is the Key, or what field is being translation. The middle Translation field is where the word is entered in the selected language. On the right is the English Text. - Enter the translation for the field in the Translation field. If a translation field isn't available for a field, the English text displays.
- Click Save when finished.
In the example below, the tool names in the Campus Parent app navigation bar are translated into Chinese.
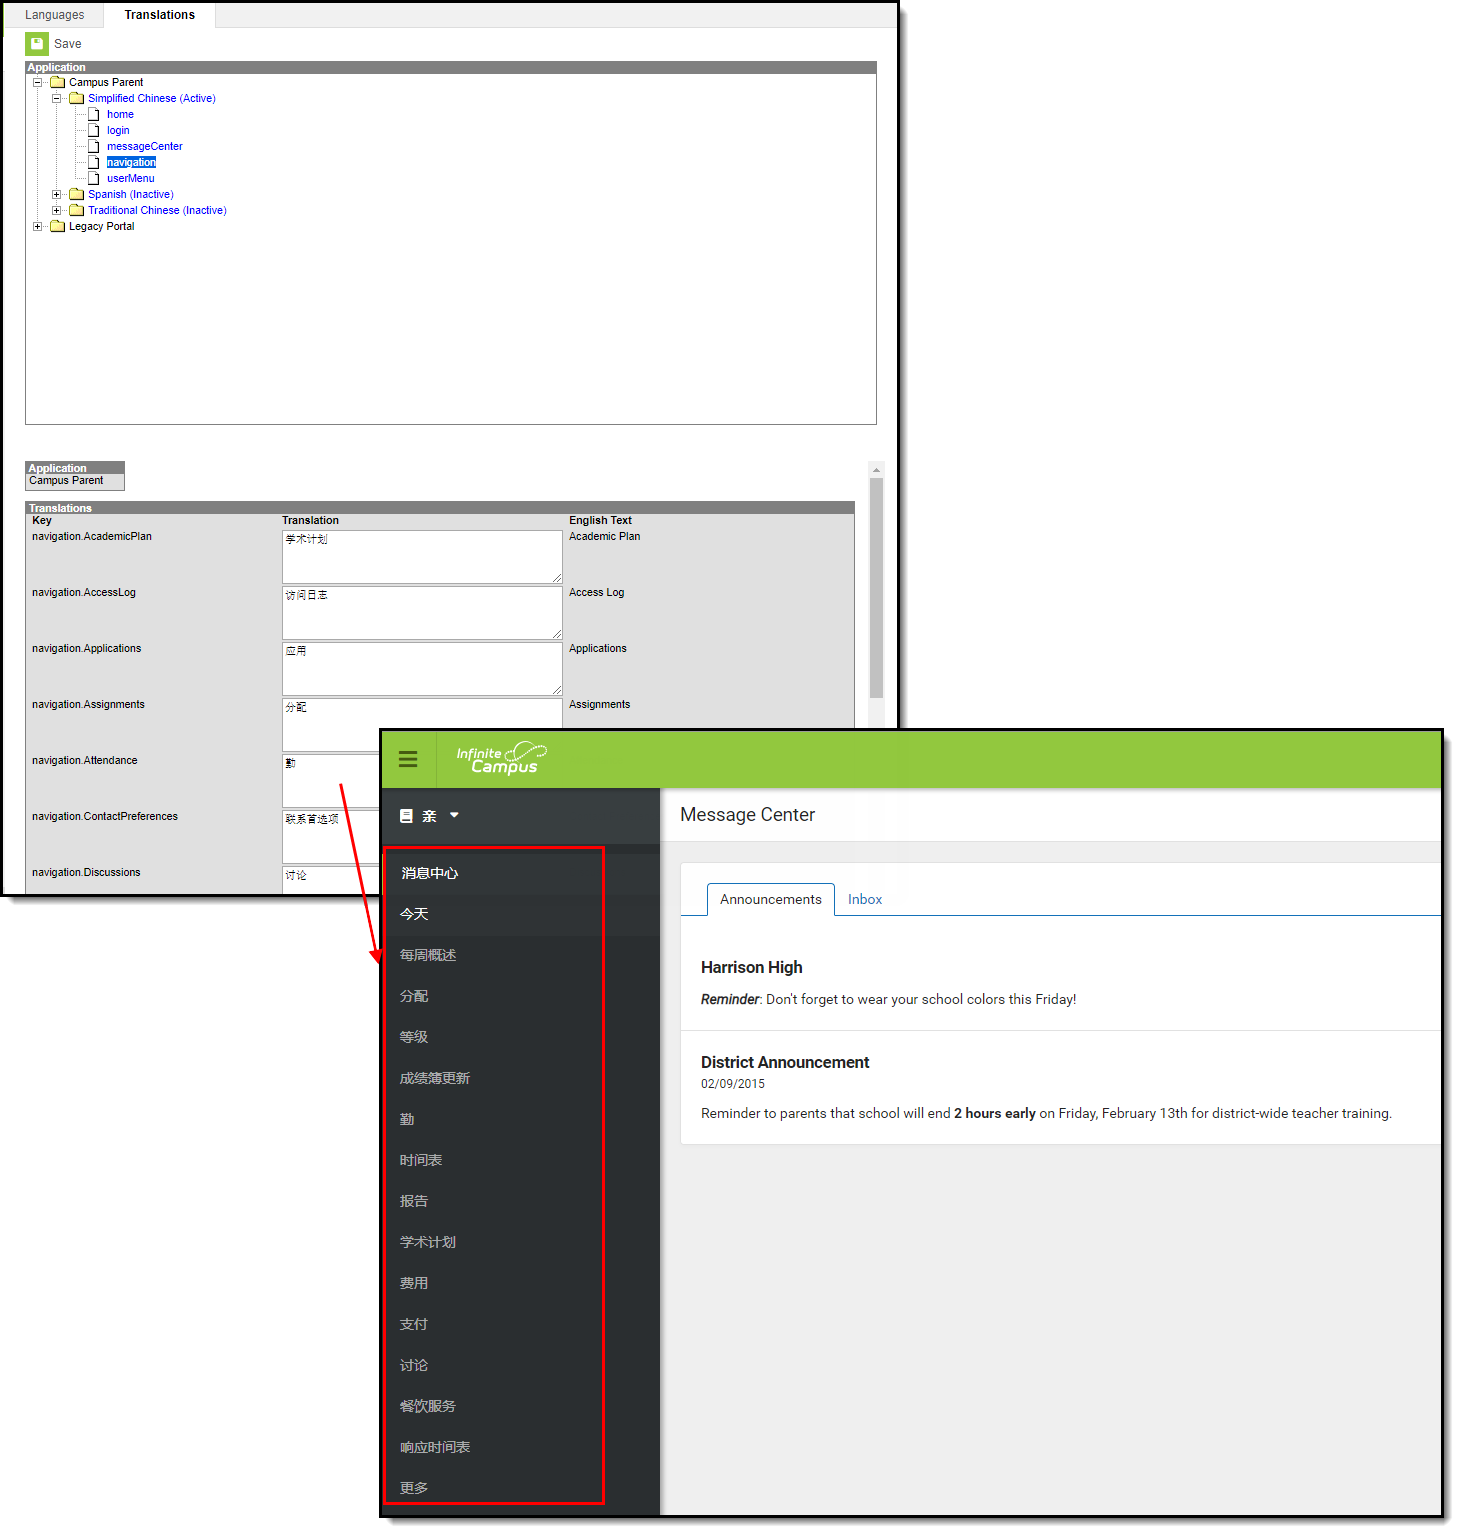 Navigation Bar Translated to Chinese
Activate a Language
When a language is added on the Languages tab, it is inactive. After the translations are entered for a language, it needs to be activated. Once activated, users can select it as an option.
New core fields added to the portal are the responsibility of the district to add their own translations in order for these new fields to have the translations needed in the existing languages.
To make a translation available for users, mark the Active checkbox (see image below). In the example below, Simplified Chinese is marked Active for the Campus Parent app and thus, is available for selection by the user.
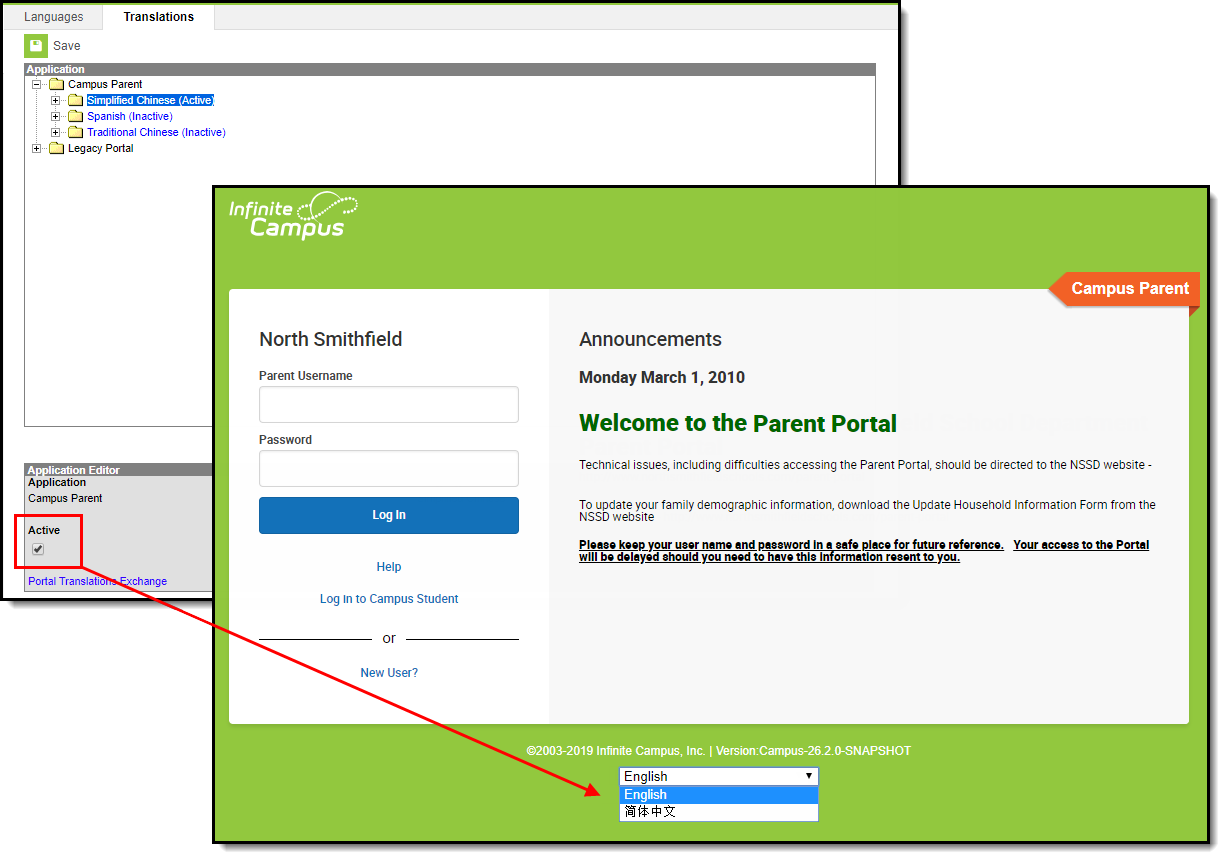 Activating a Language Translation
Download Translations
When a language is selected, a Download Translation editor becomes available. Users can download all translations or just missing translation for all fields in the module/application into a CSV format. This can be populated in-house with the needed translations, or sent to a translation service. Once translations are complete, they can then be uploaded back into Campus.
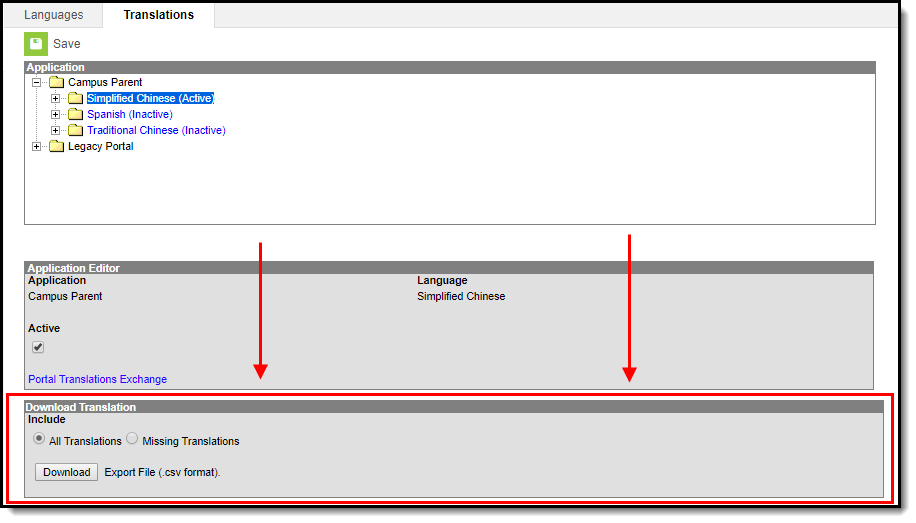 Download Translation Editor
- Determine whether all fields in the module/application should be downloaded into the spreadsheet, or just the fields that are missing translations. Choose the appropriate radio button for All Translations or Missing Translations.
- Click the Download button. The CSV spreadsheet downloads as other downloads would.
- Save the newly downloaded file and enter the translations or send it to your third party translator.
The CSV spreadsheet includes the selected Language Code, the label, the application from which the fields are being downloaded, the English Text that displays and the Translated Text.
 CSV Download
Upload Translations
When the downloaded spreadsheet has been populated with translations, use the Upload Translations functionality to upload the file and add the translations to the Campus database. You can also upload a shared file that was available on the Campus Community Forums.
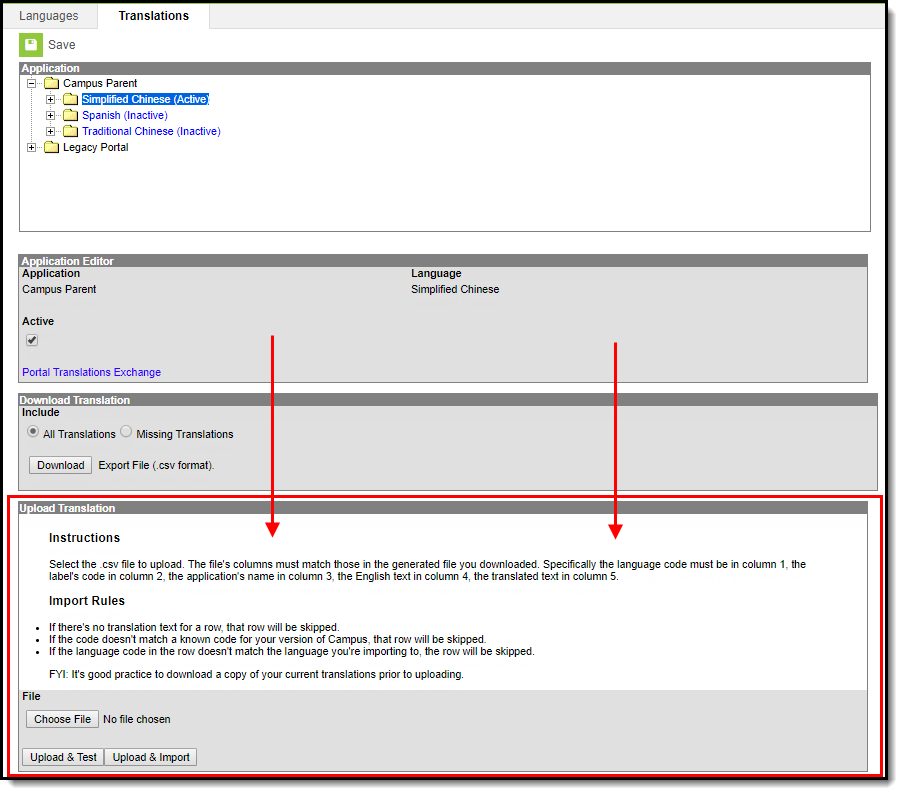 Upload Translations Editor
- Click the Choose File button to locate the file to upload.
- Click the Upload & Test button to test the format of the file before uploading. An error report displays when the test has been completed. Correct these issues prior to importing the file.
- Click the Upload & Import file to import the translated files to the database.
Encode CSV files to use UTF-8. Other encodings do not work properly.
Share Translations
A Campus Community Forum is available for users to share their translation files. Use the Download Translations process above and add your file to the forum for any language you have translated. In turn, import any translation file posted on the Forum that other districts have translated.
A link to the Portal Translations Exchange Forum is included on the Application Editor, displayed when a specific language is selected. It will open the Campus Community.
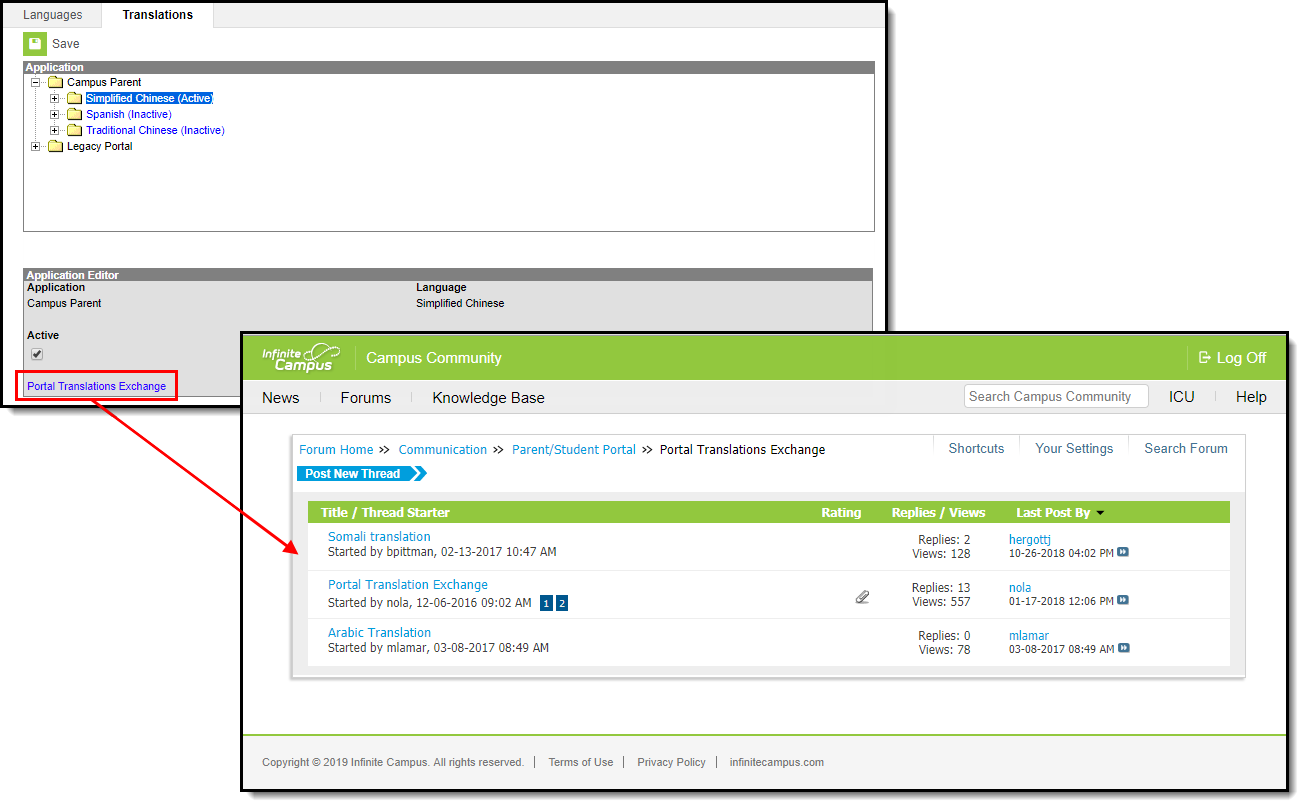 Portal Translations Exchange
Translation Setup allows administrators to add and maintain translation text for a language that displays to parents and students in Campus Student/Parent. This video demonstrates how to add and modify translation text.
Generating Portal Reports
Portal Usage Report: Administrators can review a list of which students and parents have Portal accounts and see account activity using the Portal Usage Report.
Search Term: Portal Usage Report
The Portal Usage Roster lists which students and parents have Portal accounts, and the login activity on those accounts. A version of this report is also available for administrators.
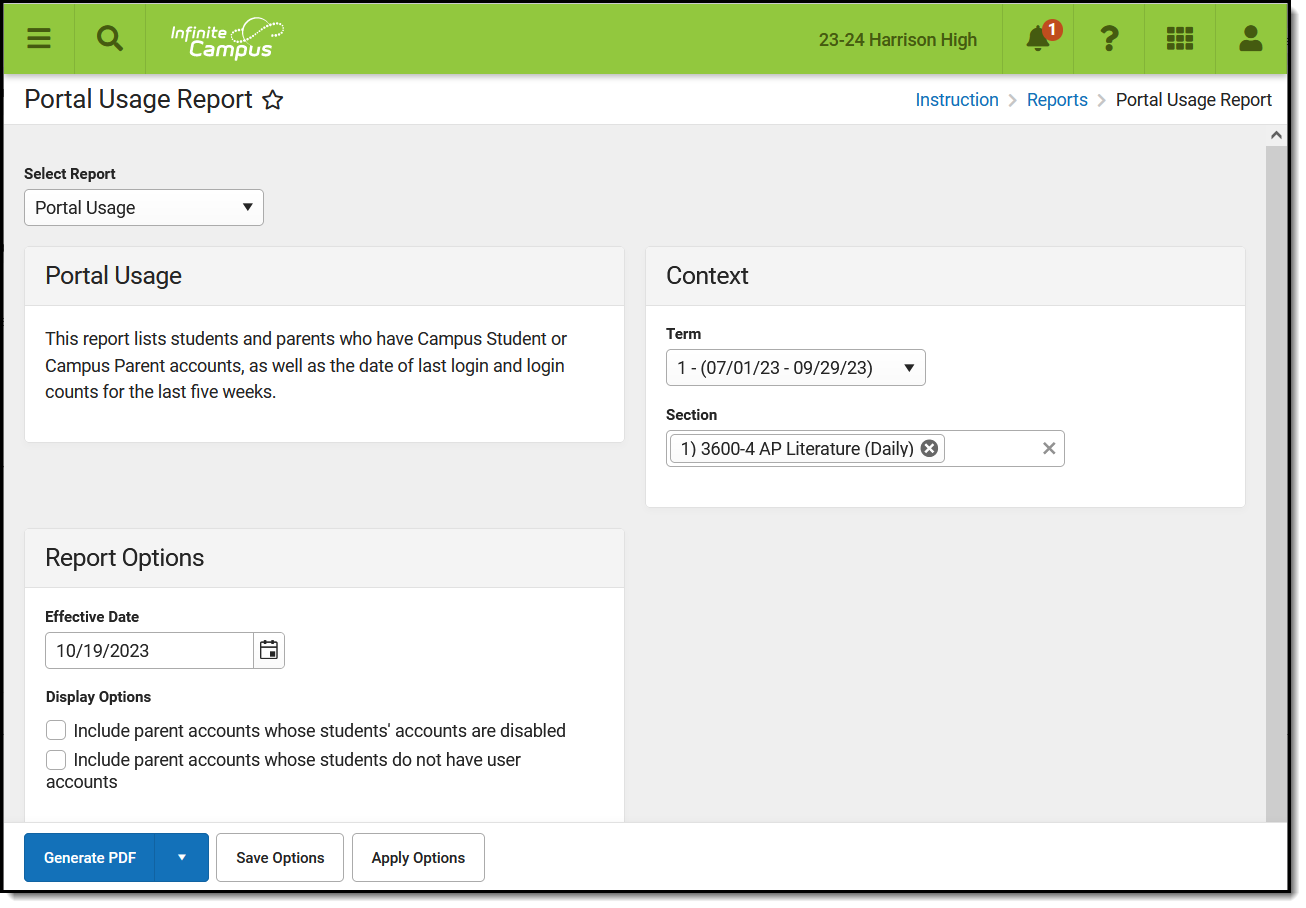 Review login activity of parents and students using the Portal Usage report.
Generating the Portal Usage Roster
- Select the Term and Section for which you want to generate usage data. Select multiple sections if desired. The Report Options and Student list will include data from all selected sections.
- Change the Effective Date if desired. This date auto-populates with the current date. This report includes usage data for the week that includes this date and the four prior weeks.
- Mark the Include parent accounts... checkbox to include parent accounts in the report even if they are parents of students whose accounts have been disabled.
- Click Generate PDF to view the report in PDF format or click the arrow button next to Generate to select a different format.

Example of the Portal Usage Roster
This report lists students in the course and any of their parents who have an account. The Student Account columns indicates which students have been given Portal accounts, followed by the last time each student or parent has logged in.
Login counts are totaled in the following columns for the week of the Effective Date and the previous 4 weeks, followed by a total of all 5 weeks in the last column.
Portal Request Summary Report: Description of the topic. Example: Attendance for individual students can be entered and edited from this location.
Tool Search: Portal Request Summary
The Portal Request Summary Report lists requests submitted via the portal, the person who requested the update, the person for whom the request was made, who processed the request, the date it was requested, the date it was processed and the status of the request. These requests are processed using the Portal Request Processor.
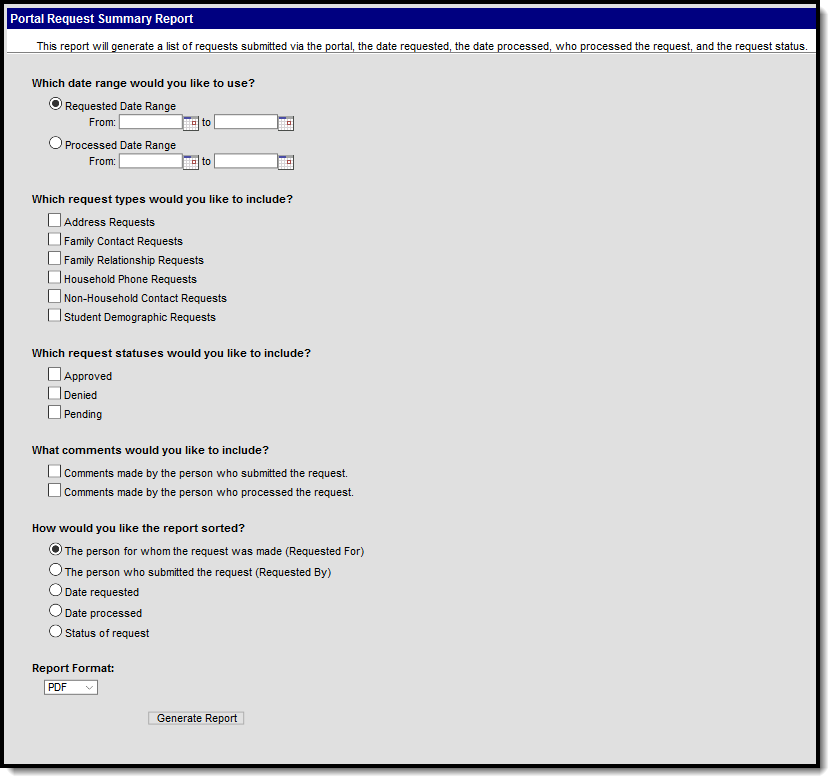 Portal Request Summary Report
See the Portal Preferences Reports Tool Rights article for details on available tool rights for this report.
Report Logic
This report lists requests submitted via the Portal using the Self Service update functionality for Student Demographics, Households and Family Members.
Report Editor
The following defines the options available on the Portal Request Summary Report.
| Field | Description |
|---|---|
| Date Range | Portal Requests can be reported by using either a Requested Date (date the request was entered) or the Processed Date (date the request was approved or denied). Both the From and To dates must be entered in order to generate the report. Dates are entered in mmddyy format or use the calendar icon to select a date. |
| Request Types | The report will return one or more of the following types:
At least one option must be selected when generating the report. All options can be selected, if desired. |
| Request Statuses | Users can generate the report for requests that have been approved, denied or are pending (request submitted, but not processed). At least one option needs to be selected in order generate the report. |
| Comments | Users can choose to include comments that were entered by the person submitting the request and/or by the person processing the request. |
| Sort Options | The following sort options are available.
|
| Report Format | The report generates in either PDF or DOCX format. |
Generate the Report
- Determine which date should be used on the report - Requested Date or Processed Date.
- For the selected date, enter a range of dates to pull the data.
- Select at least one Request Type to include on the report.
- Select at least one Request Status to include on the report.
- Select the desired Comment Types.
- Select how the report should be sorted.
- Select the desired Report Format.
- Click the Generate Report button.
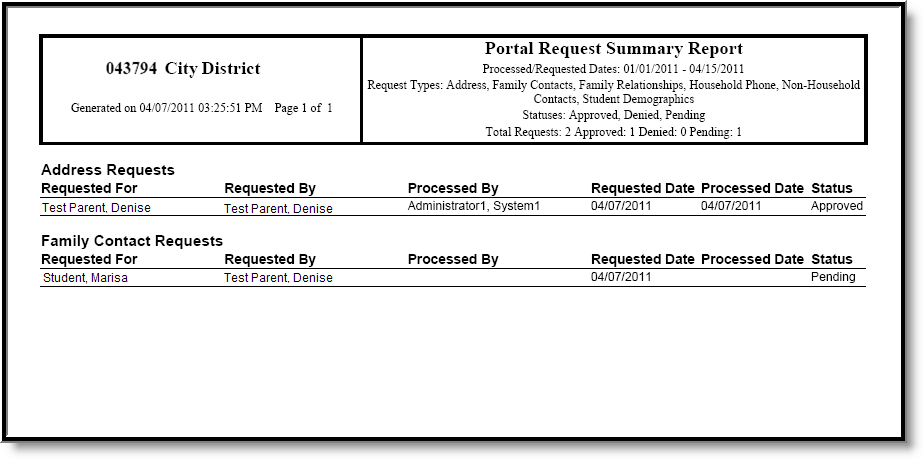 Portal Request Summary - PDF Format
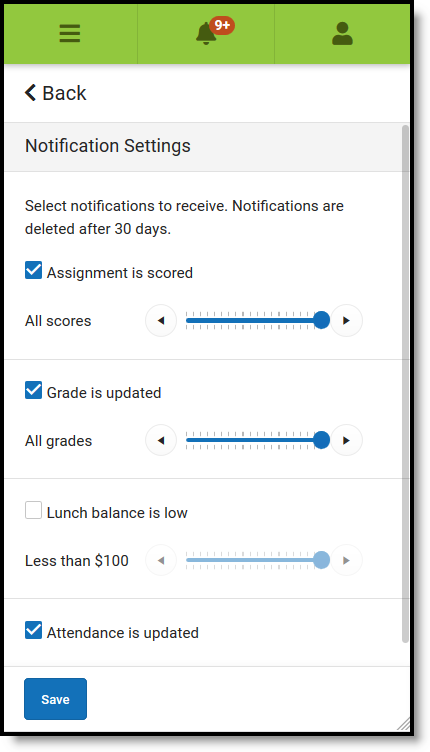
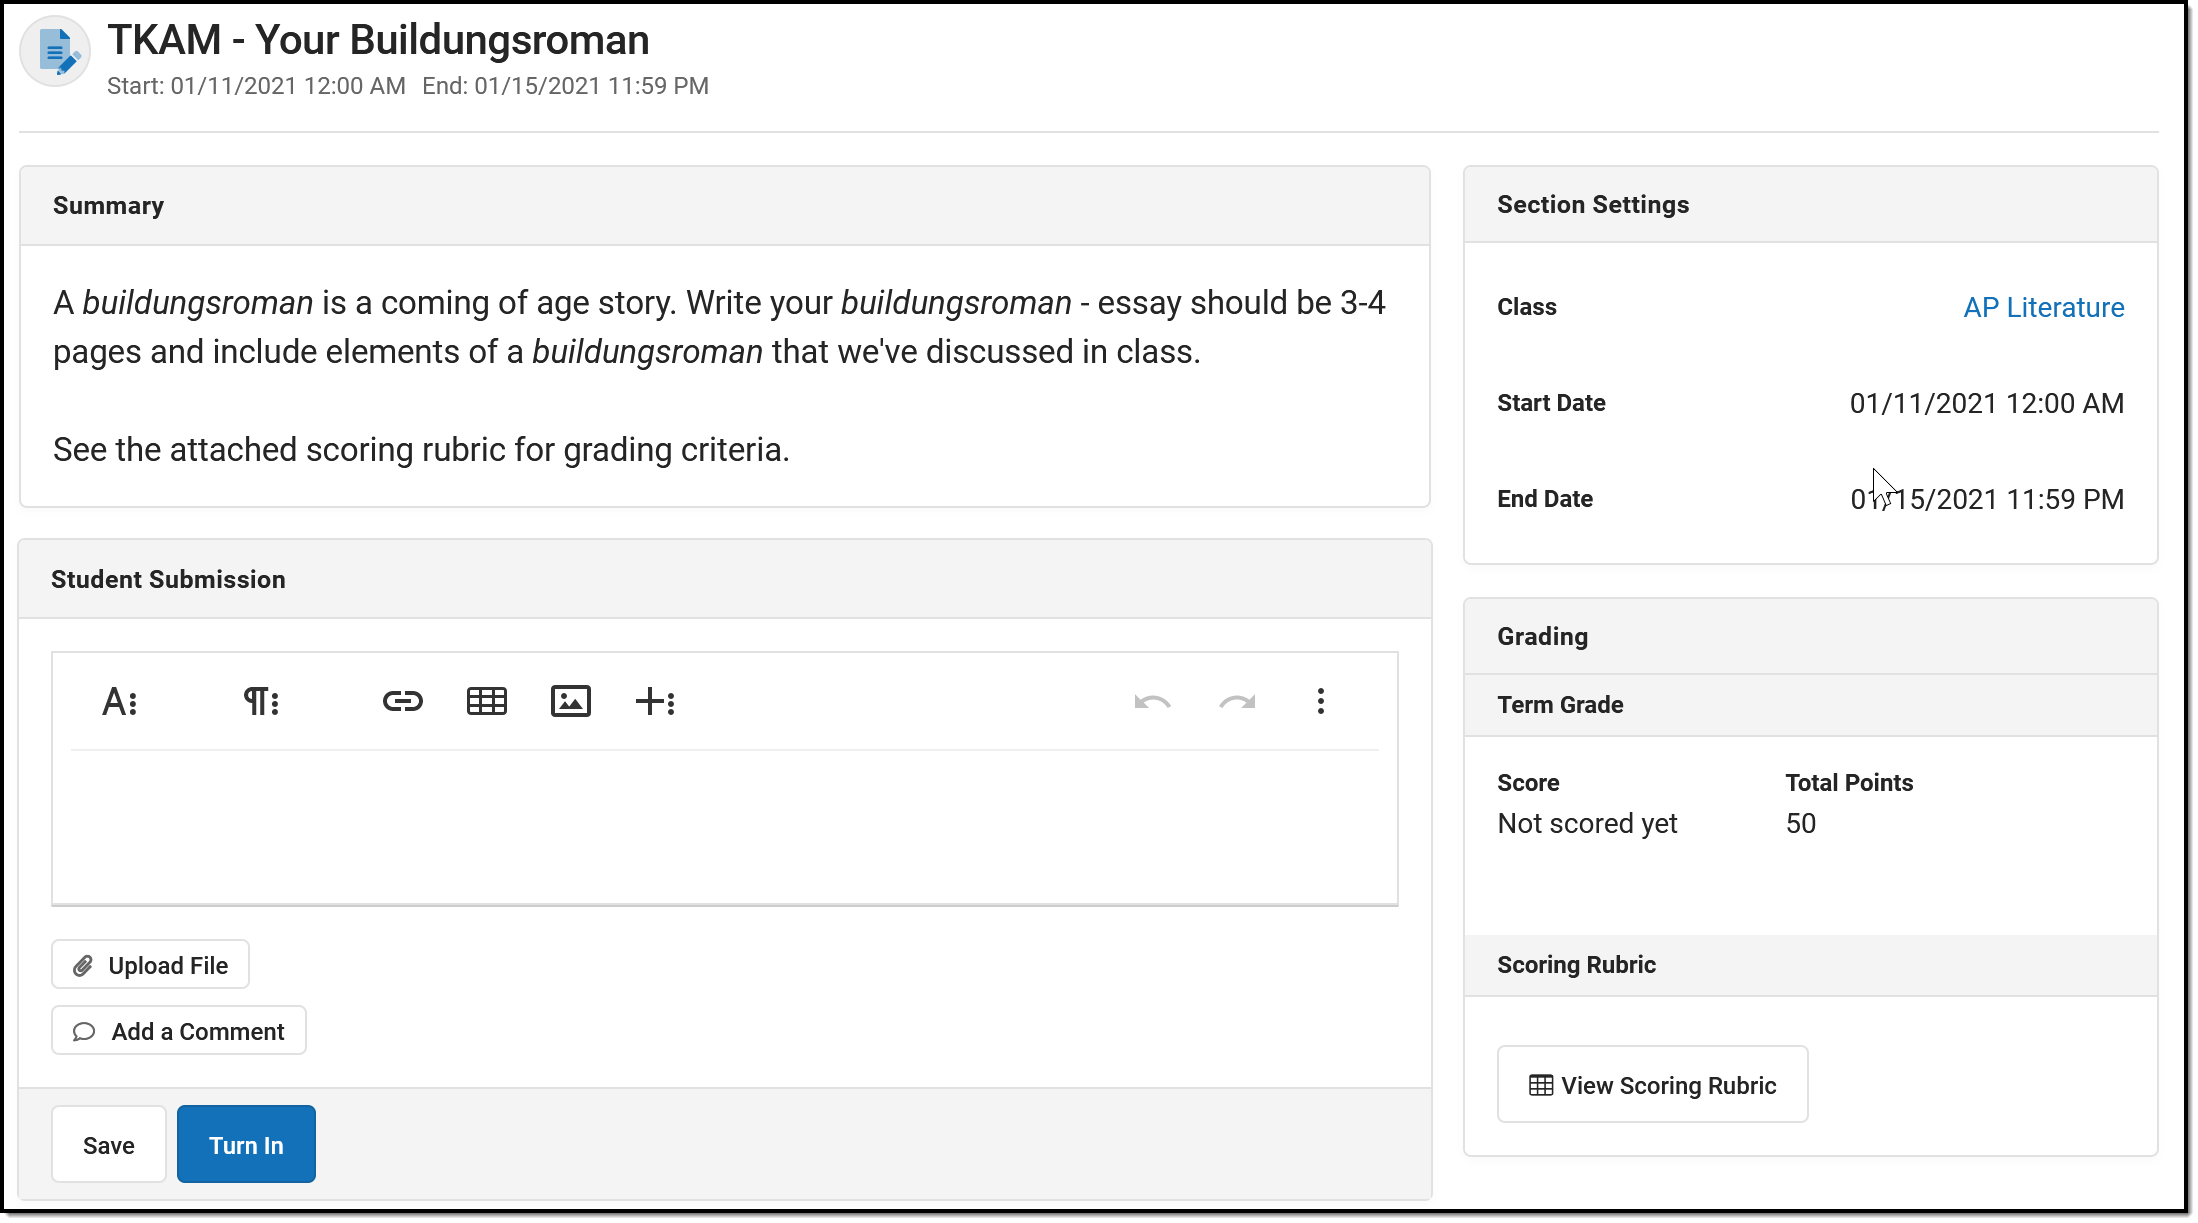
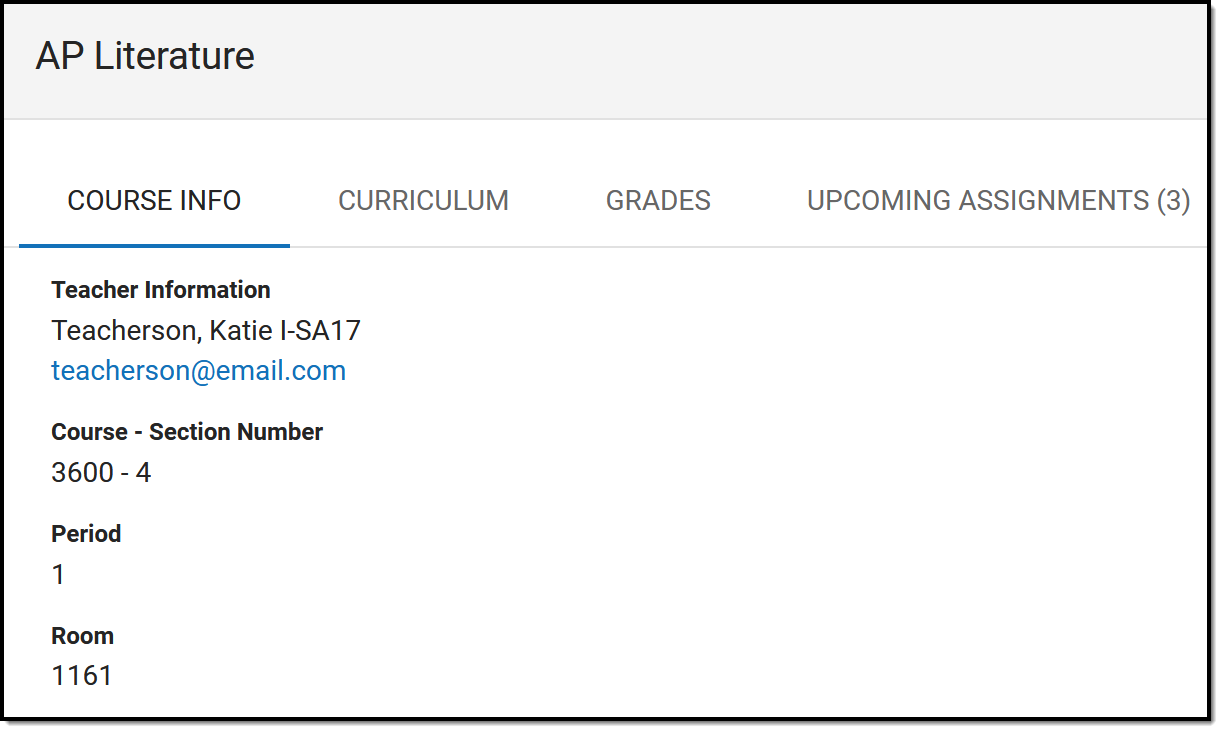
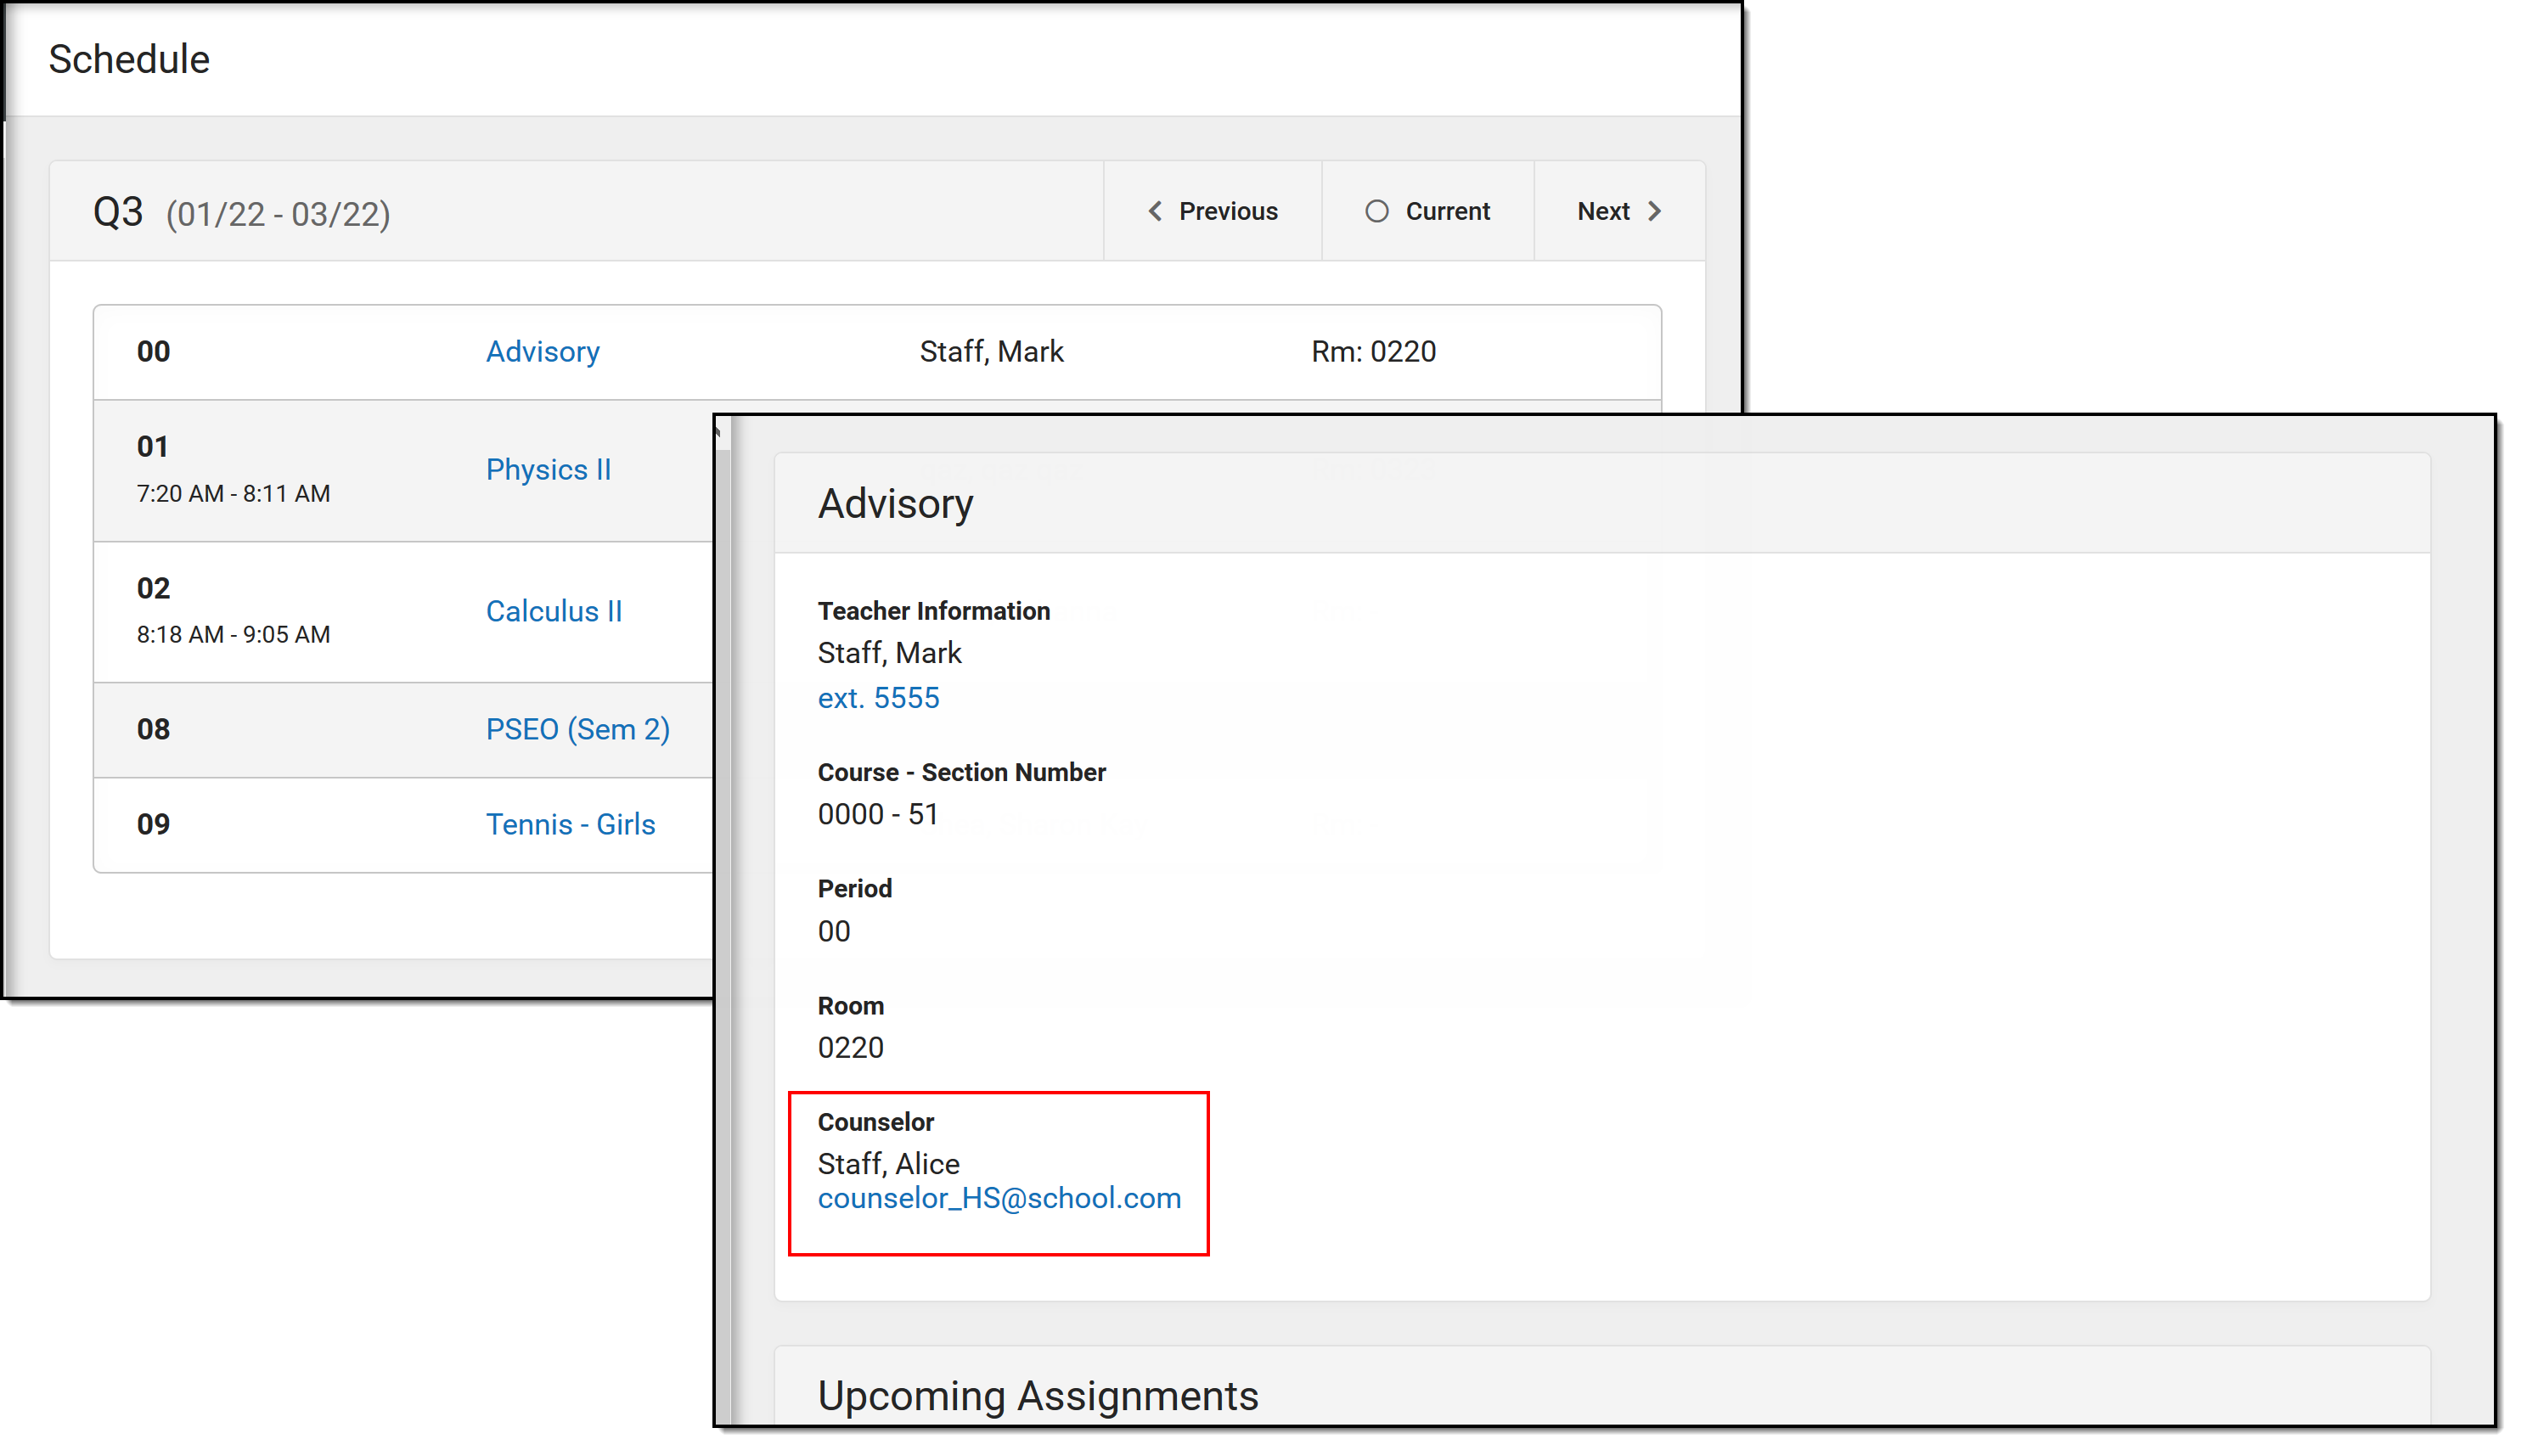
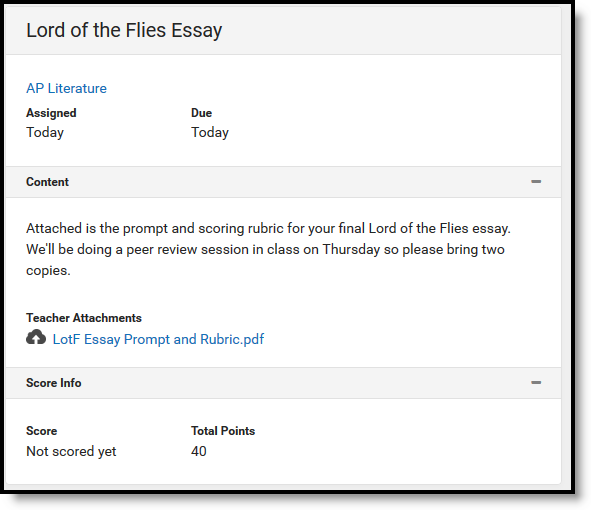


 The Checkout Screen displays.

