Tool Search: Feeder Import Wizard
The Feeder Import Wizard and its counterpart, the Feeder Export Wizard, were developed to aid districts in adding student information when those districts are considered "feeder" districts. A feeder district is defined as a district where all students, upon completion of the highest grade level, are fed into another district with the next sequential grade level.
The Feeder Import Wizard is used to import census data for students entering a new school level. For example, students moving from an elementary school are fed into a middle school; students moving from a middle school are fed into a high school. This wizard allows non-Infinite Campus districts to import information to Infinite Campus districts.
Prior to using any of the Feeder tools, the following must be done:
- Verify the destination year, school, calendar and schedule structure are selected in the Campus toolbar, indicating into which calendar the feeder students will be imported.
- Create a holding calendar that will be the school of enrollment for the time being until the district is ready to enroll the students in the actual school calendar. This allows the school to create proper households and relationships using their standards and guidelines. See the Calendar toolset for more information.
The Feeder Import Wizard tool is based on other import wizard available in Campus, like the Score Import Wizard and the Eligibility Import Wizard.
Feeder Tool Process
The following provides high level steps of the process for using the Feeder tools available.
Setting | Process |
|---|---|
If both districts are Campus districts |
|
If sending school is a Campus district, but receiving school is not |
|
If sending school is not a Campus district, but receiving school is |
|
If sending district feeds students to multiple locations |
|
Using the Feeder Import Wizard
The following provides information on using the Feeder Import Wizard based on a particular district's student information system.
Importing from a District Using Infinite Campus
This option is used when the sending district uses Campus and the receiving district uses Campus.
Select the destination year, school, calendar and schedule structure from the Campus toolbar.
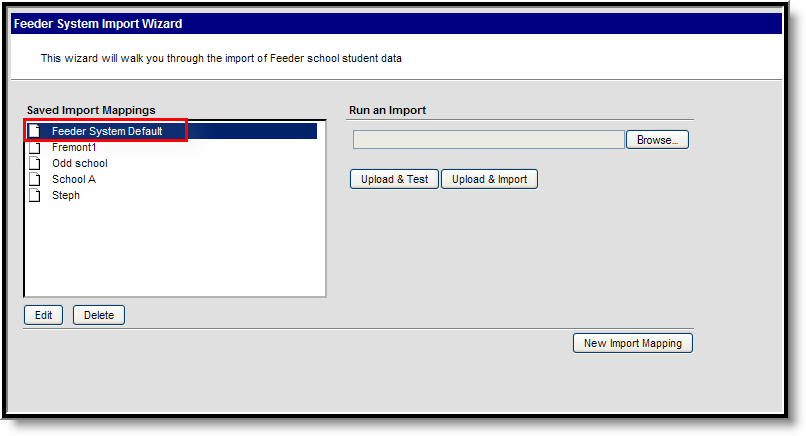
- Select the Feeder System Default option from the Saved Import Mappings list. See Image 2.
- Click the Browse button to locate the file being imported. This file contains the data from the sending school district.
- Select the Upload and Test button to verify the accuracy of the data before importing. No data will be imported with this option.
- Select the Upload and Import button to import the data.
Once data has been imported, the new student enrollments will be created and the Feeder Import Custom Tab will be populated.
Importing from a District NOT using Infinite Campus
This option is used when the sending district uses Campus and the receiving district uses Campus.
Select the destination year, school, calendar and schedule structure from the Campus toolbar.
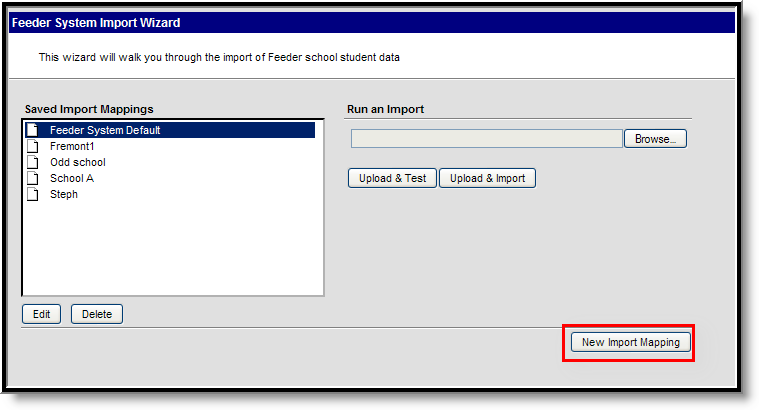
- Select the New Import Mapping option from the Saved Import Mappings list. See Image 3.
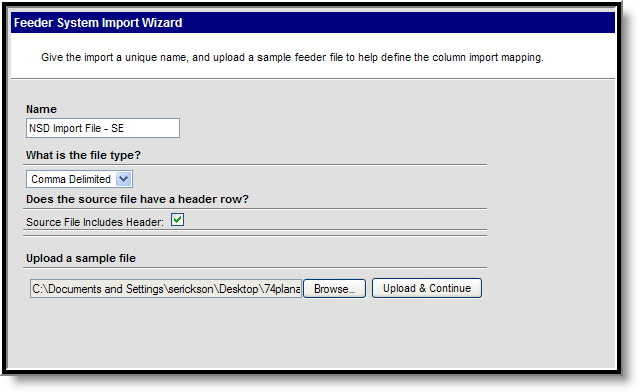
- Enter a Name for the import file. See Image 4.
- Select the File Type of the import file.
- If the source file has a header row, mark the Source File Includes Header checkbox.
- Click the Browse button to locate the file.
- Once found, click the Upload and Continue button.
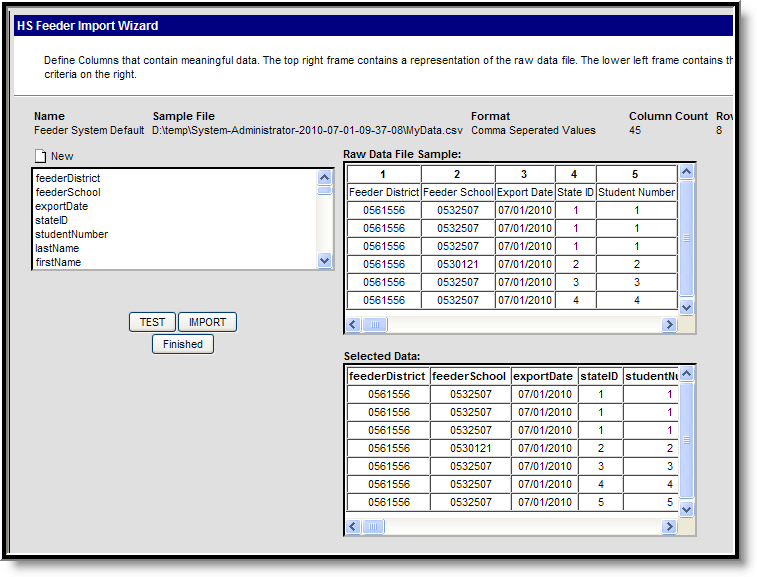
After uploading the data source, the fields in the source file need to be mapped to fields in Campus. This page shows the Raw Data File Sample, a count of the data included in the sample, and provides options for mapping the data to other locations. See Image 5.
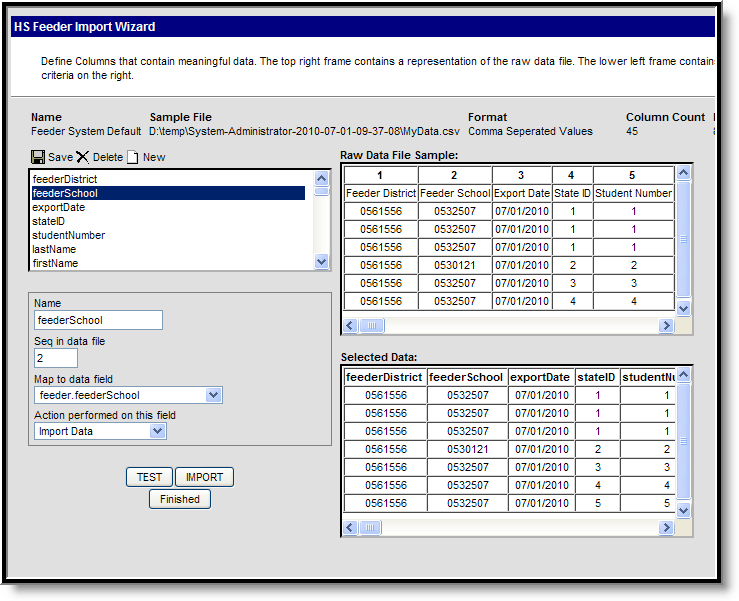
- Click the New icon.
- Enter a Name for the field that will be imported from the data file.
- Enter the Sequence of that field in the data field.
- Select the Map to Data Field option from the dropdown list.
- Select the Action to be performed on this field from the dropdown list. Options for this field are:
- Import Data
- Warn if already exists
- Error if missing data
- Continue this process until all desired fields are mapped. A list of the selected fields appears in the Selected Data window.
- Click the Save icon when finished.
In the image above, the field Feeder School, in sequence location 2, is being mapped to the feederSchool field and data will be imported.
There are no required fields that need to be mapped. However, a best practice is to import the student's Last Name, First Name and Date of Birth.
When finished mapping fields, choose one of the following buttons:
- TEST - this will verify the options chosen and produce a report listing any errors or warnings that occurred.
- IMPORT - this will import the data as mapped and the Custom Feeder Import tab will be populated.
- Finished - this will return the user to the first screen of the Feeder Import Tool.
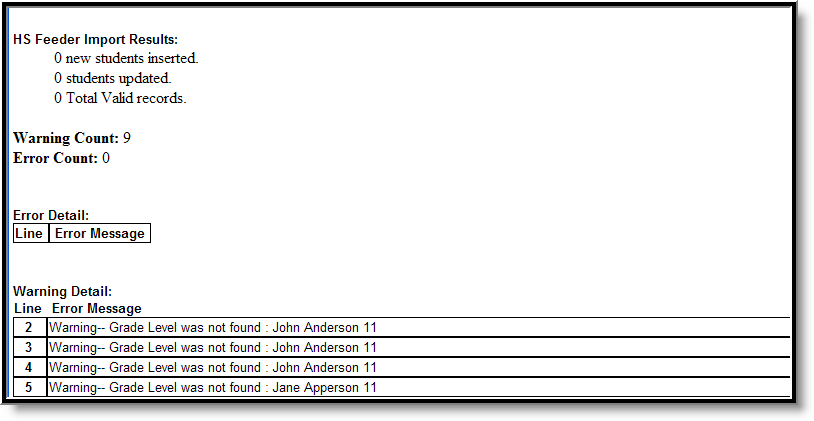
A sample report of any errors/warnings will look like this: