This functionality is only available to customers who have purchased Campus Point of Sale as an add-on functionality.
Tool Search: Terminals
The Terminals tool contains system information and settings for all Point of Sale terminals within a district. It also includes system information related to Cafeteria Serve and Class Serve functionality.
See the Terminals Tool Rights article for information about rights needed to use this tool.
| What can I do? | What do I need to know? |
|---|---|
If a Campus Point of Sale has not communicated with the server for three weeks, it will be inactivated and all pending messages from Infinite Campus will be deleted to improve server performance.
Users can reactivate the terminal and update POS data by performing a Data Reload one of two ways:
- From the POS Terminal app: Perform a Data Reload from the POS Terminal Admin screen. This will auto-activate the terminal on the Terminal List and update all data on it.
- From Campus SIS: Click Active on the Terminal Detail (Food Service > Administration > Terminals) and then perform a data reload using the Terminal Manager screen (Food Service > Administration > Terminal Manager) to update all data on the terminal.
Campus Point of Sale can still be used before the reload, but data will not be sent from Infinite Campus to the POS terminal app until the terminal is reactivated.
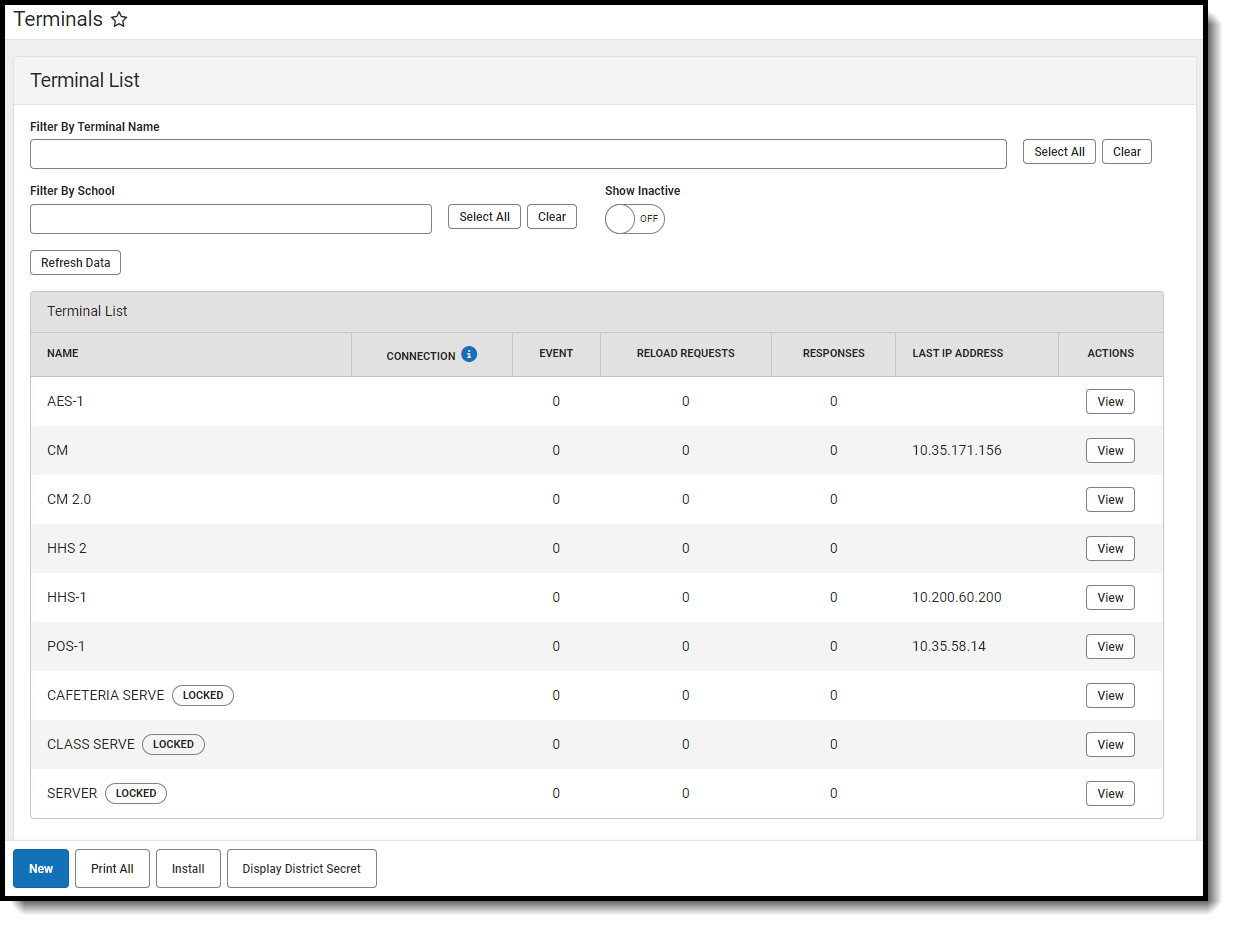
Terminal List Filters
Filters can be used to limit the terminals that appear within the Terminal List. Terminals can be filtered by Terminal Name and School. Additionally, the Show Inactive switch can be turned ON to have terminals that are not Active appear.

Terminal List Column Descriptions
The Terminal List displays system information for each terminal within a district and a terminal's current operating status.
 Terminal List
The Refresh Data button above the Terminal List can update the data displayed within Connection, Event, Reload Requests, and Responses without resetting the filters.
Column | Description |
|---|---|
Name | The Name column displays the POS terminal name and indicates whether it is active. Inactive terminals will show an "Inactive" status in the name column. Active terminals are set by marking the Active checkbox in the Terminal Detail panel. |
| Connection | Indicates if a terminal is online. Online terminals will show "Online" in the Connection column, while offline terminals will not display any status. Connection messages from the terminal are sent at the same rate as the Disconnected Status Time set in General Preferences. Click the Refresh Data button periodically to see updated data and connection statuses. There may be up to a 30 second delay. |
| Events | Messages waiting to be sent to the terminal from the Campus application server, such as enrollment updates and account changes. |
| Reload Requests | Tracks Reload Requests made from this terminal that are currently not complete. |
| Responses | Messages to be sent to the Campus application from the terminal, such as POS Data Reload command. |
Last IP Address | IP address of the terminal as last reported to Campus. |
Actions | Upon clicking the View button, the Terminal Detail panel opens. This panel allows users to edit the terminal name and active status, add or remove selected schools, print terminal information, delete the terminal, or review terminal reloads requests. |
Types of Terminals
All terminals listed in the Terminals tool are used in reporting, allowing reports to indicate where/how a transaction occurred. Reports indicate whether a transaction occurred as part of Cafeteria/Class Serve functionality, through a manual adjustment on a patron's Journal tab (indicated by the Server terminal), or through an actual POS terminal.
The following types of terminals are displayed in the Terminal List.
| Terminal Type | Description |
|---|---|
| POS | Most terminals are standard POS terminals that represent actual physical terminals used to process food service transactions. The district creates these terminals. |
| Class Serve | This terminal represents Class Serve functionality, although an actual physical terminal is not used. This terminal is built-in by Infinite Campus and cannot be changed or deleted. |
| Server | This terminal represents the Campus application, although an actual physical terminal is not used. This terminal is built-in by Infinite Campus and cannot be changed or deleted. |
Best Practices for Terminal Setup
The best practices described here are the preferred setup recommended by Infinite Campus.
- Create terminal(s) for each cafeteria.
- Keep the terminal name short or use an abbreviated form. Terminal names should be under eight (8) characters.
- If there is one school type and one terminal at each site (Main High School, Main Middle School, Main Elementary), the terminal names should be abbreviated to the school type. For example, HS_01, MS_01, EL_01. If another terminal is added in the future, additions should be named HS_02, MS_02, EL_02, etc.
- If there are two or more school types and only one terminal at each site, such as East Elementary and West Elementary, the terminal names could be East_01 and West_01.
- If there is only one school type and more than one terminal at that site, the terminal names could be HSPizza, HSGrill, HSAC, MSGrill, MSPizza, which would indicate the physical location of the terminal within the cafeteria.
| Option | Cafeteria Structure | Terminal Structure |
|---|---|---|
| A | This options is best for the following cafeteria structure:
|
|
| B | This option is best for the following cafeteria structure:
|
If more than one school is assigned to a terminal, each school's enrollments will appear on the terminal. This also allow students to be charged at their correct eligibility. |
Add a New Terminal
- Click the New button.
Result: The Terminal Detail area displays.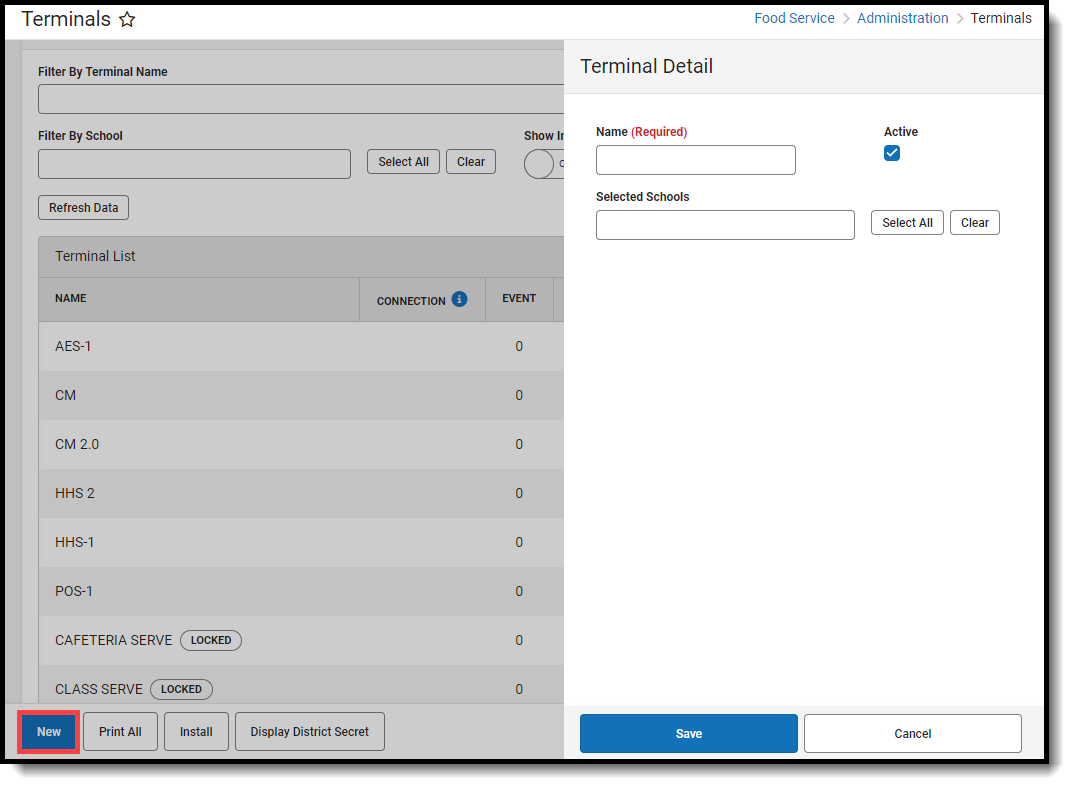 Add a New Terminal
 - Enter a unique Name for the terminal (duplication is not allowed).
- Select the Selected School(s) for which the terminal will be used.The School selected in this field determines the patrons who appear for processing on the terminal. The School also appears on reports.
- The Active checkbox is active by default. Uncheck that field to make it inactive.A terminal should not be made active until it is configured and is ready to receive/load student data from Infinite Campus.

Delete a Terminal
- Click the View button of the terminal you want to delete. The Terminal Detail panel will open.
- Click the Delete button. A Confirm Delete prompt will appear.
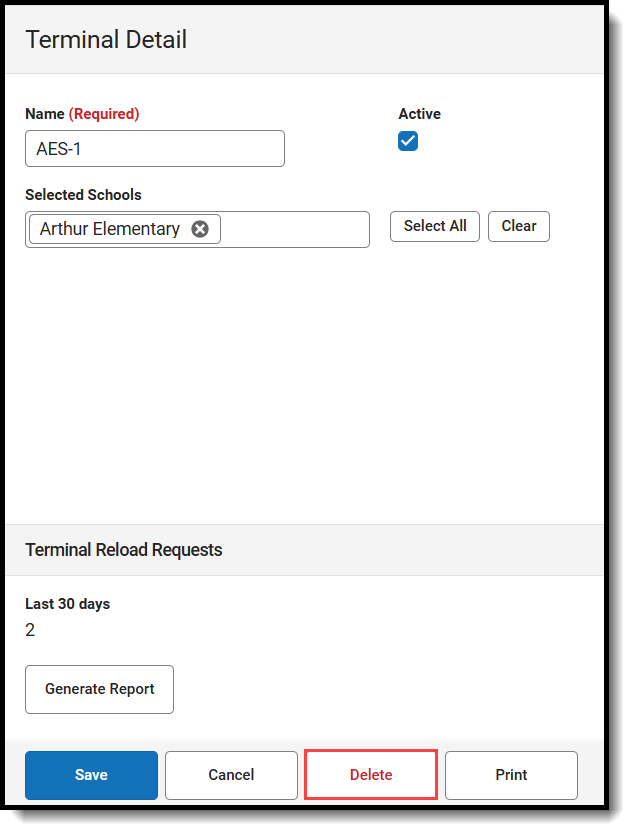
- Click Delete. The Terminal is deleted and removed from the Terminal List.

Generating a Terminal Reload Request Report
The Terminal Reload Requests section shows how many terminal reloads have been initiated in the last 30 days. This is done by reloading a terminal from the Terminal Manager tool or by loading data in the POS Terminal Admin. A report of any reloads for that specific terminal over the last 30 days, and if the request was made via the POS Terminal Admin or Terminal Manager, can be generated by clicking Generate Report.

Install a Terminal
| To install a... | See... |
|---|---|
| POS Terminal | Terminal Installation and Configuration |
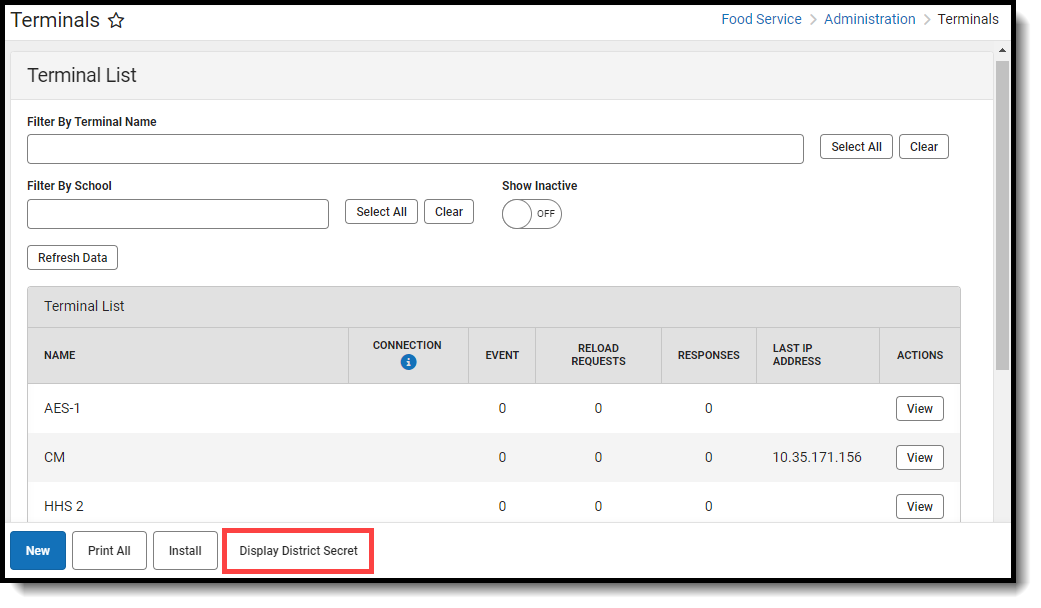
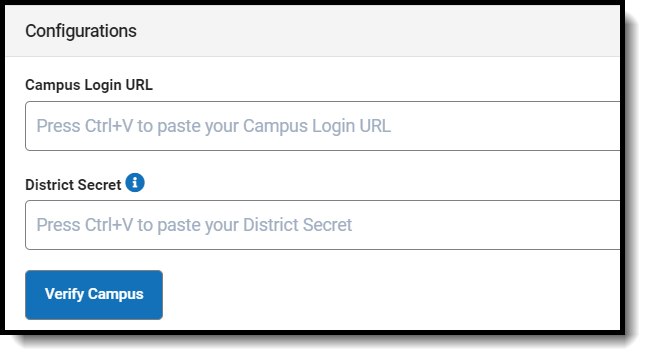
Display District Secret
The District Secret authorizes the terminal to pull data from Campus and prevents users from using the URL from another district to load district data on the terminal.
- Click the Display District Secret button to display the Authenticate POS with District Secret screen.
 Display District Secret
 - Click the copy icon
 to copy the District Secret.
 - Paste the District Secret in the District Secret field on the POS Terminal Admin.
 District Secret Field

 to copy the District Secret.
See the Terminal Installation and Configuration article for more information about the POS Terminal Admin.
