Tool Search: Special Ed Documents
The Amend tool allows users to make changes to locked plans. This option is not available in all states. The Amend tool may look different depending on which version of Campus used.
IEPs must be locked to use the Amend tool. A PDF copy of the IEP, prior to it being amended, can be created. See Special Ed Preferences for more information.
IEPs can be amended after the End Date of the plan has passed as long as the Amendment Date falls within the plan dates.
New Look Amend Process
Users can Amend a document in the New Look of Campus with any of the RWAD tool rights. When a user does not have any tool rights to Amend, the Amend button is grayed out.
For more information, see the Special Education Tool Rights article.
Certain states have plans with the New Look of Campus. The Amend process for New Look plans is different from Classic View process.
- Select the document to be amended from the Documents list.
- Click the Amend button in the action bar.
- A warning displays asking the user to verify that they want to amend the document. Click OK or Cancel.
- Select the editor to be amended.
- Click Amend from the action bar. The Amend side panel displays.
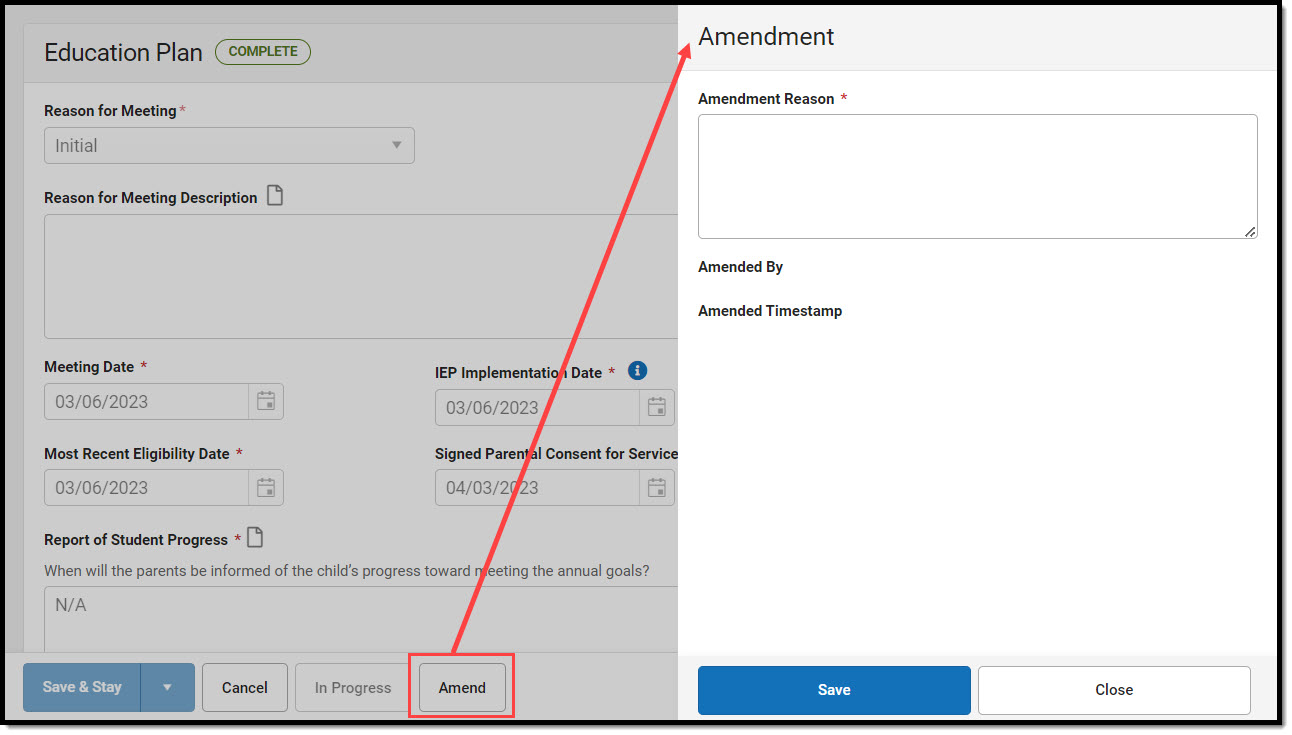 Amend Side Panel
 - Enter the Amendment Reason, then click Save. The Amended by and Amended Timestamp fields automatically populate once the Amendment Reason is saved. The Amend button changes to Amendment Reason and allows the user to edit the reason.
- Make desired edits to the editor. Click Complete when amendment edits are complete.
- Repeat steps 4-7 for all desired editors.
- Navigate to the Editor Home. Click Review Amendment. The list of amendments display in the Review Amendment side panel. The Amendment Reason can be modified here for each amended editor, if desired.
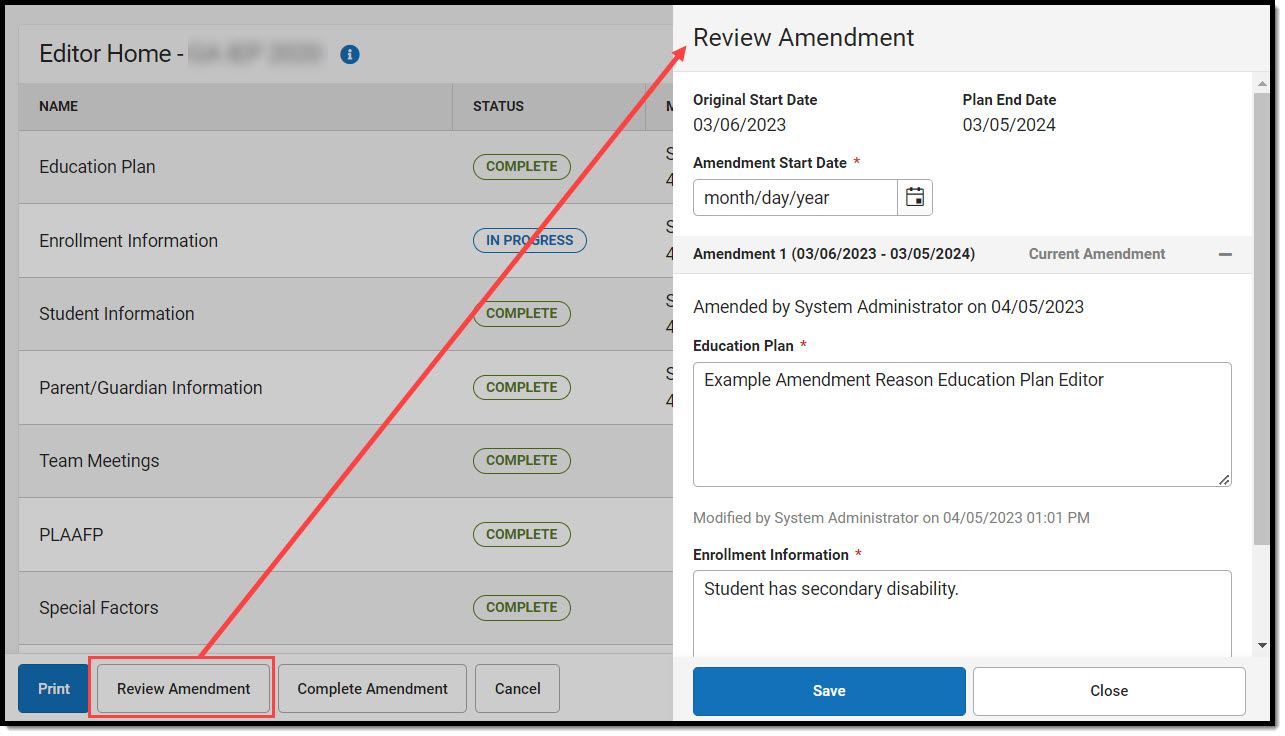
- Enter an Amendment Start Date. The Start Date of the amended plan is changed to the value saved.
- Once all editors are marked Complete, click Complete Amendment. The user is automatically navigated to the Special Ed Documents tool.


The Start Date of the amended document changes after the amendment has been completed.
The amended document displays above the original on the Documents tool. The original is labeled (Amended Original) and the new document is labeled (Amended 1). The original document End Date automatically changes to one day before the Start Date of the Amended document.
The Amendment Start Date displays in the Document Detail for the amended plan. This can be queried in Ad hoc (Query Wizard > Student > Learner Planning > Learning Plans > learningPlan.amendStartDate).
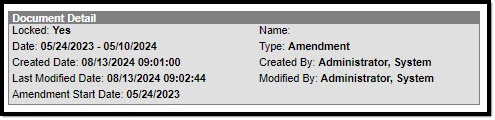 Amendment Start Date in the Document Detail
Classic View Amend Process
Read - Modify an already amended editor. Users without any rights are able to view in-progress amendments when they have rights to the document.
Write - Amend an editor.
Add - Amend a locked document.
Delete - N/A
For more information, see the Special Education Tool Rights article.
This section details the amend process using the Classic View of Campus.
 Amend Tool
- Select the document to be amended from the Documents list.
- Click the Amend button in the action bar.
- A warning displays asking the user to verify that they want to amend the document. Click OK or Cancel.
- Select the document editor to be amended.
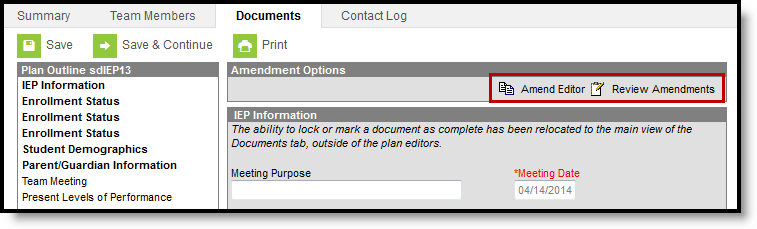 Amend Options
 - Click the Amend Editor button above the editor.
- Enter an Amendment Reason and amend desired fields.
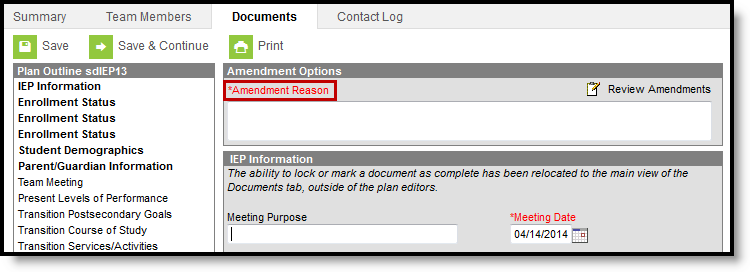 Amendment Reason
 - Click Save & Continue to move to the next editor or Save to save the changes and remain in the editor. Complete any additional amendments needed. Once saved, the document can be closed and remain in unlocked draft status.
- Once all desired editors are amended, click Review Amendments.
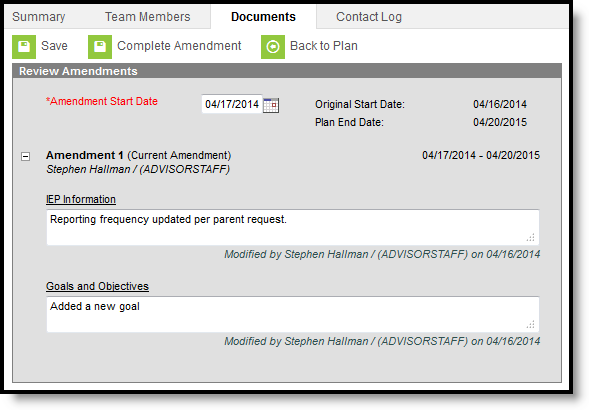 Reviewing Amendments
 - Enter an Amendment Start Date. The Start Date of the amended plan will be changed to the value entered.
- To continue:
- Click Save to continue making amendments to the document. Use this option to save the amendment in unlocked draft status. The Amendment Start Date and amendments are saved and the service dates are adjusted accordingly.
- Click Back to Plan to make more amendments. Save changes first.
- Click Complete Amendment to complete the amendment and lock the amended document. The End Date of the previous plan is updated to the day before the Amendment Start Date. Service dates are adjusted accordingly.


Note: Services with an end date prior to the Amendment date do not display in the amended plan. The end dated services still display in the original plan.
The amended document displays above the original on the Documents tool. The original is labeled (Amended Original) and the new document is labeled (Amended 1). The original document End Date automatically changes to one day before the Start Date of the Amended document.
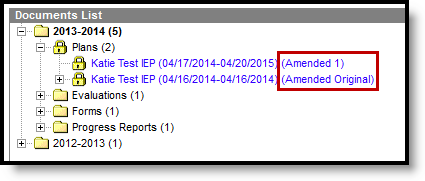 Original and Amended Documents
