Tool Search: eTranscript Batch
The eTranscript Batch Report allows users to generate eTranscripts to upload to third-party vendors. An eTranscript Report must first be created in the Report Setup tool.
Generating the eTranscript Batch Report is Step 11 in the eTranscript Workflow.
See the Grading & Standards Reports Tool Rights article for the tool right needed to generate this report.
eTranscript Batch Field Descriptions
The following provides information on the options available on the eTranscript Batch editor.
| Option | Description | |
|---|---|---|
Report Required | Determines which eTranscript report generates. eTranscript reports are created in Report Setup. A report must be selected to generate the report. | |
| Student Selection | Students can be selected by choosing a Grade enrollment level, using an Ad hoc filter, or searching for students. | |
| Grades | Only grade levels available in the school calendar selected in the Campus toolbar are available for selection. Alternatively, you can leave the selection at All Students to generate eTranscripts for all students. Selecting All Students is NOT recommended for performance purposes unless you use the Submit to Batch option to generate the report. Note that only the primary school of record can send eTranscripts. | |
| Ad hoc Filter | Only those students included in the filter will be returned on the report. Filters are created in the Filter Designer. | |
| Enrollment Effective Date | Filter the student set to only those actively enrolled students as of the entered date. This date only applies to the student selection when choosing a grade level. | |
| Student Search | Search for specific students using Last Name, First Name, Grade Level, or Student Number (school-assigned student number). When searching for first and last names, at least one letter must be entered. The complete student number must also be entered to return the results. The Enrollment Effective Date entry does not apply to the student search; active and inactive students can be found using the student search. | |
| Report Generation | Use the Generate Report button to display the report results immediately. Use the Submit to Batch button to download a large number of eTranscripts. See the Batch Queue article for more information. If you are generating eTranscripts for more than ten students, consider using the Submit to Batch button. | |
Generate eTranscript Reports
Using Grade or Ad hoc Filter Options
- Select the appropriate eTranscript report from the Report dropdown list.
- Determine how students should be selected by Grade level or Ad hoc Filter.
- Enter an Enrollment Effective Date.
- Click the Generate Report button or the Submit to Batch button.
Using Search for Students Option
- Select the appropriate eTranscript report from the Report dropdown list.
- Choose the Search for Students radio button.
- Enter the desired search criteria (last name, first name, grade level, or student number).
- Click the Search button. Matching results are displayed in the left-hand box.
- Select the students by highlighting their names and clicking the right-facing arrow. This moves the student's name to the right-hand box. Once the student's name is selected and moved to the right, it no longer displays in the Results List (left-hand box). Click the left-facing arrow to move the student's name back to the left-hand box. Only the student names in the Selected List (right-hand box) are included in the report.
- Click the Generate Report button or the Submit to Batch button.
The eTranscript Report is displayed in XML format. See the PESC XML Output for eTranscripts for more information.
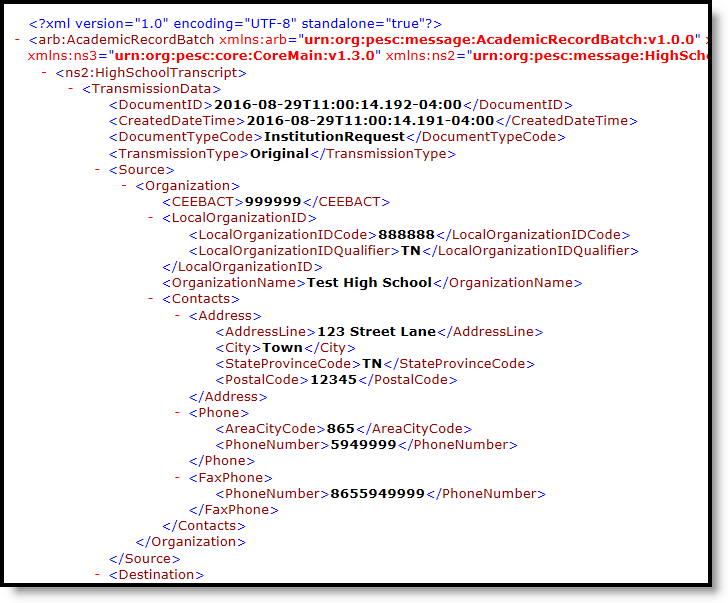 Sample eTranscript XML
When using the Submit to Batch option, the Batch Queue list of reports displays which reports have been submitted. The following four statuses display:
- Queued - Waiting to process
- Processing - Currently being processed
- Completed - Finished processing, and the user can get the report and/or release the XML file
- Sending - Processed and is being sent to the vendor
- Released -The user has electronically submitted the batch to their vendor of choice; the date and time of release displays
- Error - The submitted batch could not complete the sending process due to an issue in the file (missing required fields, etc.).
Completed and released reports display a Get the report link in the Download column. This displays the generated report in XML format.
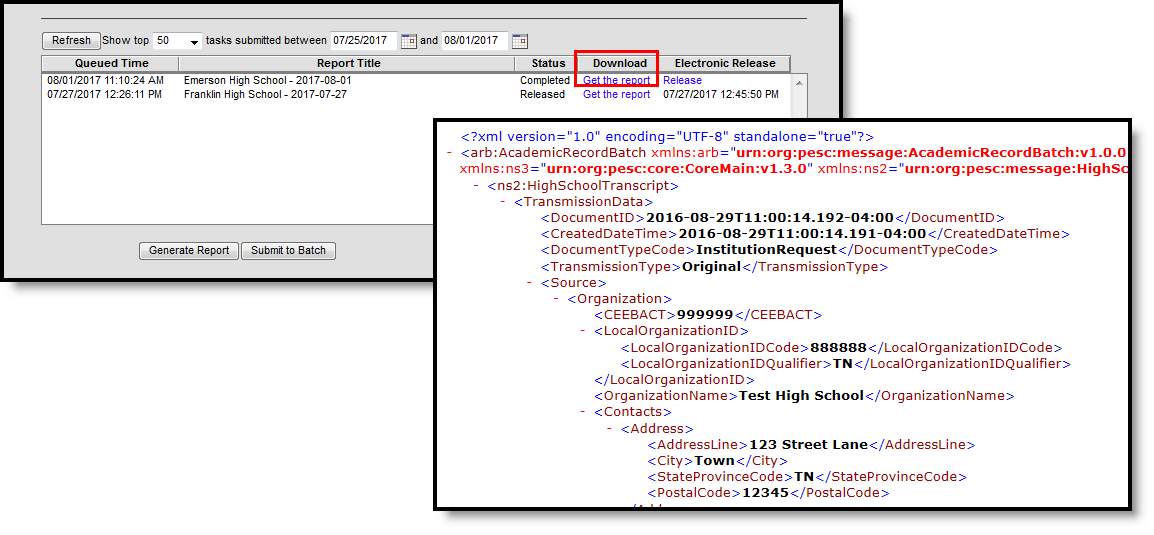 Batch Queue - Download saved reports
Release XML eTranscript to Vendor
A vendor must be set up using the Electronic Release Setup tool to use this option.
This process requires at least R(ead) rights to the Electronic Release sub right of the eTranscript Batch report and R(ead) rights to the Electronic Release Setup. For more information, see the recommended eTranscript Tool Rights.
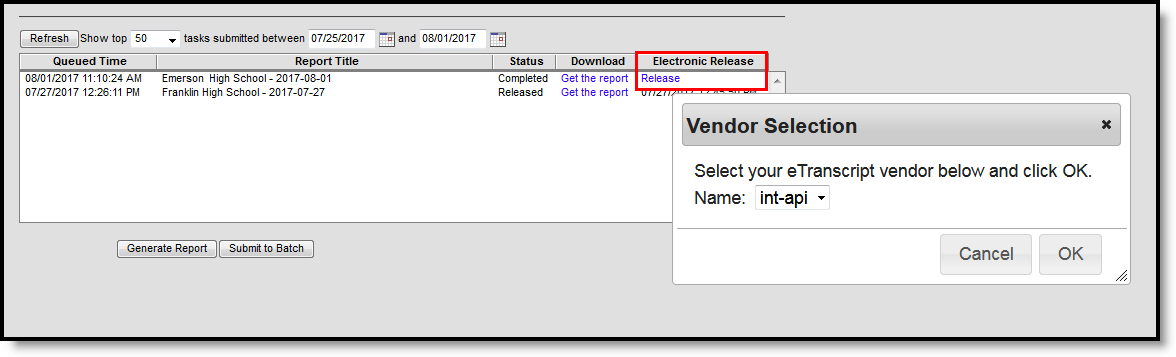 Vendor Selection to Release eTranscripts
Once a report has been completed, it can be released.
- Click the Release option in the Batch Queue editor.
- Select the correct eTranscript vendor from the Name dropdown list and click OK.
- The eTranscript vendor is created, and the vendor's API access is configured in the Electronic Release Setup tool. A pop-up message indicating electronic release has initiated displays.
- Click OK.
- When a date and time are displayed in the Electronic Release column, the eTranscripts have been released.
The Status column changes to Sending, and when it has been sent, it changes to Released. If there is an issue sending the batch file, the status displays as 'Error'. An error occurs when values are missing in the XML output for a required field, or when a connection fails. When an error occurs, the XML batch file is not released, and data is not submitted to the vendor.
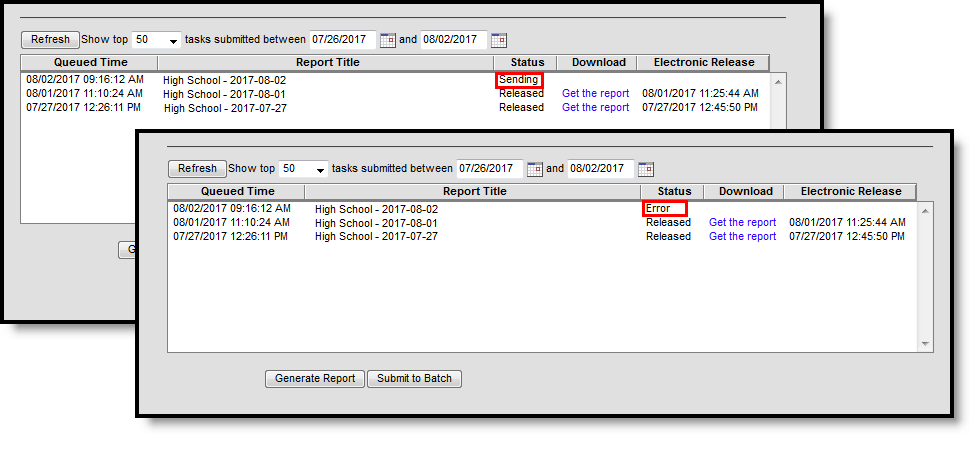 Batch Queue Status Display of Sending, Error
