Tool Search: Orders
This report provides detailed information about purchases made in the School Store.
 The Orders Report does NOT include Public Store purchases.
| What can I do? | What do I need to know? |
|---|---|
Generate the Report
To create the report, use the Field Descriptions found in this article to select the report options then click the Generate button.
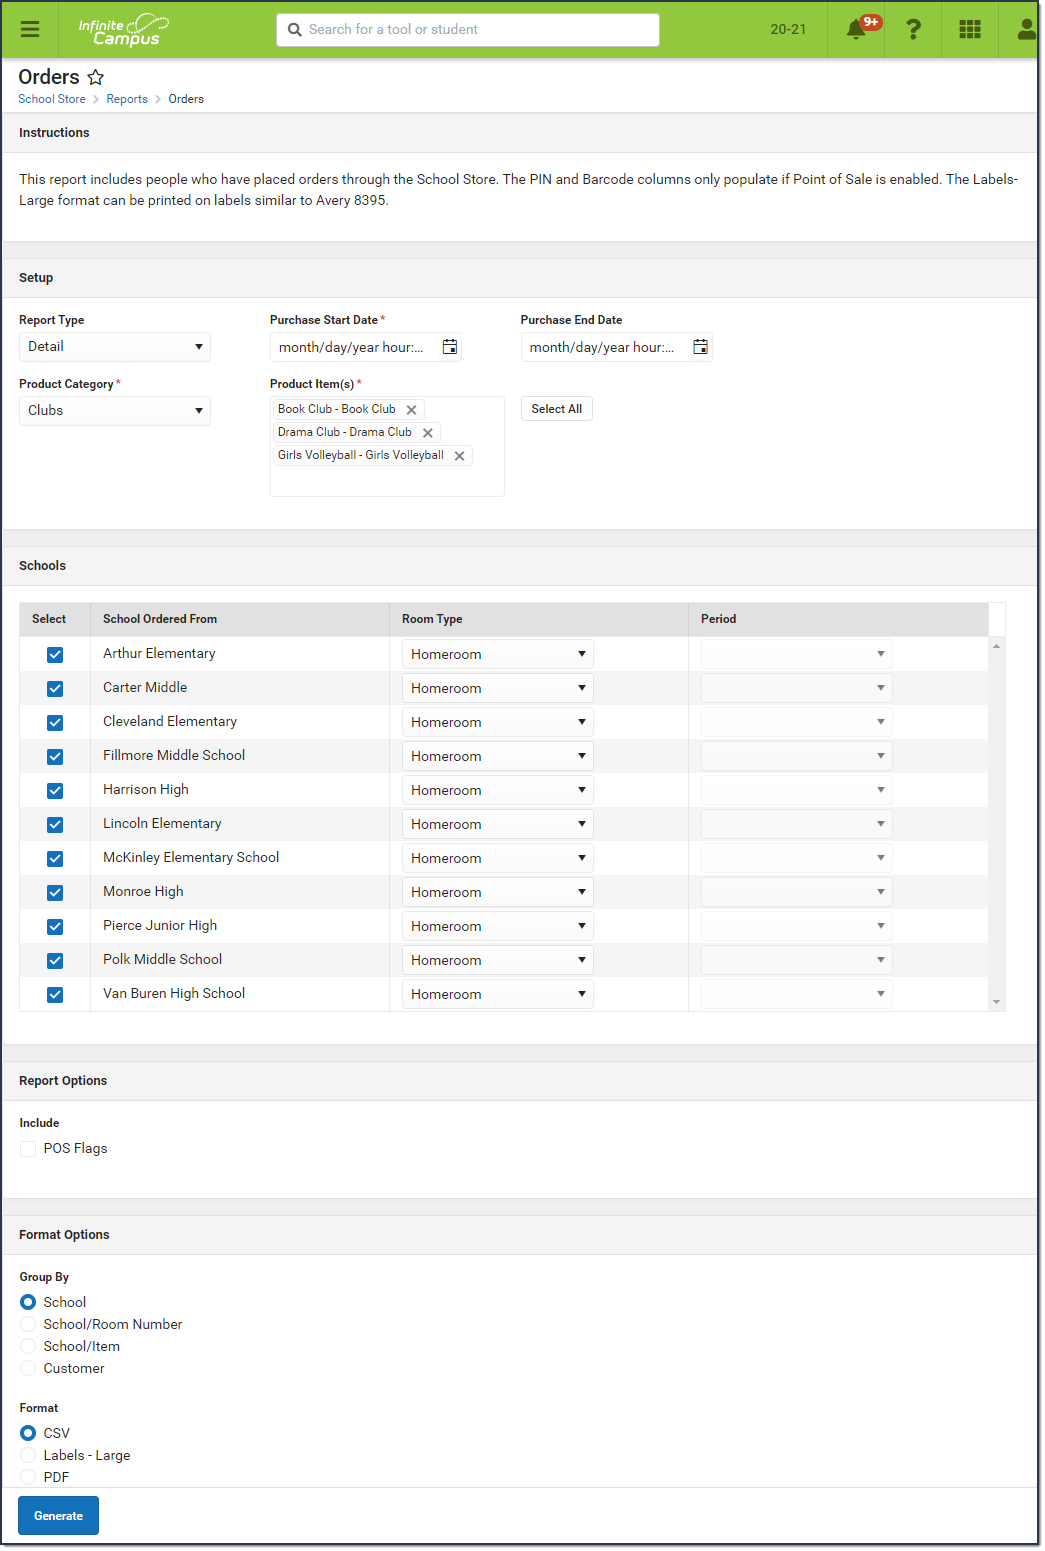 Example Orders Report Editor
Report Editor Field Descriptions
| Field | Descriptions | ||||||||
|---|---|---|---|---|---|---|---|---|---|
| Setup | |||||||||
| Report Type | Detail is the only option available at this time. | ||||||||
| Purchase Start Date | The first date on which you want to report. The report returns purchases made on this date through the entered End Date. This is a required field. | ||||||||
| Purchase End Date | The last date on which you want to report. The report returns purchases made on the Start Date through the End Date entered here. | ||||||||
| Product Category | The category defined in the School Store Administration. This is a required field. Schools using this category automatically display in the Schools section of the editor. If you have removed a school from a Category, you will not be able to use the Orders Report for purchases made for that combination of Category and School. | ||||||||
| Product Item(s) | The item defined in the School Store Inventory. Only items assigned to the selected Category display. This is a required field. | ||||||||
| Schools | |||||||||
| Select | All checkboxes are selected by default. Clear the checkbox next to the school(s) you want to exclude from the report. | ||||||||
| School Ordered From | The school from which the purchase was made. This is not necessarily the school where a student is enrolled. | ||||||||
| Room Type | Select one of the following options. This option does NOT filter the data. It only indicates which room data displays on the report.
If you select the Period with Lunch Minutes option, the report will include the room the student is in during the selected period. The period reports as of the day you print the report. If the student's location will change based on the day, the report must be printed ON the serving day to get the correct period information. | ||||||||
| Period | Select the Period to include in the report. This option is only available if you selected Period in the Room Type field. | ||||||||
| Report Options | |||||||||
| Include | POS Flags - When this checkbox is marked, an additional column called POS Flag is included in the report. This column displays the User Warning and the Flag name that appear on the Point of Sale terminal. If the User Warning is not entered, the column reports the Flag name and null; e.g., "User Warning on Student Record (POS display flag);null." This option only displays if you have tool rights to the Display POS Flag tool rights under the School Store Order report. | ||||||||
| Format Options | |||||||||
| Group By | This option allows you to to arrange the data in the report by one of the following options. Orders within each option are grouped by student name.
| ||||||||
| Format |
| ||||||||
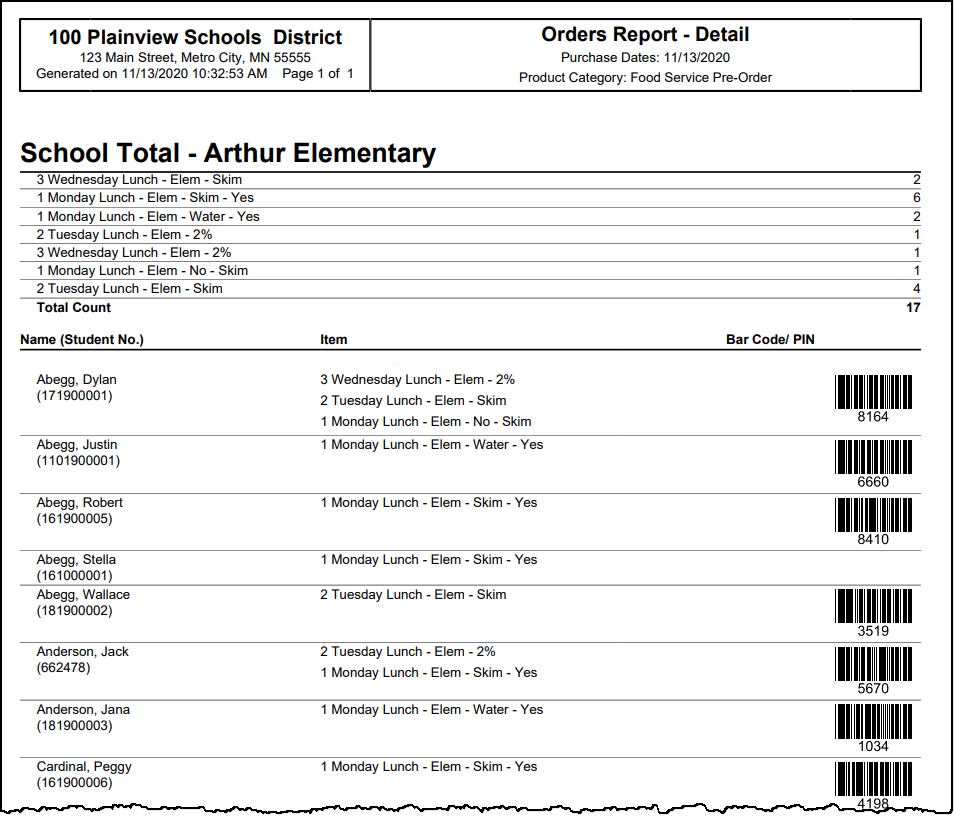
Example Detail Report
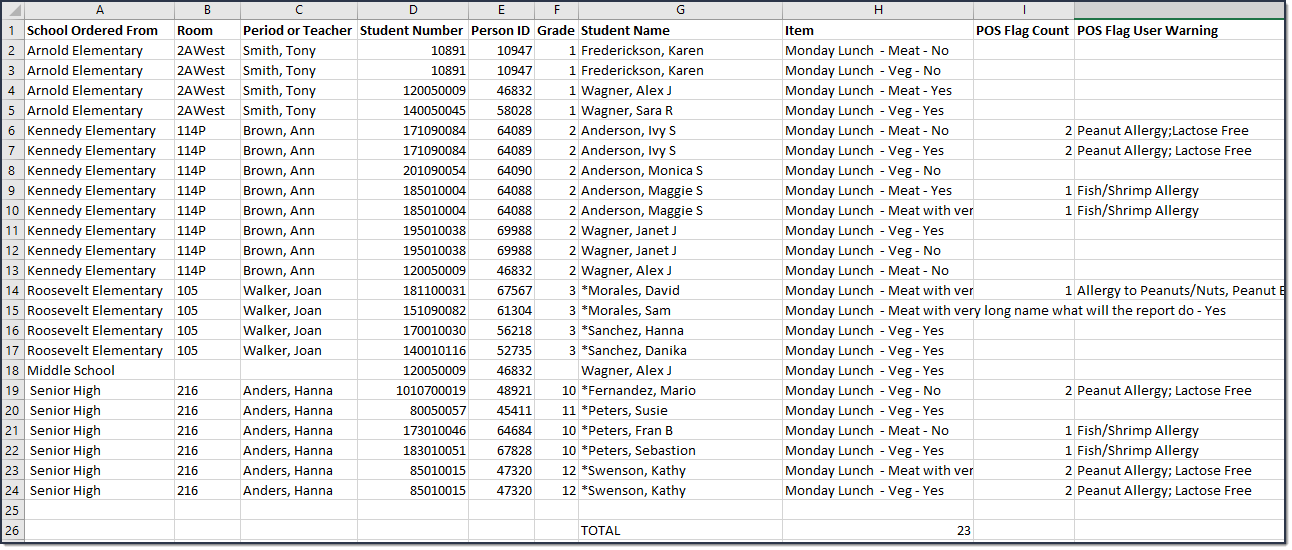 Example CSV Report
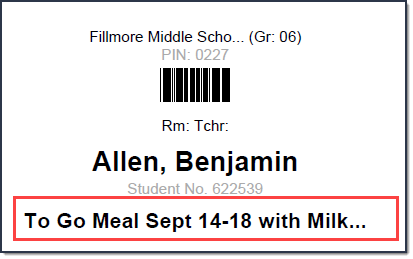
Example Labels - Large Report
Note
The Barcode is blank if the student does not have a PIN or if Point of Sale is not enabled. In the following example, the student on the right does not have a PIN.
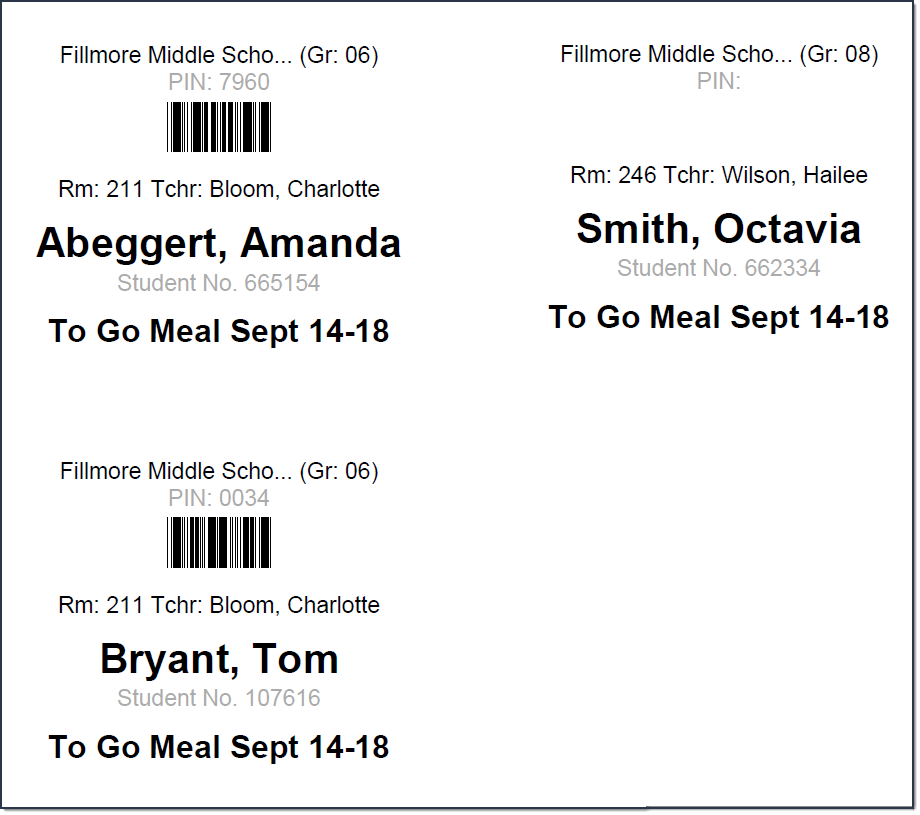 Example Labels

Example PDF Report
 Example PDF Report
Report Layout
| Column | Description |
|---|---|
| School Ordered From | The school from which the pre-order was placed. If the purchase
then the school assigned to the event displays in the report. |
| Room | The student's homeroom number. |
| Period or Teacher | The student's homeroom teacher or the period with lunch minutes. |
| Student Number | The unique student number assigned and maintained by the school district. |
| Person ID | The Campus assigned person ID for the student. |
| Grade | The grade in which the student is currently enrolled. |
| Student Name | The student's full name. |
| Item | The specific meal or Ala carte item that was purchased. For the order to print on a label without being cut short, limit the Product Name and attributes in the School Store to 31 characters. If this information is too long to fit on one line, the information is truncated and followed by an ellipsis.  |
| POS Flag Count | The report only includes this column if the POS Flag checkbox is selected on the report editor. This column displays the total number of POS flags active on the day the report is printed. |
| POS Flag User Warning | The report only includes this column if the POS Flag checkbox is selected on the report editor. This column displays the User Warnings; e.g., "No tree nuts; severe dairy allergy", that are marked as a POS Flag and are also active on the day the report is printed. Multiple user warnings are combined into one string and separated by a semi-colon (;). If there is not a User Warning, the column does not report. |
| Order Comment | Any information the customer added to their purchase before they checked out. |
| Customer Name | The name of the person who made the purchase. If the payment was recorded using the Campus Mobile Payments app, this is the name from the credit card when it was swiped. |
| Student PIN | The student's Point of Sale Account PIN. If Point of Sale is not enabled, this column is blank. |
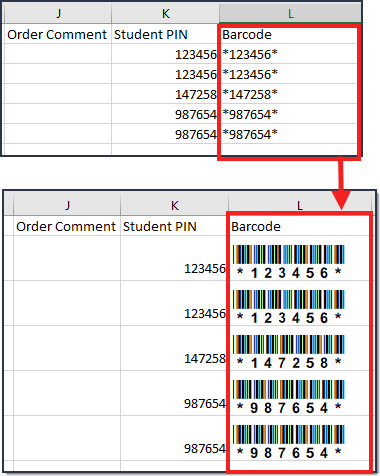
| Barcode | Currently, the CSV file displays the student's Point of Sale Account PIN in this column. You can use this column to create a scannable barcode list in the CSV file. If Point of Sale is not enabled, the Barcode is blank. |
| Purchase Start Date | The date selected on the report editor. The report returns purchases made on this date through the Purchase End Date entered on the report editor. |
| Purchase End Date | The date selected on the report editor. The last date on which purchases were made. The report returns purchases made on the Purchase Start Date through the Purchase End Date. |
| Product Category | The Product Category selected on the report editor. The Category is defined in the School Store Inventory. |
| Total | Item - The total number of meals and ala carte items. |
Create a Barcode List
After the you generate the CSV Detail report, you can create a barcode list that can be read with a 1D or 2D barcode scanner. To create the barcode list, select the Barcode column and change the font to the standard Code 39 font. If you do not have this font installed, you will first need to download and install the font from a trusted source. You must also keep the * (asterisk) before and after the PIN number and make sure the barcode is not bold.
 Example Barcodes
