Tool Search: Responsive Scheduling
Responsive Scheduling allows teachers to provide guidance to your students on specific topics of interest. These topics, called Offerings, can be related to additional information for a class, like watching a movie related to a book that was read by the class, or a review session in preparation for an upcoming test, or a time for students who missed a test to take a make-up test.
As a teacher, you can create your offerings for a responsive day session, review other teachers' offerings for the same day that may include one or more of your students, and request that any of your students attend one of your offerings.
See the Instruction Tool Rights article for more information.
Responsive Scheduling Workflow
This section covers step 7 in the Responsive Workflow
Responsive Scheduling Process
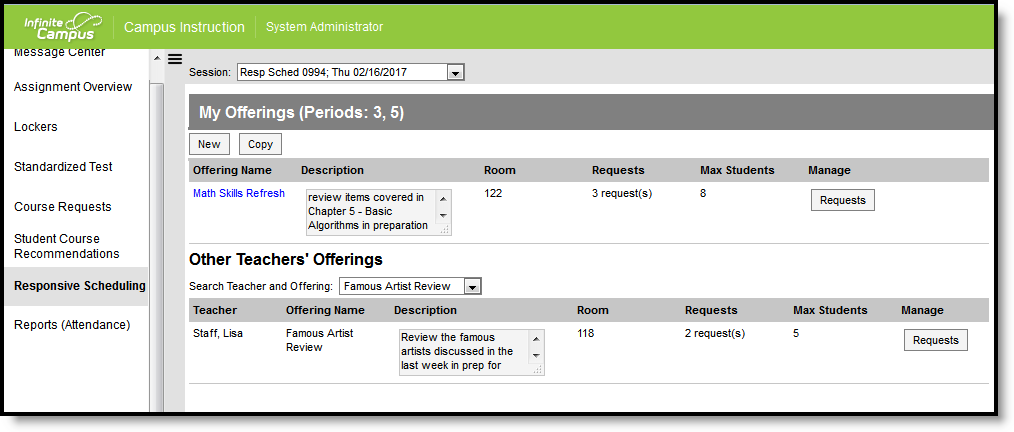
Available responsive days are indicated in the Session dropdown at the top of the tool. For any available responsive day, an offering can be created for the available sessions, and you can add students from your class rosters to these sessions. You can also see what offerings other teachers have planned for the responsive day.
Previous setup for calendars and courses needs to be done prior to teachers being able to create Responsive Day Offerings, as noted in the Workflow above. Your administrators (counselors, principals, etc.) will communicate with you when offerings can be created.
Keep the following in mind:
- You can only request students to attend your offerings when they are scheduled into your regular courses. This is not a guarantee that a student you requested to attend your offering will actually be scheduled into your offering. Final say occurs after all teachers have created offerings and requested students, and after administrators have scheduled (built) responsive day sections.
- Edits can be made to your offerings up until administrators have scheduled sections. After that occurs, you can only modify how many students are allowed to attend your offering. All other fields cannot be modified.
- There may be other teachers with offerings who make a request for a student you have requested. A message appears when a student has already been requested for another offering. If this is the case, contact the other teacher to discuss which offering would be of most benefit to the student. You can remove the request for that student so the other teacher can request that student for their offering. Teachers cannot override another teacher's requests.
- The students in your offering are not finalized until the window for offerings is passed. This includes students having the opportunity to select their own offerings. A final tally of students may not be available until a day before the session, and even then, administrators could change where a student is scheduled for the session.
- Your offerings display in the Campus Student (the Portal) when students select offerings. For this reason, offerings and descriptions of the offerings need to be clear as to what is being offered during the session. Selected offerings also display on student schedules. Entered Reason text is not displayed in the Portal.
Attendance, if the course has been set properly, can be recorded for responsive day offerings. This process is the same as recording attendance for regular classes. Assignments and grades are not given for responsive offerings; however, you could have an offering scheduled for study time for a particular course. Any homework that is completed as part of that course would be recorded in the Grade Book for that class.
Create a Responsive Day Offering
- Select the appropriate Session from the dropdown list at the top of the editor.
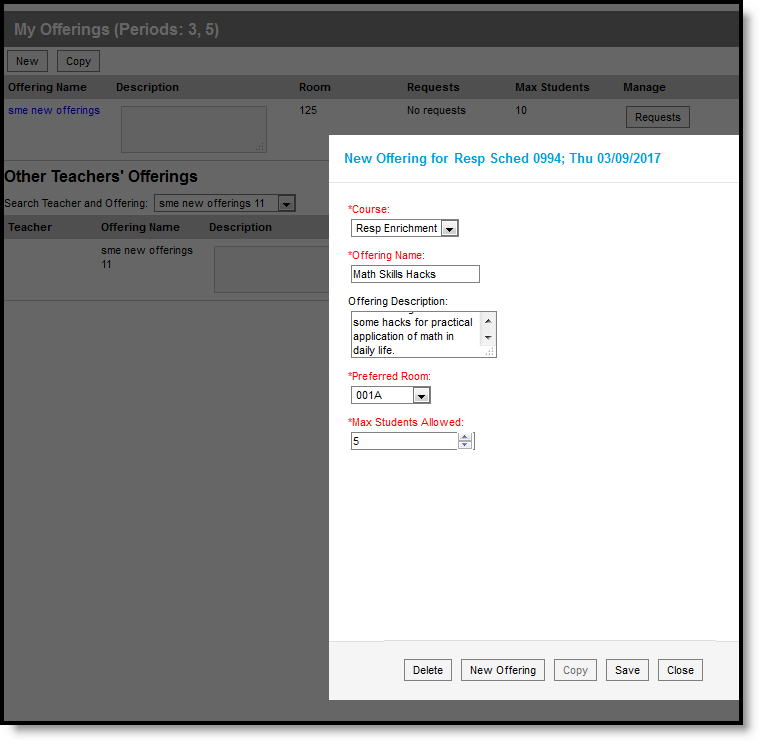
- Click the New icon. A New Offering editor displays.
- Select the Course for which the offering applies.
- Enter an Offering Name and an Offering Description.
- Enter the Max Student Count value.
- Select your Preferred Room from the dropdown list. For the most part, this will be where your course is already held, but if you need a larger room or additional equipment that is only available in a certain room, select that room.
- Click the Save icon to save the offering.
You can create additional offerings for other responsive days using the New Offering button from this editor. This saves any existing offering you may have entered and clears the editor for creating a new offerings.
Copy a Responsive Day Offering
Use the Copy option to create an additional offering from an existing offering. There are two ways to copy an offering.
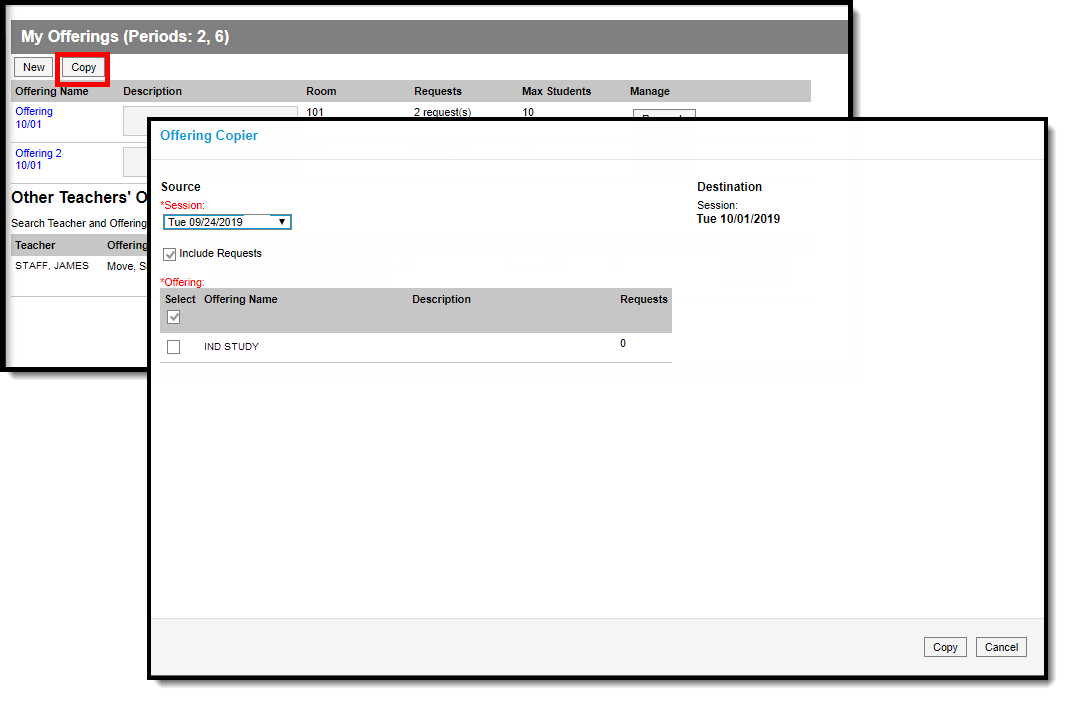
The first way is to select the Copy button located next to the New button.
- On the Offering Copier editor, select the session to copy from the Source Session dropdown list.
- Mark the Include Requests checkbox to include student requests from the original offering in the new offering.
- Select the desired Offering to copy. The selected information displays in the Destination column on the right hand side.
- Click the Copy button.
The second way is to click an offering name and choose the Copy button. An Offering Copier editor displays, where the Destination of the new offering is available. Mark the Include Requests checkbox to include student requests from the original offering in the new offering.
If the selected offering has already been scheduled, the original Course, Offering Name, Preferred Room and Max Students Allowed fields cannot be modified.

Manage Available Offerings
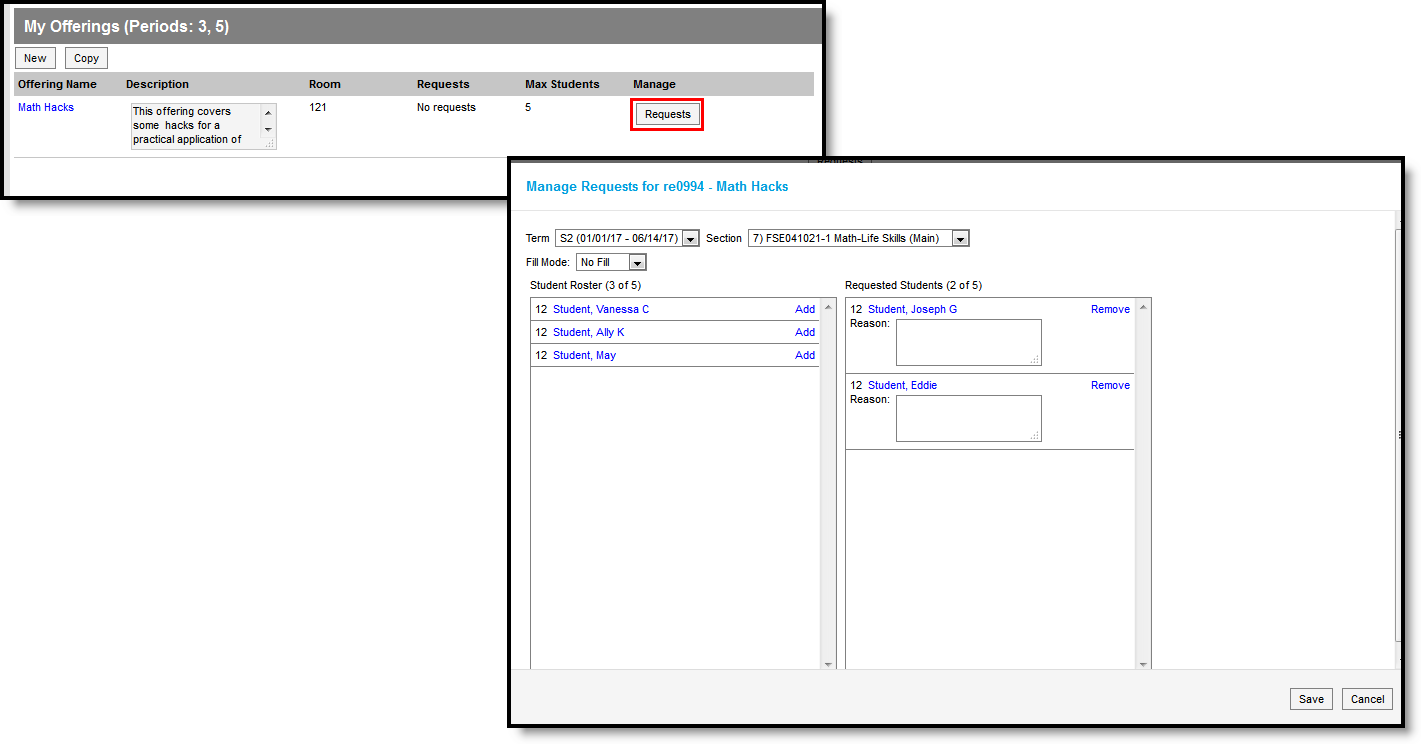
After creating and saving an offering, use the Requests button to add students to the offering. For the selected section, the roster of students in that course display. Click the Add link to move the student name from the Student Roster column to the Requested Students column. If desired, enter a Reason you requested that student to attend. This request displays in the Student Portal for that student to see. Click the Save button when finished.
If your student has already been requested by another teacher to attend their offerings, that student cannot be added to your offering. A warning message displays indicating a request has already been made for that student.
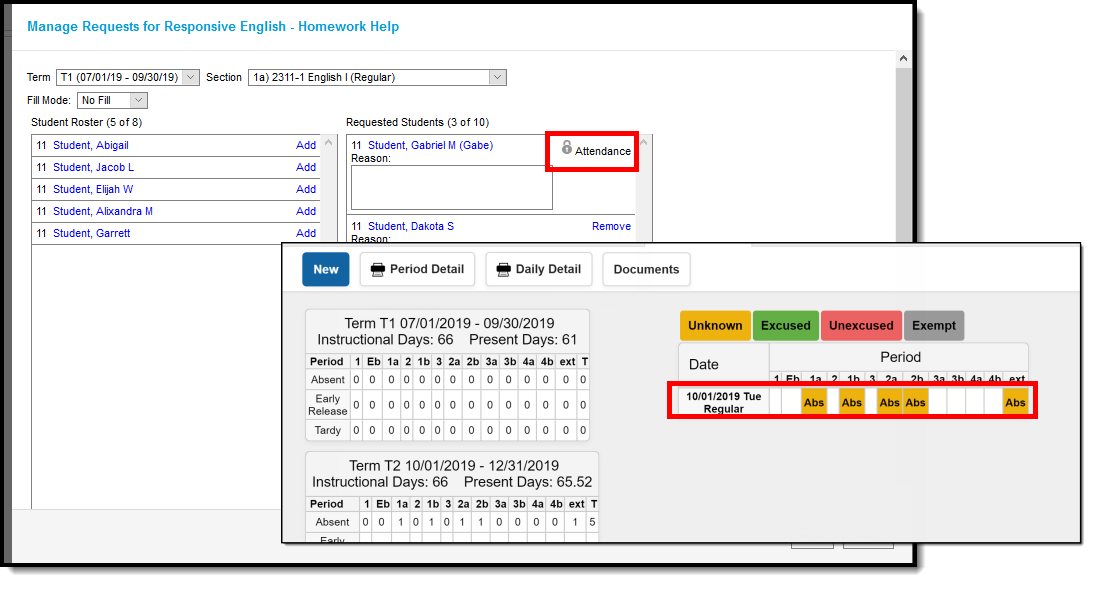
If a student is marked absent on the day of the offering, an indication of an attendance record displays. This attendance icon displays when viewing requests for your own offerings, for other teachers' offerings, and for your requests for other teachers' offerings.
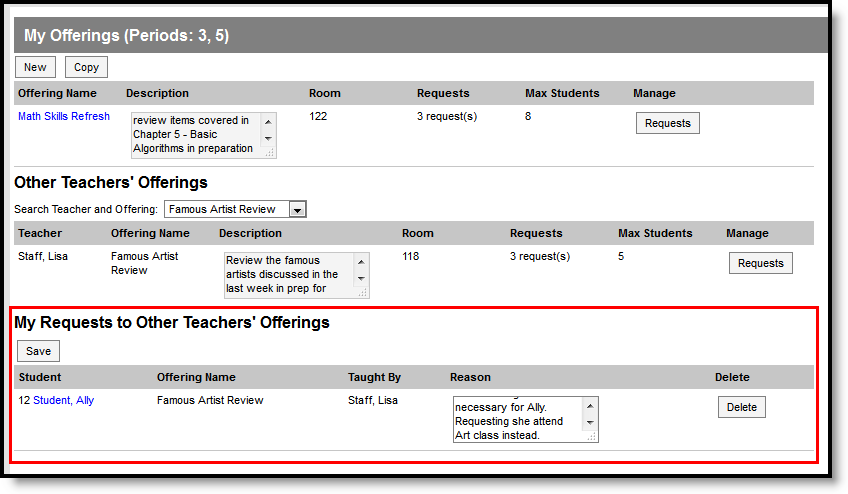
Manage Other Teachers' Available Offerings
Offerings created by other teachers are also listed here. Follow the steps above to add any of your shared students to their offerings. Or use this screen to see where your students may already be scheduled; if you feel your student needs to attend your offering instead, contact that teacher to discuss that change.
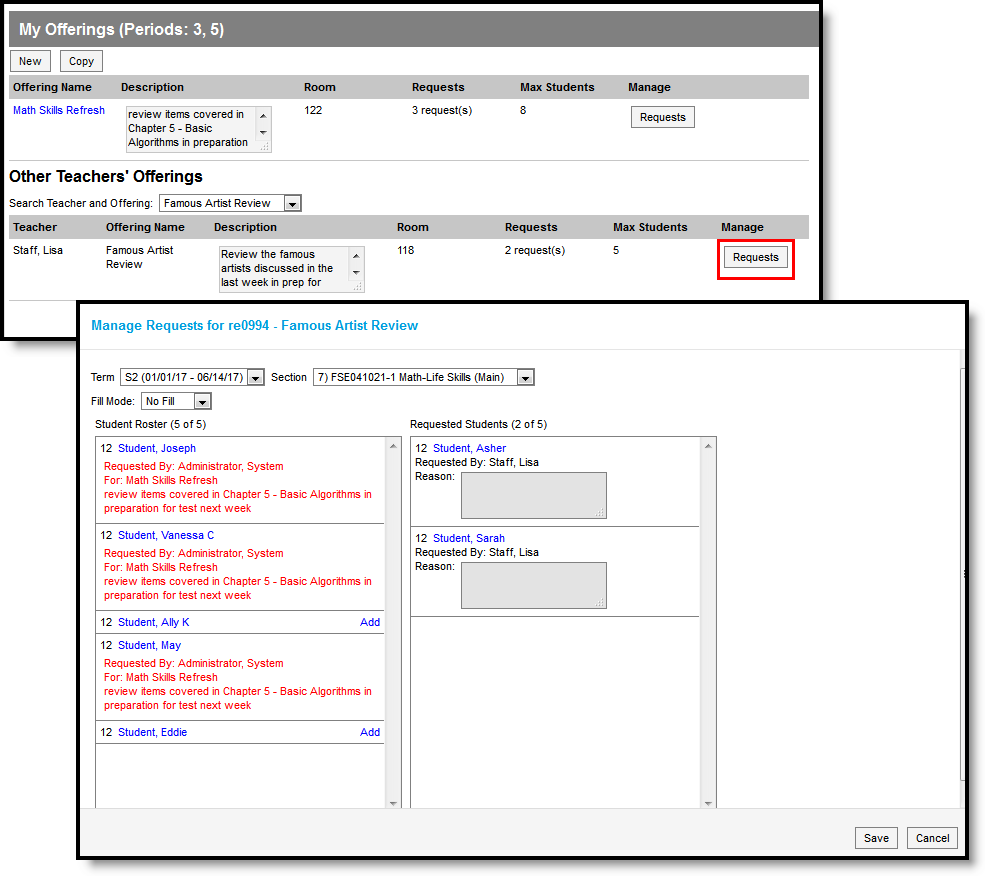
After making a request for another teacher's offerings, you can see which students you have requested to attend other offerings. Enter a Reason for this request and click the Save button. Or, if you change your mind, click the Delete button.