Tool Search: Scheduling Center
The Scheduling Center provides a visual representation of a school's status in the Scheduling process for a given year. Administrators and Schedulers can see at a glance whether a school's calendar has been rolled forward for the next school year, if enrollments have been added, or if students have Academic Plans posted to Schedule Requests.
This is modeled after the Checklist for Scheduling article available on the Knowledge Base. The Scheduling Center provides a percentage of completion and a list of tasks that still need to be completed, reminders of what else needs to occur, and allows quick access to those tools to make additional updates.
See the Scheduling Center Video for additional highlights.
 Scheduling Center
See the Scheduling Center Tool Rights article for information about rights needed to use this tool.
Navigation of Scheduling Center
The following cards (e.g, scheduling sections or areas) are available on the Scheduling Center.
|
|
|
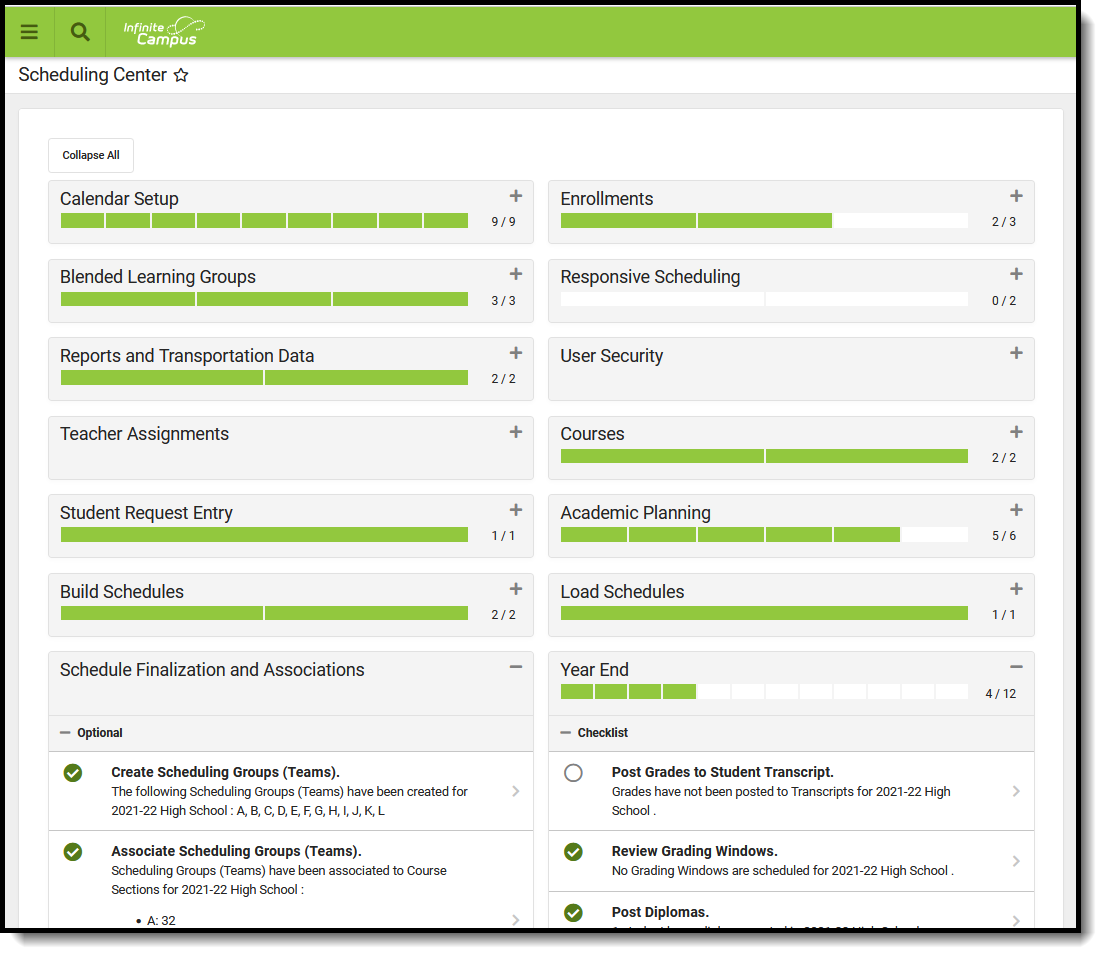
Most cards include a progress bar with the total amount of tasks for that card (optional tasks are not included in the total), and can be collapsed or expanded as needed, using either the Collapse All/Expand All button at the top of the Scheduling Center, or using the Plus (+)/Minus (-) options on each individual card. Cards may have:
- A set of Reminders for that card
- A Checklist of items to complete that may include a pie chart of information (e.g., Enrollment Breakdown by Grade Level)
- A set of Optional tasks to complete
- A list of Tools to use to complete the tasks
- Appropriate Reports to generate for assistance in completion and data review
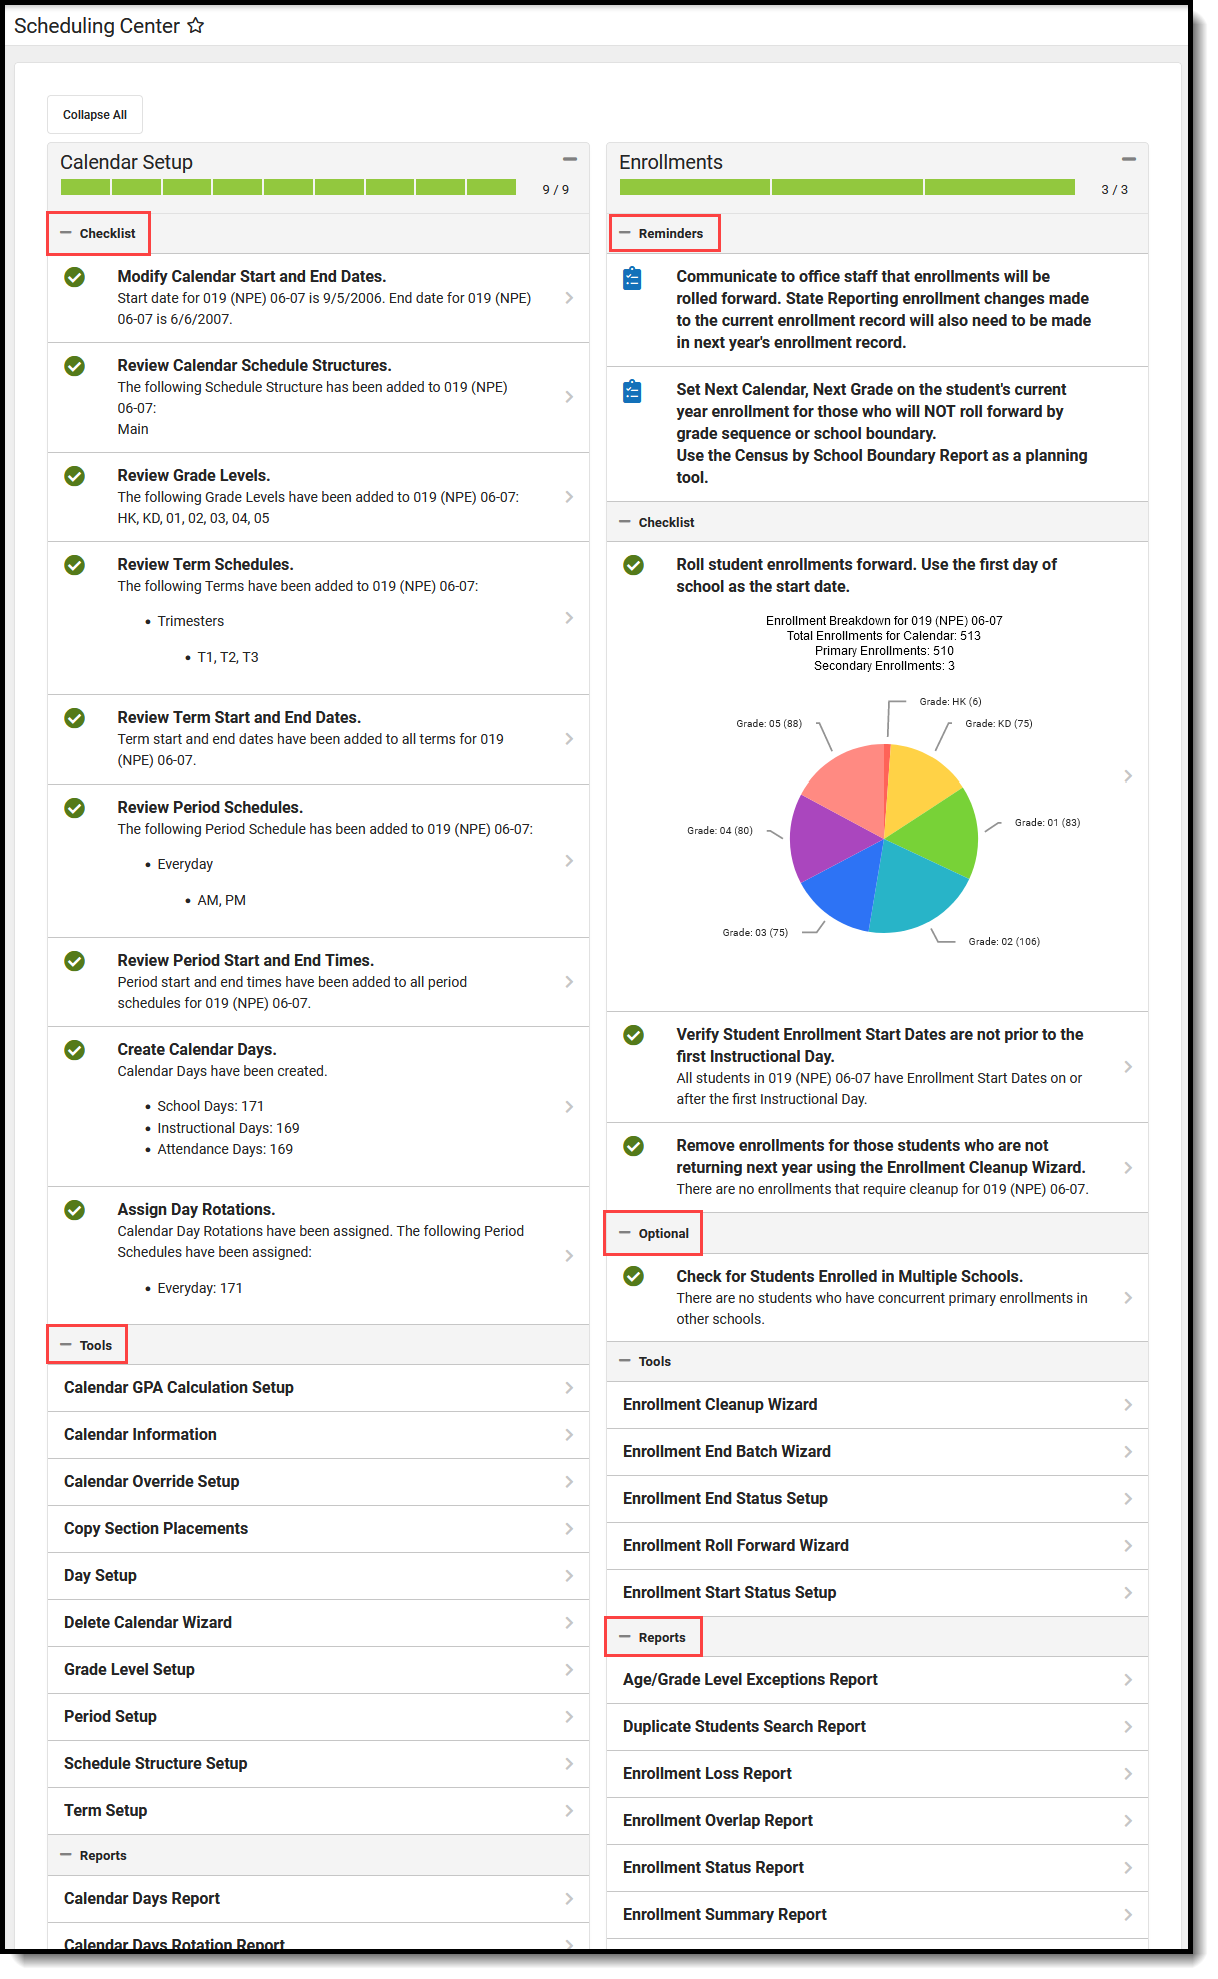 Scheduling Center Checklists, Optional Items, Reminders, Tools, and Reports
To complete an item, expand a section and click the arrow next to the entry or the entry itself to navigate to the selected tool. Make the necessary changes and save the updates; then, return to the Scheduling Center.
Definition of Complete
- Data is in the right spot for the item.
- Data displays with context for analysis.
- Tools are linked to take action.
Complete indicates some data is present for that checklist item. For example, when adding grade levels, the presence of one grade level completes the task, even though more grade levels still need to be added.
It is recommended that a review of the data be conducted to ensure it is accurate and that all necessary information for the item is complete.
Once a task is completed that can be performed in Campus, the progress bar updates to indicate the newly added data. There are some tasks that count towards completion, but the task might be performed outside of Campus - e.g, parent/guardian approval of Academic Plans require a student's guardians to log in to Campus Parent and mark the appropriate checkbox.
Return to the Scheduling Center by locating that option in the Index of available tools on the left hand side.
With all cards collapsed, a high-level view of the progress toward completing the Scheduling process can be seen. In the example below, additional information is needed for Responsive Scheduling, Academic Planning, and Load Schedules, while items such as Calendar Setup, Enrollments, and Student Request Entry have been completed.
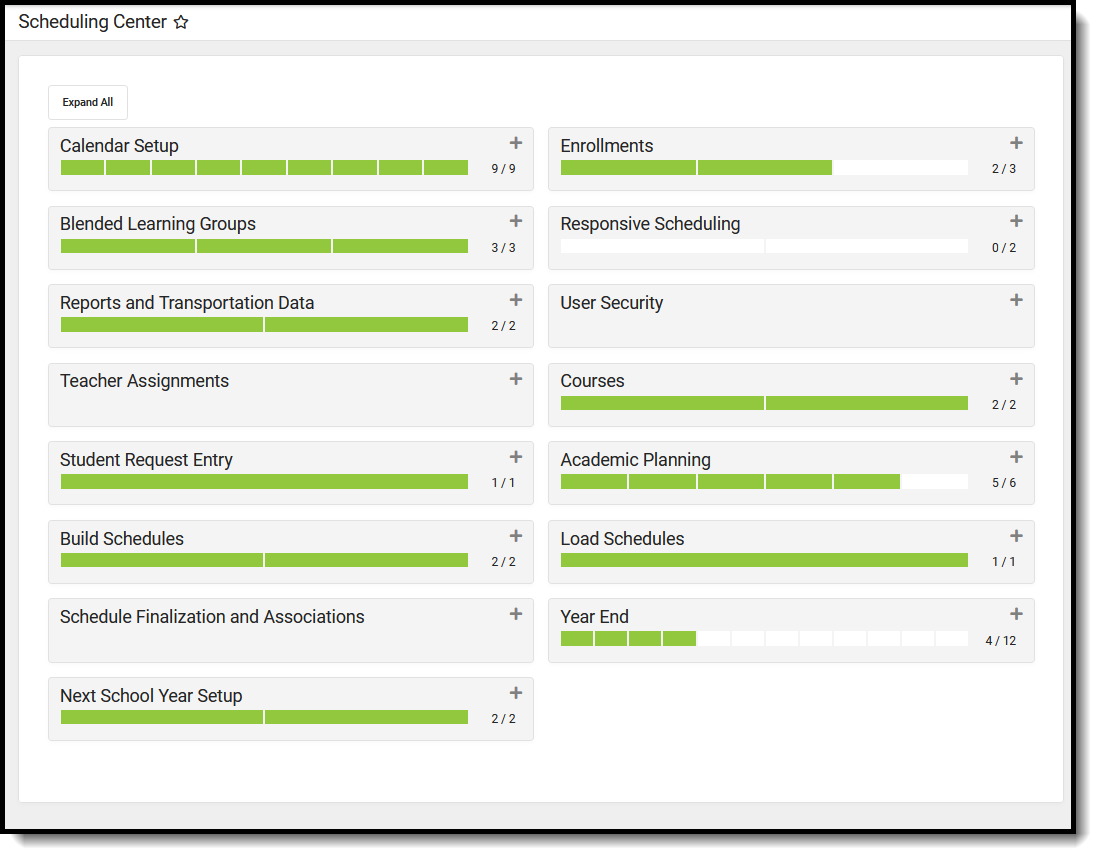 Collapsed Cards Show Overall Progress Towards Completion of Scheduling
Specific tools require a count of distinct students that looks to an end date on the enrollment to find a final record of scores for a student and to differentiate between transcripts posted at the end of the school year and those posted at the end of the semester. Keep this in mind for schools that do not end enrollments when verifying that all tasks are complete.
Future Year vs. Current Year
The scheduling process occurs throughout the school year. To that end, certain items are performed in the current calendar year, and certain items are performed in the future calendar year.
Typically, a school calendar's instructional time runs from September to June. However, state requirements may dictate that school calendars start on July 1 and end on June 30.
- A future calendar is not marked as active and includes dates that are typically after June 30 of the calendar year.
- A current calendar is marked as active and includes dates up to and including June 30 of the current calendar year.
Future Year | Current Year |
|---|---|
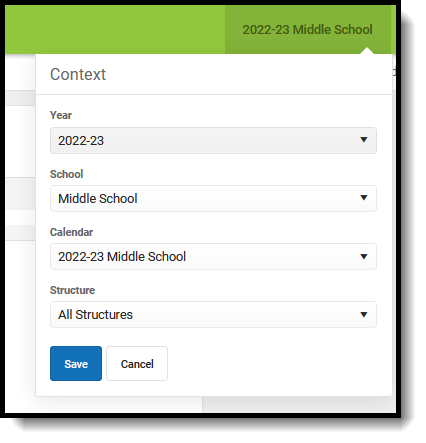 | 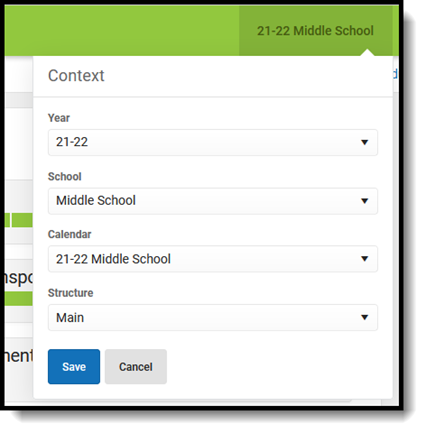 |
Select a future calendar when completing tasks on the following cards:
- Calendar Setup
- Blended Learning Groups
- Responsive Scheduling
- Courses
- Academic Panning
- Load Schedules
- Schedule Finalization and Associations
- Next School Year Setup
Use the Scheduling Center
To complete an item, locate it in the corresponding card and navigate to the relevant tool. Complete the task - roll students forward, change calendar dates, roll transportation data forward, etc.
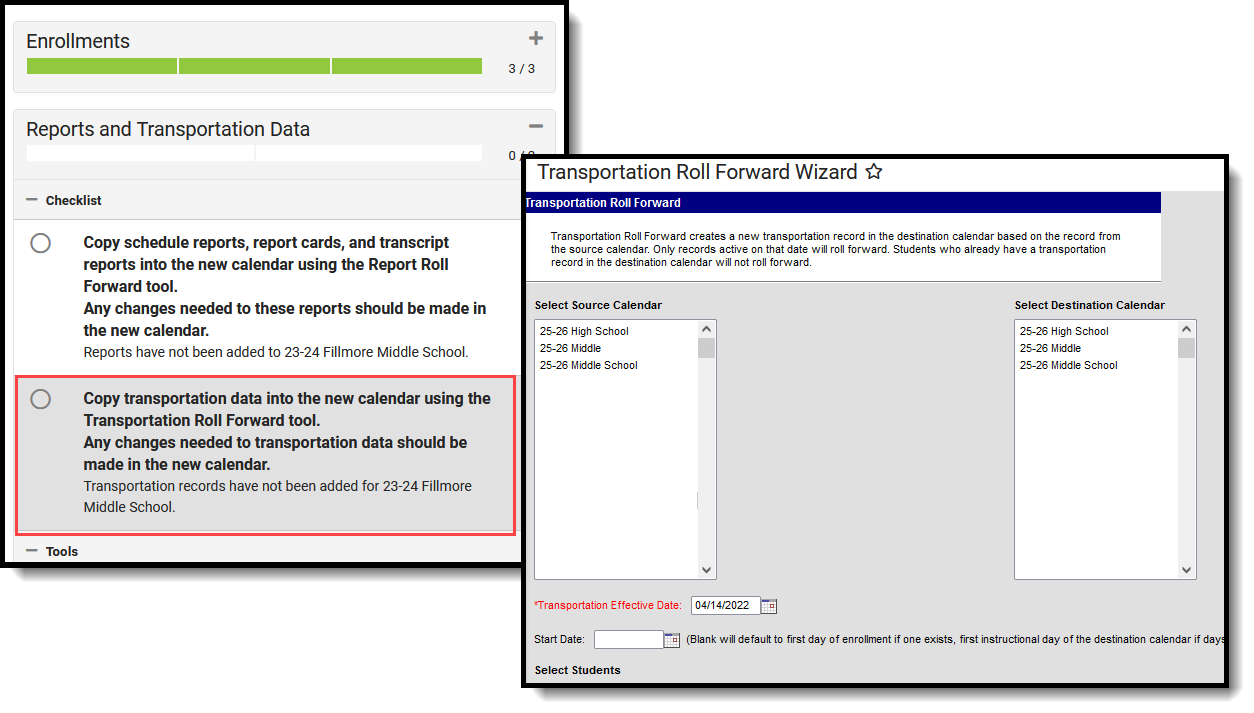 Scheduling Center - Completing Checklist Items
When the process or action has been completed, return to the Scheduling Center. The item now has a green checkbox indicating completion, and the progress bar has been updated.
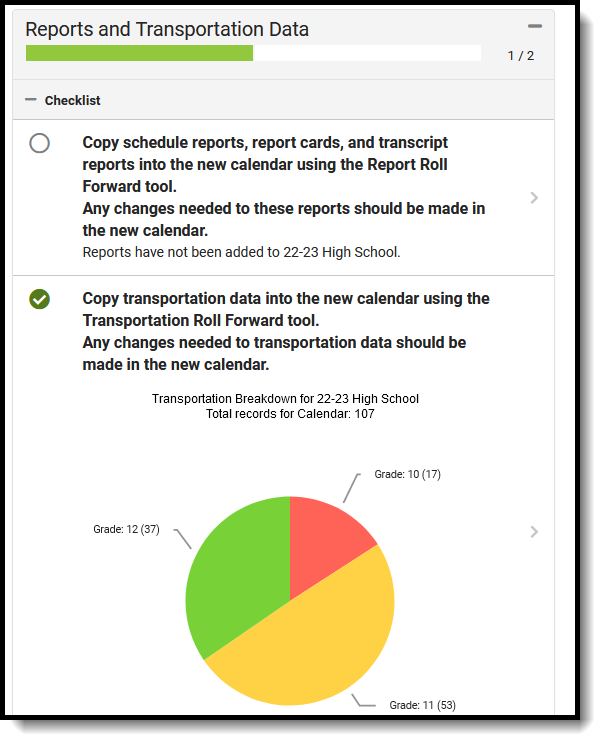 Checklist Item Complete
Only those tasks labeled as Checklist items are counted towards the completion of that card and are necessary to complete the scheduling process. Optional items can be completed and aid in the overall scheduling process, but they do not alter the progress bar on the card.
Complete the Optional items as needed for your district. Review any reminders and generate reports as necessary. Changes can be made for the future year up to the date when that future school year becomes or is marked as the Active school year and calendar. Once the school year starts, making changes in the active year is not recommended.
