Tool Search: Dependent Care
Creating a New Session
Dependent Care Sessions allow users to create childcare options for each scenario offered at a site such as before and after school care, non-school daycare, summer care, etc.
- To create a new session, press New. The Create Session (New) screen displays.
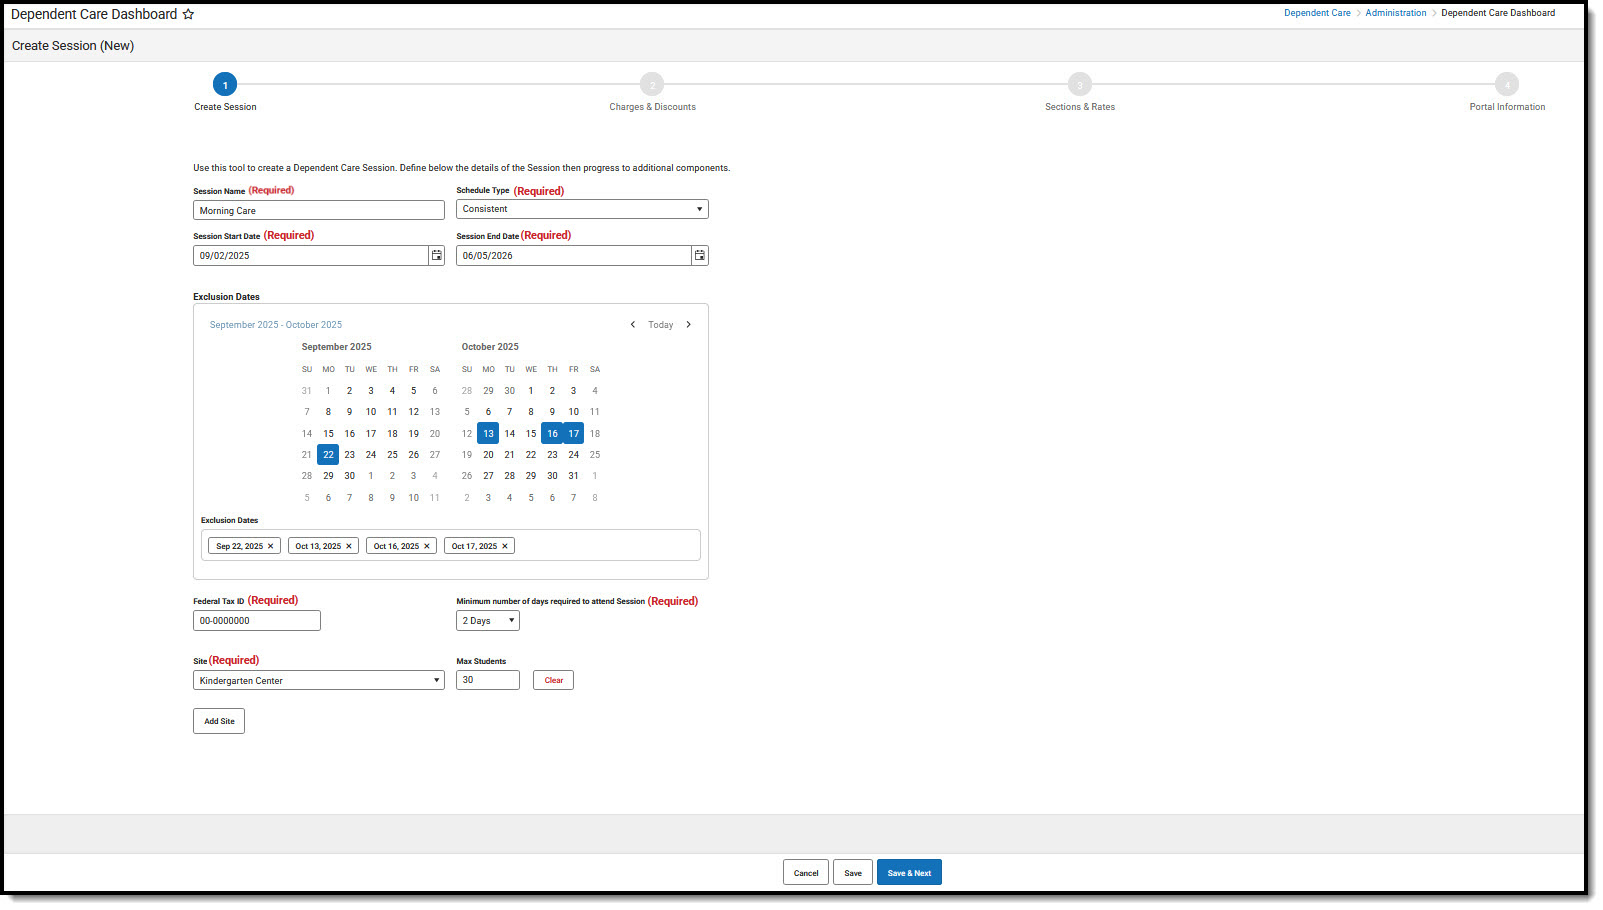
 Dependent Care Create New Session Editor
 - Use the Session Name field to enter a name for the session. Users must enter a Session Name before saving a session. It is recommended to use a name that helps identify the session's purpose (i.e. 2025 Summer Care).
- The Schedule Type drop-list allows users to select the type of care the session offers: Consistent or Non-School Day. Consistent care offers childcare multiple days each week of the session, while Non-School Day childcare offers care on days when school is not in session. Users must enter a Schedule Type before saving a session.
- Next, use the calendar icons to select the Session Start Date and Session End Date. These are the dates on which care sessions will begin and end.
- Exclusion Dates allow users to determine the dates throughout the session on which childcare will NOT be offered. Click on all desired exclusion dates for the session. Once you've clicked on a date, it appears in the Exclusion Dates list. Users must enter a Session Start and End Date before saving a session.
- To remove a date from exclusion, click on the X for the desired date. The date is removed from the Exclusion Dates list.
- In the Federal Tax ID field, enter the appropriate tax ID. Users must enter a Tax ID before saving a session.
- Use the Minimum number of days required to attend Session drop-list to select the minimum number of days the student must attend the session in order to register. Users must enter a value before saving a session.
- Now, use the Site drop-list to select the site where the session will be offered. Users must select at least one site before saving a session.
- Users may add additional sites offering care by using the Add Site button for each additional site. Use the drop-list to select the site where care will be offered.
- To remove a site from the list, press Remove for the appropriate site. The site is then removed from the list.
- In the Max Students field, enter the maximum number of students to whom the site can offer care. Entering a value for a maximum number of students is optional.
- If only one site is selected for care, users may clear the selection and number of Max Students by pressing Clear.
- Once a site is cleared, users must select a new site before the session can be saved.
- If you do not wish to create the new session, press Cancel to return to the Dependent Care Dashboard. To save the new session and remain on the screen, press Save. To save the session and continue to the Charges and Discounts screen, press Save & Next.
- Please see the Adding Charges and Discounts to a New Session article to continue creating your new session.

