Tool Search: Attendance Letters
After creating attendance letters - establishing trigger criteria, writing the body of the letter - it's time to print letters. Schools should discuss when letters are going to be generated - daily, weekly, etc. A student only receives one letter, even if the student has multiple enrollments in the same calendar.
Attendance Letter Workflow
Reference the following workflow for a high-level checklist for creating an attendance letter. Generating and printing letters is referenced in Steps 14-19.
Preview Attendance Letters
Click the Preview button to review the letters prior to printing them. The Preview includes a header page (page 1) that summarizes the letter and lists the students included in the generation, along with their mailing address. The following pages (page 2, and continuing) are the actual attendance letters.
Preview letters include a Preview watermark, making it very clear it is not the official attendance letter to be sent.
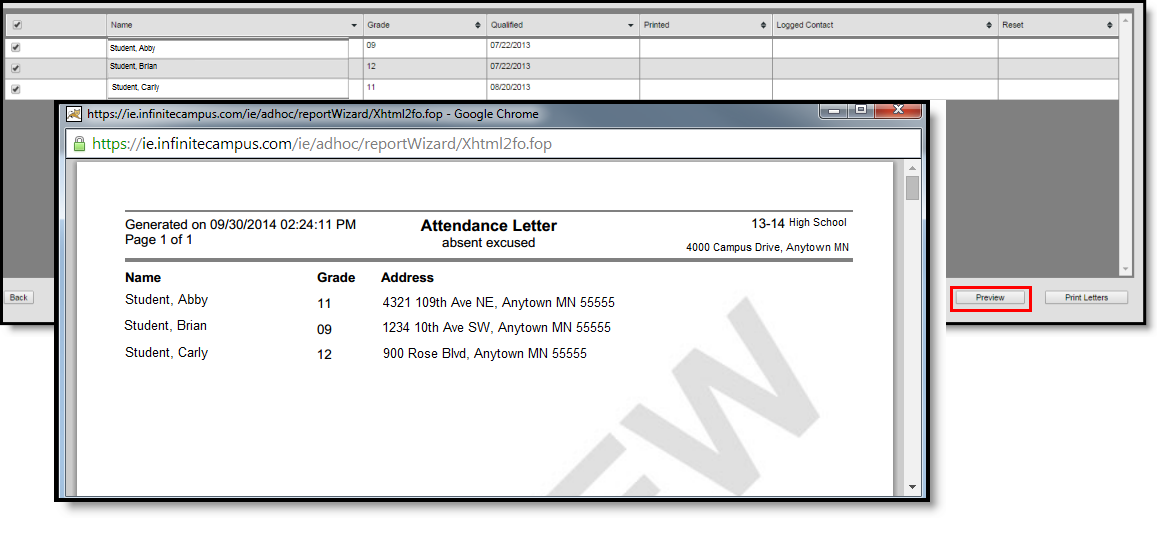
Preview Letters - Header Page
For students who are in a household that is not assigned a mailing address, letters still print and the student's name is included on the list of students receiving a letter, but instead of an address, the words NO MAILING ADDRESS displays where the address would otherwise display.
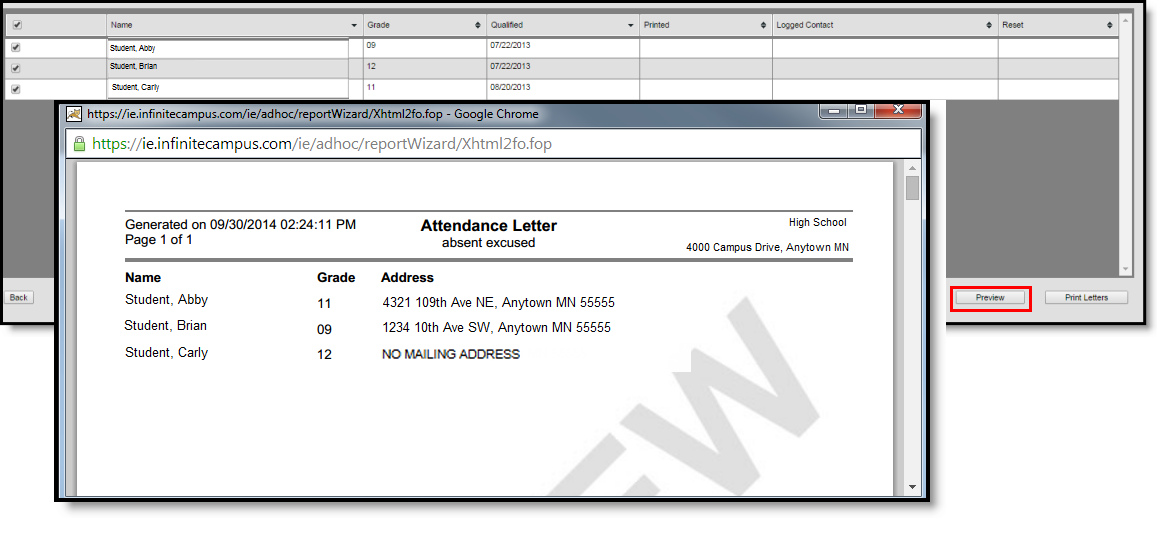
No Mailing Address for Student
Attendance Letters and Ad hoc Filters
When selecting Ad hoc filters with an Attendance Letter, one or more filters can be selected. The filters available for selection are any filters the user has created and any filters saved to user groups of which the user is a member. Selecting an ad hoc filter narrows the list of students included in the letters. If the letter criteria includes all students in who were unexcused for five or more consecutive days in all grade levels, and the selected ad hoc filter includes students in grade 10, only the students in grade 10 are included in the Print and Preview list of students.
Choosing multiple ad hoc filters requires the selection of a Set Operation of either Union or Intersection.
- When set to Union (default selection), students in all selected filters are eligible to receive a letter if their attendance qualifies.
- When set to Intersection, only those students who are in ALL of the selected filters are eligible to receive a letter if their attendance qualifies.
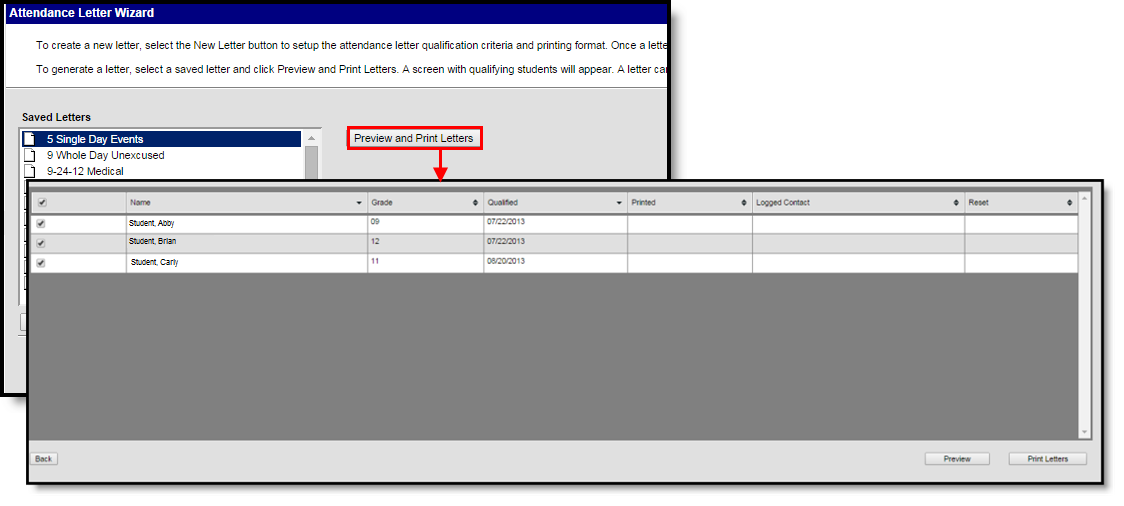
Generate an Attendance Letter without an Ad hoc Filter
- Select the letter to generate from the Saved Letters list.
- Click the Print and Preview Letters button. A list of students who met the criteria of the letter are listed.
- Review the list of students that met the criteria of the letter, and remove their selection as needed.
- Click the Preview button to review the letter format prior to printing.
- If satisfied with the format, click the Print Letters button.
Print and Preview Attendance Letters
All students who meet the attendance letter criteria, whether currently active students or have ended enrollment since the last time the attendance letter was printed, are included in the letter.
- For students who meet the letter criteria but have since ended enrollment in the current calendar, their names display in red with the word withdrawn.
- For students who meet the letter criteria in a previous calendar, their names display in red with the word end dated.
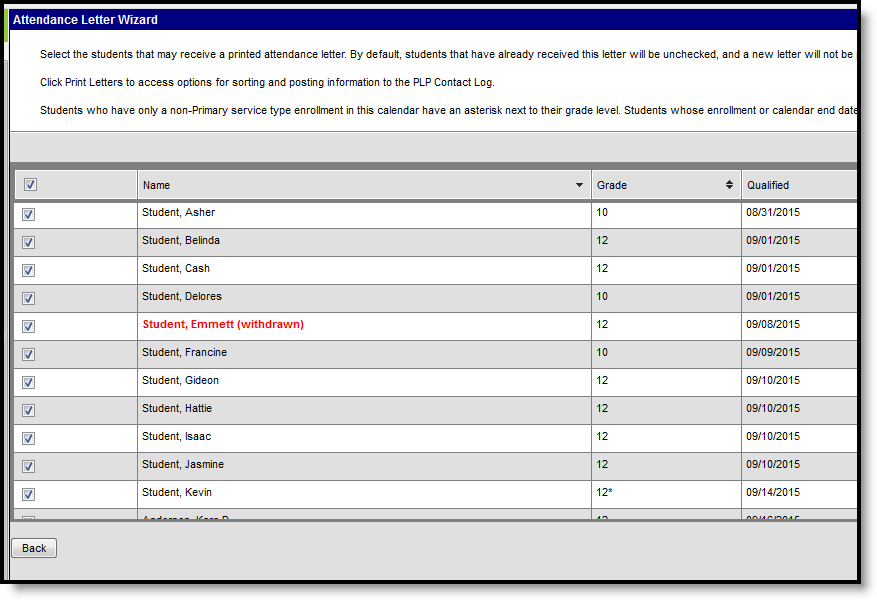
Print and Preview Attendance Letters - Withdrawn Student
This grid lists the following:
- Names of the student meeting the letter criteria
- The students' grade level
- The course number of the course in which the student met the letter criteria (if using the Course or Course/Term Interval)
- The name of the course (hover over the course number) (if using the Course or Course/Term Interval)
- The date the student first qualified for the selected letter,
- The date the letter was printed,
- Whether a Student Information Contact Log was recorded for the student
- An X to essentially delete the record of a letter printing for the student
Generate an Attendance Letter with an Ad hoc Filter
- Select the letter to generate from the Saved Letters list.
- Select the desired Ad hoc Filter.
- Click the Print and Preview Letters button. A list of students who met the criteria of the letter and the criteria of the Ad hoc Filter are listed. Refer to the Attendance Letters and Ad hoc Filters section for more information.
- Review the list of students that met the criteria of the letter, and remove their selection as needed.
- Click the Preview button to review the letter format prior to printing.
- If satisfied with the format, click the Print Letters button.
Print Letters
Click the Print Letters button. The same header page and body of the letter prints, just without the Preview watermark. When the Print Letters button is chosen, a pop-up window displays.
- Choose how the letters sort (Sort printed letters by) - by Student Name or Zip code.
- Select the name of the staff person who printed the letters in the Contacted By dropdown. This is required entry, and is limited to those individuals who have the Behavior Admin checkbox marked on their District Assignment record, or is the current user with tool rights for printing attendance letters and may or may not have the Behavior Admin checkbox marked on their District Assignment record.
- Determine if a Student Information Contact Log record should be recorded (Update Student Information Contact Log) by choosing Yes or No. If Yes, a Contact Log record is automatically created and saved for the student; if No, no contact log item is saved.
- Choose to Close this window or Print.
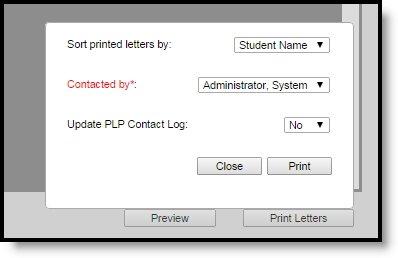
Print Letters Dialog
If a Contact Log item is recorded, it displays as such. If a user determines the student should not receive the letter after letters print, resetting that student's record DOES NOT remove the contact log entry; it will need to be manually removed. Resetting that student's record DOES remove the letter from the Profile tab.
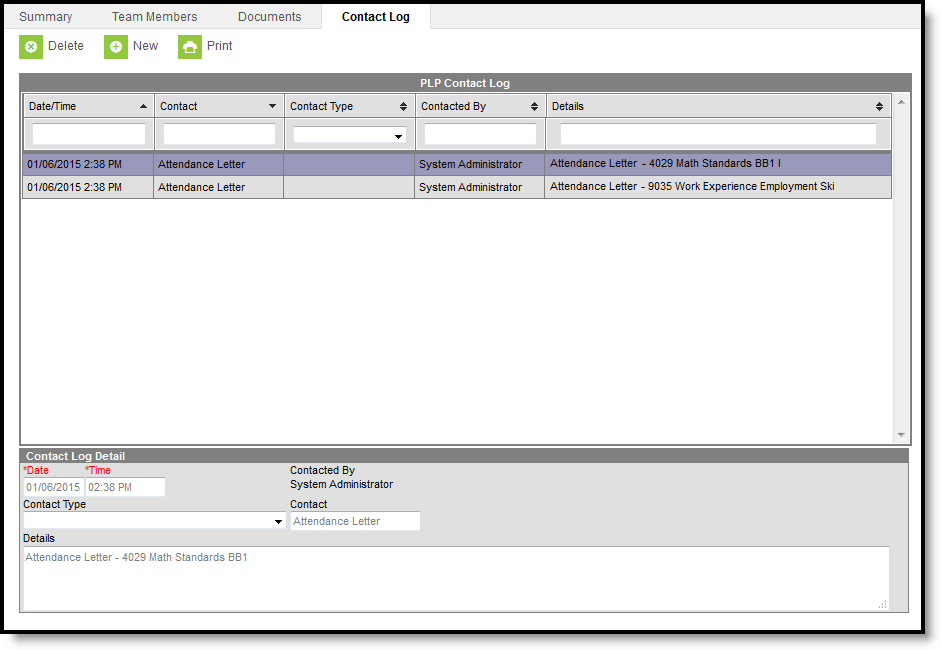
Attendance Letter Student Information Contact Log Record
For students who do not have a mailing address, a letter still generates for them. Like in the Preview of the attendance letters, the student's name is listed on the summary of who receives a letter, but instead of an address, the words NO MAILING ADDRESS displays where the address would otherwise display. Letters print for the student with the same NO MAILING ADDRESS indication.
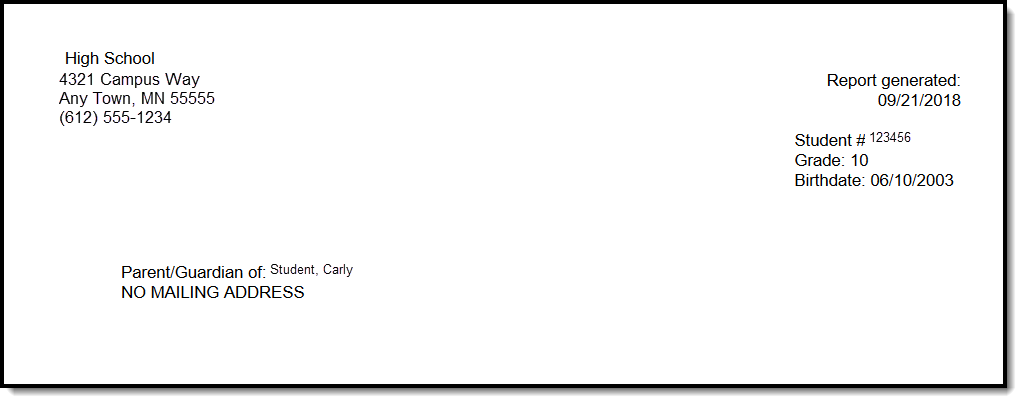
No Mailing Address Display on Letter Print
No Mailing Address is determined by the Mailing checkbox marked on the Household associated with the Address.
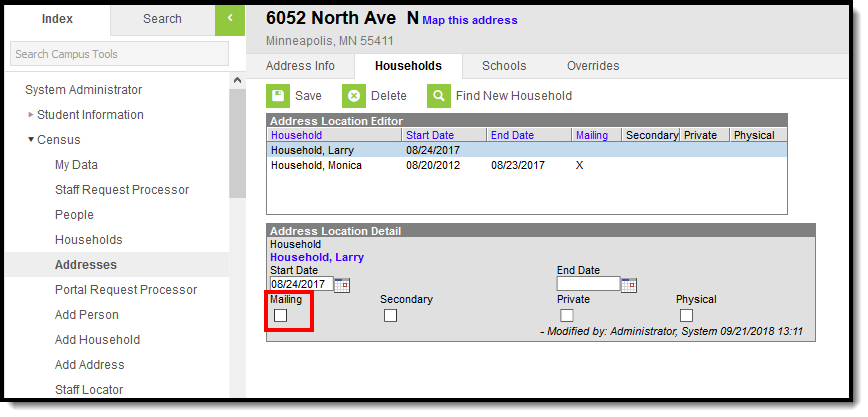
Address Location Detail - Mailing Checkbox
Export Attendance Letters
Click the Export button to view and save the list of the students who were included in the Preview of Attendance Letters in CSV format.
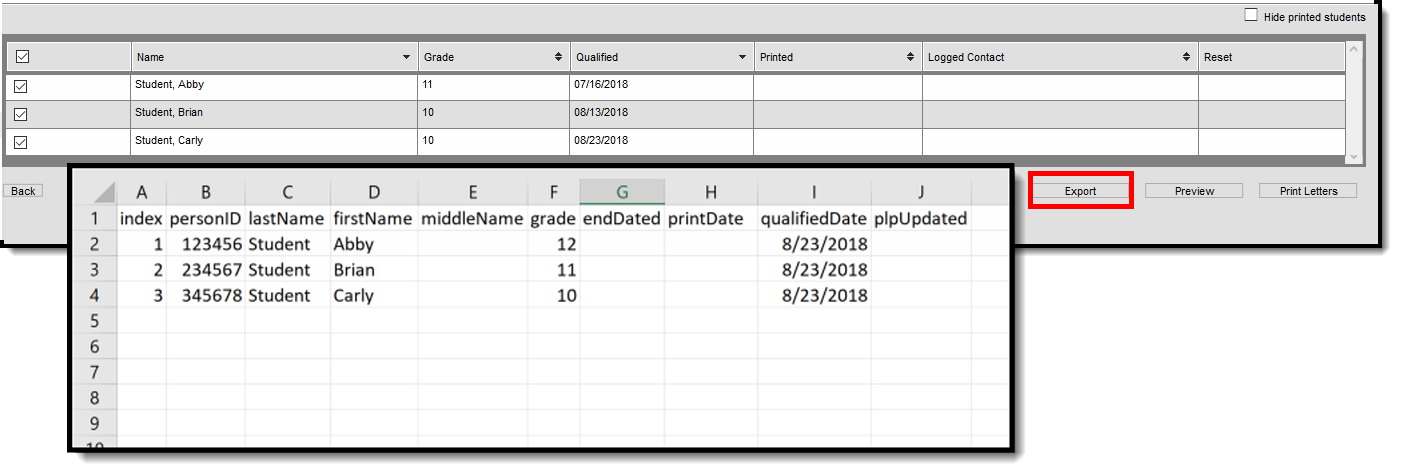
Attendance Letters Export
Attendance Letters Things to Know
Print and Preview
If letters are printed for multiple guardians, the sort order is determined by personID. The guardian with the newest personID prints first.
- After letters have printed, the list of students for whom a letter printed now display in gray text, indicating the letter was printed. The date of the printed letter displays in the Printed column and an X displays in the Reset column. If a Contact Log record was recorded, the date of that contact displays in the Logged Contact.
- If a letter was printed for a student but the student should not have received the letter, click the X in the Reset column. A dialog box displays, verifying this is the action that is needed. Click OK to continue or Cancel to not remove the X. Once the X has been removed, the student's name displays in normal text, with dates removed, and a future letter can be printed when desired.
- Once a letter is printed it will display on the student's Profile tab.
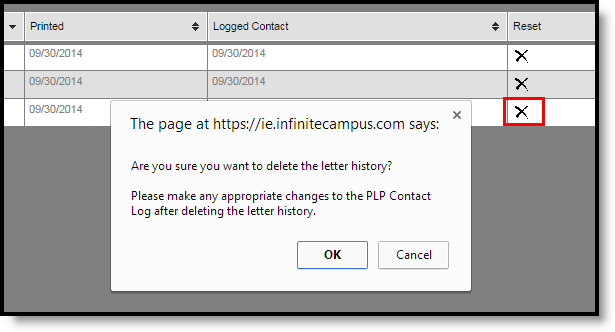
Resetting Letters
- These columns sort first by student name. They can be resorted as needed by clicking the arrows in the column headers.
- Students who have already received a letter can be hidden. Mark the Hide printed students checkbox in the upper right corner of the page. Then, only those students who have not previously received the selected letter are listed.
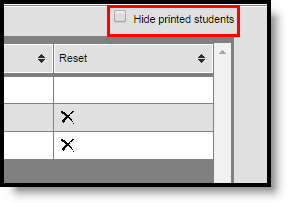
Hide Printed Students
General Attendance Letter Management
- Edit, Delete and Copy letters from the first Attendance Letter Wizard screen by choosing that option below the list of saved letters.
- Edit opens the selected letter so criteria can be modified.
- Delete removes the selected letter completely, including any record of that letter being sent to students. A letter can only be deleted if it has never been printed (attempting to delete such a letter returns an error message in the Saved Letters list).
- Copy makes an exact replica of the selected letter and renames it to Copy [ Name of Letter ]. Additional changes may need to be made to that letter (name, letter criteria, etc.) before sending it.
Address Logic
For addresses to print on the attendance letter:
- A student needs to be a member of in a household with a guardian. If there is no guardian, the student is considered a self guardian.
- The address associated with that household needs to be marked as mailing.
- The guardian needs to have a relationship with the student.
If these items are missing, the letter generates with NO MAILING ADDRESS.
