Tool Search: Section Templates
Section Templates allow users to define the meeting pattern of a section (Period Schedule, Period and duration) for section placement in a calendar that has a complex schedule structure. Each meeting pattern is captured in a template. The set of all possible meeting patterns for a section are stored in template groups. Template groups are then assigned to courses, and are used to place the course section in the correct location on the White Board when using Scheduling Board.
Users create Template Groups and Section Templates for every term in the calendar, and should reflect where courses can be placed in the periods.
See the When to Create and Use Section Templates for best practices on when to create Section Templates.
 Section Templates
See the Section Template Information Tool Rights article for information about rights needed to use this tool.
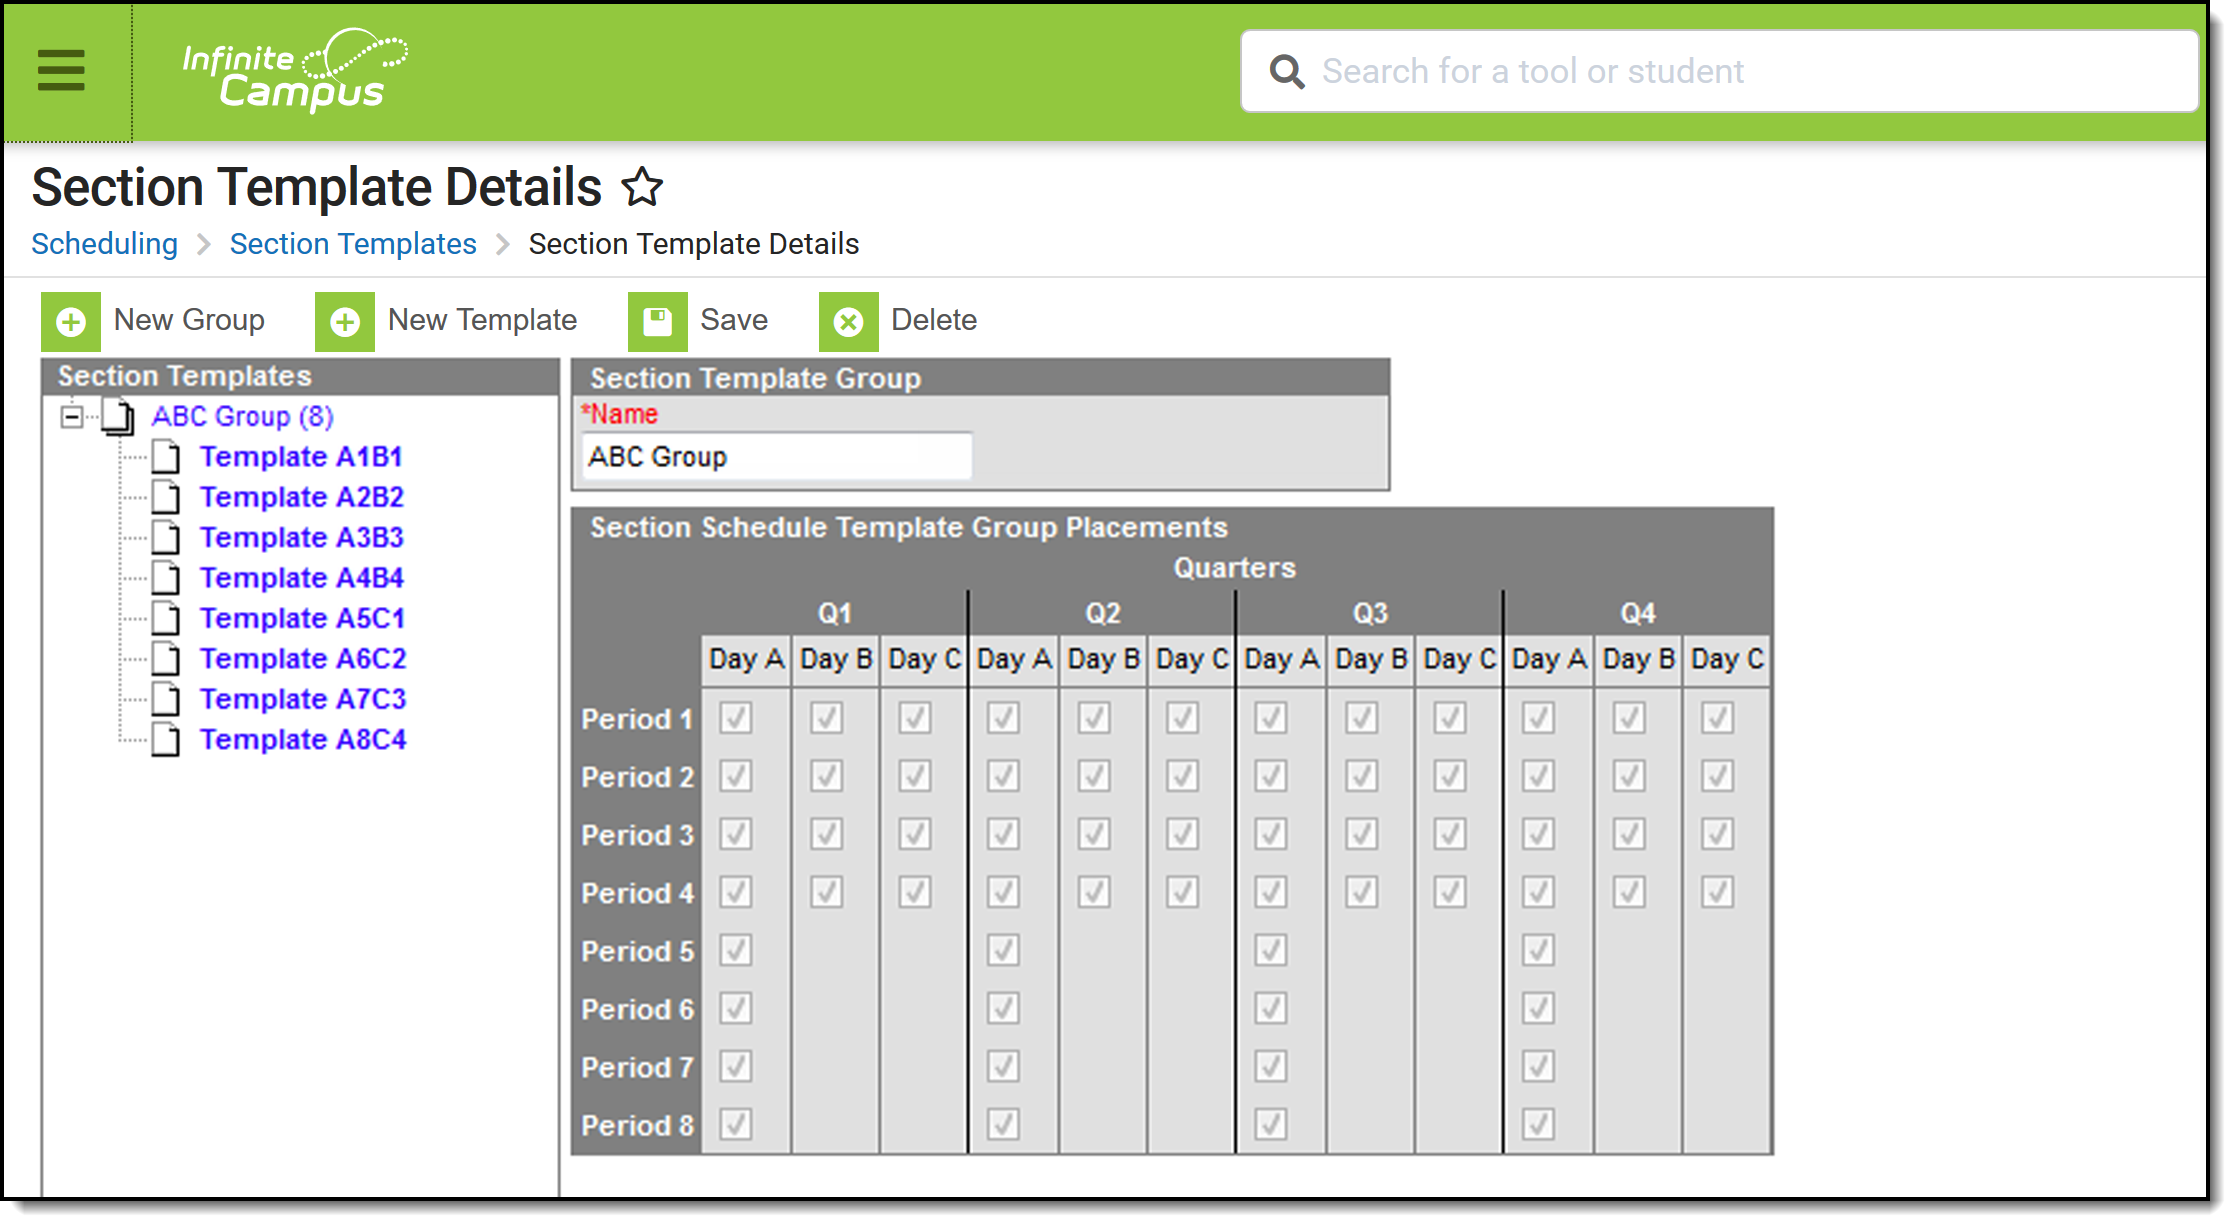
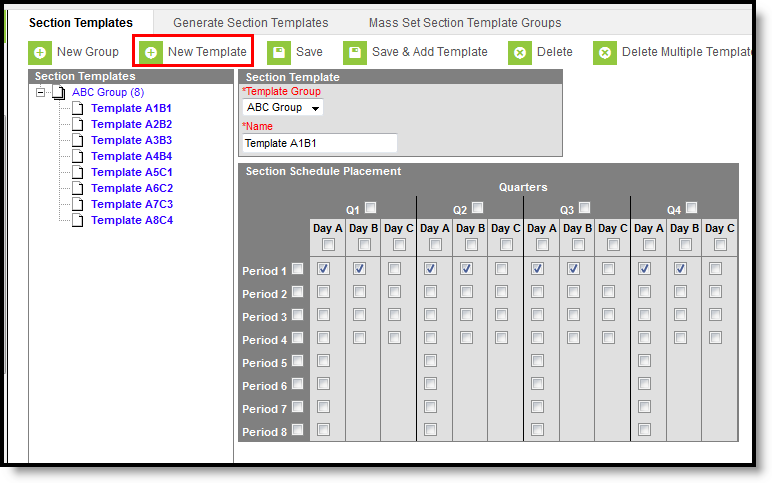
In the image above, a Template Group is created for a three day rotation schedule (A/B/C Days) where all periods meet on Day A, periods 1-4 meet on Day B, and periods 5-8 meet on Day C. This Template Group is named ABC Group. Then, a Section Template is created for courses meeting Day A Period 1 that also meet Day B Period 1 for the entire year, called Template A1B1 (image below), where the Section Schedule Placement grid is marked for Period 1 Day A and B for every term.
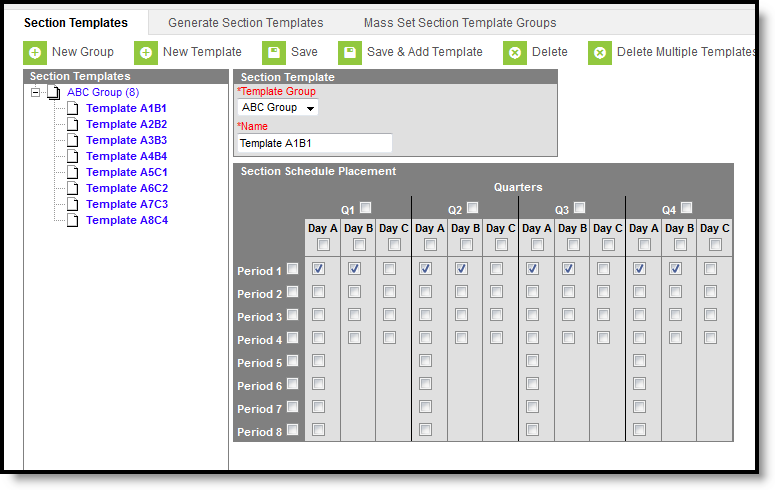 Section Template for Day A Period 1 and Day B Period 1
A second section template is created for courses meeting Day A Period 2 that also meet Day B Period 2. This is called Template A2B2 (image below).
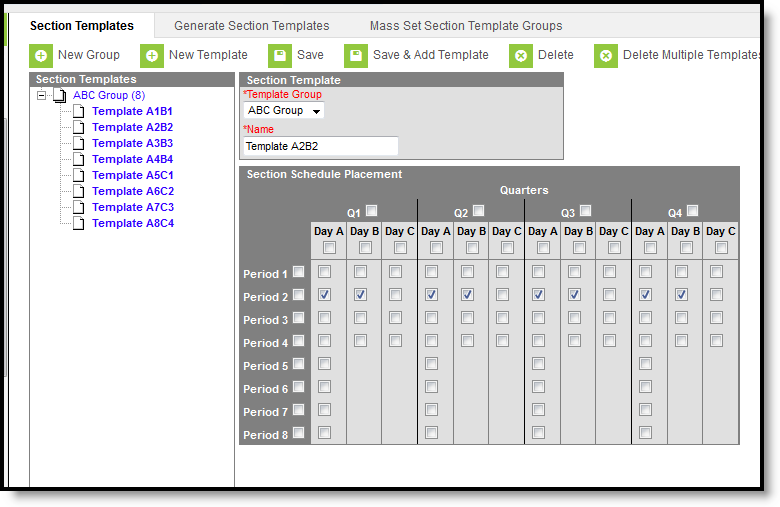 Section Template for Day A Period 2 and Day B Period 2
This process continues until all periods have been marked to meet in a certain day combination. When finished, eight templates are created, so each period that meets on Day A has a corresponding meeting time in the other day rotations.
Create New Template Groups
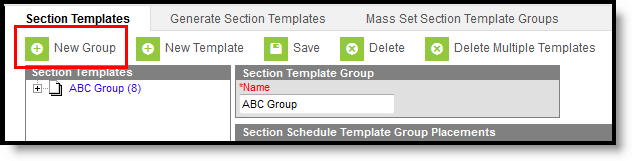
- Click the New Group icon. A Section Template Group editor displays.
- Enter the Name of the Section Template Group. This group displays in the Section Template tree to the left of this field and is the value that can be assigned to courses on the Course Editor and on the Course Planner.
- Click the Save icon when finished. The new group saves and displays in the Section Template tree in alphabetical order.
 New Template Groups
Group names display with a numeric value in parentheses behind the group name. This value indicates the number of templates associated with the group.
After Template Groups are created, do the following:
- Modify existing template group names by selecting the group name from the tree and entering a different name.
- Create new templates.
- Auto-generate Section Templates.
Create New Templates
- Click the New Template icon. A Section Template editor displays, along with a Section Schedule Placement grid.
- Select the Template Group to associate with the new section templates from the dropdown list.
- Enter a Name for the Section Template. This name can be reflective of when it is assigned, like "Quarter 1 Day A," or it can be reflective of the courses that will be assigned to that group, like "Fine Arts Placement."
- Mark on the Section Schedule Placement grid where courses assigned to this Template Group can be placed for the entire calendar year (all terms).
- Click the Save icon when finished.
- Or, if more templates need to be created for the same group, click the Save and Add Template icon. This saves the current record and resets the Section Template editor and Section Schedule Placement grid for entry of another template.
- Repeat the process of saving and creating templates for each term and period combination for your courses as needed.
 Section Template Placement
Using the image above as reference, when marking on the Section Schedule Placement grid:
- If courses assigned to the Section Template can meet in Period 1 in every term, mark the left-most checkbox next to Period 1. This marks all of the periods across all schedule structures (days) and terms.
- If courses assigned to the Section Template can meet on Day A in Term 1, mark the upper most checkbox just below Day A. This marks all of the periods for Day A in Term 1.
- If courses assigned to the Section Template can meet in any available days in any period in the first term, mark the checkbox next to the name of the term. This marks all of the periods across all of the days in Term 1.
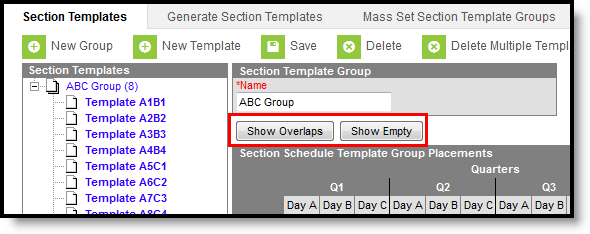
Verify Template Placement
Once checkboxes have been marked on the Section Schedule Template, either manually or by using the Generate Section Template tool, use the Show Overlaps and Show Empty options to verify placement of templates.
These options only display when the Template Group name is selected AND there is an issue in the Section Templates that would cause an overlap or where an empty period exists. It does not necessarily mean there is an issue with the setup, but it should be verified that is the intended selection.
 Template Overlap and Empty
In the image above, Alpha Group Three has two templates associated with it - a Tuesday Program and a Wednesday Program. Both programs are marked to meet on Day C during all periods. This is considered an overlap and should be modified before the template is assigned to courses.
Overlaps
- Click the Group Name in the Section Template tree. This displays a non-editable Section Schedule Placement grid with two buttons - Show Overlaps and Show Empty.
- Click the Show Overlaps button. The periods/days where the two templates overlap are highlighted in dark black color surrounding the checkboxes.
In the example below, Period 2 on Day B is highlighted, meaning there are multiple Section Templates where this period is marked.
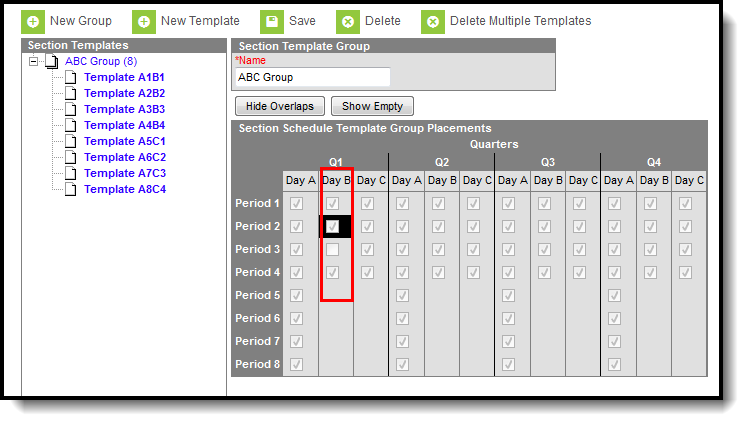 Overlapping Template Selections
When the Show Overlaps button is selected and the checkboxes are highlighted on the grid, the button changes to Hide Overlaps, allowing the user to not show the dark black coloring around the checkboxes.
Empty
- Click the Group Name in the Section Template tree. This displays a non-editable Section Schedule Placement grid with two buttons - Show Overlaps and Show Empty.
- Click the Show Empty button. The periods/days that are not marked for the periods are highlighted in a white color surrounding the checkboxes.
In this example below, Period 3 on Day B is highlighted, indicating one of the Section Templates does not have this period marked.
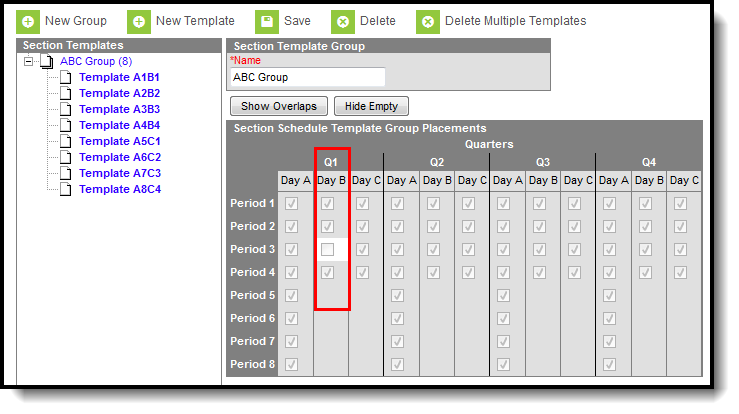 Empty Template Selections
When the Show Empty button is selected and the checkboxes are highlighted on the grid, the button changes to Hide Empty, allowing the user to not show the highlight around the checkboxes.
Delete Section Templates
To remove Template Groups and Templates, click the Delete icon from either the Group level or the Template level.
- Clicking Delete at the Group level deletes the group name and any templates associated with it, along with the assignment of the template to any course (the course does not delete, just the assignment of the template to the courses). If the template group is assigned to a course, the warning message indicates the total number of courses to which it is assigned.
- Clicking Delete at the Template level deletes the template.
To delete multiple templates, click the Delete Multiple Templates icon. This displays a Delete Multiple Templates editor. For the selected group, select which templates to delete. If there are many templates to delete, click the Select All checkbox.
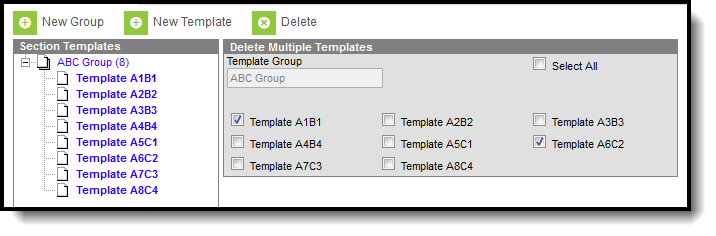 Delete Multiple Templates
Template groups and sections can be deleted at any time. If the template group is assigned to courses on the Course Planner as part of the scheduling process, deletion of the templates does not affect sections that may already be placed. However, if a template is deleted or otherwise modified, the change to the template affects any section that is not currently placed.
Next Steps
- Generate Section Templates
- Mass Assign Section Templates to Courses
- Manually Assign Section Templates to Courses
